
Hi there AppWorks fans,
Welcome to a new installment of AppWorks tips.
In this installment we’ll (again!) make a Content Management System available as storage location for our data. This time we use the CMS called ‘OpenText Content Server’ and is globally used at enterprise companies.
Facts:
- OpenText calls it the ‘flagship’ of the company
- In 1996 this product had the name ‘Livelink’, so you will see this term back in the post!
- The fullname was ‘Livelink ECM- Enterprise Server’
- Livelink became known as ‘OT Content Server’
- In 2012, it was renamed to ‘OpenText Content Suite’ as part of the ECM portfolio
“OT Content Server” (OTCS) saves data in a structured way in 1 location, also called a ‘repository’ like ‘Documentum’ does too. All data saved in a repository can be seen as an ‘object’ with metadata saved in a relational database. The content will be stored on a file store location.
Quoted again from the Documentum blog: *AppWorks has connectors available to connect several CMS systems and OTCS is one of them. AppWorks is an Enterprise Service Bus that makes working with processes really easy but saving data in a structured way is something else. So, both systems working together is the best solution of all.*
Let’s get right into it…
Start your AppWorks VM and make connection with the MobaXTerm client with the available user ‘sysadmin’ and related password ‘admin’. In the RHEL installation post you can read why I switched from the ‘otadmin’ account to ‘sysadmin’. I also install OTCS on the same image as AppWorks (what I also did for Documentum). This way we can share some resources like the PostgreSQL database, but also the OTDS instance we normally connect to the platform.
Go to the ‘Download’ section on the OpenText support site and start looking for ‘Content Server’. We go for the (AppWorks 21.3 supported) 21.2 release (on CentOS 64-bits with PostgreSQL) which is always 1 version behind on the compatibility matrix of the support notes! I know we are on 22.1 by now, but my test image (At this moment of writing this post) is still on 21.3. It won’t be that much of a difference!
Direct link: ‘Content Server 21.2 Linux’
Accept the license and start downloading the file ‘21.2.0_cs64_lnx6.tar.gz’
Upload the downloaded file to the image in the home directory of in our case ‘/home/sysadmin’ and extract the file tar -xvf 21.2.0_cs64_lnx6.tar.gz
This post will help you install OTCS, but make sure you also have the documentation available somewhere. Documentation can again be found on the OpenText support site under the documentation section. Make sure you search for ‘Content Server’. The main PDF you need for now is the installation guide ‘OpenText Content Server CE 21.2 - Installation Guide’, and the release notes ‘Content Server 21.2 Release Notes’. Both can also be found here.
The release notes refer to the ‘Product Compatibility Matrices‘ where you can find an Excel sheet ‘OpenText Product Compatibility Matrix (Current Maintenance).xlsx’ that covers all the compatibilities with the several software packages. Nice to have a look, but not required for now.
Pre-check list
Make sure you are administrator.
You have this privilege when you use the ‘sysadmin’ user we’ve introduced for all our posts on this site.
OS support
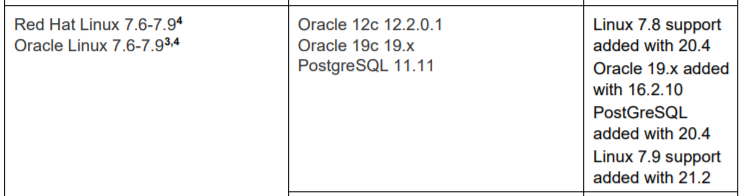
My images run on “CentOS Linux release 7.9.2009 (Core)”. Have a look with a command like cat /etc/centos-release. The release notes don’t tell me anything about CentOS, but because CentOS “smells” like ‘Red Hat Linux’ I take the chance, and just go for it. This information is in the release notes:
Java support
We’ll run Tomcat as an application server which requires Java. The release notes tell me to use ‘OpenJDK 11.0.9’.

My VM java -version tells me we’re fine with the long-time supported version ‘OpenJDK 11.0.11 2021-04-20 LTS’.
Application server (Tomcat)
You can also use (a more lightweight service) Apache HTTP, but as I already have TomEE for AppWorks, and Tomcat for OTDS, we just add another Tomcat based on this post on location /opt/tomcat_cs and port 8282! My used Tomcat version is 8.5.43 which matches the release notes!
Database support
Meat the PostgreSQL version from the compatibility matrix. Our AppWorks database uses (PostgreSQL 11.1.0 64-bits) which should be fine although the release notes tell me to use a higher version (see OS support image!). For OTCS we just need some extra PostgreSQL extensions with a command like this: sudo yum install -y postgres*contrib
Finally, we create a database for our new CMS, and we also install the extensions into it (incl. double-check):
1 | cd /usr/pgsql-11/bin |
Some X11 server stuff
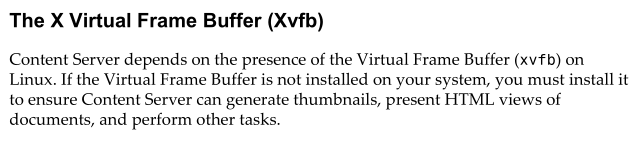
We normally install X11, so we can show the installation wizard of a software package (like we saw during the installation of AppWorks as well as for Documentum). This time X11 is used for a feature called “X Virtual Frame Buffer (Xvfb)”; don’t shoot the messenger, just #RTFM
Copy the required commands to make it happen:
1 | #Required for RHEL8! |
Directory availability
Create a directory for the installation and own it to the ‘sysadmin’ user
sudo mkdir /opt/opentext/cssudo chown sysadmin:sysadmin /opt/opentext/cs
Content Server installation
Now the major step of this blog post.
Go to your extracted installation files: cd /home/sysadmin. Give the .bin file execution permission sudo chmod +x setup and execute the magic command: ./setup
The CLI (non-GUI) installation starts, and we start with a ‘Y’ answer on the license terms.
We have a verified “Xvfb” feature, and should look fine at this moment
Next is the installation path; We’ll make it:
/opt/opentext/csThen for the great question: Would you like to install Open Text Content Server? Well, what do you think? HELL YEAH!!!! Hit it on the
<Enter>key for a default ‘Y’!Port ‘2099’…Is it valid? Double-check:
sudo ss -tulpn | grep 2099(I use a second session in my MobaXterm tool); When no results on the command, we’re fine! Hit<Enter>Port ‘5858’…Is it valid? Hit
<Enter>again. Double-check with:sudo ss -tulpn | grep 5858For the CGI alias question to get a ‘support’ alias available from the ‘livelink’ path. What??…Yes, just hit
<Enter>YOLO! 🙈The “Filter Engine” on the ‘/tmp’ location…Sure…Hit
<Enter>We are on PostgreSQL, so that’s a ‘3’ for me. After
<Enter>I see this execution of the installation:![cs_002]()
Remember those 2 paths:
- livelinksupport:
/opt/opentext/cs/support - livelink:
/opt/opentext/cs/cgi
- livelinksupport:
Finally, we just hit
<Enter>again to start content server!

Logging:
1 | ls -ltr /opt/opentext/cs/logs |
Also have a look at this interesting settings file:
cat /opt/opentext/cs/config/opentext.ini
Start|Stop services:
1 | #ll = livelink |
Ok, what service is for what, and what does it do!?
“csserver”; I see this service as the equivalent of the llserver
“llserver”; This service serves the ‘runtime’ workspace for the end-users (both the classic view and the SmartView UI); It also starts the livelinksupport alias which supports the assets.
“lladmin”; This service serves the ‘admin’ workspace for the administrators…I guess!? Let me know otherwise!
Livelink(support) on Tomcat
Ok…We have Tomcat up and running, and we have OTCS up and running. Time to glue them together!
Create a new file on our “Tomcat” application server: vi /opt/tomcat_cs/latest/conf/Catalina/localhost/livelink.xml
Insert this piece of XML (make sure the ‘docBase’ path is valid):
1 |
|
Create another file on that same location: vi /opt/tomcat_cs/latest/conf/Catalina/localhost/livelinksupport.xml
Insert this piece of XML (make sure to use the correct locations for ‘docBase’, and the ‘workDir’)
1 |
|
2 notes:
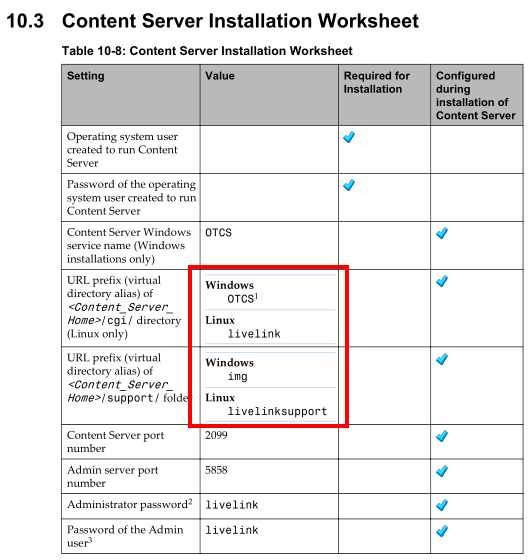
From a Windows perspective this ‘livelink’ should be ‘OTCS’
‘livelinksupport’ should be ‘img’, as found in the documentation:
In my opinion the documentation is not very clear on the HTTP mapping to be made in these files; The same for Apache HTTP. I had a big struggle on that one although it’s the simplest HTTP server you can have!? On the other hand, maybe it’s just my lack of knowledge!?
Have a restart on our new ‘tomee_cs’ service: systemctl restart tomcat_cs
Content Server configuration steps
Time to enter the world of OTCS with this URL: http://192.168.56.107:8282/livelink/cs?func=admin.index

2 interesting notes:
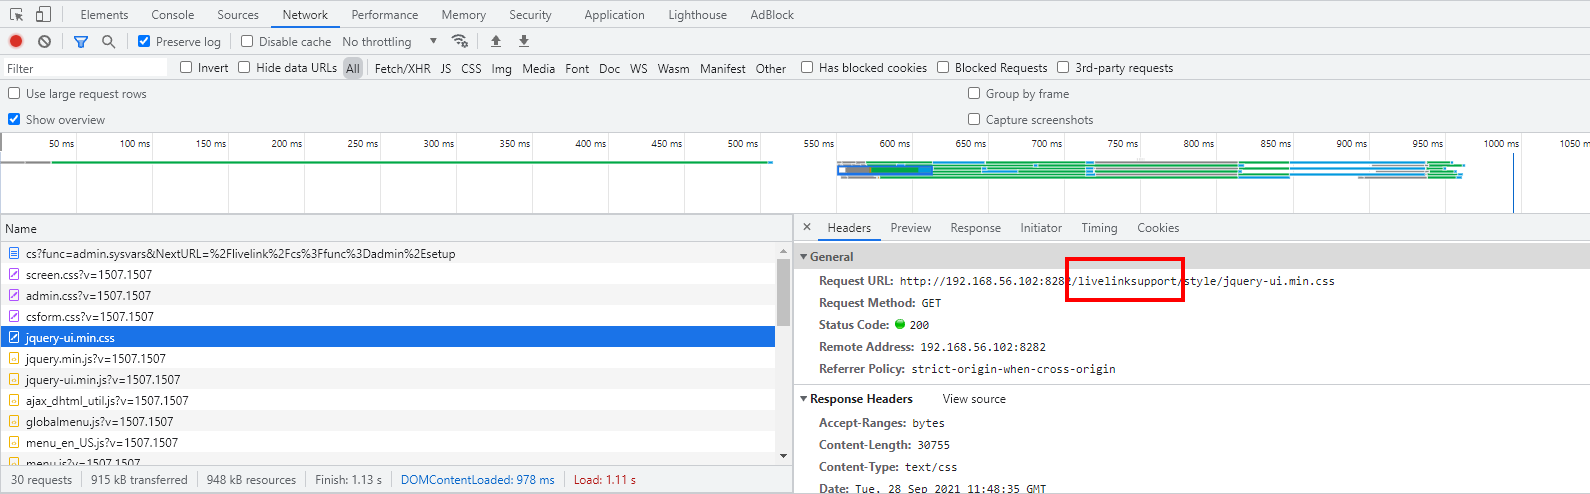
Have a look in the developer console of Chrome with
<F12>for a view on the ‘livelinksupport’ part. Looks like all kinds of ‘assets’ are served to ‘support’ the regular ‘livelink’ which is our content server! 😇 Let me know in the comments if this is wrongly explained!?
In a lot of OT demo’s I see these kinds of URLs passing by with the ‘/otcs/‘ location:
http://192.168.56.107:8282/otcs/cs?func=admin.index. Can we update (I guess!?) this in the file:vi /opt/tomcat_cs/latest/conf/Catalina/localhost/livelink.xmlwith XML content like this:
2
3
4
5
6
7
8
9
10
11
<Context path="/otcs"
docBase="/opt/opentext/cs/application/"
debug="0"
swallowOutput="true"
reloadable="false">
<Logger className="org.apache.catalina.logger.FileLogger"
prefix="livelink"
suffix=".txt"
timestamp="true" />
</Context>We also need to update the file name:
mv /opt/tomcat_cs/latest/conf/Catalina/localhost/livelink.xml /opt/tomcat_cs/latest/conf/Catalina/localhost/otcs.xmlAfter a ‘tomcat_cs’ restart we’re fine with a new prefix! 😎 Maybe the ‘path’ update to
/otcsin the XML isn’t the smartest thing to do, but whatever I type is working fine after a restart! Let me know in the comments why…That’s my inexperience!I also searched for the file ‘livelink.txt’ via
sudo find / -type f -name livelink*, but I couldn’t find it…Also, my inexperience!…I do a revert and continue with the original URL!
Ok…The first configuration steps!
We need a required password for the so-called “Web Administrator” account…I just provide a simple password ‘admin’.
The ‘Web Administrator’ is another account next to the ‘Content Server Administrator’ account with name ‘Admin’ and default password ‘livelink’
Scrolling down shows us the ‘livelinksupport’ path…Just leave it as is, and we also leave all the other settings as is (you can read all about it in the mentioned installation manual). In the bottom of the page we’ll find a ‘Save Changes’ button…Hit it!

The next screen will let us set a language setting:
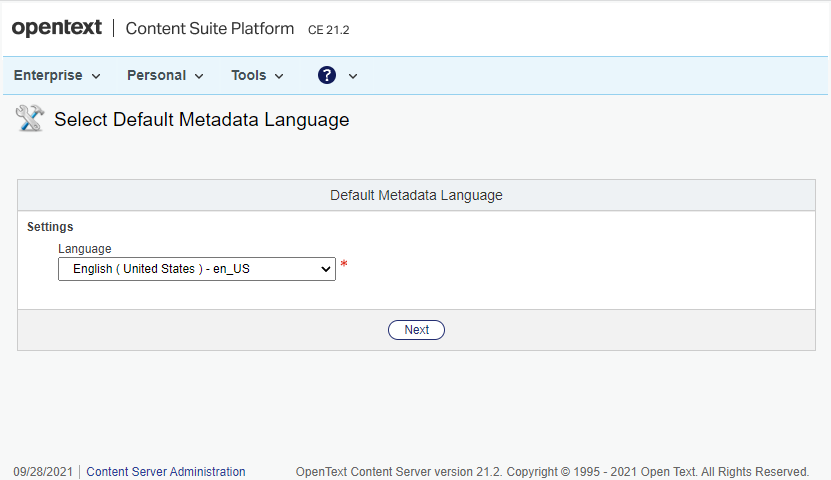
I select ‘en_US’ and hit ‘Next’
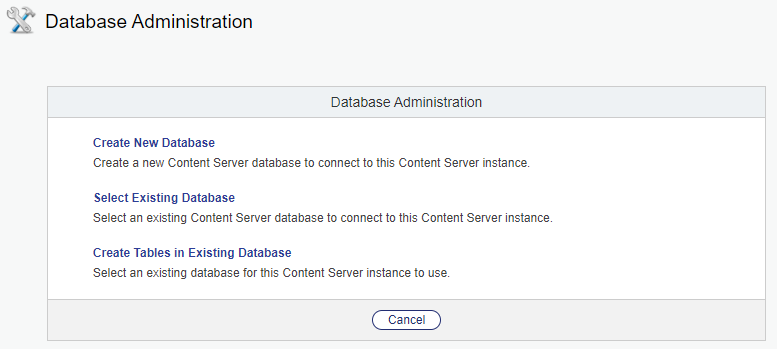
Time to connect our database…I already created the database with name ‘csdb’, so I hit the last option and get the next screen:
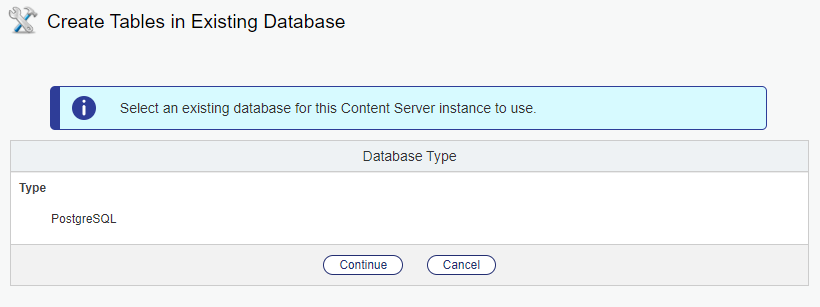
It finds my ‘PostgreSQL’ type (Remember? Database choice ‘3’ of the Content Server installation!) I just ‘Continue’…
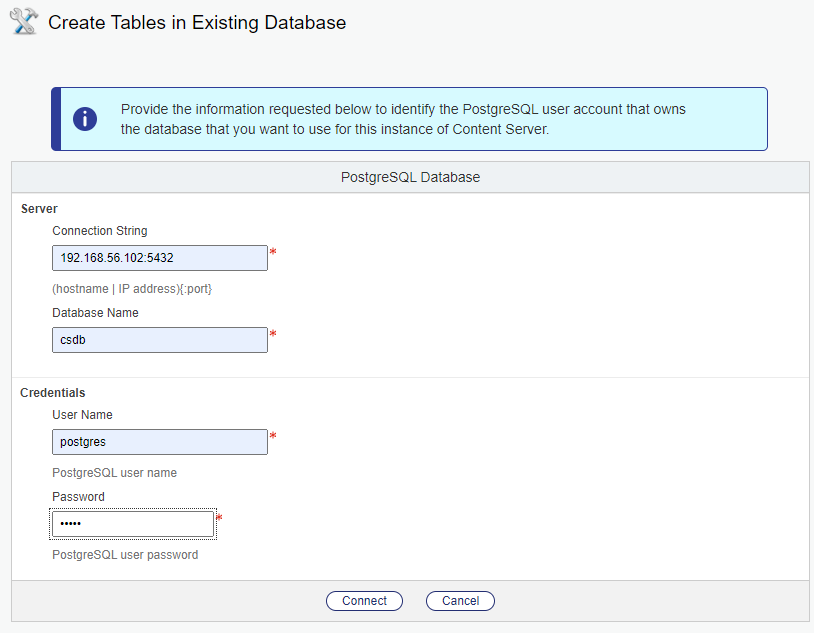
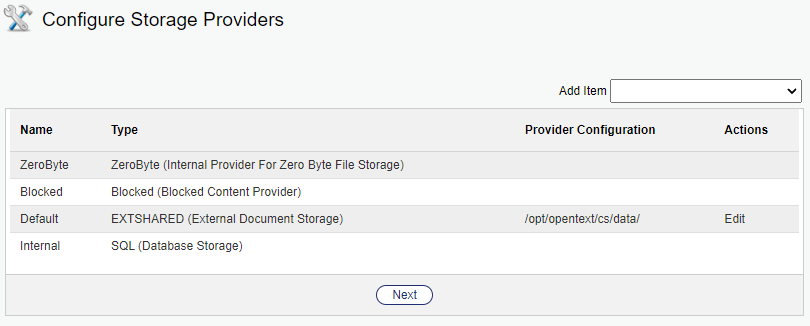
Fill-in the form with the correct information and click ‘Connect’. We now get a new option to configure an ‘External storage’ location.

I point it to /opt/opentext/cs/data and click ‘Create Tables’…Get a quick soda! 🥤
On my VM, I created off-course this directory (with full permission for all…because we’re on DEV!):
2
3
chown sysadmin:sysadmin /opt/opentext/cs/data
chmod 777 /opt/opentext/cs/data
Next screen…

Default username is ‘Admin’ (with capital ‘A’) and default password is ‘livelink’ (see also the documentation)…Hit “Log-in”
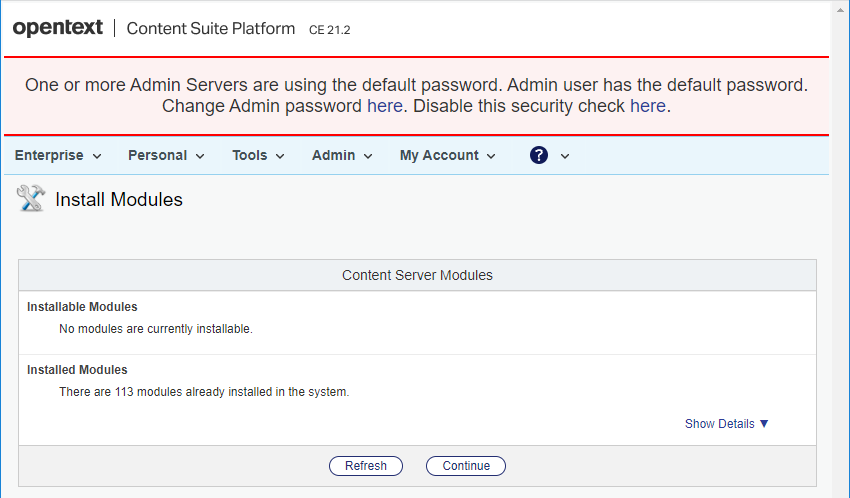
Get notified by that ‘red’ message, but we just hit ‘Continue’
These are the links behind it (for later usage!):
- Admin password change link:
http://192.168.56.107:8282/livelink/cs?func=admin.adminuserpwd&nextUrl=%2Flivelink%2Fcs%3Ffunc%3Dadmin%2Emodulesetup- Disable security check link:
http://192.168.56.107:8282/livelink/cs?func=admin.securityvars
Interesting overview…We just hit ‘Next’
…Let’s continue on our soda-drink! 🙄
After the restart, we get the ability to connect to OTDS:
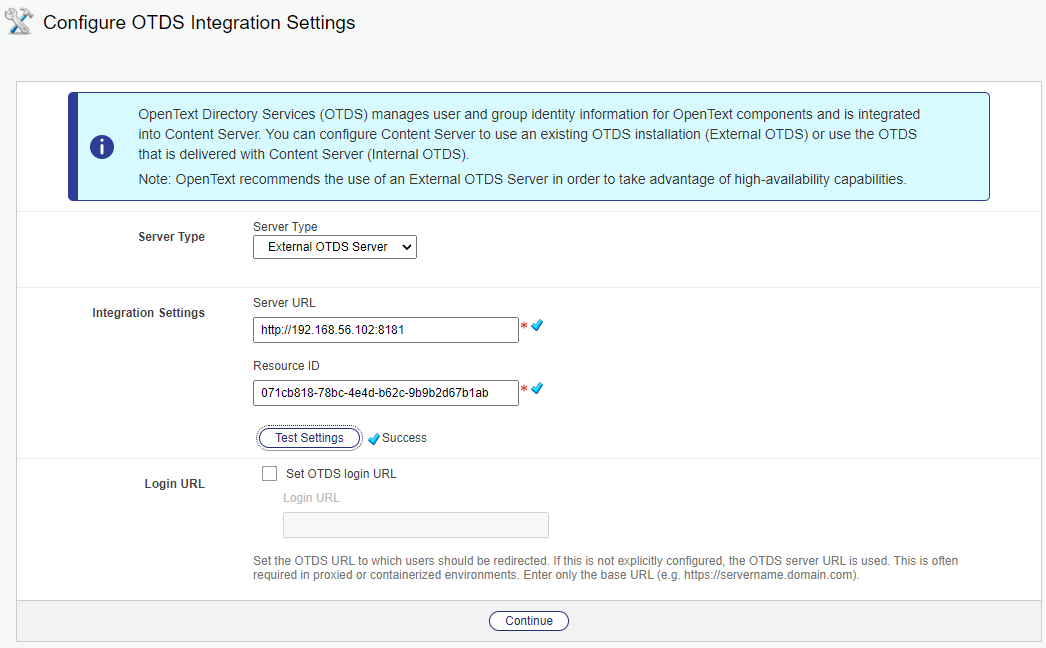
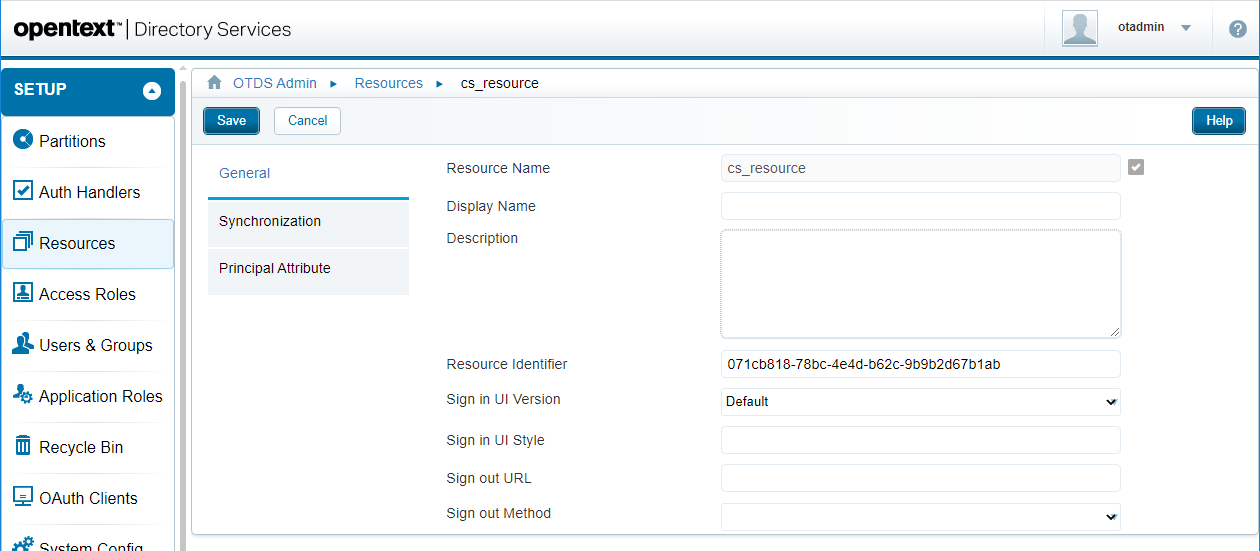
I already have OTDS up and running for my AppWorks instance, so we’re just reusing resources here. From the OTDS perspective I’ve only created a new ‘Resource’:
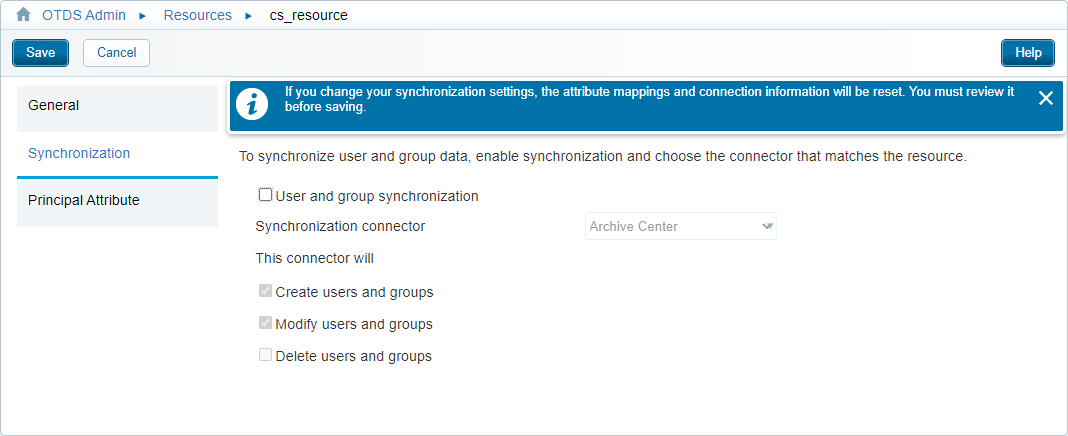
…without any user/group synchronization:
…and the default principal attribute:
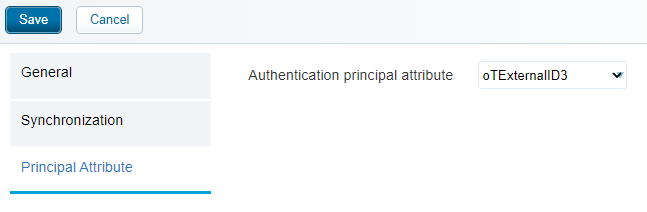
After this I could simply test my settings and ‘continue’ my life…
Normally, we also would like to synch some user/groups from this OTDS resource, but for this we are required to use the so-called ‘Content Web Services’. I wasn’t able to figure out the correct URL at this moment. Should be something like this:
- http://localhost:8080/cws/services/MemberService?wsdl
- http://localhost:8080/cws/services/Authentication?wsdl
Let’s get back to this in a later post; When we really require some user authentication!
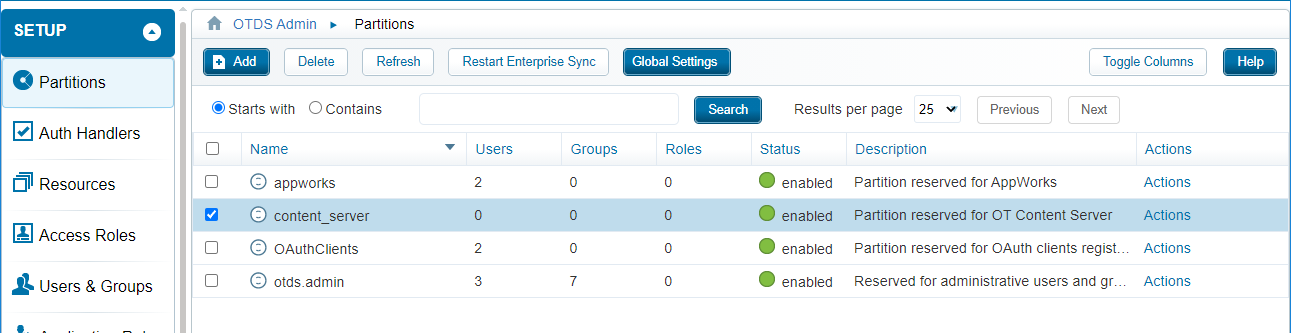
Time for an OTDS partition:
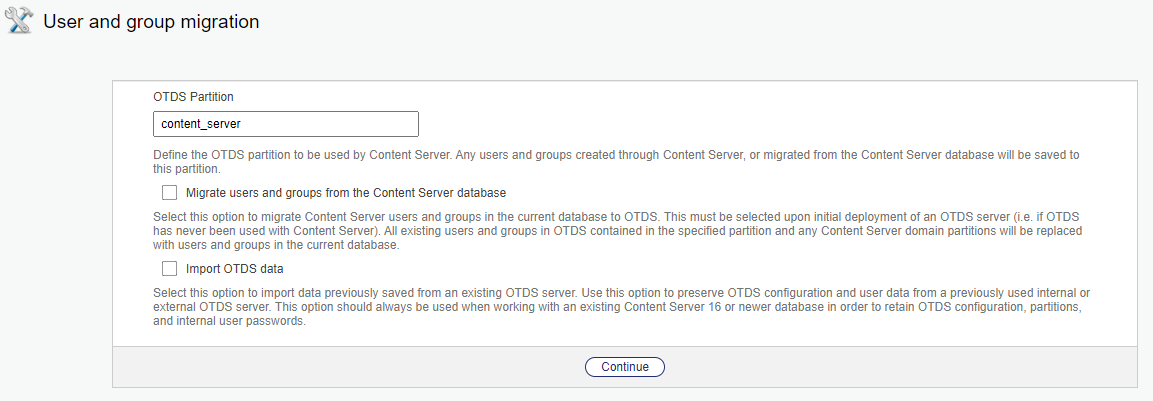
Hit ‘Continue’…
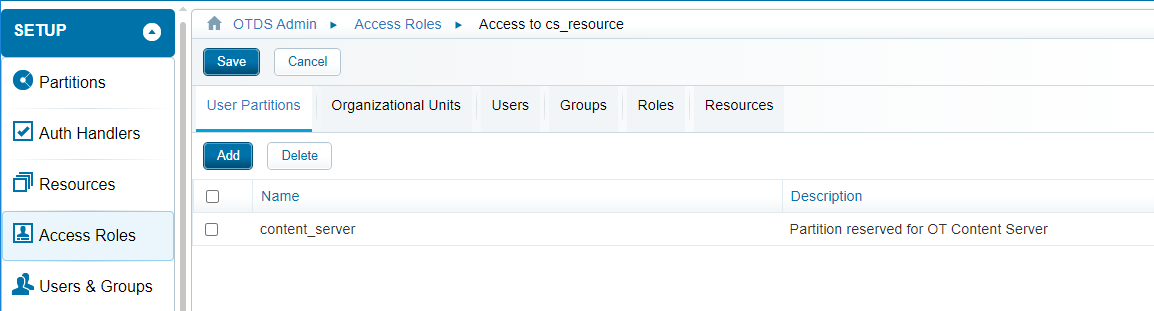
In OTDS it looks like this for a non-synchronized partition:
It’s a partition added as ‘User Partition’ to the ‘Access Roles’ for this resource!
The next screen is about the ‘Search System’
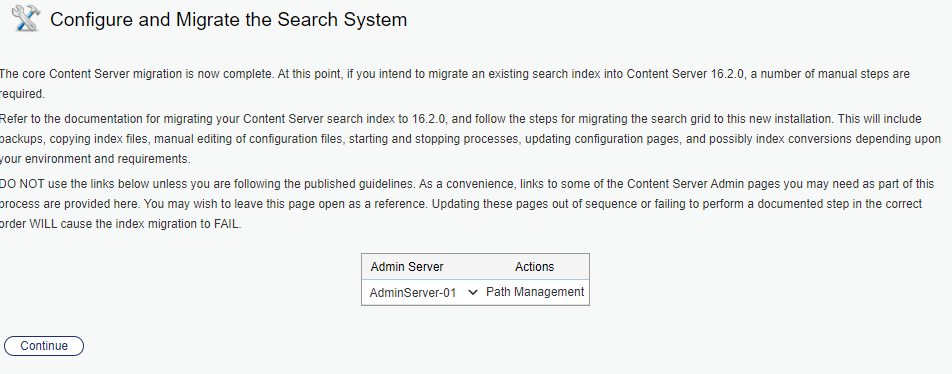
Hit ‘Continue’…YOLO! Next one:
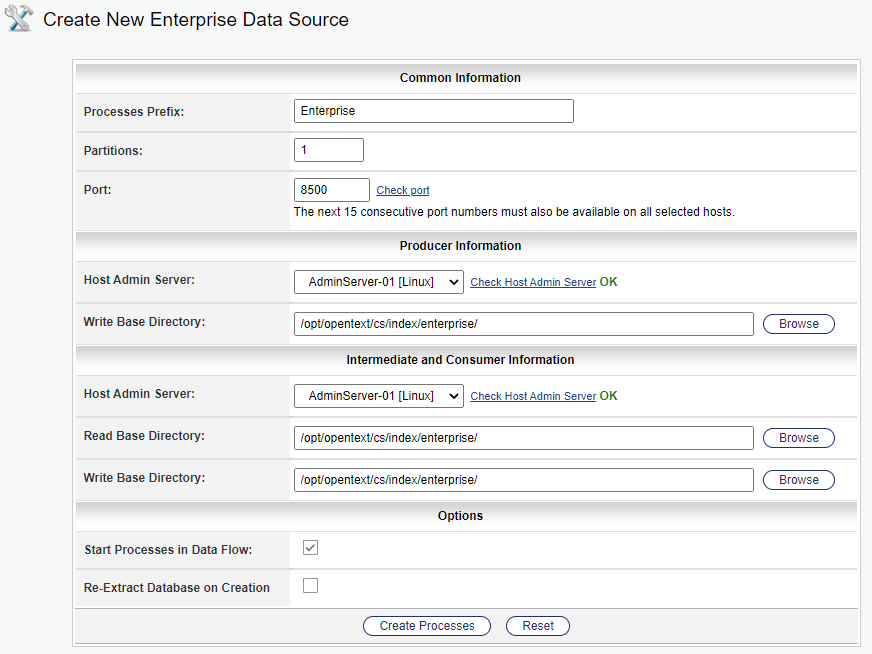
YOLO again?…Hit that ‘Create Processes’ button
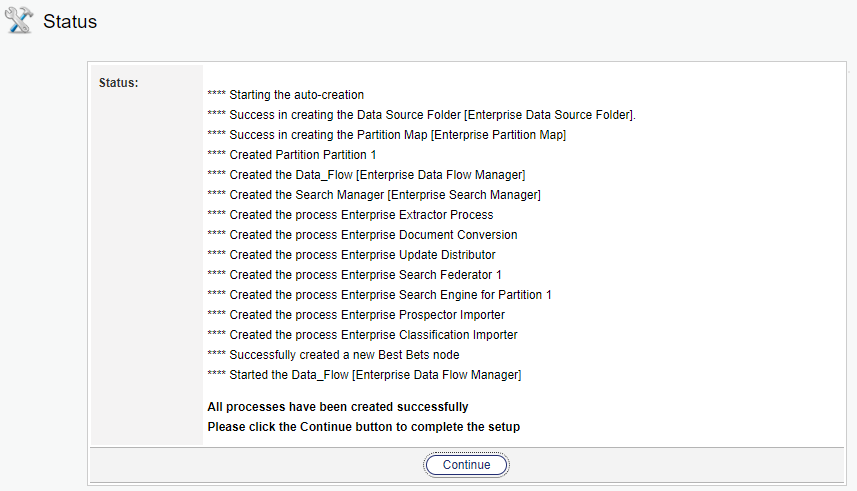
Nice…Let us ‘Continue’…
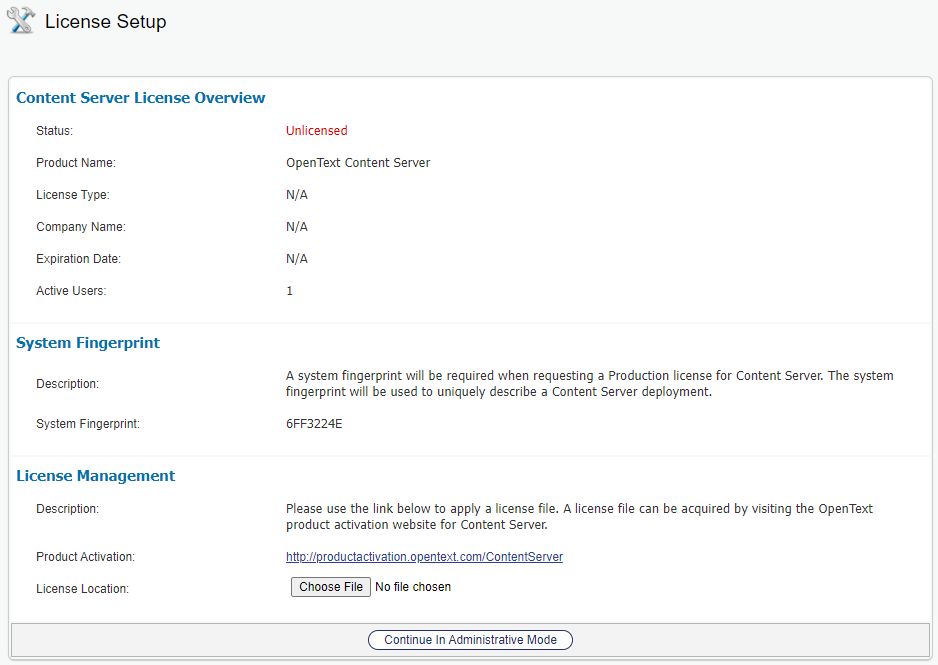
Looks like the last screen! Hit that link which forwards to: https://www.opentext.com/productactivation/
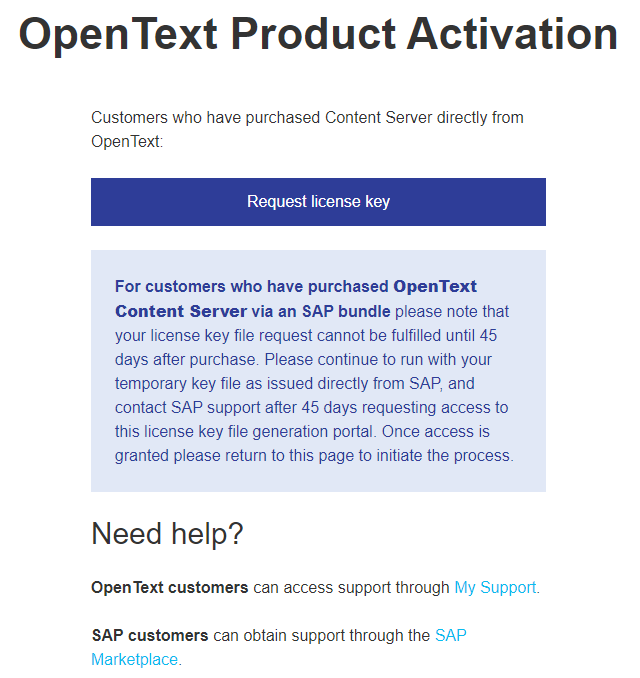
I don’t fall in any of the categories, so let’s request a license like we also did for the AppWorks platform!
Let’s hit the final button ‘Continue In Administrative Mode’
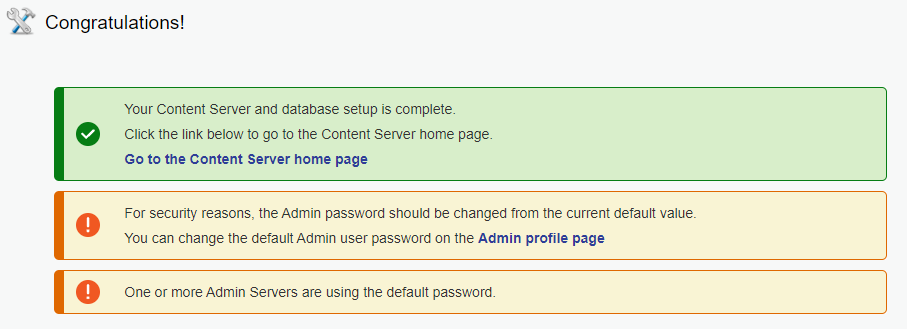
Time for a party! 🎉🎈
Nice…We’ve reached the end of the wizard and when we hit the ‘Go to the Content Server home page’ link we end up with a new URL: http://192.168.56.107:8282/livelink/cs?func=llworkspace. Looks like the wizard lived in the ‘admin workspace’…Now we have the ‘livelink workspace’! Sounds like our runtime for the end-user (like in AppWorks!?)
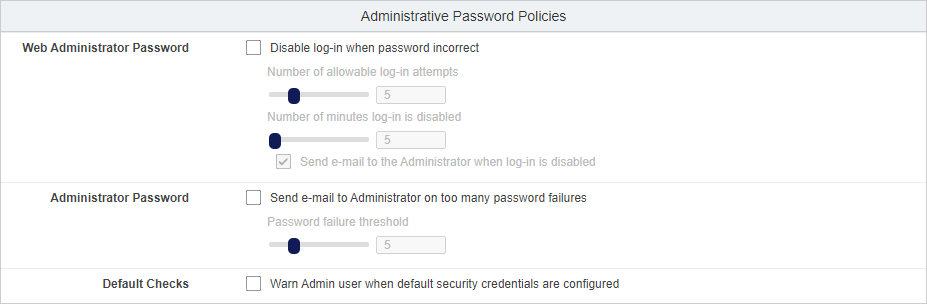
Disable the ‘admin’ security
Back into the ‘admin workspace’ and go to http://192.168.56.107:8282/livelink/cs?func=admin.securityvars
I just removed these marks for our environment:
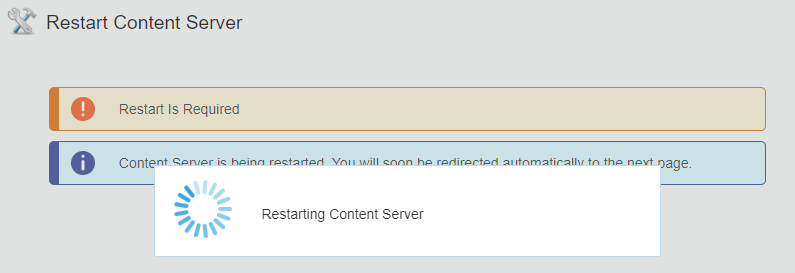
A required restart!…Just hit the link and wait for your time to come…Did you finish that soda yet!?
When done, the message vanishes after hitting the ‘Continue’ button!
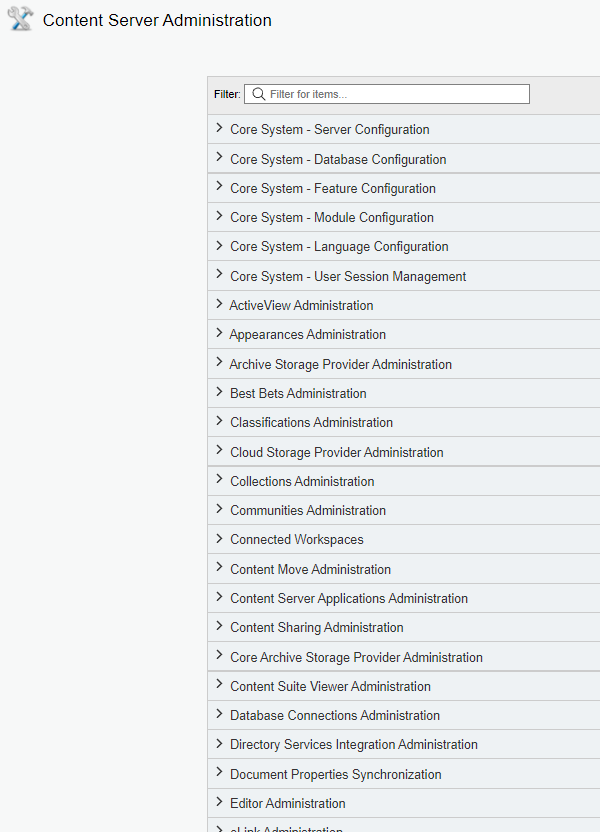
Now, everything is up to you to continue the administration part of it all, but we leave this part for some other time…Seen the large list of settings! 😅
The famous Smart UI!
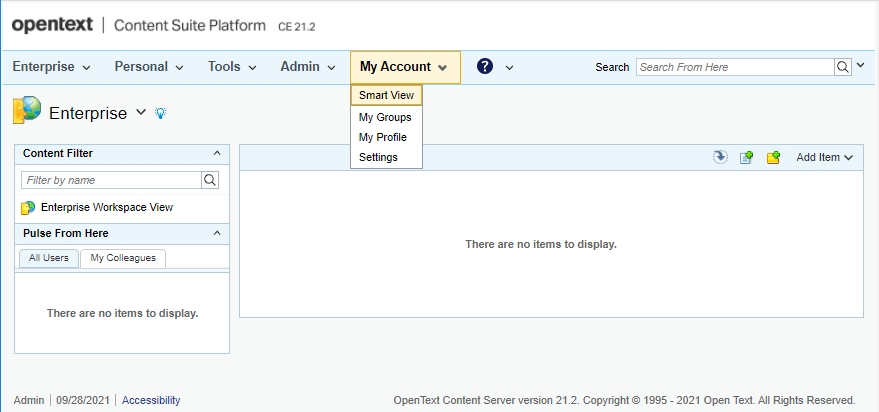
We’ve finished in the ‘llworkspace’ with URL: http://192.168.56.107:8282/livelink/cs?func=llworkspace. This is also called the ‘Classic’ view of OTCS. Let’s switch to the famous SmartView UI:
With a nice end-result we’ve long been waiting for…
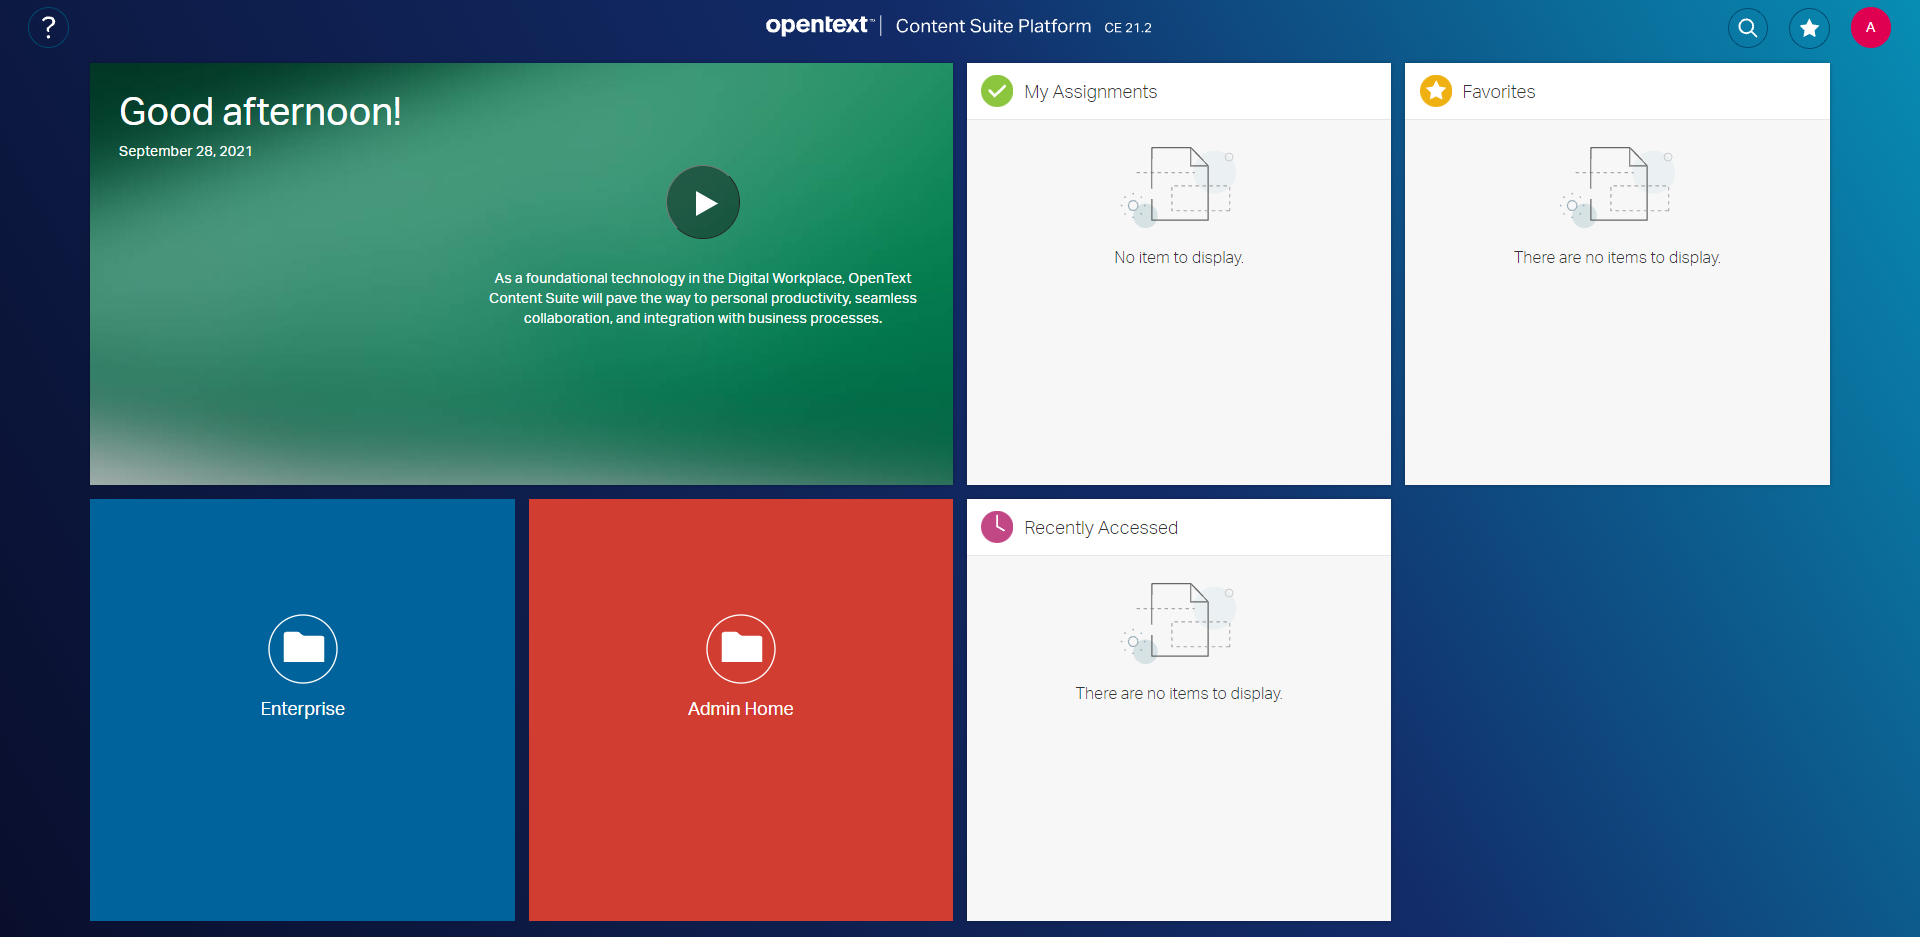
We see a URL switch to: http://192.168.56.107:8282/livelink/cs/app. From the top-right profile-icon, we can switch back!
From a ‘Developer Console’ perspective, we see the interesting CSUI libraries passing by:
The CSUI is delivered with an SDK. Training on this be found here; More information can also be found on the support site.

“systemctl” service creation
After the restart of my VM I see this message passing by in my browser:
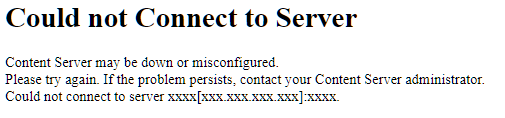
Let’s fix this with the creation of a new service file: sudo vi /usr/lib/systemd/system/cs.service
The content for this file looks like this:
1 | [Unit] |
Reload the daemon: systemctl daemon-reload
Enable the service: systemctl enable cs.service
Now we can do a start like this: systemctl start cs, and a stop like this: systemctl stop cs
Logout and login…through OTDS
Another thing I see after my VM restart; A new login screen:
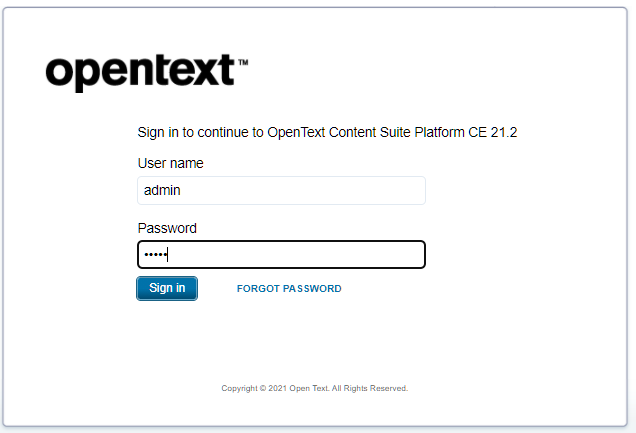
This login page is a re-direct to my OTDS instance, but how to login as I didn’t add any users/groups yet in OTDS. I tried the credentials of my ‘Content Server Administrator’ account! I would have expected to use the username ‘Admin’ with a capital ‘A’, but that’s not working! Username ‘admin’, with the updated password ‘admin’ (was by default ‘livelink’) moved me to the next screen. Maybe this is another account…I don’t know…Let me know otherwise in the comments. Again…inexperience! I just learn as we go along…
Another question is: Can we also use a parameter to skip the OTDS authentication login screen and use a platform specific login?
I found something like this on the forum: ?func=admin.adminuserlogin
Let’s try this URL: http://192.168.56.107:8282/livelink/cs?func=admin.adminuserlogin with this login screen:

This ‘Web administration’ account has the configured password ‘admin’…So let us ‘Log-in’ and get to the next login screen:

That’s our ‘Content Server Administrator’ account; Again with non-capital username ‘admin’ and the updated password ‘admin’…’Log-in’ and we’re back on track!
An extra note on those 2 accounts:
- ‘Web Administrator’; Looks like an extra security layer account only needed after restart of the ‘lladmin’ service, or the Tomcat instance…I’m not sure!?
- Password: admin (was set during the configuration wizard!)
- ‘Content Server Administrator’; Is the main account for administration tasks on the platform.
- Username: admin (I thought it was ‘Admin’ with a capital A, but that’s not working…I don’t know why!?)
- Password: admin (was ‘livelink’ but is updated in the configuration wizard!)
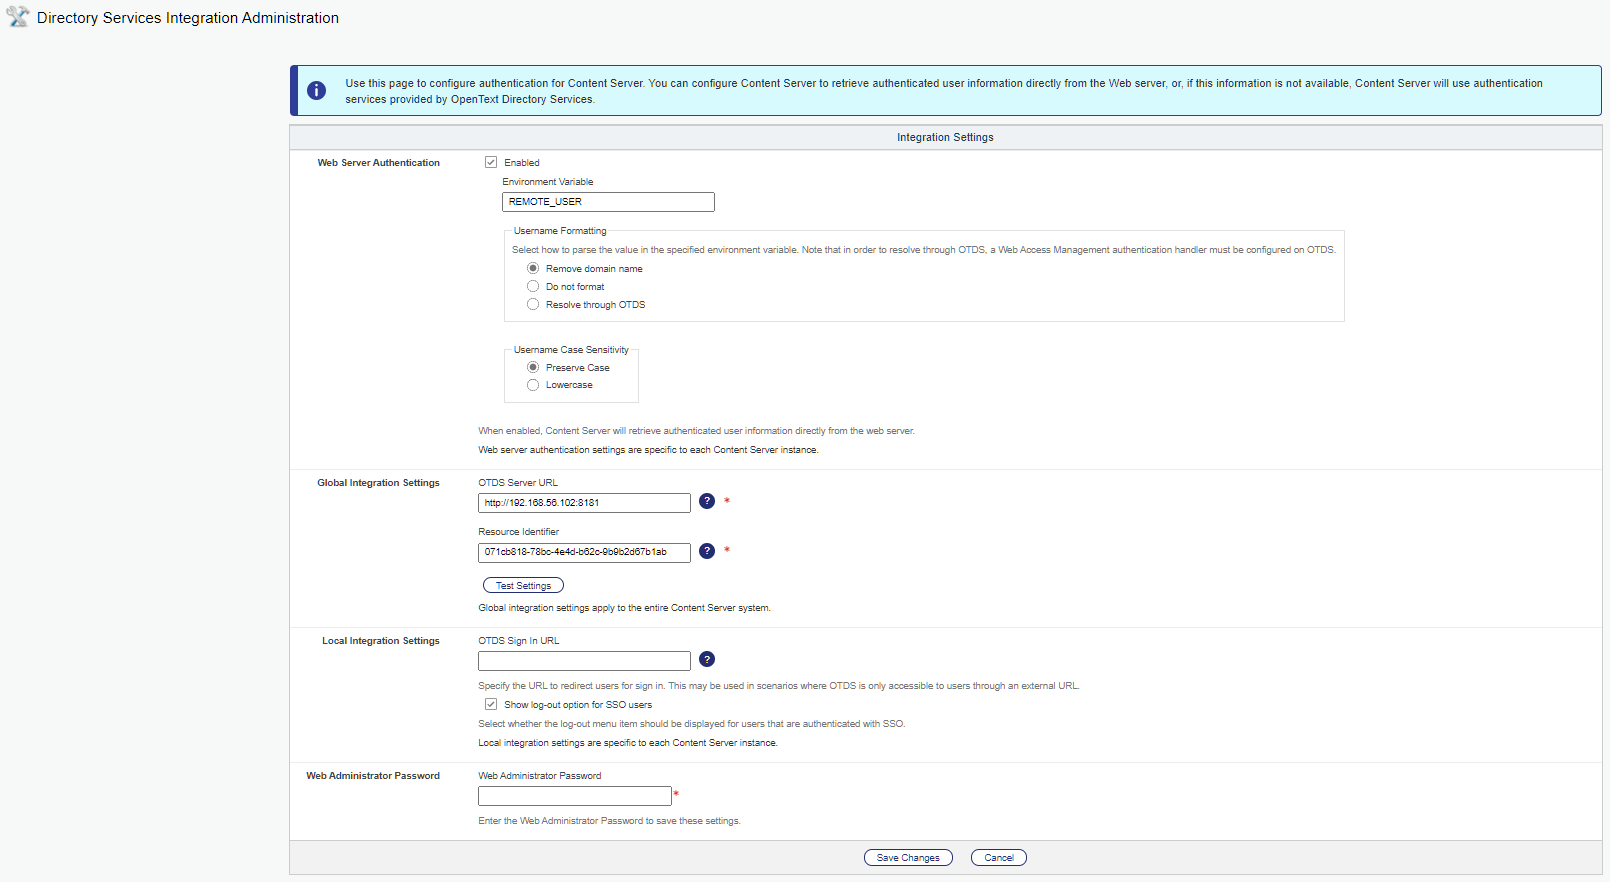
To update the OTDS login settings we can use this parameter in the URL:
?func=otdsintegration.settings. There are probably a lot more parameters to play around with, but that’s another post and probably a #RTFMYou land on this page with recognizable settings (where I remove the mark for ‘Web Server Authentication’ as we’re in dev-mode):
License upload
Now, that we are able to login again (in the meantime we have a license file available!) it’s time to license our development “OTCS” instance.
Go to this URL: http://192.168.56.102:8282/livelink/cs?func=admin.viewLicense
After login, we see this screen:
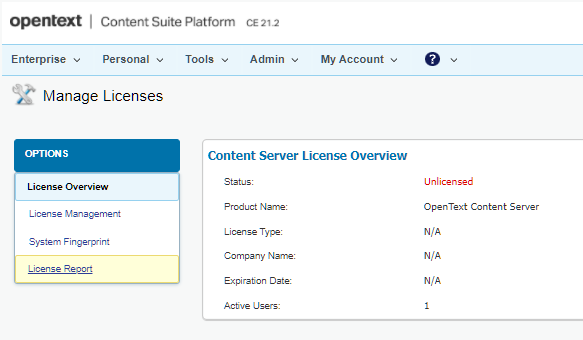
I don’t know what the limitations on an unlicensed server are, but from this view we can go to the ‘License Management’ section (on the left). In this screen we can hit the ‘Manage Licenses’ button! What now happens surprises me a bit, as OTDS is started in a ‘license’ section! I’m an AppWorks/Documentum person, so I just observe and write it down. Licensing via OTDS is new to me, but as I’m as curious as you are we just dive into it!
So, this is my screen at the moment where I have the ability to add a new license…To I guess the ‘Content_Server’ license…duh!?

I get a screen where I can paste in my license information:
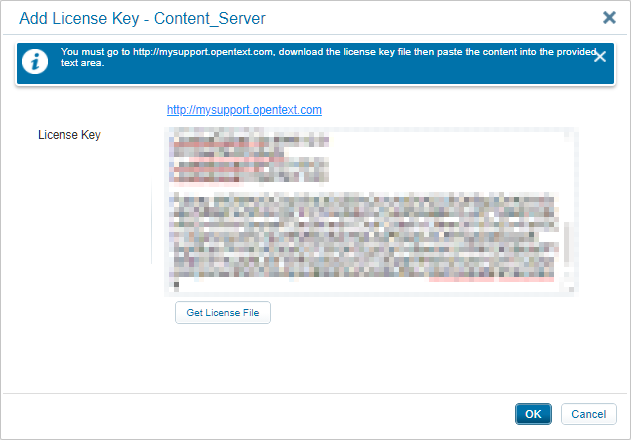
After OK and a refresh on the content server UI, it looks like the server is valid now:
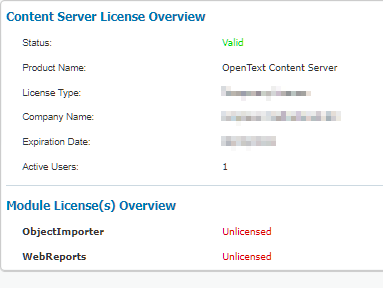
Nice, except for the other two modules, but I don’t think we need those at this moment!?
That gives (finally!) a valid ‘DONE’ on the “OpenText Content Server” installation. It was a topic living on my backlog for a long time. Each attempt failed, but we have now made Content Server available to play around with from our AppWorks platform perspective! Like with Documentum we can save our data in a structured way for the future via a ‘Document store’ connector. We can also start to have a look at the business workspace BB which is available on an Entity! Smells like xECM, and I’m pretty curious on that connection too. Have a great day, and I see you in the next post.
Don’t forget to subscribe to get updates on the activities happening on this site. Have you noticed the quiz where you find out if you are also “The AppWorks guy”?
