
Hi there AppWorks fans,
Welcome to a new installment of AppWorks tips.
With this post we finish the series of posts where want to learn about Continuous Deployment and Continuous Integration (CD/CI) on our AppWorks platform. A hot topic so keep in tuned in. Last week we covered the Ant-tasks to deploy a package and this week we focus on building a pipeline in Jenkins to execute the full process (from build to deployment) on our environment. We’ll have fun with this post! 😜
Let’s get right into it…
Make sure java 8 is supported (required for Jenkins!) by running java -version. You can search for a proper java installation on this site where we installed Java 11!
But in short steps:
Install it with:
sudo yum install java-1.8.0-openjdk-develChange your default Java version with
sudo update-alternatives --config javaJava can be found in this location:
cd /usr/lib/jvm
Jenkins installation
I also just search the internet and came to this site where the installation is pretty clearly explained already…Let’s just follow it with some extra notes for my image if required!
- Java is already done in the first section of this post…check
- I did these commands (they are the same…Except for the ‘-y’ as I’m a lazy installer):
1 | sudo wget -O /etc/yum.repos.d/jenkins.repo https://pkg.jenkins.io/redhat-stable/jenkins.repo |
- If the default port 8080 is already in use like on my image (for TomEE) you need to search for another port that is available like 7070.
- See if it’s available:
sudo netstat -tulpn | grep 7070 - And update the port in:
sudo vi /etc/sysconfig/jenkinsJENKINS_PORT="7070"
- See if it’s available:
- And now make these commands to spin it all up!
1 | sudo systemctl start jenkins |
- This site also talking about a firewall, but we disabled it long time ago. For our development image that’s fine!
Now for the Jenkins frontend; go to http://192.168.56.107:7070/
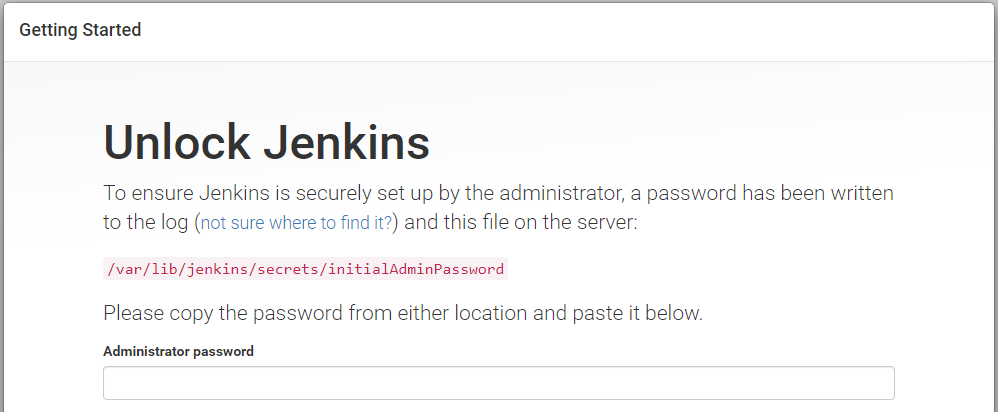
Get that password with this command: sudo cat /var/lib/jenkins/secrets/initialAdminPassword
And click ‘Continue’

We just follow the suggested installation!

Just grab a coffee and let the magic happen…
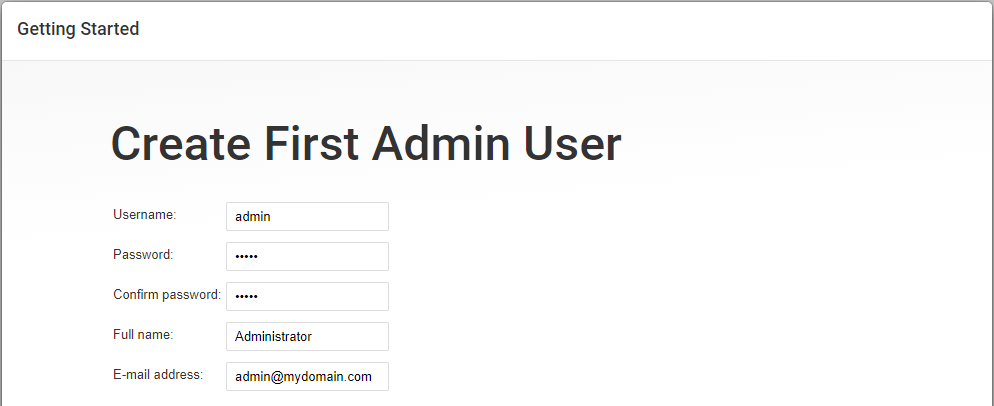
Time for our first admin account.
- Username: admin
- Password: admin
- Name: Administrator
- E-mail: admin@mydomain.com
We now just ‘Save and Continue’.
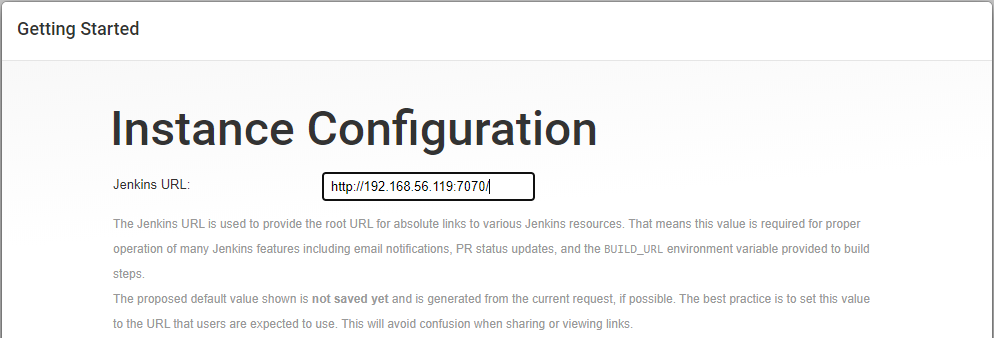
We leave this Jenkins URL as is and we just ‘Save and Finish’
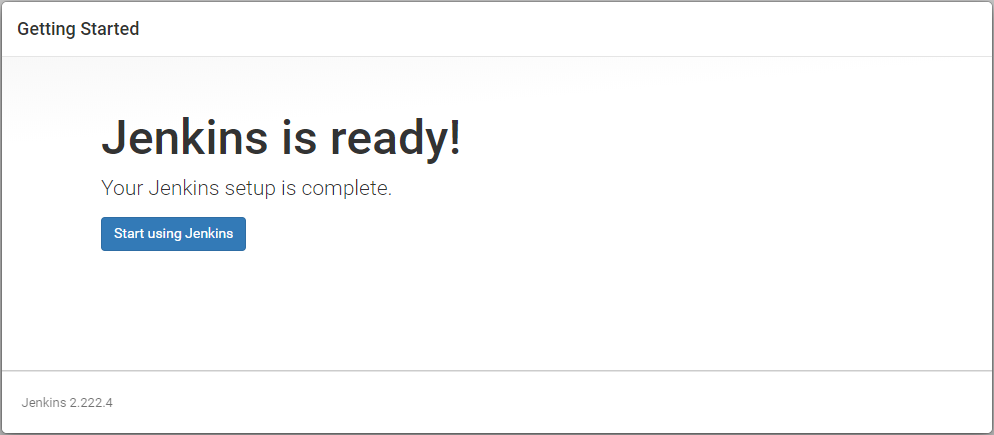
Our Jenkins is ready to be used…Playground is open!
Run Jenkins as ‘root’
To skip all the security issues we make sure our Jenkins is running under the ‘root’ account. By default it’s running under the ‘Jenkins’ account with less permissions!
So, let’s update that config file again sudo vi /etc/sysconfig/jenkins
Update this line JENKINS_USER="root"
And also update these directories:
1 | sudo chown -R root:root /var/lib/jenkins |
Don’t forget to give the Jenkins service a reboot: systemctl restart jenkins
Time for our first job!
Maybe first a use-case description what we are trying to do with this tool. Well, it’s a simple process that we want to achieve!
- Build a .CAP package from SVN sources with the CLI commands we learned in previous posts
- Save that .CAP file to a ‘safe’ location
- Clean the build environment with a CLI command
- (Optional) Let’s see if we can create some approval step before we deploy!
- Deploy the .CAP with the provided Ant-tasks in the deploy organization!
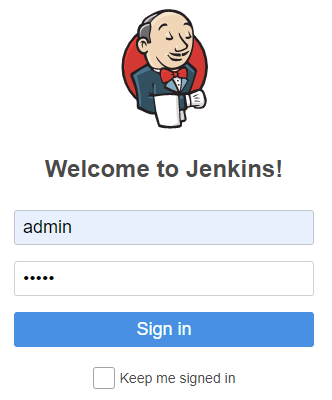
Start a new browser with http://192.168.56.107:7070/ where we are prompted with a login screen for Jenkins. Let’s fill-in those credentials to enter the pipeline-Walhalla!
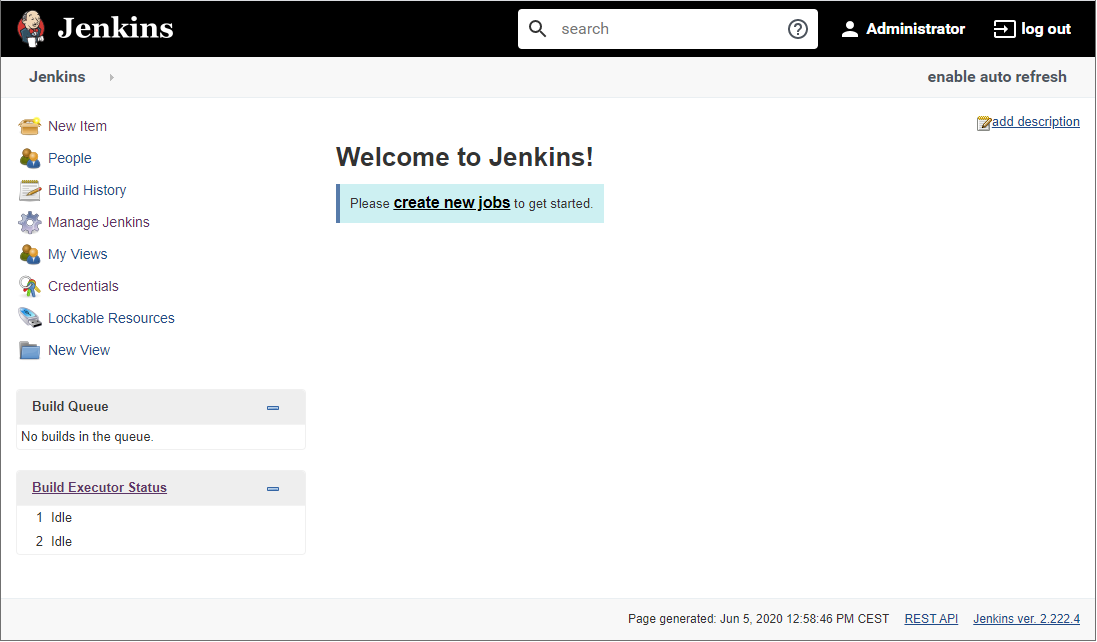
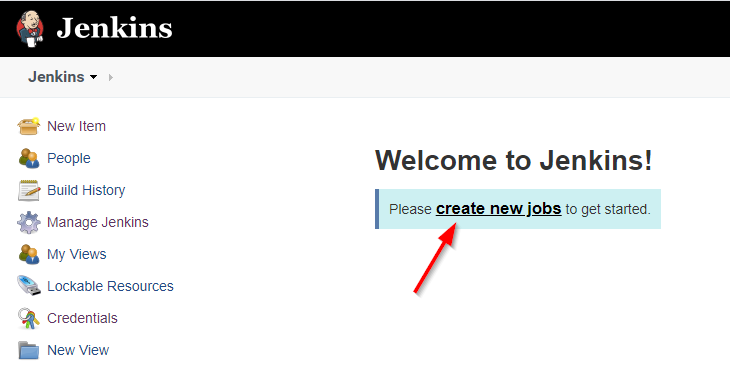
We are back on our welcome page where we can start with a new job.
Let me also introduce you to this website where you can also find a lot of documentation on Jenkins too.
I’m also new to this tool, so just let us hit that ‘create new jobs’ link to get us started…
We start with a new ‘HelloWorld’ name and we just select the first option ‘Freestyle project’ to just freestyle around and check the possibilities of the tool.

Hit that OK so we get to the next step…The configuration page of our just created Jenkins project!
A short description per tab:
- General
- You might give a nice description, but we just leave it empty for now. The same for all the checkboxes that can be found in this tab. We don’t need any of them for our process steps for now.
- Source Code Management
- Can also be left empty…We indeed use Subversion, but that is already called from our AppWorks CLI command tool!
- Build Triggers
- We can leave those checkboxes empty. The most interesting option is to trigger the build remotely with a script, but for now we just trigger it by hand. That’s not fully CD/CI, but for our first steps on Jenkins it’s fine!
- Build Environment
- Also these can be left alone as we have our own CLI tooling to keep the build environment clean!
- Build
- This is where it gets interesting…See the next section!
- Post-build Actions
- We can also leave this one for now…Maybe an E-mail Notification would be a nice thing to do, but also not for now
Back to the ‘Build’ section for our configuration
Click that ‘Add build step’ and let us execute a shell script to see what happens!
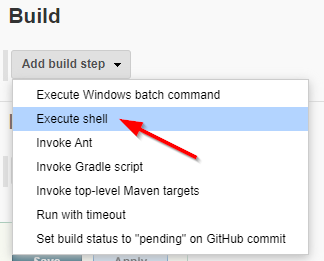
Let’s try out this command: /home/otadmin/helloworld.sh
Give a ‘Save’ so you go back to the main screen of your project where we can trigger our first manual build!
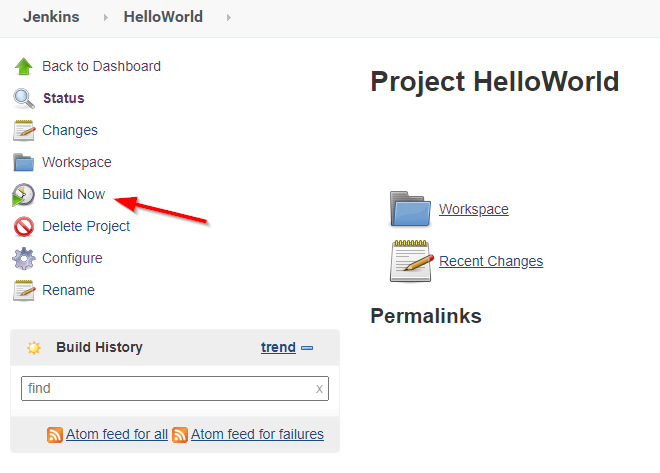
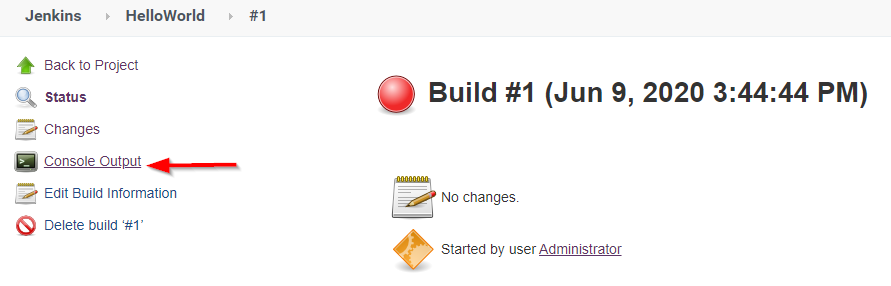
You’ll see our build ‘#1’ popping up in the build history with a red icon…hit it!
Let’s check the ‘Console Output’
And you probably guessed it already…As we don’t have that ‘helloworld.sh’ file available on our server!
Let’s create it with a MobaXTerm session with our ‘otadmin’ account.
Edit a new file with vi /home/otadmin/helloworld.sh
And past in this content (got it from here):
1 |
|
Give it a
:wqto save the file and exit the vi editor
And make the file ‘executable’ with chmod +x /home/otadmin/helloworld.sh
Back to Jenkins to execute a second build…This time with a valid output!
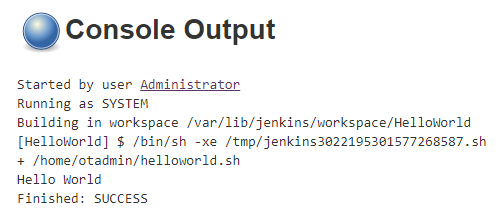
Our first SUCCESS…Great…next step…
Crafting our build.sh
Edit a new file with: vi /home/otadmin/build.sh
Use this content for the file (with a little extra flavor based on your environment!):
1 |
|
Do a chmod +x /home/otadmin/build.sh to make it executable
Back to Jenkins and update our HelloWorld project configuration: http://192.168.56.107:7070/job/HelloWorld/configure
It will be this shell script command to execute: /home/otadmin/build.sh
Save it and do a third build!
Now quickly go to the console for this (#3) build to see a live update of the commands being executed: http://192.168.56.107:7070/job/HelloWorld/3/console
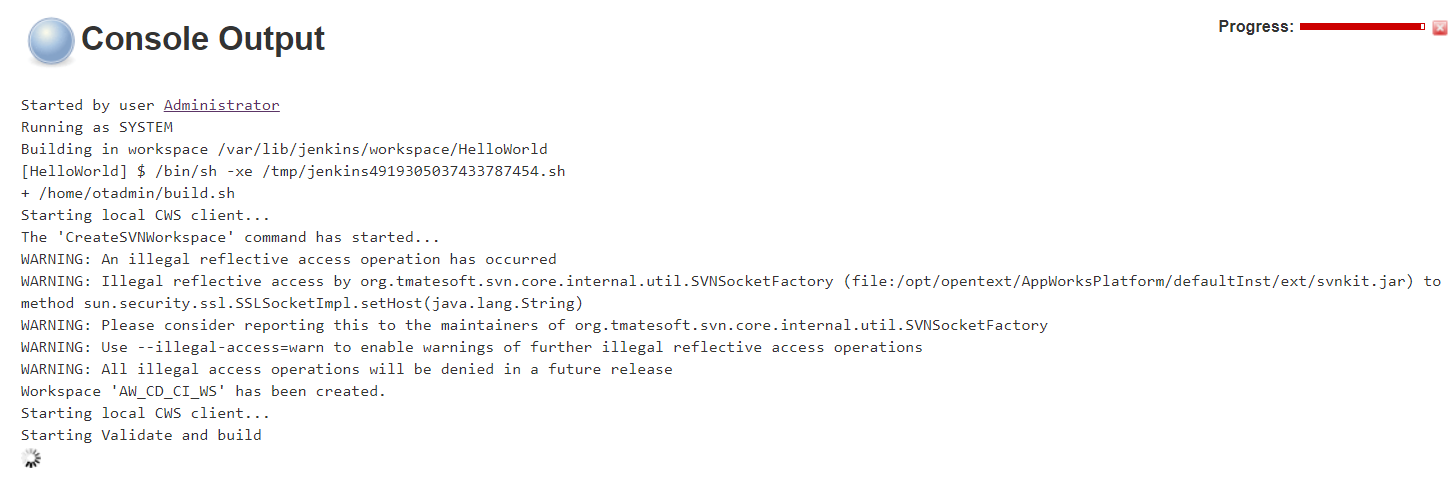
And finally you will also have that SUCCESS message where we’ve been waiting for! 💪
Crafting our deploy.sh
Edit a new file with: vi /home/otadmin/deploy.sh
Use this content for the file (again with a little extra flavor based on your environment!):
Hopefully, you still have the ‘build.xml’ and the ‘test.properties’ available in the home directory of our ‘sysadmin’ account from previous post?
1 |
|
Do a chmod +x /home/otadmin/deploy.sh to make it executable
Update our HelloWorld project again with this shell script command: /home/otadmin/deploy.sh
Save it and do a fourth build (well, for me it’s build #7 before the script was fine)!
Check the live update of the commands being executed: http://192.168.56.107:7070/job/HelloWorld/4/console
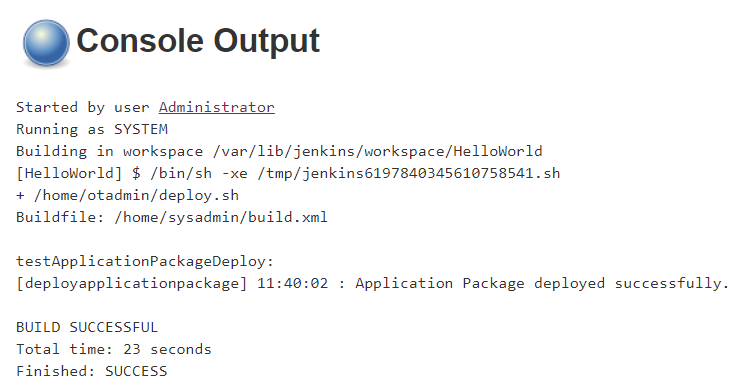
We are in a good track, but we still need to update our ‘Freestyle’ project with the created bash scripts…Ready for your first pipeline?…Check the next section…
Building a HelloWorld pipeline (with an approval step!)
The next step in our Jenkins journey to further automate the steps is the craftsmanship of a pipeline…Pipeline?…Yes, just a bunch of manual step that are executed after each other with (optional) some approval.
Back to our Jenkins dashboard/homepage where we create a new job…This time a ‘Pipeline’!
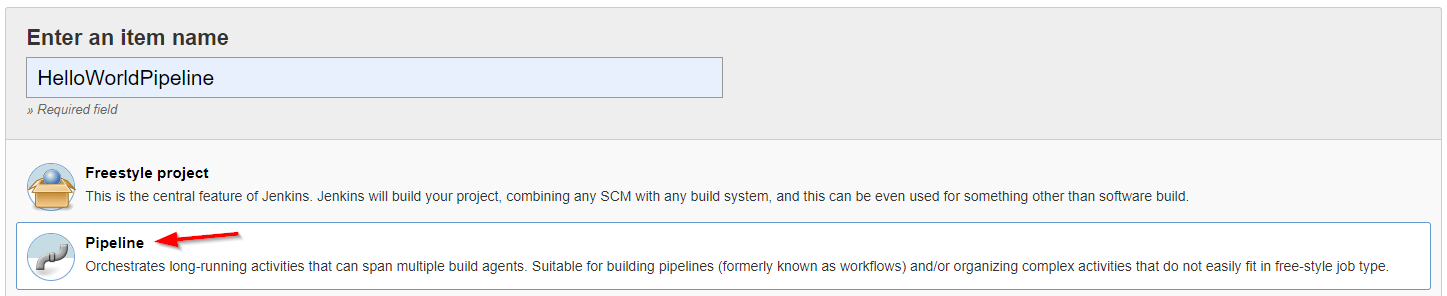
Hit OK to get to the next screen.
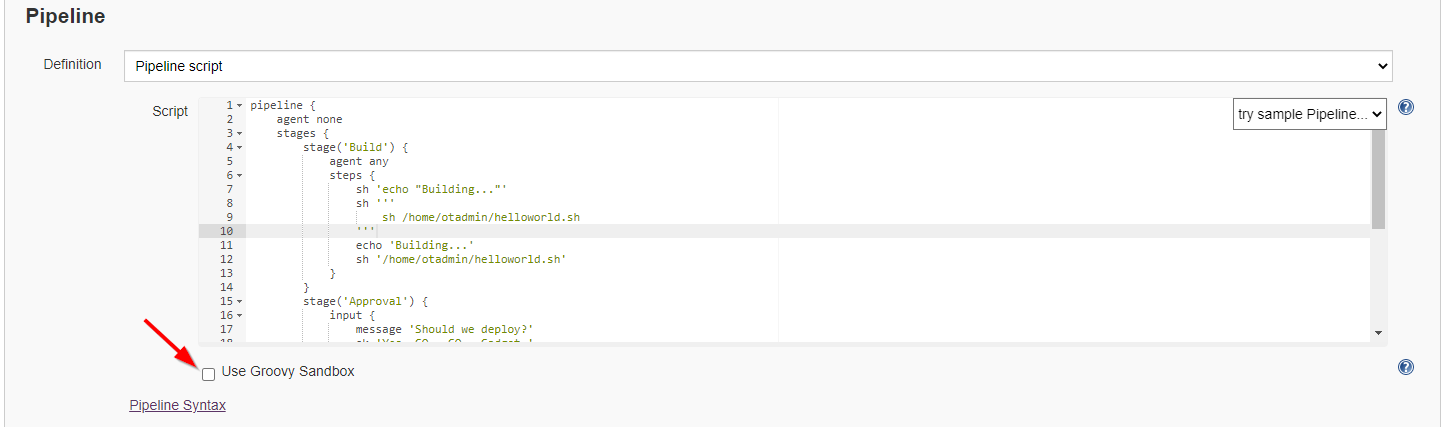
That next configuration screen looks almost the same as the ‘freestyle’ option. We also leave all the options as they are and jump to the bottom where we have the section to build ourselves a ‘Pipeline’.
The content we use looks like this (just a sample to play with!)
1 | pipeline { |
This should be the result where we also removed that checkbox for ‘Use Groove Sandbox’
Let’s save it and do a first build for this new project!
And jump to the output console with this result:
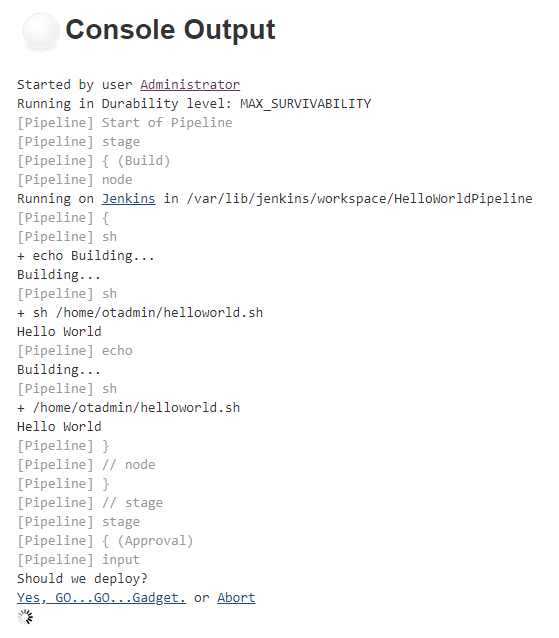
But before we click on the link you see in the output we just go back to the project overview where we see something like this! It is a nicer view for you to give the ‘Approval’ for the next step…How nice!
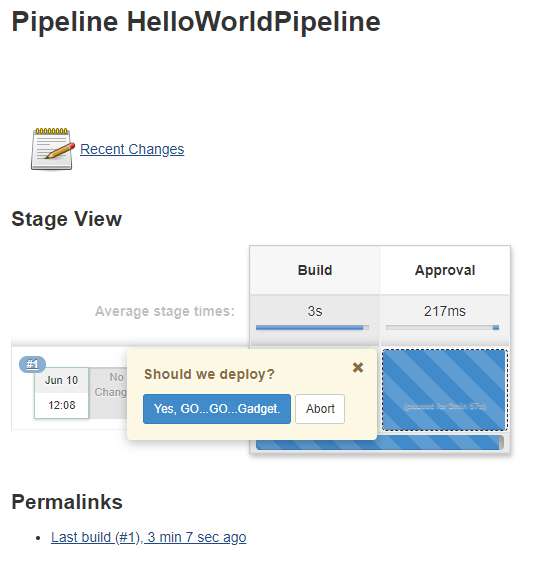
Well…where are you waiting for?…hit it…GO…GO…Gadget!
And there you have the end-result of our pipeline with the executed commands in the back end.
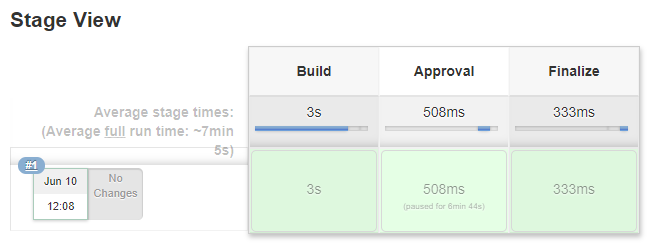
Great!…Next…
Updating the ‘Pipeline’ for our custom scripts!
The update is pretty simple as we only need to call our bash scripts in the correct stages!
Take a look at this content that we can use:
1 | pipeline { |
Update it in the configuration for our project, save it and do a second build…
Check the result yourself…you should be fine…Also after you gave that ‘GO…GO…Gadget’ approval….great!
This is my end output from the console:
After some small manual cleaning (what we can also automate!)
- Un-deploy with
ant testApplicationPackageUndeployfrom the previous post- Removal of the folder
/opt/opentext/AppWorksPlatform/defaultInst/capcontent/packages/shared/My\ Company\ AW_CD_CI_PROJECT(Not required, but it makes the output clean for you!)- Removal of the cap file
/home/otadmin/My\ Company\ AW_CD_CI_PROJECT\ 1.0.0.cap(Also not required, but nice for our final test.)
1 | Started by user Administrator |
And that is again a great success…next steps?
What about all the muttering about a ‘Jenkingsfile’?
Yes, now we’re getting somewhere!…Well, a ‘Jenkingfile’ is just your pipeline description we did in the previous section, but now it’s saved within your source control. In our case in SVN, the place where also our AppWorks project is saved!
The advantage?
- The pipeline description is under version control
- It can be edited from you own IDE
- Jenkin can read this file from your SVN and start the pipeline…and that is exactly where we want to go for in this section!
Back to our home dashboard in Jenkins where we create a new pipeline item like we did before; This time with a fancy name ‘AppWorksPipeline’
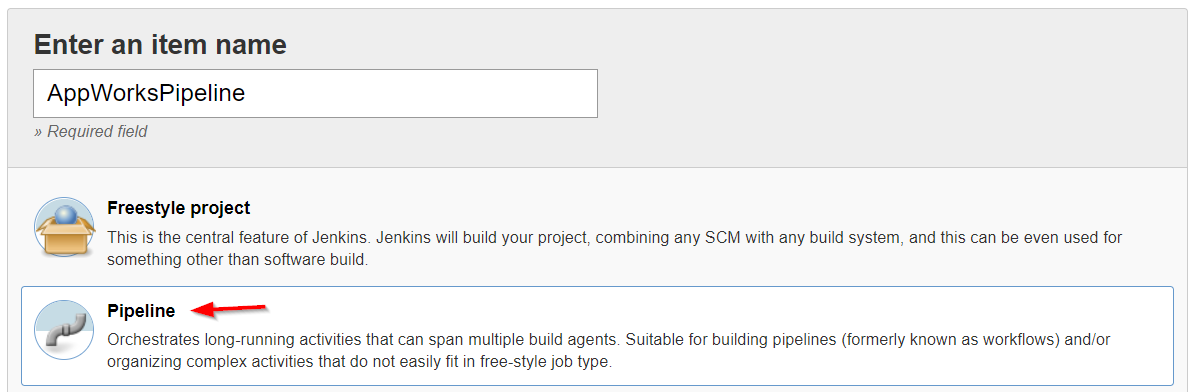
Hit OK to enter the project configuration.
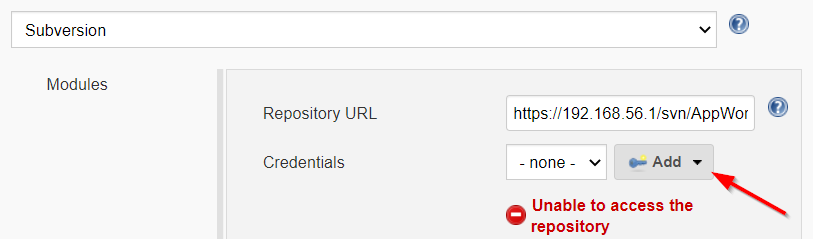
Go again to the bottom of the page and change the pipeline definition to ‘Pipeline script from SCM’
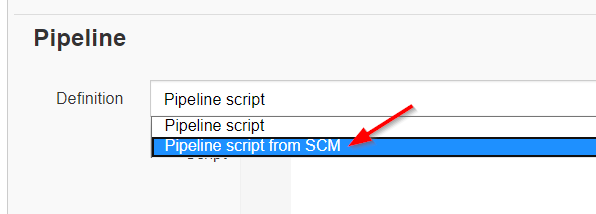
Select ‘Subversion’ as Source Control Manager and enter the URL for the repository. In my case https://192.168.56.1/svn/AppWorks as I have ‘VisualSVN Server’ running on my local laptop!
Now we need to add some Credentials for this connection:
I use the credentials like this (My default credentials for accessing SVN…Also from the AppWorks platform):
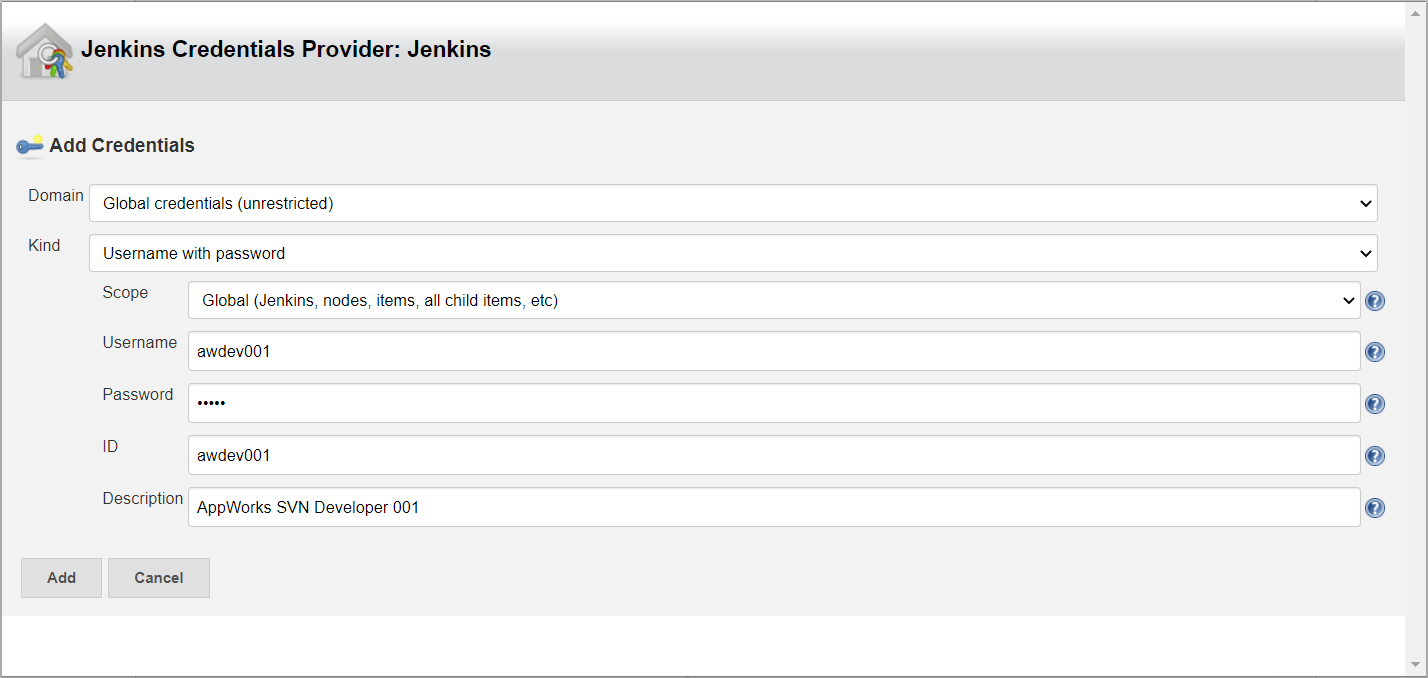
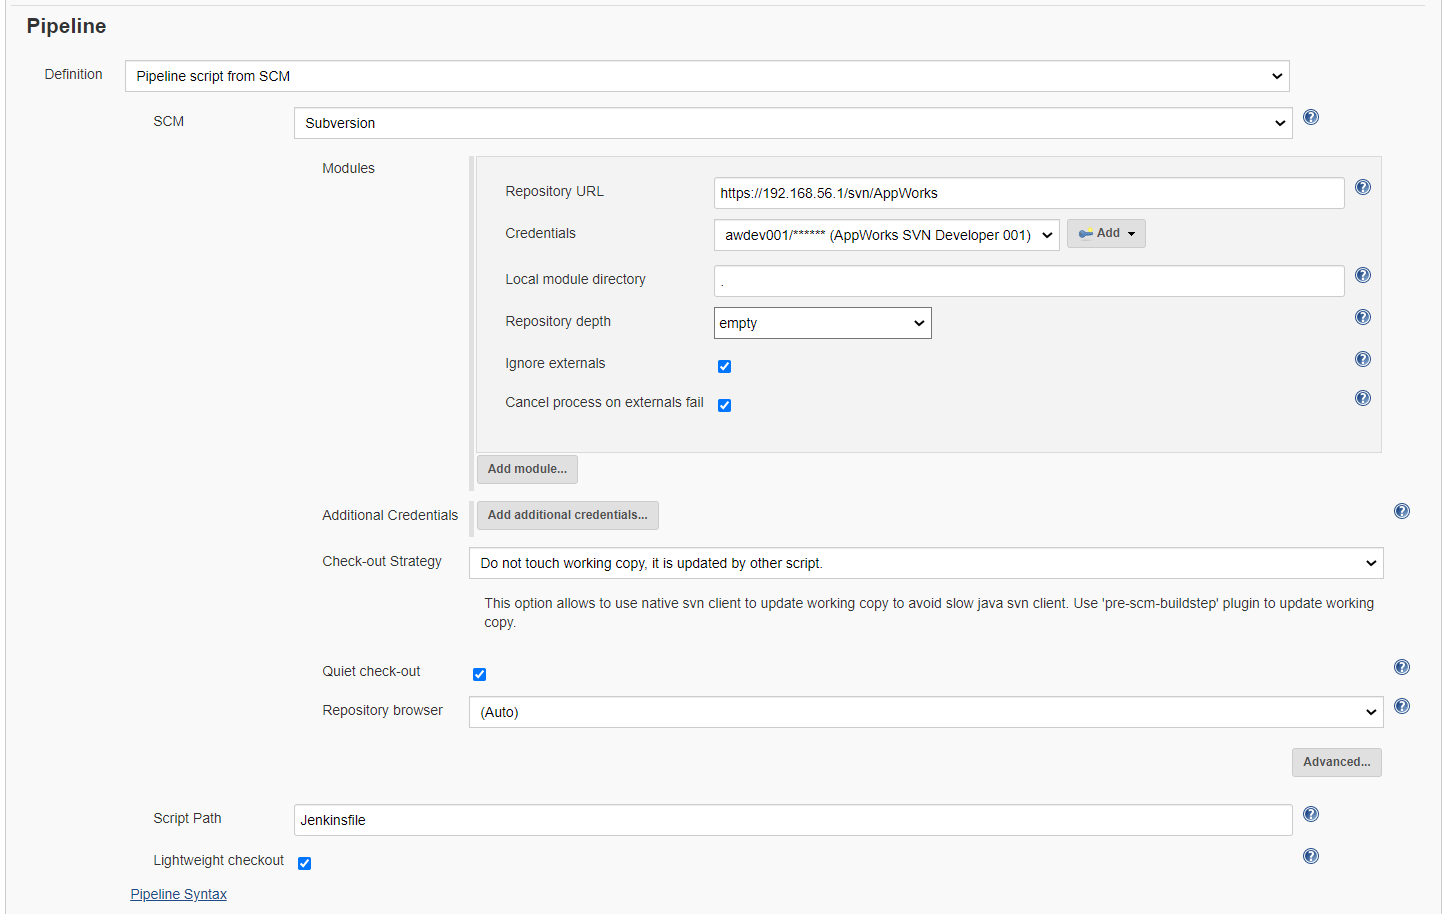
After you clicked that ‘Add’ button we’ll be back in the configuration screen where you need to select that just created credential from the list.
Other options I did are:
- Repository depth: empty (as all the rest is created outside this file does need to have a checkout)
- Check-out Strategy: Do not touch working copy, it is updated by other script.
The end result that we can save:
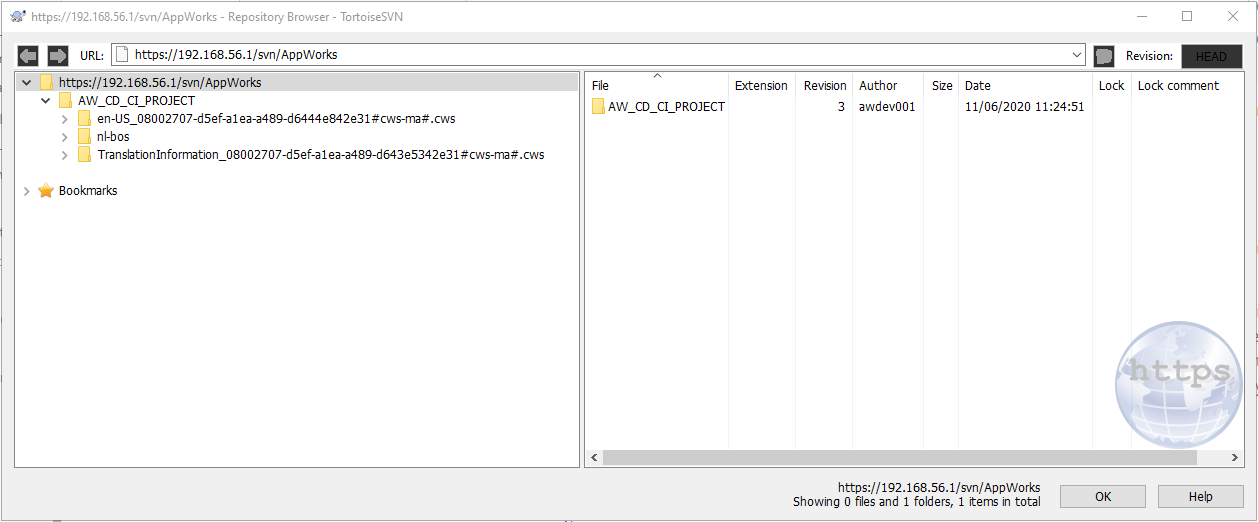
Time for our first build, but not before we created our ‘Jenkinsfile’ in SVN and for this I just use a small tool called ‘TortoiseSVN’. After you installed it you should be able view your repository with this URL https://192.168.56.1/svn/AppWorks.
Now create a new file locally on your machine with the name ‘Jenkinsfile’. That is a file without any extension! The content of this file is the same that we used for our last ‘pipeline’
1 | pipeline { |
This file must be uploaded into that ‘root’ directory next to our ‘AW_CD_CI_PROJECT’ folder…Leave the folder itself as is!!
A comment on manipulating that SVN repository that we do now. Be aware that the sources in the ‘AW_CD_CI_PROJECT’ folder are generated from your AppWorks project and are under control by the things we do in AppWorks design-time. It’s is recommended not to update any AppWorks sources outside design-time. Another (and maybe? better) option is use another repository where you save this Jenkinsfile, but the future will tell us what is the correct choice to make…right?
This also makes me think about an early question I got about sources like CSS, JavaScript, Java-code; These code snippets are not locked by default when you start to edit them from design-time like it’s done when you work on an entity for example (if you haven’t noticed?)…Well…The best approach for that is synchronize the AppWorks project to the file store of the server; grab them from there and manipulate them in your favorite IDE in a project that is under source control in a separate repository (can even be Git!). When done you do the reverse order of the same actions; upload it back to the server and can synchronize it back into the project. And yes…We now know how to automate that process…correct?
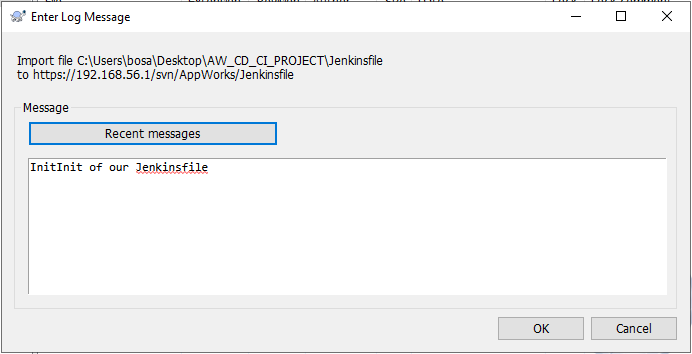
So, just drag in the file and commit it with a nice message:
Back to Jenkins where we now want to do our first (still manual) build for this new ‘AppWorksPipeline’ project!
And for me it’s a success…Well…After the fourth build! 🤞

Is there more?
What about that ‘still manual’ step?
Good question!…As we indeed still need to start our build from Jenkins itself with that ‘Build now’ button…That’s not CD/CI!!
Well, this can be solved in several ways, but that is more a Jenkins task than it has to do with deploying our AppWorks project. But to point you into the right direction it can be solved 3 ways (see also this documentation):
- Send a POST request to the build URL: http://192.168.56.107:7070/job/AppWorksPipeline/build. This can also be done with an authentication token
- Poll for changes in SVN periodically on time base. You can also trigger a polling request with a POST request to http://192.168.56.107:7070/job/AppWorksPipeline/polling
- Last resort is the ‘post-commit hook’ to trigger a build. More information here.
What is the best solution? This all depends on your situation and how many times you want to trigger a deployment.
Also a search in google on these topics can bring you to the correct implementation for your needs and now you also know what topics to search for!
And that’s it for our CD/CI journey!…I give it a greatly earned ‘DONE’ where we really learned valuable lessons for the future on our platform. I thought it was not possible, but with these last 3 valuable posts we for sure nailed the knowledge on this topic. Remember what I told you 3 weeks ago? “I never done this so we’ll see how far we get with it…But if I can do it…for sure you can too!!” 💪
Don’t forget to subscribe to get updates on the activities happening on this site. Have you noticed the quiz where you find out if you are also “The AppWorks guy”?
