Hi there AppWorks fans,
Welcome to a new installment of AppWorks tips.
In this post we’ll learn about monitoring our instantiated, running, finished (or other states!) BPM flows. Great stuff if you know where to look for and within AppWorks there is a nicely crafted artifact available with the name “Process Instance Manager”. As AppWorks is by core an Enterprise Service Bus which makes it possible to get into deep details on any running process on the platform. So, as always…
Let’s get right into it…
Spin up the machine and start in your favorite workspace. Make sure to login with an account that has the ‘Administrator’ role applied. In our case it’s the ‘awadmin’ user with password ‘admin’.
In the top-right search box type in ‘Process’ and after you found the artifact you can open it.
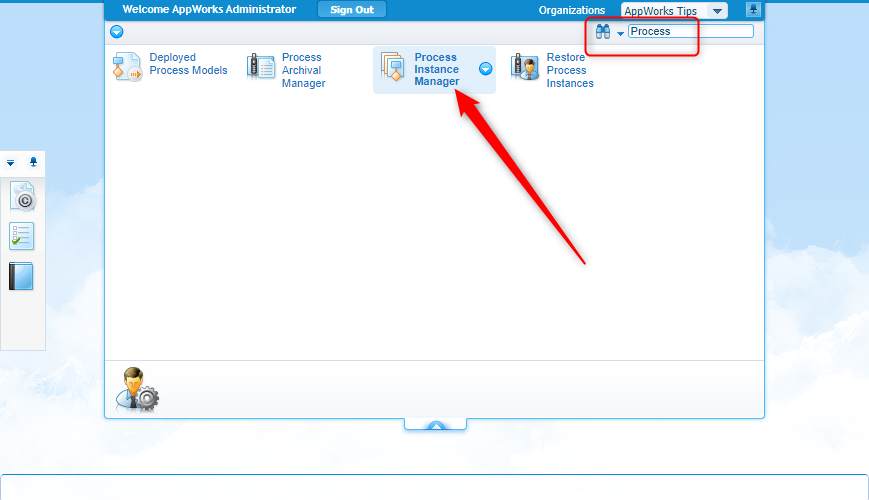
Off-course it would be very handy if you have some BPM flows running in the organization…Duh!
From our previous post we have them already available so we can use those for this post.
We now get an overview of available process models. In our case there is only 1, but that is enough for now
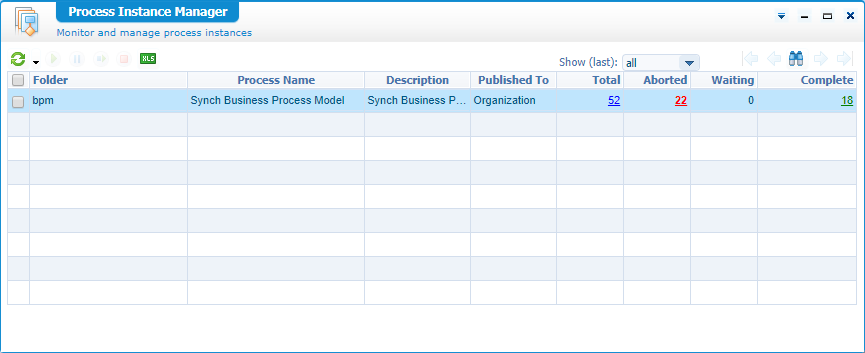
You can already see a total of 52 runs where 22 aborted and 18 completed. This flow was created for testing a specific functionality where we needed to test several times!
You could click on the number, but there is more to see in this panel…
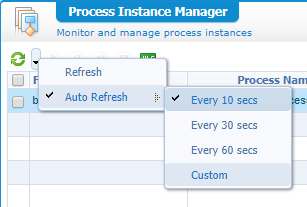
Auto refresh
Export to Excel
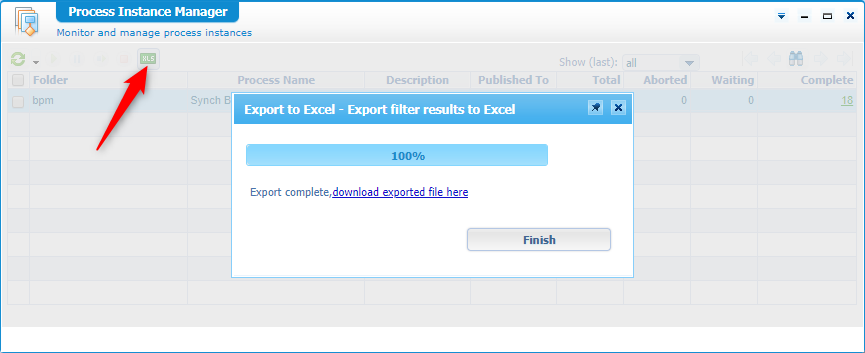
Then click that link to open the file in Excel. It’s a real .xlsx file and not a .csv as I would have expected.
Navigation

Not very useful for 1 model, but will get useful when we will get more process models available
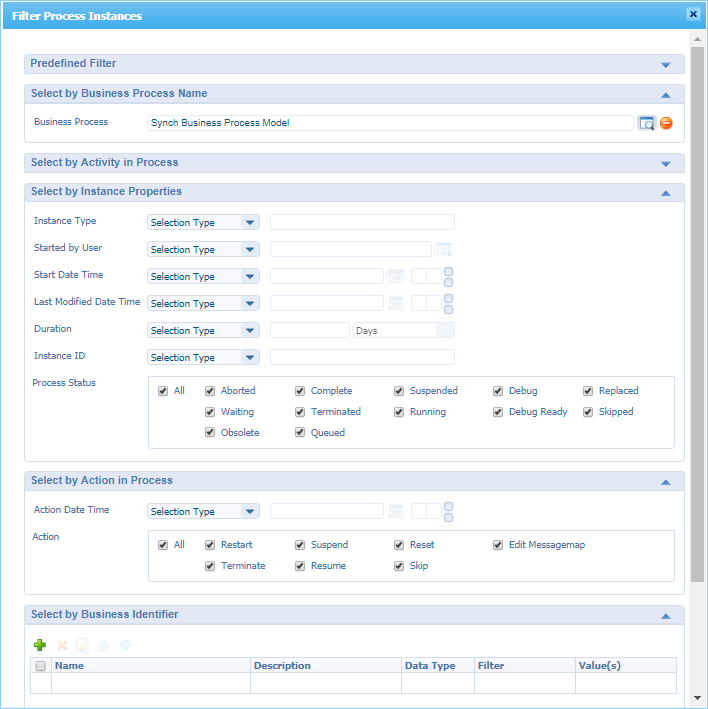
Filtering
And in that same screenshot you see some binoculars. When you click it, you can filter down the list in more detail (also not very useful with one model, but again…you know what I mean!)
Other actions
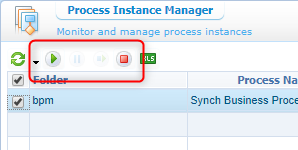
- Restart ‘Aborted’
- Will only be enabled on instances with status ‘Aborted’ and the flow will be restarted
- Suspend ‘Running’
- Will only be enabled on instances with status ‘Running’ where the flow will be paused
- Resume ‘Suspended’
- Will only be enabled on instances with status ‘Suspended’ where the flow will be continued
- Terminate ‘Non-completed’
- Will only be enabled on instances where status is not ‘Completed’ where the flow will be aborted
Now it’s time to hit that number!
And check out the view…Isn’t that a nice feeling we’re getting now!
I say: “FULL CONTOL” 🤩
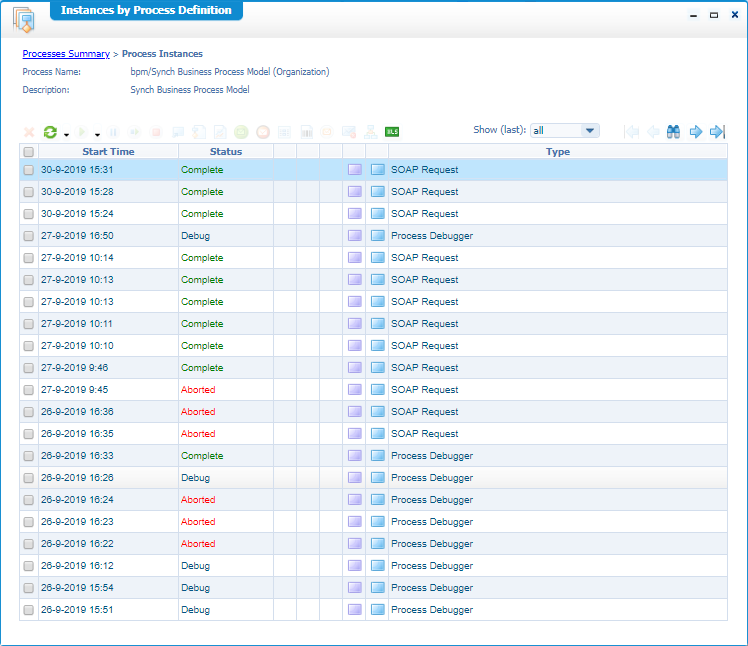
Where do we start…
Let’s first skip some stuff as the same things can be applied on this screen as the previous one. Like auto-refresh, export to excel, flow actions like restart, suspend, resume and terminate as also navigating and filtering through the list!
One special god-action to rule them all is the ‘Restart All’ action for the selected flows
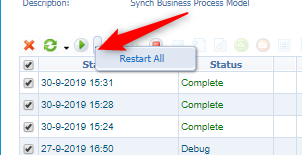
No click on for example a ‘Completed’ flow…

Several actions are direct under your command!
Delete the flow
It’s really…really deleted
Show Graphical View
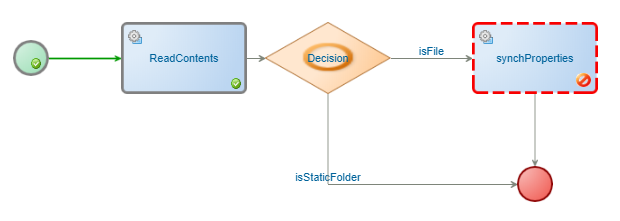
The screenshot is from an ‘Aborted’ one, but you see a ‘live’ it gets to you…ESB…You are the best!
Show Process Logs
Will not show anything for this flow, but when logging is enabled on the process model activities you can view the logging also from this button.
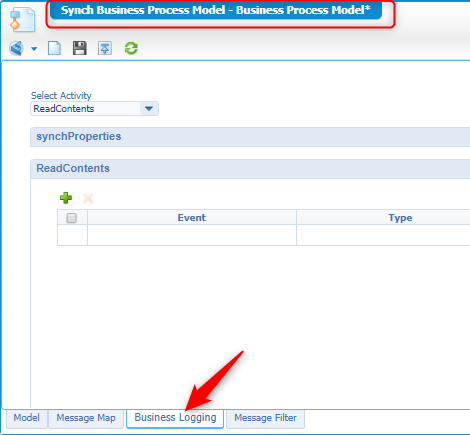
Show Input Message
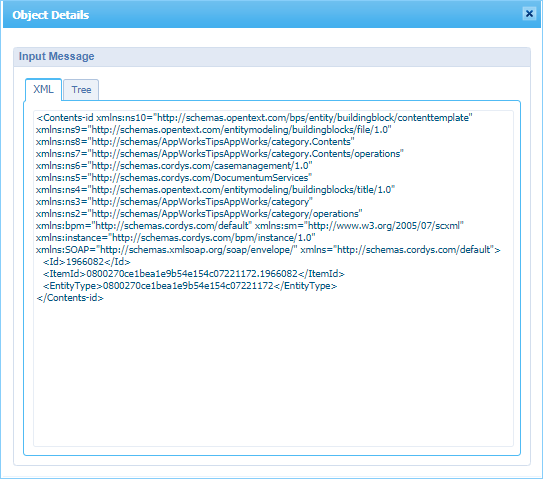
Where we can see the exact XML that initiated this flow with the instanced entity ID. And it is indeed correct that this flow is started from a ‘contenttemplate’ building block (if you followed the previous post!)
Show Output Message
It does what it says is does, just like the input message, but I don’t have an example as our flow is not putting anything out at the end!
Show/Edit Message Map
Again…heaven…As this gives all the information required to get deep knowledge on WTF happened in our flow!
This was the message for our synchPropertiesInput call

Why also ‘Edit’?? If the flow was still running you can manipulate it’s data on the fly which makes us a ‘BPM manipulation god’…Great stuff.
Show Queues for Incoming Messages
No incoming messages for my flow, but a process models can ‘wait’ for a ‘Received send message’ event from another process. Nice stuff that we will cover in another post.
Show Error Text
Available on ‘Aborted’ flows and gives you on stack trace level what went wrong.
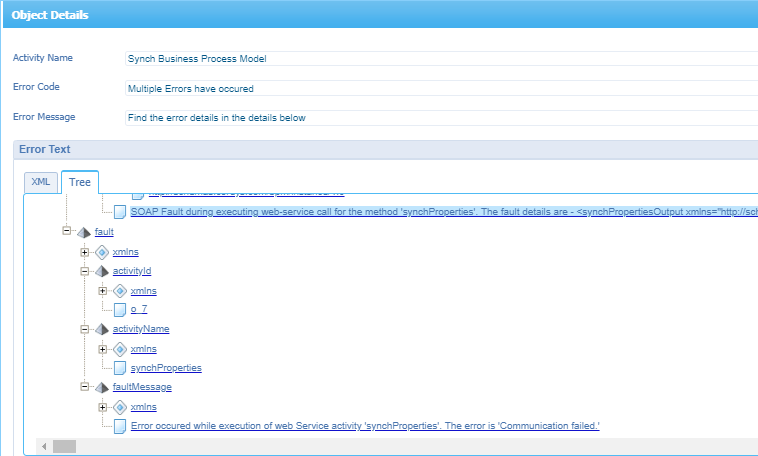
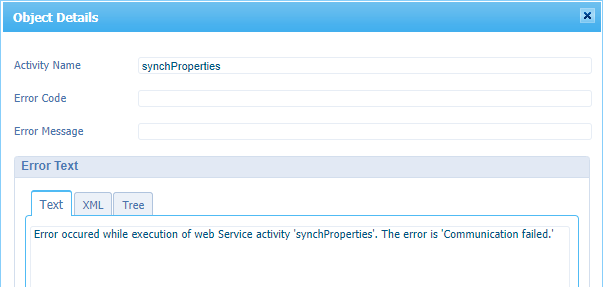
In my case it was a ‘Communication’ failure as the WS-AppServer service container was not running at that moment.
Open Debugger
Off-course only clickable when the flow is in ‘Debug’ stage. When you click on it the process model will be opened in ‘Debug’ mode and there is where the real magic start to happen. But also, this one is on my backlog for a new blog…I’ll make sure it will be great stuff again!! ✌
One click extra you will never forget

This will give you a nice overview of all the activities within the process…How cool!

And also, here all kind of actions can be done by selecting an activity.
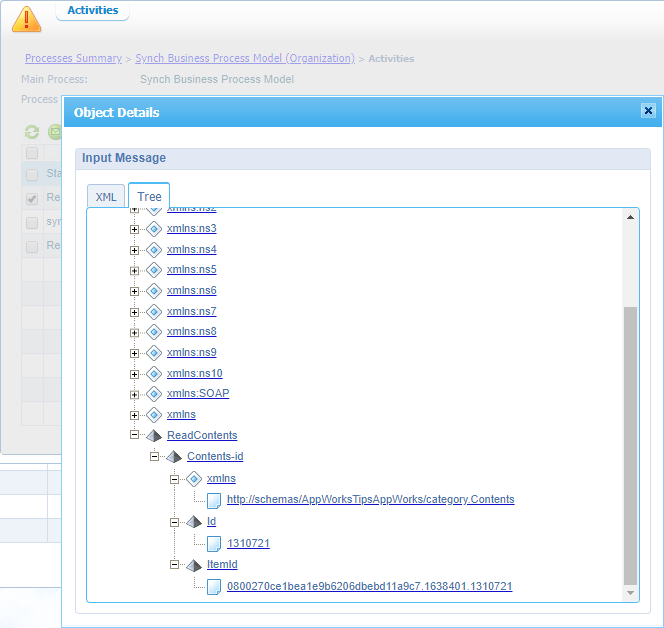
Show input message
For our ‘ReadContents’ activity that will be our extracted id information to ‘read’ the entity content
Show output message
And what goes in will somewhere come out. For the same activity we see this information passing by
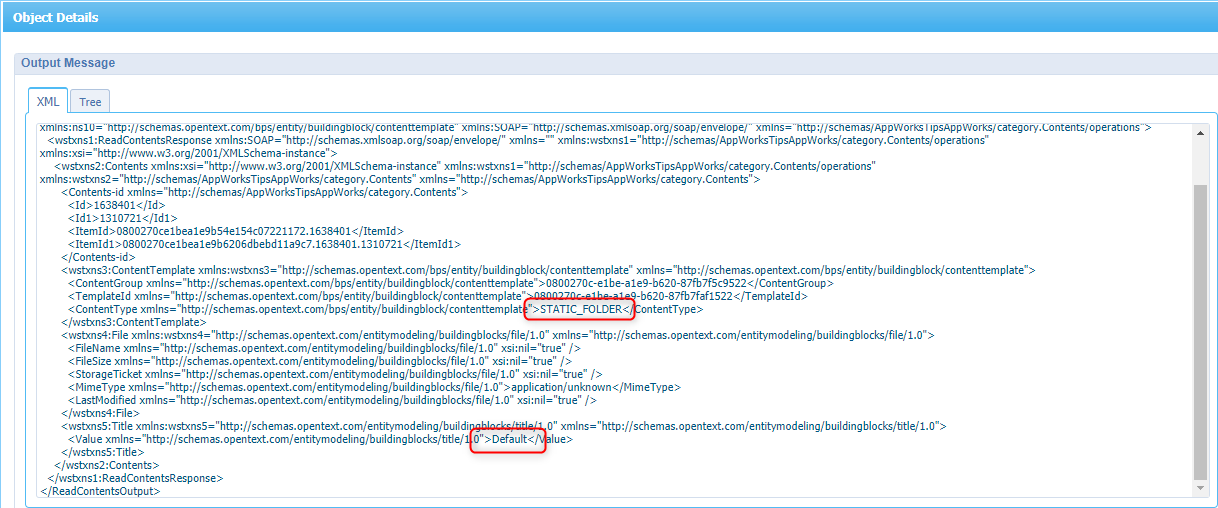
And like you can see this was the point where I started to see that the ‘Default’ folder template where we uploaded our content into was also triggered by a process. It’s not clear to me why that is, but that made me create that ‘Decision’ you saw in the end of my previous post!
Show error text
Only available when things go wrong like our ‘synchProperies’ at that moment
Show subprocess details
Nothing for me to check here as we don’t start any subprocesses in an activity in the process we have now. We’ll cover subprocesses (independent and reusable BPM) in a separate post, but this gives you a small hint…
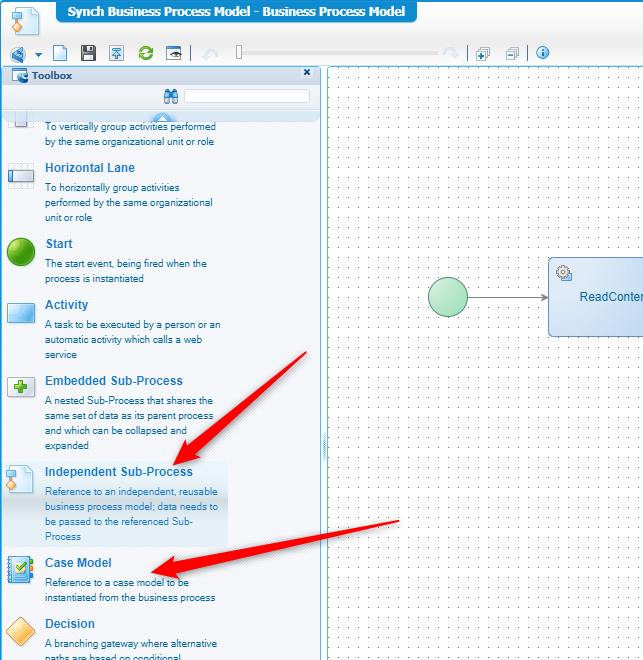
Show Case Activity details
Also, here nothing to check for now as we don’t start any case activities in this process. These case models can be created in the workspace project overview. The same way we create new entities. We’ll cover case model activities in a separate post, but the image above gives you a small hint as well as this image…
A case model is a specific type of process that can handle specific business cases. It also has activities with a start/end state.
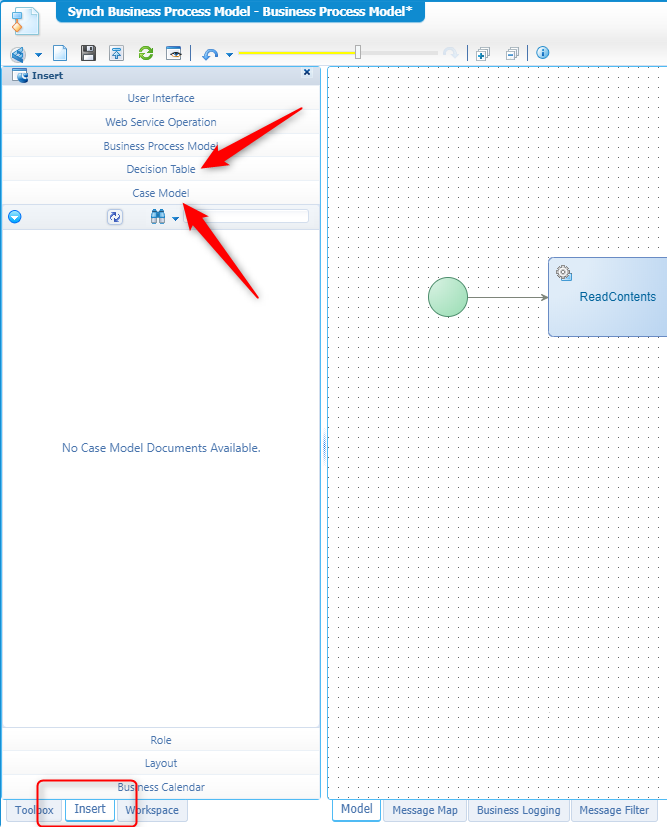
Show Decision Table details
Nothing here either for now as no decision table is used in this process for now. The image above also gives you a small hint on what will be covered in another post. With decision tables (also created like we create new entities) we can make more advanced decisions. Based on attributes and rules we can execute all kind of actions like trigger a process, send a mail, invoke webservice etc. Highly advanced and great stuff to play with.
We earned it again. Our ‘DONE’ for this post. Now we know where PIM can be good for…
YES…
- If there is something strange in your BPM and if there’s something weird…
- If you’re seeing things running through your head…an invisible man sleeping in your bed…
- If you’re all alone and pick up the phone…
Who ya gonna call?…It’s PIM! 😜
Don’t forget to subscribe to get updates on the activities happening on this site.


