Hi there AppWorks fans,
Welcome to a new installment of AppWorks tips.
Back in the good old days when communication of data was done by simply sending out (or sending in) plain text files. Totally unexplainable for the new-age people that consume JSON over ReST these days! I understand this, but in real-life you will experience that these good old systems (we call it “legacy”; others call it “mainframes”) are still used in today’s environments. Do we like it? Probably not. Do we need to embrace it? For sure! Sometimes we just don’t have a choice when we require to have a call to an external legacy system that only communicates through plain text files. There you go with your brand-new AppWorks SOA-oriented platform; Lucky for us, the platform has its own legacy too which brings us to an underrated connector with the fancy name “FileConnector”. This post will just start using it because I need the knowledge on my own project as well!
Let’s get right into it…
Where to start? Well, what about the great developer cloud from OpenText where we have a ‘resources’ section for our platform? Hmmm…Can’t find it here between the other interesting deliverables. Time to have a look in the ‘old’ legacy location. After authentication, we found ourselves a pathway to the “Community Connectors”; Did I say “good old days”? Well, this is the location where we find the ‘Community File Connector’. There is a great PDF document available as an addition to this post; I go for the latest download on file: Cordys_Community_File_Connector_4.0.1.cap.
Now start your VM and login to the ‘System’ space of the environment. I use my sysadmin account to open the ‘Application Deployer’ artifact where we just follow the simple steps:
- Leave the space to ‘Shared’
- Browse to the just downloaded CAP file
- Hit the ‘Upload and Deploy’ button
- Check the version, and hit ‘Next >’
- Check the operation DEPLOY, and hit ‘Next >’
- Check, and ‘Next >’
- I always mark ‘Revert on Failure’, and click ‘Deploy’
- After 10 sec., you can ‘Finish’
The package is “Unassigned”; When you face this issue during the steps, you need to update the security settings in the ‘Security Administration’ artifact (in the ‘Code Signing’ tab!)
I’m not sure if it’s required, but let’s also restart the TomEE instance (systemctl restart tomee); Just because we can and there are probably some jar files deployed at magic locations! 🤔
…
Let’s do some preparation on the server (our VM) first. You can thank me later once we start using these locations! Create a directory structure to work with and set the correct permissions:
1 | mkdir /opt/opentext/AppWorksPlatform/defaultInst/fileconnector |
The next step is to also do some preparation in AppWorks (not in system, but this time your own organization!) with the introduction of some XML configuration files in the XML store. It’s simple; Thank me again later…
- Create a new folder
xmlstorein your project structure - Set this folder as “Start point of qualified name”
- Create a new document of type ‘XML Store Definition’ in the root of this folder
- Create this folder structure under the
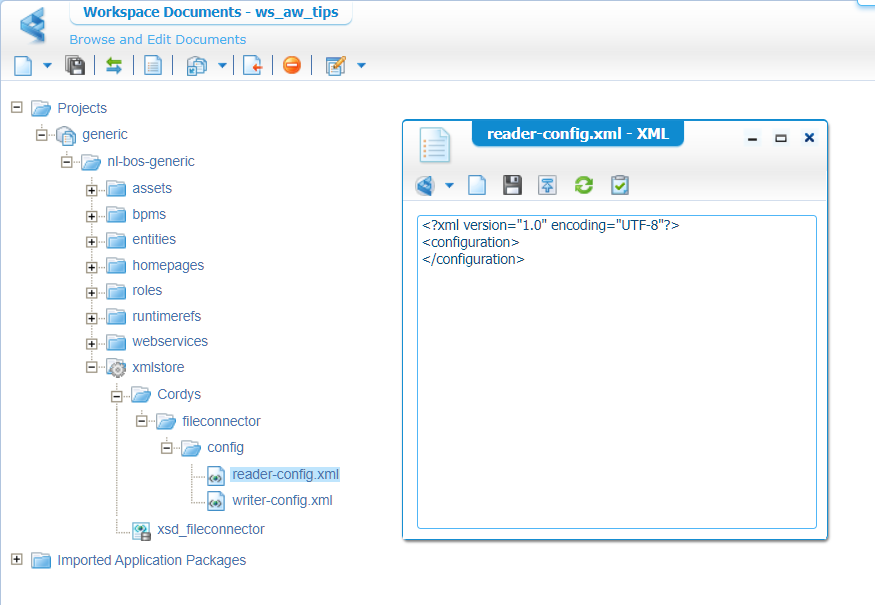
xmlstorefolder:/Cordys/fileconnector/config - Now create 2 new xml files under the
configfolder.reader-config.xmlandwriter-config.xml; Both with this content:
1 |
|
This is the end-result which you can publish:

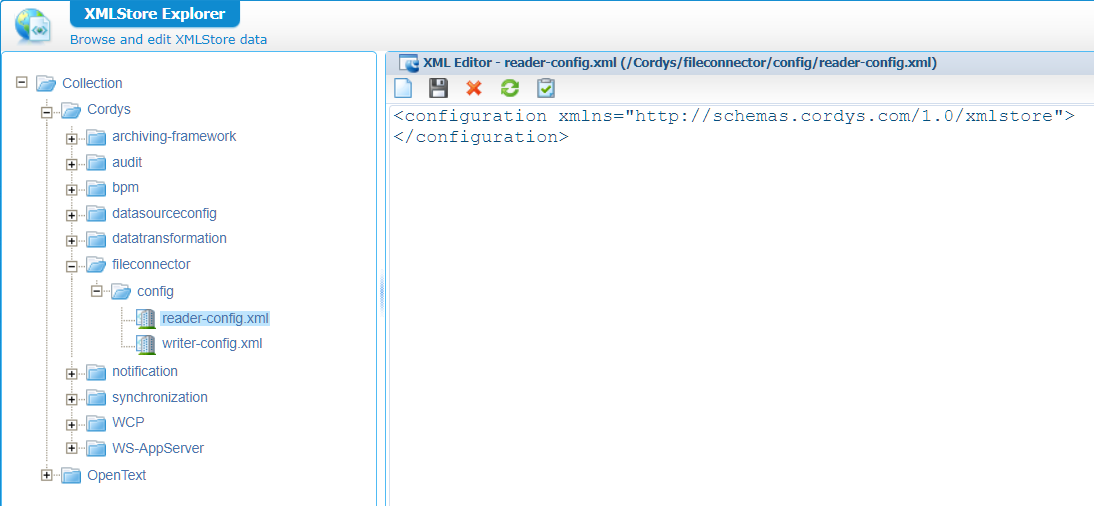
After this publication, you can check the ‘XMLStore Explorer’ on a result like this:

…
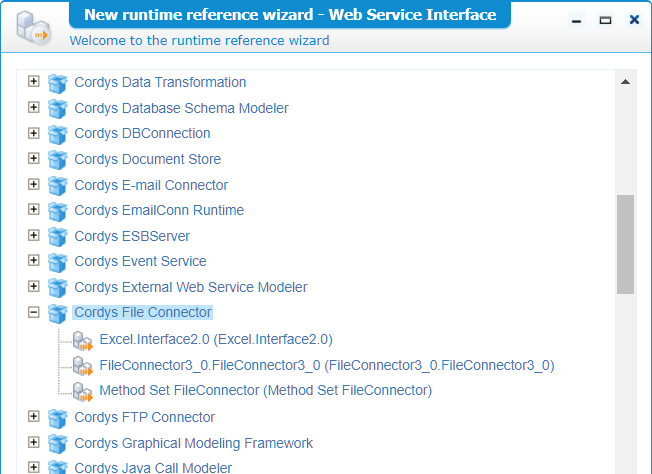
The playground is almost open! We miss 2 things…Some runtime references to use the connector services in our BPMs (if needed). Give it a right-click on your runtimerefs folder in the project, go to the ‘Add runtime reference…’ option, and add the webservice interfaces for this connector:

Now it’s getting interested…

You can right-click them and evaluate them but WAIT! First things first; We need a supportive service container!…Open the ‘System Resource Manager’ and create a new service group with this input:
- Connector type:
FileConnector - Group name:
sg_fileconnector- Select all three interfaces
- Service name:
sc_fileconnector- Startup: automatically
- Assign to OS (recommended by OT by default for all service containers!)
- The fileconnector Main-tab is already prepared! Yes, thank you! 🤗
- There is also a ‘Directory Poller’ tab, but we manage that one in a later section
- The ‘Drive Mappings’ tab will be out of scope for my journey…I leave it with you!
With the service group/container in place, and all preparation done, the playground is now open!
Service call examples
Just some test calls to see if it’s working fine…I start with a test.log file on the server: echo 'Hello world!' > /opt/opentext/AppWorksPlatform/defaultInst/fileconnector/test.log. We can read the file via a service call looking like this:
1 | <SOAP:Envelope xmlns:SOAP="http://schemas.xmlsoap.org/soap/envelope/"> |
This is my response:
1 | <data> |
NICEEEE! 😎
You can also run these service calls via the ‘Web Service Interface Explorer’ artifact!
Now for some other service calls…
1 | <SOAP:Envelope xmlns:SOAP="http://schemas.xmlsoap.org/soap/envelope/"> |
Check it on the server: ll /opt/opentext/AppWorksPlatform/defaultInst/fileconnector/. Trust me, it’s there! Let’s revalidate this with the next call:
1 | <SOAP:Envelope xmlns:SOAP="http://schemas.xmlsoap.org/soap/envelope/"> |
…This will clean our mess:
1 | <SOAP:Envelope xmlns:SOAP="http://schemas.xmlsoap.org/soap/envelope/"> |
…This call will even create a new file and write content to it! It’s a party…This FileConnector! 🎉
1 | <SOAP:Envelope xmlns:SOAP="http://schemas.xmlsoap.org/soap/envelope/"> |
Our first exploration was a success! Now for that extra step…In the beginning we skipped a polling feature on the connector. This is where it gets interesting as what I would like to accomplish is monitoring a folder on file input; Once a file is uploaded, I want to start an AppWorks BPM to manage its content further for our solution. Would it be possible…Let’s find out in the next section.
Polling mechanism
Time to move back to the ‘System Resource Manager’ artifact and grab the properties of our sc_fileconnector service container. In the ‘Directory Poller’ tab we can enable the polling feature with valid paths like this:

We have those paths already available on the server…Remember?
Save it, but don’t restart the container yet as we first need to add the poller-config.xml to our XML store. We do this of course via our xmlstore folder and the related ‘XML Store Definition’ document! The XML document will be published in this location /Cordys/fileconnector/config/poller-config.xml and will have this part of content:
1 |
|
After publication, we can restart our service container without problems!
What does this whole configuration do? A valid question! The service container will start the poll the configured input folder
/opt/opentext/AppWorksPlatform/defaultInst/fileconnector/input(see XML config) every 10 sec. (see service container). When it “detects” a file with .xml extension it will “watch” again for 10 sec. (see XML configtrack-time) for any changes and will eventually trigger a method. In our case that’s theExecuteProcessmethod that will initiate our configured BPM with an input message. The input message has some special attention with thoseFCDP:element-dataparts and make it possible to extract file data directly into the XML as value! You will see this later in the message map for your BPM instance.
You can also set the<move-file>true</move-file>to move the file to the application folder (see service container). In that case the trigger method is responsible for cleaning the file; In our case the BPM, but we have the service calls available to do so in the runtime reference folder of the project!
…
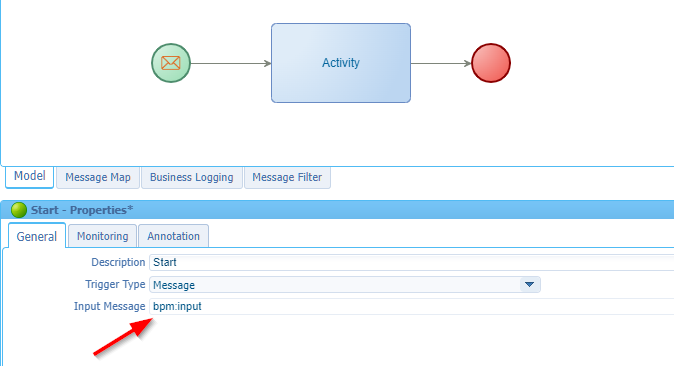
The only thing we miss now is…The BPM! Well, where are you waiting for; Hit that gazzz, you know the drill on creating one! Keep it simple with just one activity and make sure the location matches that path in the config file: /nl-bos-generic/bpms/bpm_dummy. The only thing to not forget is the ‘input’ message (which you can create from the message map…comment me if that’s a hard task!):

Publish the BPM, set the runtime security if you use a regular test account, and you’re ready for that final test! From a server perspective, we can now create a new file in the “poller” input-folder:
echo 'My first input' > /opt/opentext/AppWorksPlatform/defaultInst/fileconnector/input/test.xml
NOTE: On my side I also need to update this file with the correct permission before it was picked up:
sudo chown tomcat:tomcat -R /opt/opentext/AppWorksPlatform/defaultInst/fileconnector. I log in to my VM with thesysadminaccount, but the service container runs under thetomcataccount. It is what it is, no big issue; Just a security thing to consider!
Now what? Well, have a look in the PIM! You will see a BPM instance passing by (eventually!) and watching the message map data it will give an interesting insight:
1 | <messagemap xmlns:SOAP="http://schemas.xmlsoap.org/soap/envelope/" xmlns:bpm="http://schemas.cordys.com/default" xmlns:sm="http://www.w3.org/2005/07/scxml" xmlns:instance="http://schemas.cordys.com/bpm/instance/1.0" xmlns="http://schemas.cordys.com/bpm/instance/1.0" lockID="08002700-8c65-a1ed-acd7-5e4d79570b57"> |
Check that input; Exactly what I’ve expected! That input can be nicely managed further into our entity solution, but I leave that task up to you…
For what I wanted to know, it’s a “DONE”. I leave the reading of Excel files and the read/write of records with you to explore; The documentation of the connector is particularly good, and you have already the head start with this post where we explored the first steps to start with the underestimated “FileConnector”. Have a great weekend and I will see you in another post, next week.
Don’t forget to subscribe to get updates on the activities happening on this site. Have you noticed the quiz where you find out if you are also “The AppWorks guy”?


