Hi there AppWorks fans,
Welcome to a new installment of AppWorks tips.
Today (again) xForm knowledge, but as important to know like the call from last week. This week it’s slightly different as we move from an entity webservice call to a BPM execution. For this we use an interesting webservice which we need to inject with fine-grind XML data. It’s not that hard to do, but if you don’t know the trick it might be a struggle to overcome.
Let’s get right into it…
Let’s start again with a fresh image, use the project from last week or do whatever you want. As long as you have a ‘Developer’ rolled account with a workspace and related project. 😎
FYI: I’m using Oracle VM VirtualBox which makes it easy to create local images and create snapshot for recovery. A great tool to play with, and a recommendation from my side to use it for your own journey and explorations.
Right…What I said; I start with a fresh image, and a clean project (with basic folder structure). We want to trigger a BPM, so why not start by creating one. Just a simply one with a start-construct, one activity, and an end-construct. Save it in the bpms folder of the project and give it a fancy name like bpm_xform_triggered:
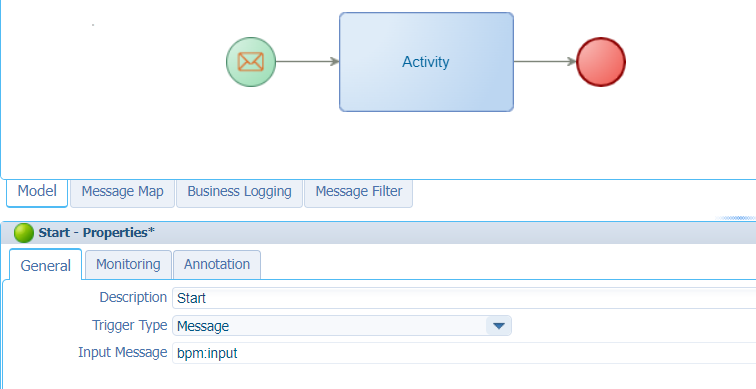
I also made it a bit interesting with an input message! You can create the input message from the ‘Message Map’ tab
Next…Ohw! Don’t forget to publish it! 😉
Webservice trigger
By now you know we can just right-click the BPM and trigger a run. This provides us with a modal popup to fill in the input message. It’s even possible to generate a webservice out of the BPM and trigger it from that standpoint (here is an example). For this post we use another service to trigger our BPM; it’s called ExecuteProcess. Open the ‘Web Service Interface Explorer’ artifact and do a search for this service name. When found, we can evaluate it with input like this:
1 | <SOAP:Envelope xmlns:SOAP="http://schemas.xmlsoap.org/soap/envelope/"> |
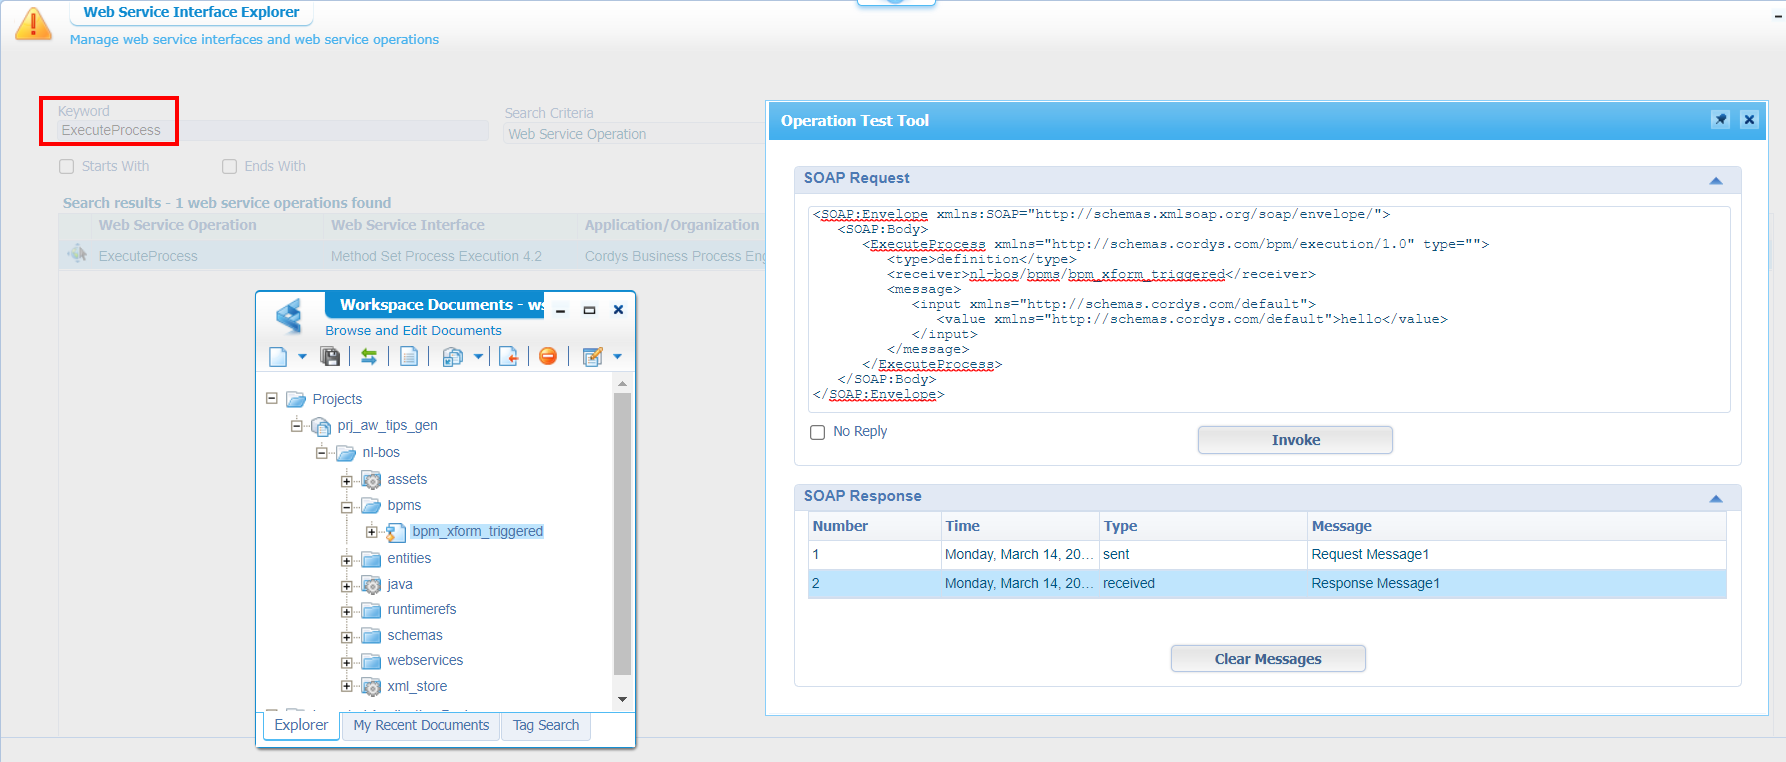
Important to know: We can find the namespace for the ‘input’ and ‘value’ element in the properties of the model itself:
Eventually you’ll get a response back with an ‘instance_id’ of the started BPM (double-check the PIM on this one!)…Next step!
Add a runtime reference
Before we are able to call the ExecuteProcess webservice from our xForm we need to make it available within our project. We do this via a so-called ‘Runtime Reference’ which is just a reusable component created in the platform for you to consume…How nice! Let’s create a folder called runtimerefs in our project. Right-click it, and add a runtime reference of type ‘Web Service Interface’:
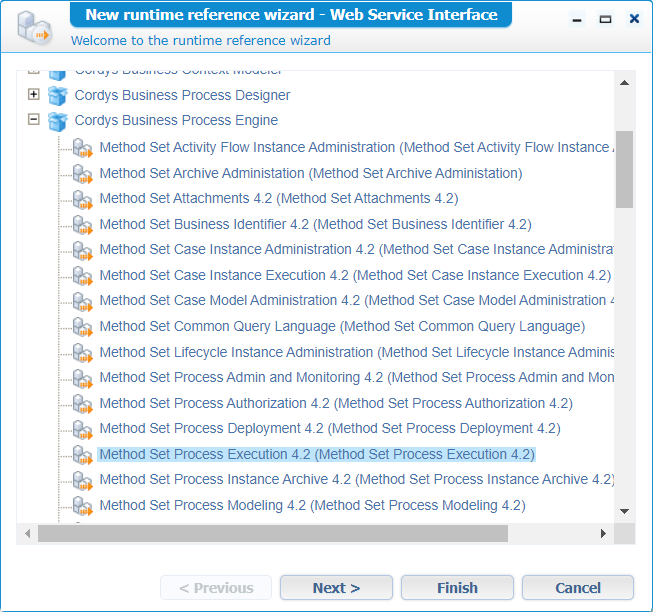
Click ‘Next >’, and ‘Finish’. You now have the webservice available in your project:
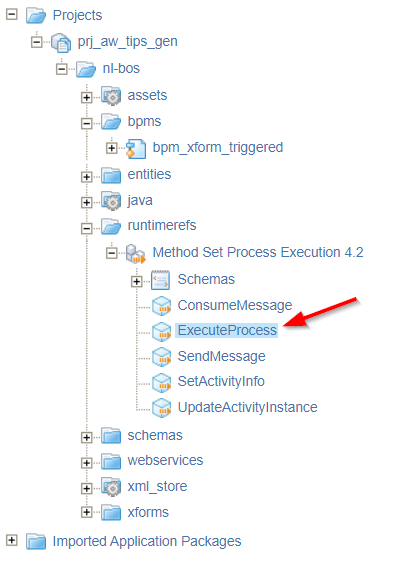
How did I know about that specific location? Well, have a look again from the ‘Web Service Interface Explorer’ artifact perspective:
The xForm implementation
Now we’ll make sure that webservice gets a trigger from an xForm perspective. This will be another document of type ‘User Interface’, saved in the xforms folder of the project with a sample name like ui_bpm_call. Do a first publication and make sure you can call it from runtime with a URL like this (learned from last week): http://192.168.56.107:8080/home/appworks_tips/nl-bos/xforms/ui_bpm_call.caf.
Back to the xForm where we insert our webservice called ExecuteProcess. The same trick from last week; No further input / output UI generation, but only the creation of the model within the xForm:
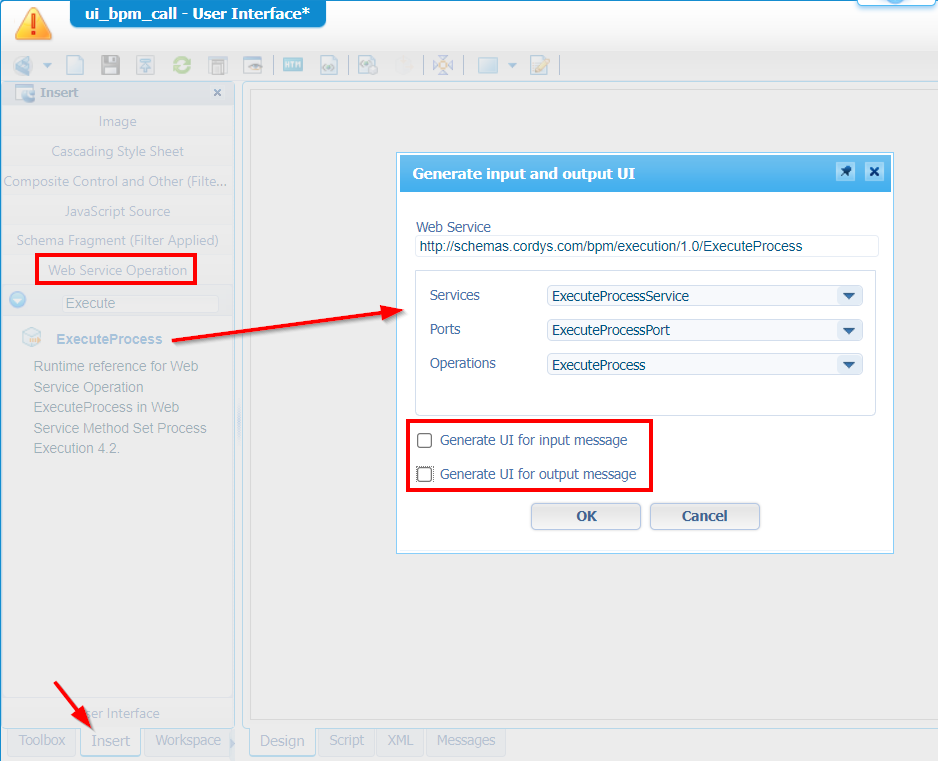
After the ‘OK’ button it looks like nothing happened!? Only, When you open the ‘Manage Models’ panel we have the availability of the model with name ExecuteProcessModel. Time to add the event handler methods and make sure we are in self-control for the model execution:
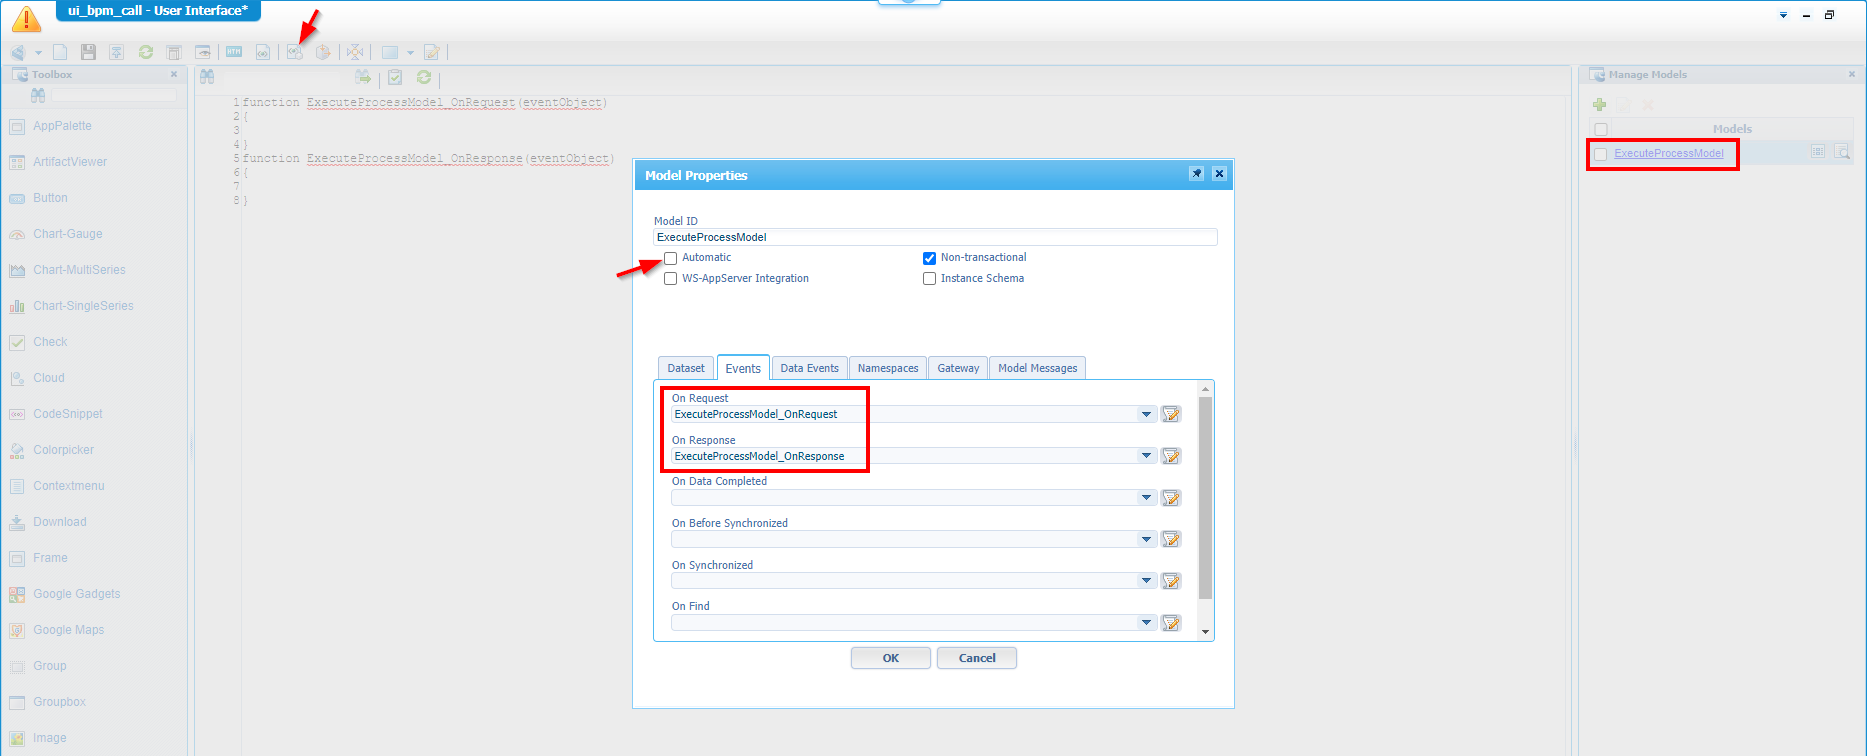
When done we end up in the ‘Script’ tab of the xForm with a result like this:
1 | function ExecuteProcessModel_OnRequest(eventObject) { |
Jump back to the ‘Design’ tab where we create a trigger button; simple and efficient like this (incl. the event-handler method):
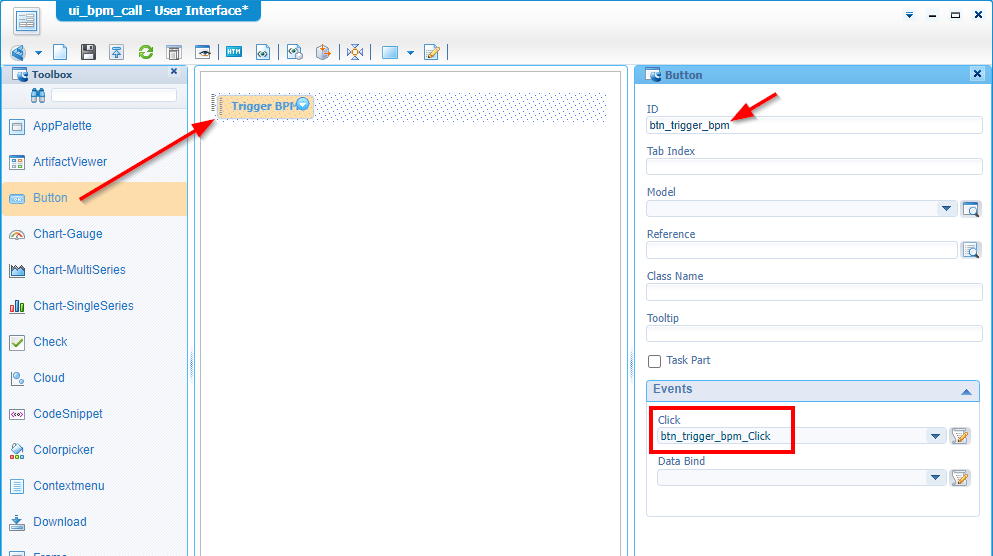
Your script will look like this at the moment for further implementation:
1 | function ExecuteProcessModel_OnRequest(eventObject) { |
Script implementation
A first step to open the “eyes” in the Chrome development console:
1 | function ExecuteProcessModel_OnRequest(eventObject) { |
Publish the xForm and have a look in runtime (with the URL pointing directly to the CAF file). You’ll see the button; after click you’ll see a 500-error in the console, but that’s because we send out an invalid request! How should the request look like? Well, like the previous call in the ‘Webservice trigger’ section of the post…Have a look again and make a copy of the XML request!
From the xForm perspective, we open the ‘XML’ tab, and we paste in the correct request in the current xml-element (and give it a proper ID startBPM). Like this:
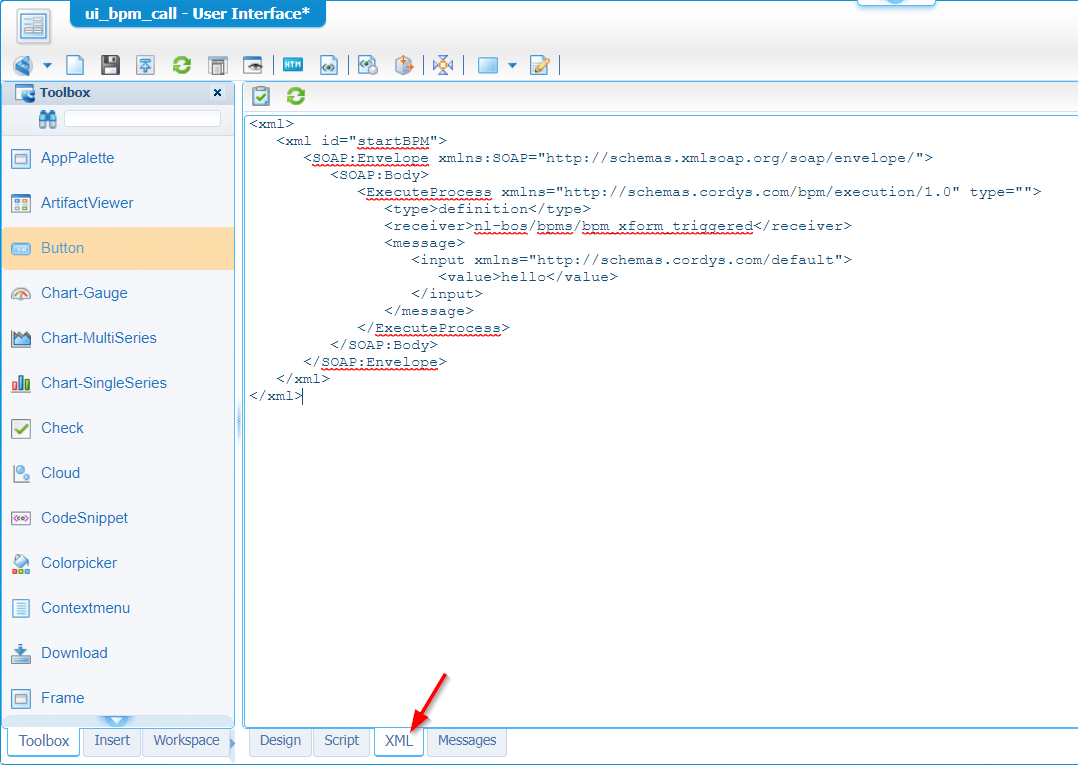
1 | <xml> |
From a scripting standpoint, we can do an update like this:
1 | function ExecuteProcessModel_OnRequest(eventObject) { |
Watch the
startBPMvariable again as it matches the ID from the XML!
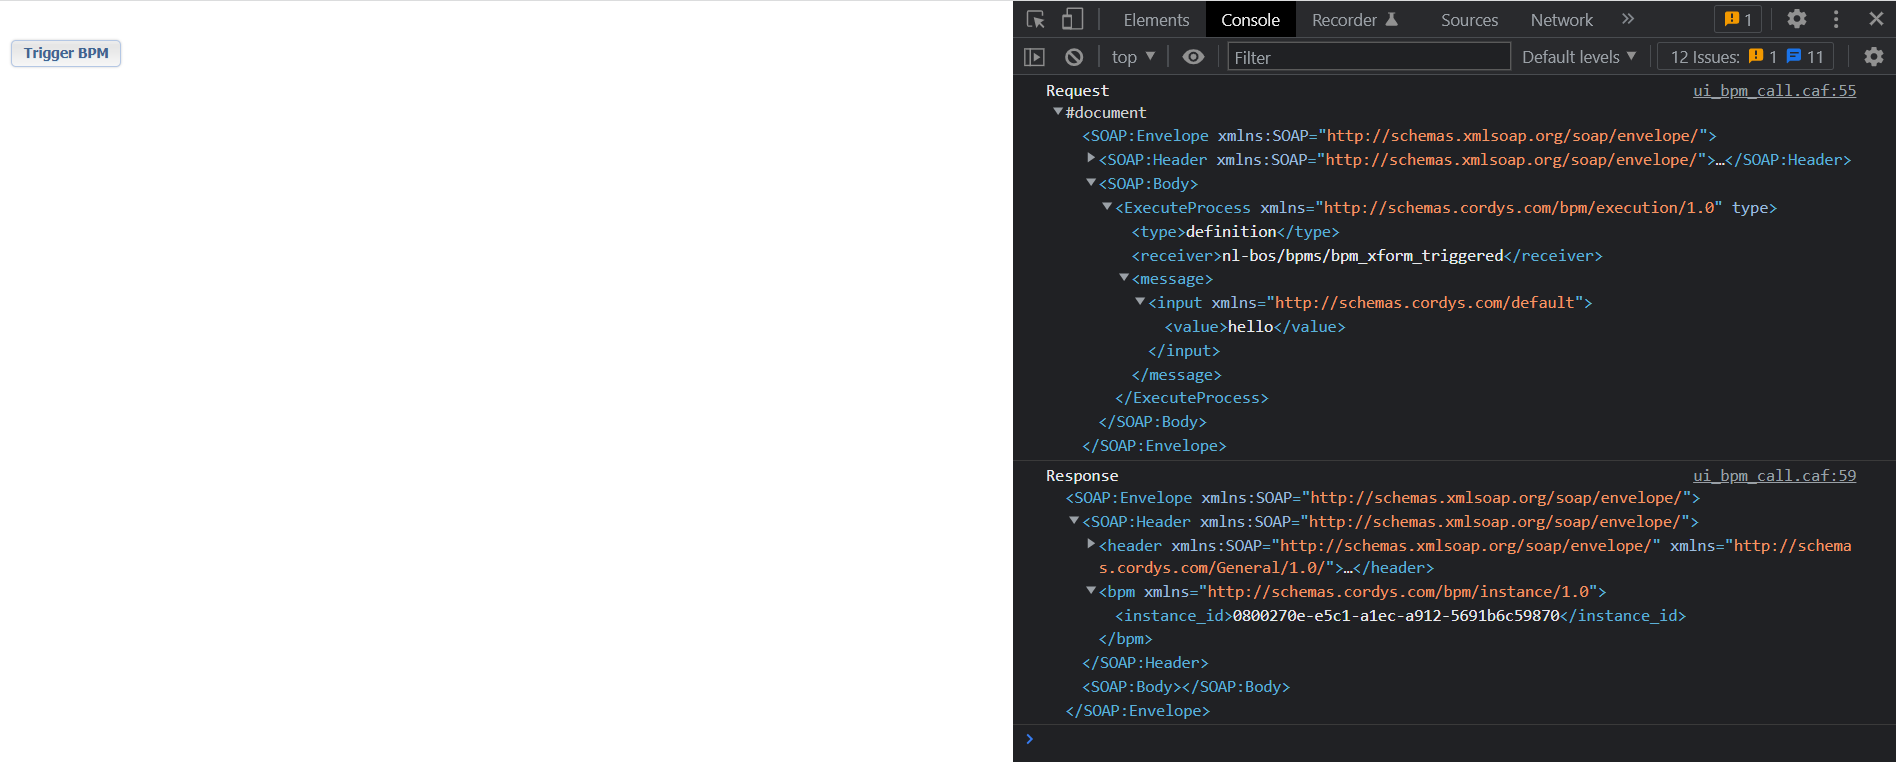
After a publication and a retest in runtime, we have a green flag with a valid response:
Finally, we do an update in the scripting-part where we update the value for our input-message and where we consume the response:
1 | function ExecuteProcessModel_OnRequest(eventObject) { |
That’s all folks!… 🤓
An assignment for you; just because you can: Add an output-message to the BPM and read it from the response.
Wasn’t this a smooth experience? Give yourself a “DONE” where we made another knowledge step in the direction of xForms (although I’m still not the biggest proponent; it shouldn’t get any crazier on this blog site). Have a great xPerience; we’ll meet again…next week with another great topic on AppWorks Tips!
Don’t forget to subscribe to get updates on the activities happening on this site. Have you noticed the quiz where you find out if you are also “The AppWorks guy”?


