
Hi there AppWorks fans,
Welcome to a new installment of AppWorks tips.
O boy, O boy…sometimes you see requirements passing by, and you just don’t know where to start thinking!? You get that feeling…right? Let me explain the use-case:
Long, long time ago…There was an “external system” which can push out XML data. This system runs somewhere in your internal intranet! The ‘Analyst guy’ (there he is again!) has the nicest thing thought out. The AppWorks platform should expose a service (based on XML; so, we’re talking SOAP here!) which can be called from that “external system”. The exposed service should be able to accept the pushed XML, so the platform can start some BPM to handle the further actions which partly is defined in the XML.
Right!?…Do you have your diving suit on!? (don’t forget to bring the flippers, and a beer once we’re done!) 🍺
Let’s get right into it…
First the plan:
- What XML are we talking about?
- Our platform is XML based, so just upload it for reusability
- We need to have a BPM in place to handle the XML data (with a ‘dummy’ activity to be ‘publishable’ valid)
- The XML data needs to be passed in (I guess as input message on the BPM)
- Do we also need to return something? Not for this post, but that would be the output message!
- Once the BPM is ready we need to expose it as a webservice (which includes our XML input message)
- A BPM webservice can’t be executed without a BPM service container (we’ll create one)
- Finally, we need to test it (with SoapUI Open Source and also with a regular user account to double-check runtime security issues)
Nice…Plan is ready! Next is the implementation…
The XML
During my vacation (some time ago), I just played a bit with MQTT on my Raspberry Pi Model B V1.2…Interesting stuff!! 🤓
Let’s go for an XML like this:
1 |
|
So, for the good understanding; this XML-chunk needs to be accepted by our beloved platform in some way!? The platform is XML-minded, but because we are not interested in the values of the XML, but only the ‘blueprint’, we convert the XML to an XSD schema via this website. We can use the result to create a new ‘XML schema’ type of document…Just in a ‘schemas’ folder for your project!
1 | <xs:schema attributeFormDefault="unqualified" elementFormDefault="qualified" xmlns:xs="http://www.w3.org/2001/XMLSchema"> |
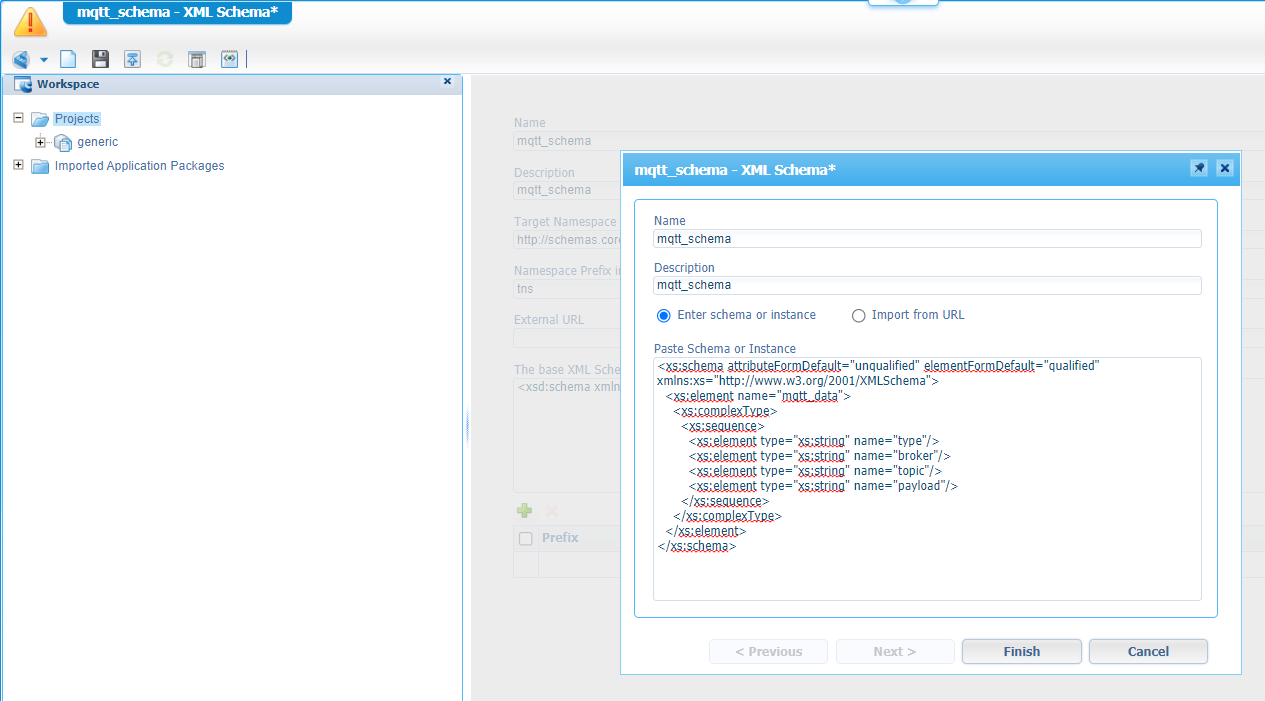
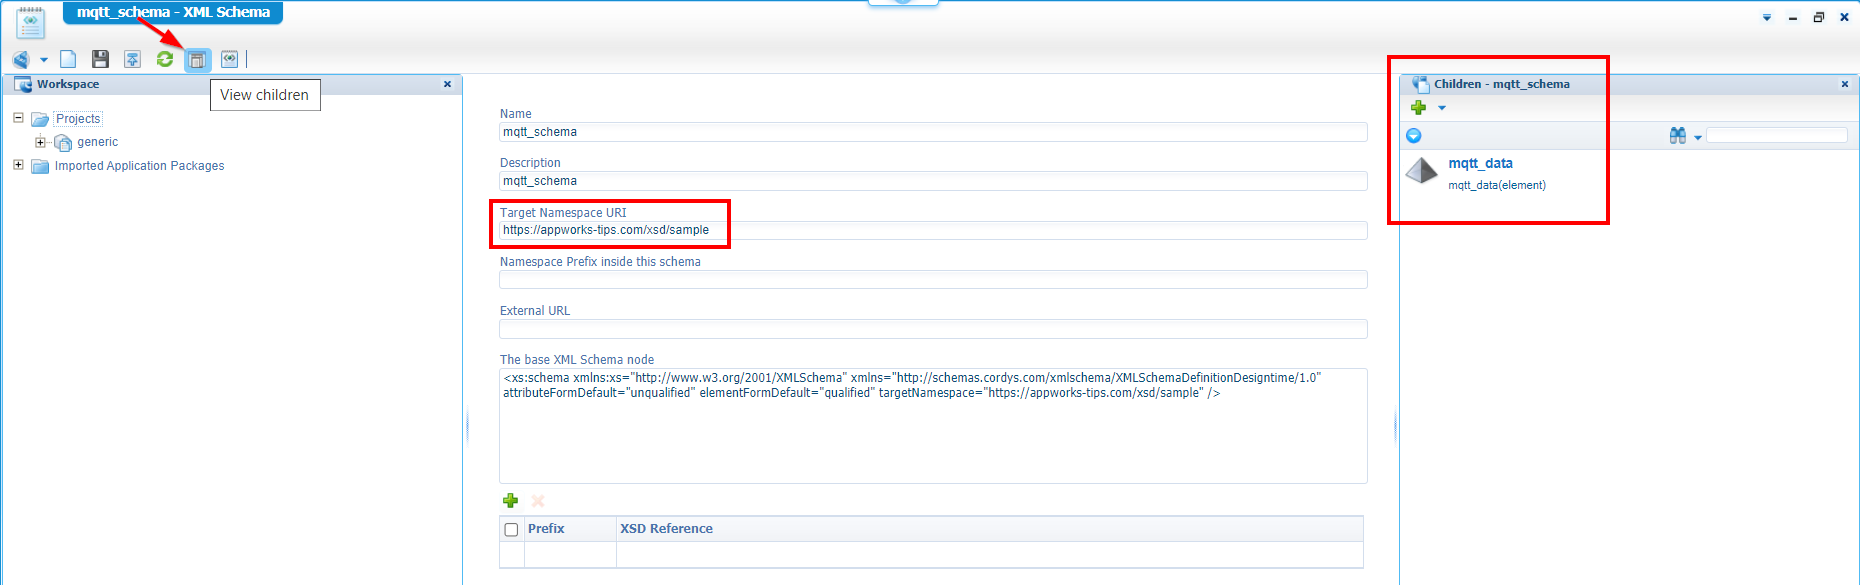
After hitting the ‘Finish’ button, you get a message to fill in a target-namespace-URI. You can just fill-in something you like, but “normally” we would like to use some company URL with some post elements behind it. For AppWorks Tips that could be something like https://appworks-tips.com/xsd/sample. Here you’ll find more about namespace settings and why we do it. Later on you’ll also see the advantage of using XSD schema documents!
Also have a look at the ‘Children’ nodes of this document where you’ll find out we could also build up this XSD ourselves:
The BPM
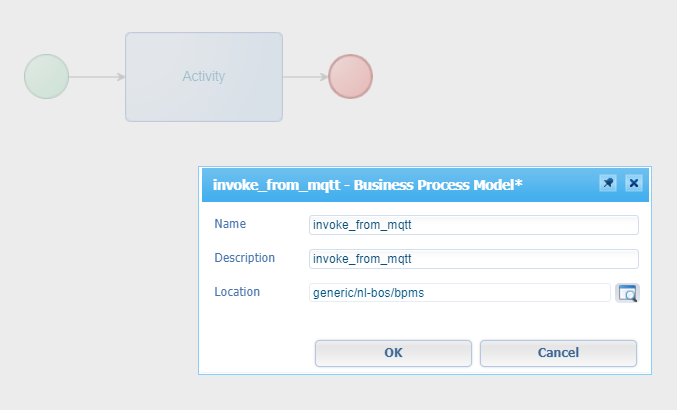
The XML needs to trigger a BPM…So, let’s create one (nicely created in the ‘bpms’ folder!)
The trigger moment (to start this BPM) needs to be a SOAP service call with input of our XML data…Great! as our BPM can have an input message (later on we’ll focus on the service-call part). Open the “Message Map” of our initial BPM and create a new ‘Message’:
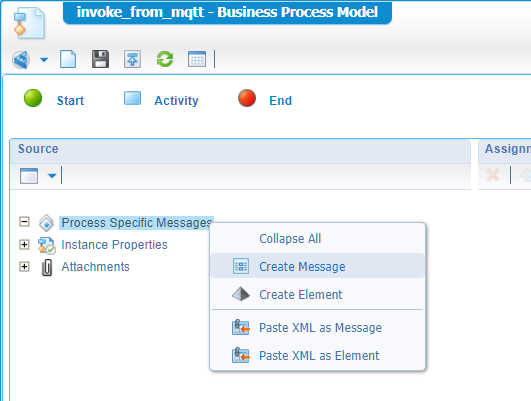
We just update the name to a value like input and next we drag and drop our element of the XSD document into it…watch and learn:
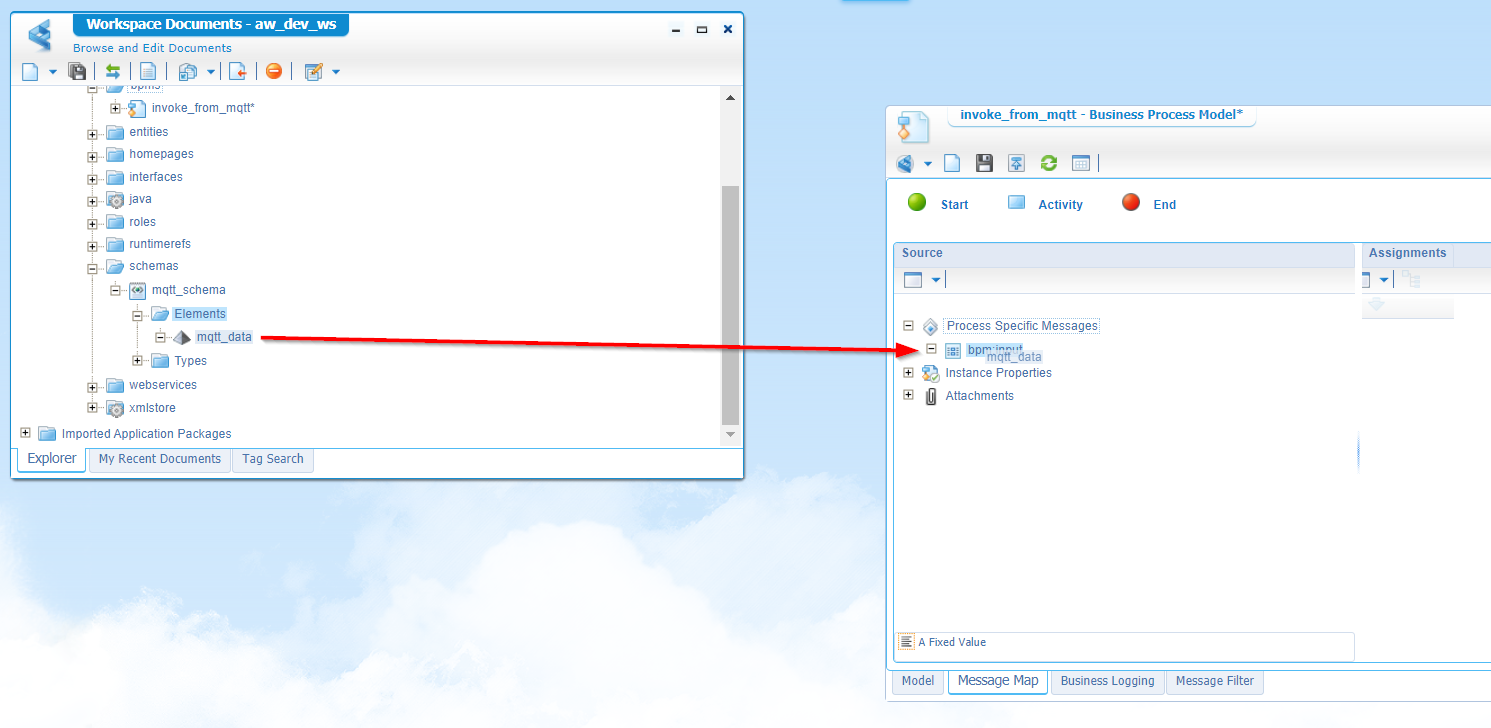
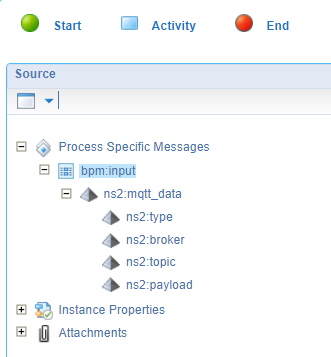
The end-result will look like this:
Now that we’re already in the namespace theory…Let’s do that namespace URI trick also for our BPM! (A thing I also always forget, but that’s the difference between the ‘noob’ and the ‘pro’…as my kids always tell me). Just keep on doing it and after some time you eventually do these settings as a second nature (took me 2 years to not forget it!) 💪
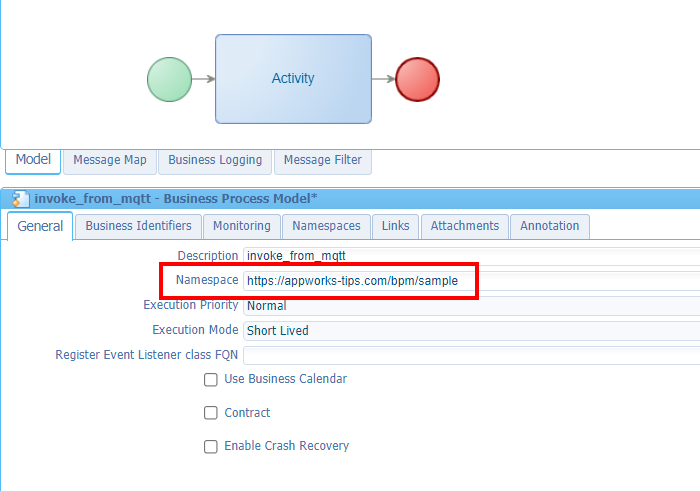
See also that update on the ‘execution mode’ where we move to “Short Lived” as this BPM doesn’t have any manual activities at the moment. On the other hand it would not be that harmful when the BPM was “Long Lived” as it hasn’t any interaction with the UI (yet)!? It all depends…As always!
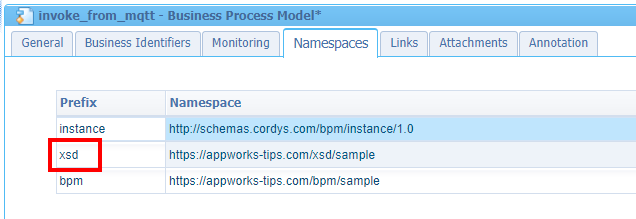
To make it even 2.0 “name spaced” we even can update the prefix to a nicer value within this BPM:
Enough about the ‘namespace’ stuff…Back to focus on the post…The input-message!
Get the properties of the green ‘Start’ construct and make sure it accepts our message as trigger:
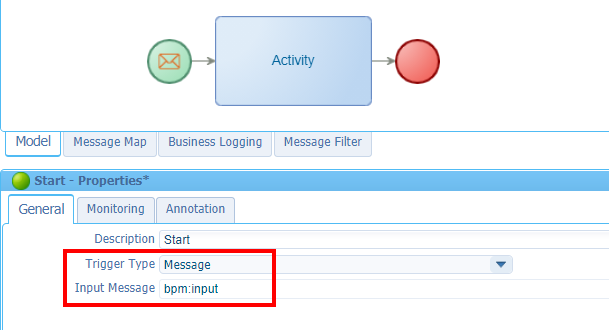
Did you notice the ‘envelop’ icon on the ‘Start’ construct? Now you’re on the good track…😉
So far, so good…Save, and publish it. From the project, right-click the BPM and do a run…
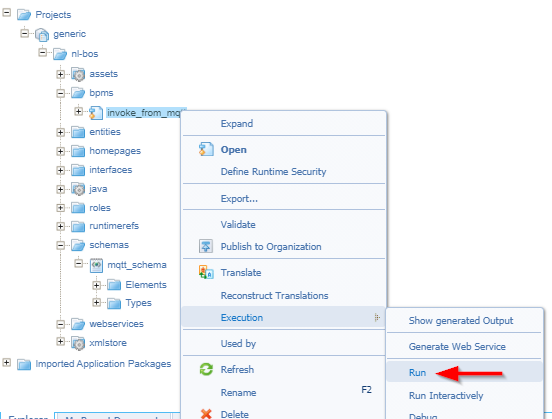
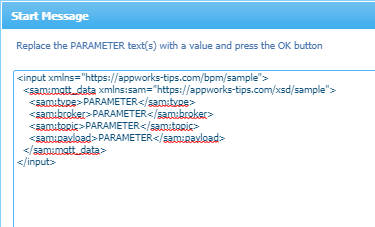
…where we get a nice input screen!
Time to convert this all into a webservice call…
The (BPM) webservice
Now, our BPM is ready…Let’s generate a webservice out of it!
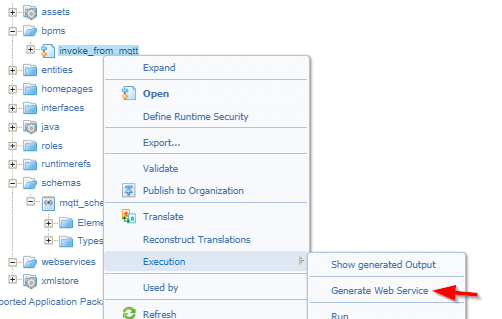
You get a modal popup where we can define what needs to be generated (where we save it nicely in our ‘webservices’ folder of the project):
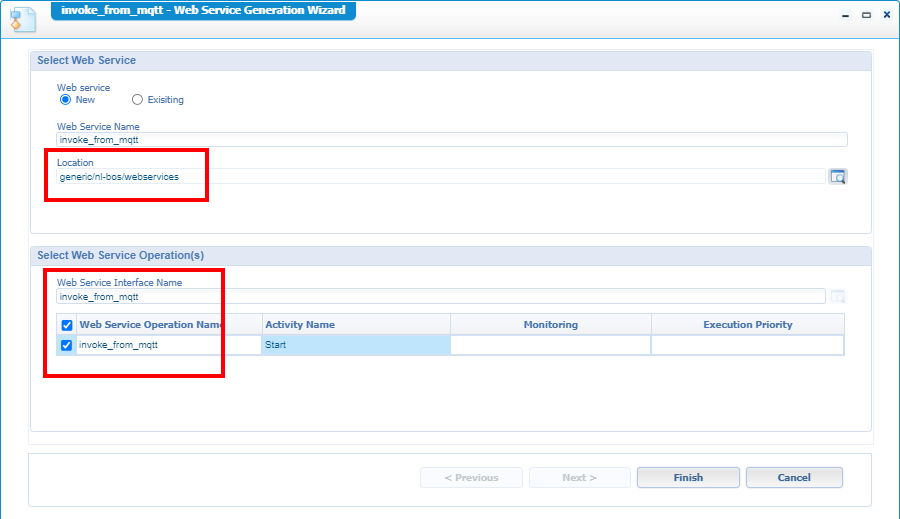
Hit that ‘Finish’ and see the magic being triggered…with in the project a nice service:

Before we can test this service (via right-click), we need to do 2 things:
- Publish it…Let’s just do it (again from a right-click action)
- Make a BPM service container available which can handle this service (you will get an error when you try to test it:
Service Group Lookup failure.).
This error will be solved in the next section…
The (BPM) service container
BPM service is ready…Time for a BPM service container to handle the requests! Open the ‘System Resource Manager’ artifact and create a new service group of type BPM:
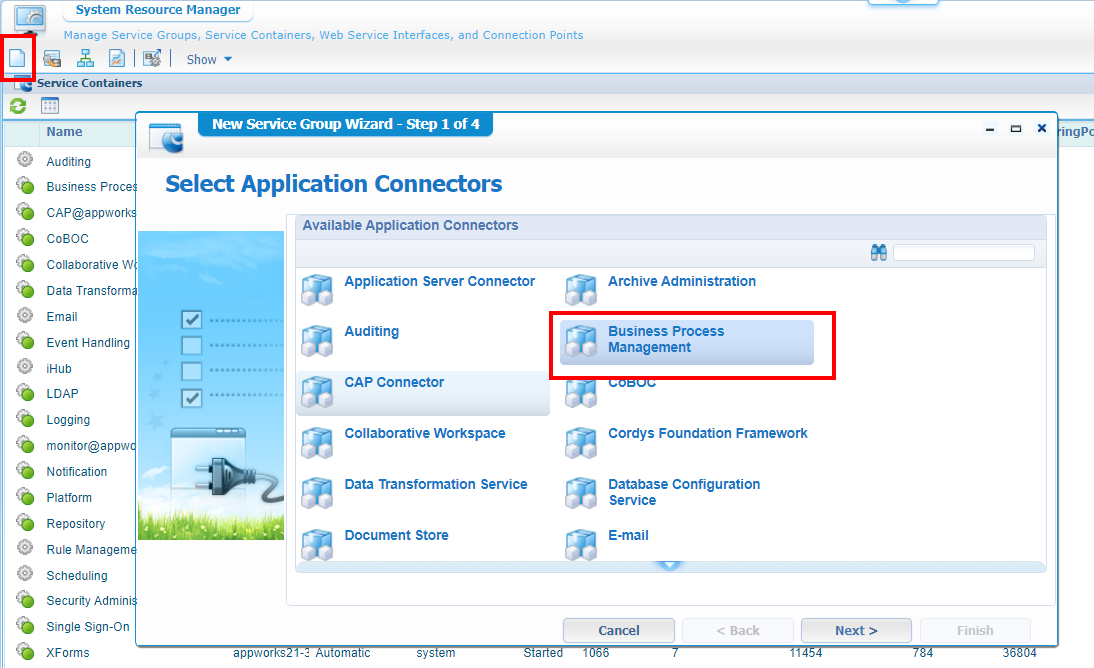
Hit ‘Next >’
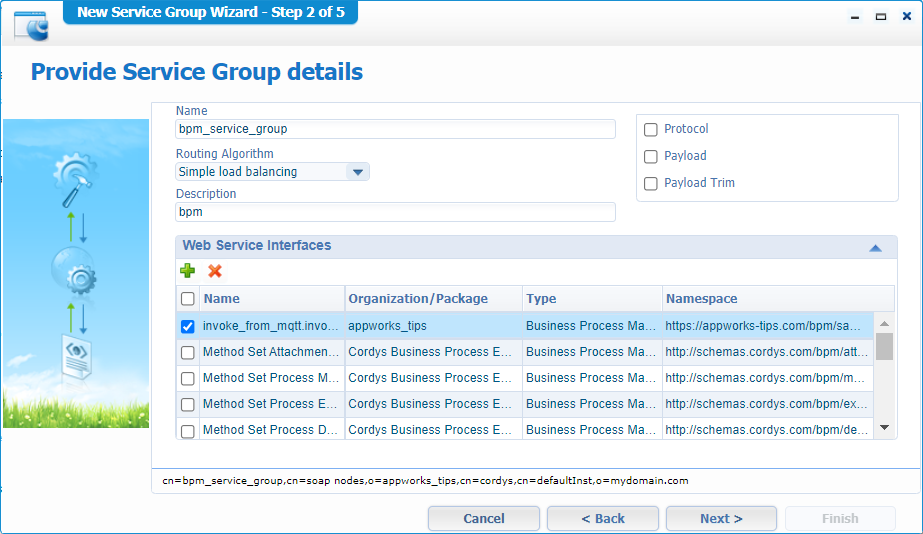
Give a nice name and mark our service interface (which is of type BPM!). Hit ‘Next >’ when ready…
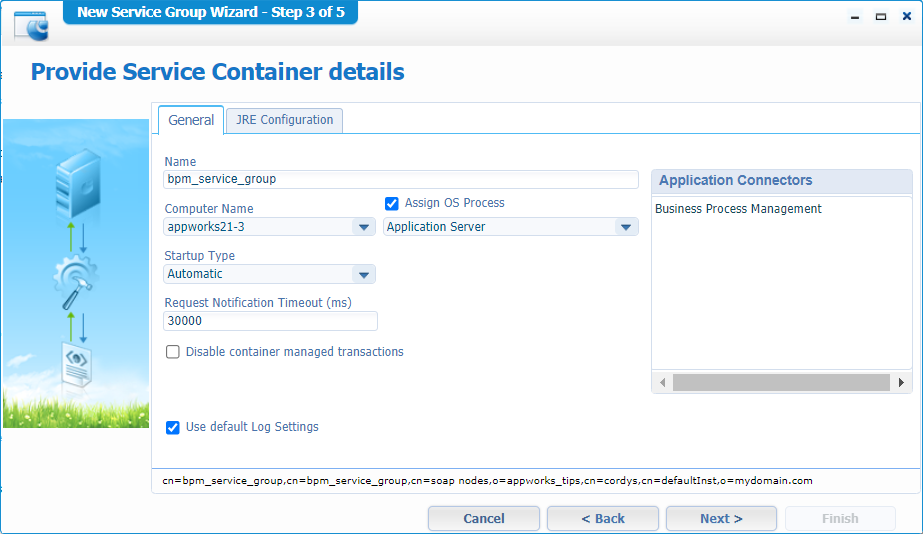
Give a nice name again, mark the options as you like and hit ‘Next >’
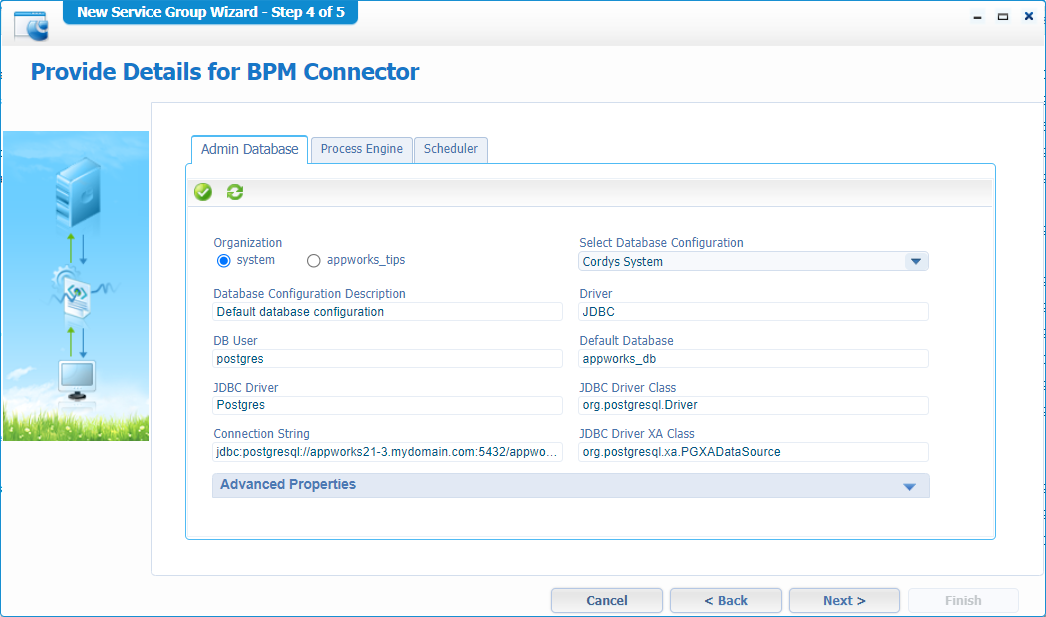
Now three interesting tabs where we can decide where to store BPM information. For now, we just select the ‘system’ organization and we re-use the current AppWorks database. We can do the same for the ‘Scheduler’ and if you mark the ‘Enable Rule Engine’ option in the ‘Process Engine’ tab we can do the same trick.
As I’m as curious as you what information will be saved in these database settings, I made a backlog item out of if for further exploration. A first guess will be the storage of BPM related information like when a BPM starts, who started it, what went wrong, etc…We’ll see!
Hit ‘Next >’
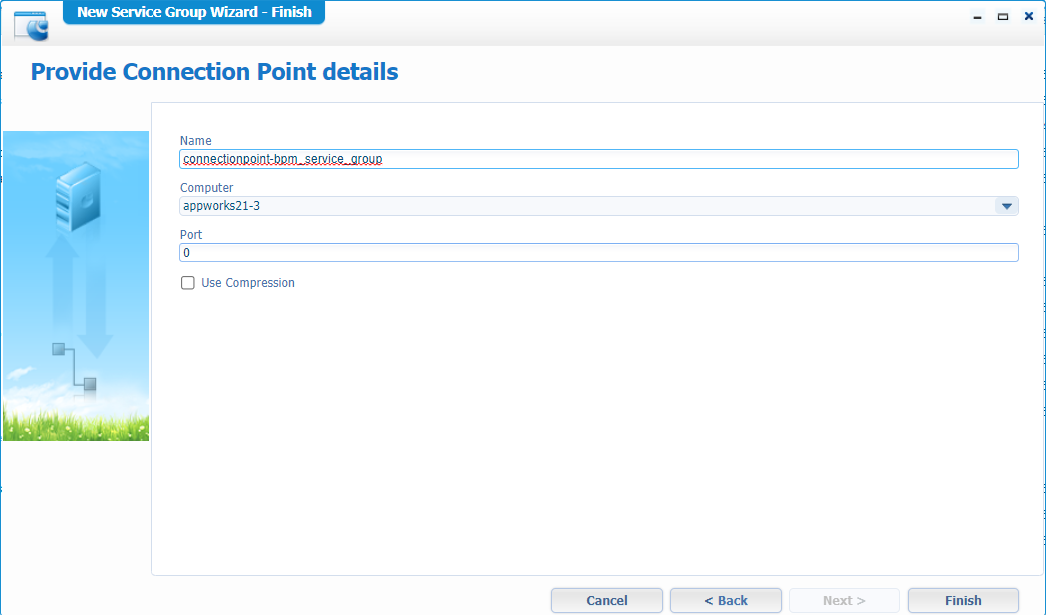
Finally, we can hit ‘Finish’
OK…Back to our BPM service in the project for a quick test…
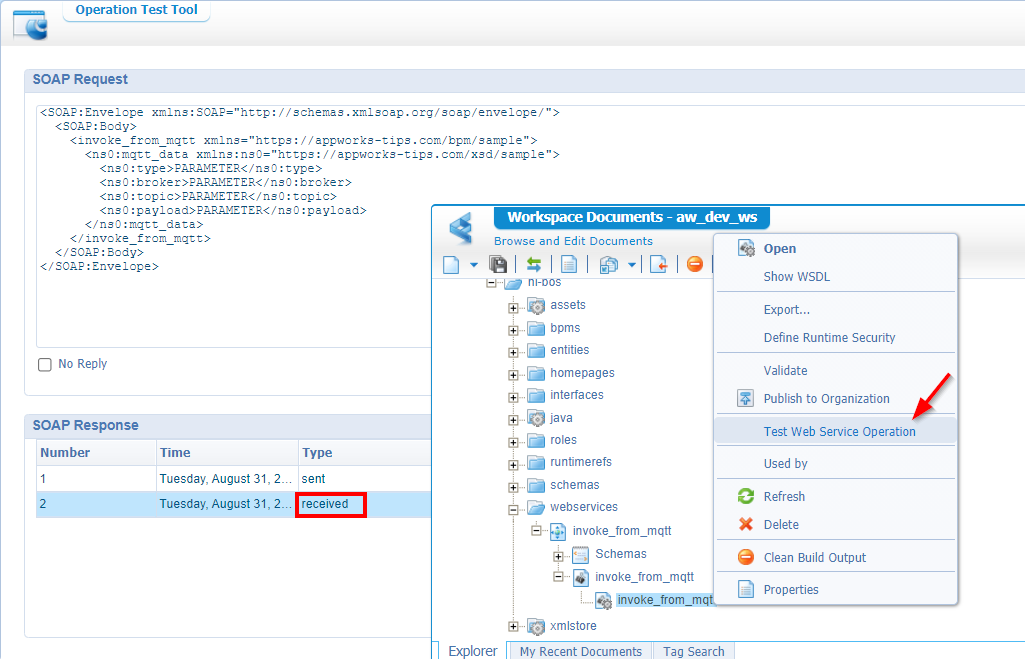
This time we nicely retrieved a message with the instance_id of the just started BPM…This will also be available from the PIM perspective! 🕵
The final external test (with SoapUI)
Time to make a session with our ‘normal’ user as we currently executed everything with the ‘Developer’ role account. My ‘awtest’ account doesn’t have any role applied and with this account I will try to execute our brand-new service from the ‘services time’ of the platform via URL:
http://192.168.56.107:8080/home/appworks_tips/services
I use a new ‘Incognito’ tab in Chrome, so I’m sure to get a fresh login screen as we still need to authenticate!
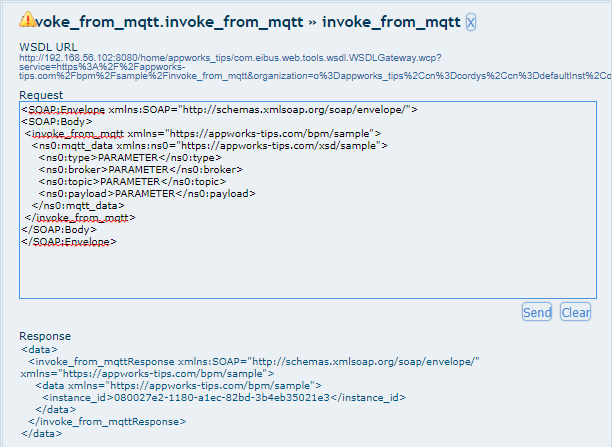
Have a browser search for ‘mqtt’ to get our service exposed which we will test:

Insert the request and send it out…
2
3
4
5
6
7
8
9
10
11
12
<SOAP:Body>
<invoke_from_mqtt xmlns="https://appworks-tips.com/bpm/sample">
<ns0:mqtt_data xmlns:ns0="https://appworks-tips.com/xsd/sample">
<ns0:type>PARAMETER</ns0:type>
<ns0:broker>PARAMETER</ns0:broker>
<ns0:topic>PARAMETER</ns0:topic>
<ns0:payload>PARAMETER</ns0:payload>
</ns0:mqtt_data>
</invoke_from_mqtt>
</SOAP:Body>
</SOAP:Envelope>
There you have it…A security error (as expected!): Access is denied for the Web service operation 'invoke_from_mqtt'.
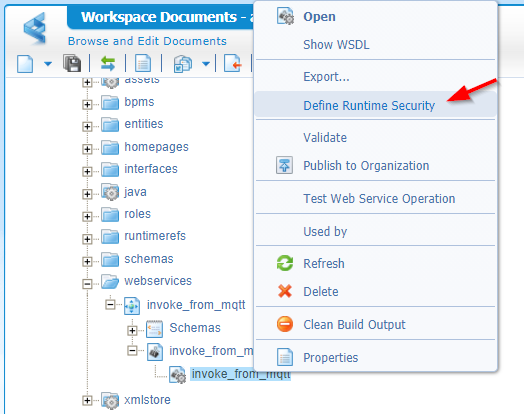
OK…Back to design time and have us a “runtime security” in the webservice:
For this security we need a new ‘role’ with in our case the name ‘resource’…Like this:
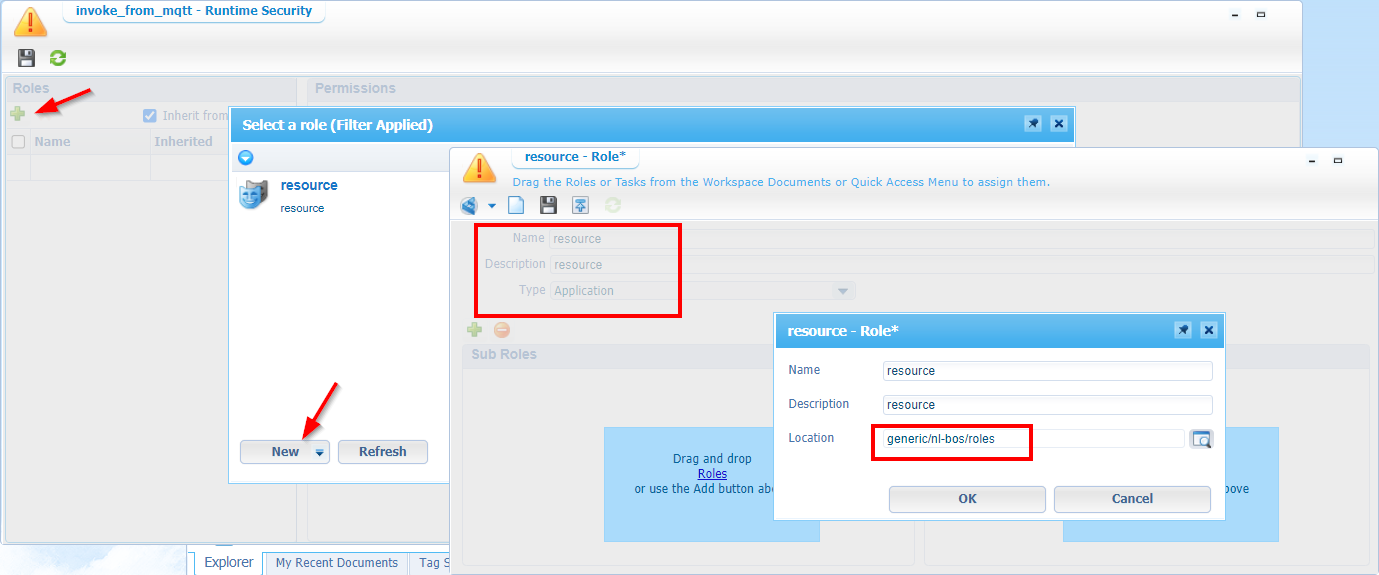
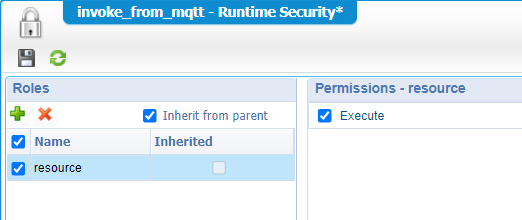
We save it nicely in the ‘roles’ folder of the project, and we also make sure this role can ‘execute’ our webservice:
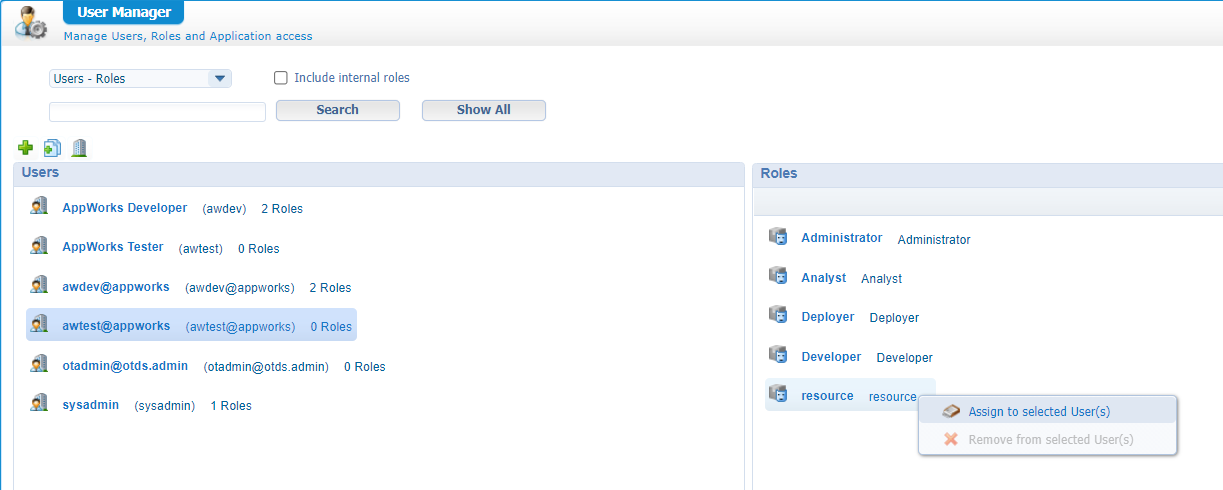
Now, let’s publish the role and make sure you assign the ‘awtest’ account to the role from the ‘User Manager’ artifact:
Time for a retest…Again an error:
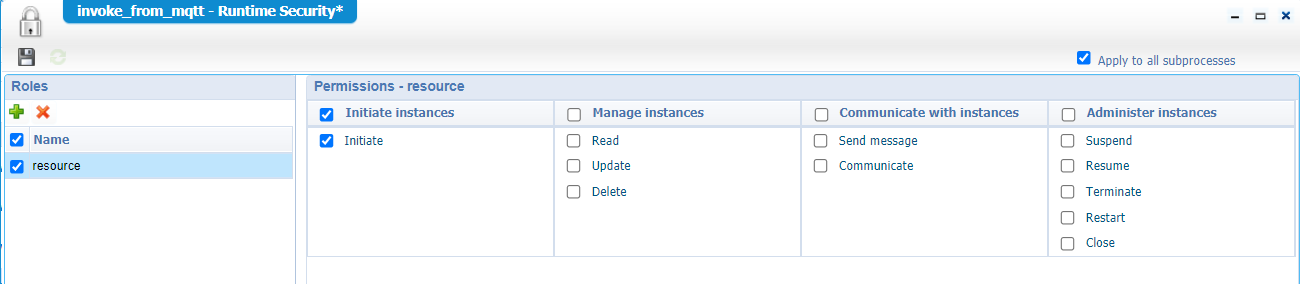
1 | Access is denied for the Web service operation 'ExecuteProcess'. |
Right, we’re making progress, but this time our ‘awtest’ user also requires a runtime security for the BPM itself. Right-click on our BPM in design-time and do the same trick as we just did for the webservice!
Again a publication and a retest with (this time) a valid response:
Green flags! ✅✅✅…time for SoapUI
…
We use the opensource version which can be downloaded from here.
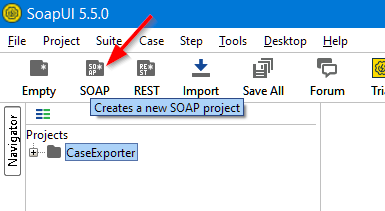
Once installed and started, we can create a new SOAP project:
Fill in the information like this:
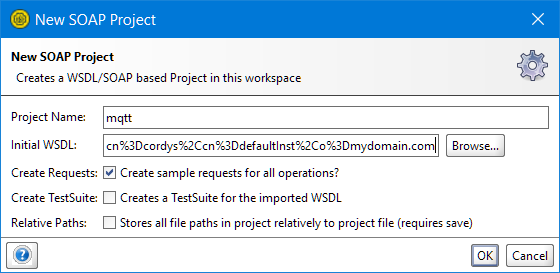
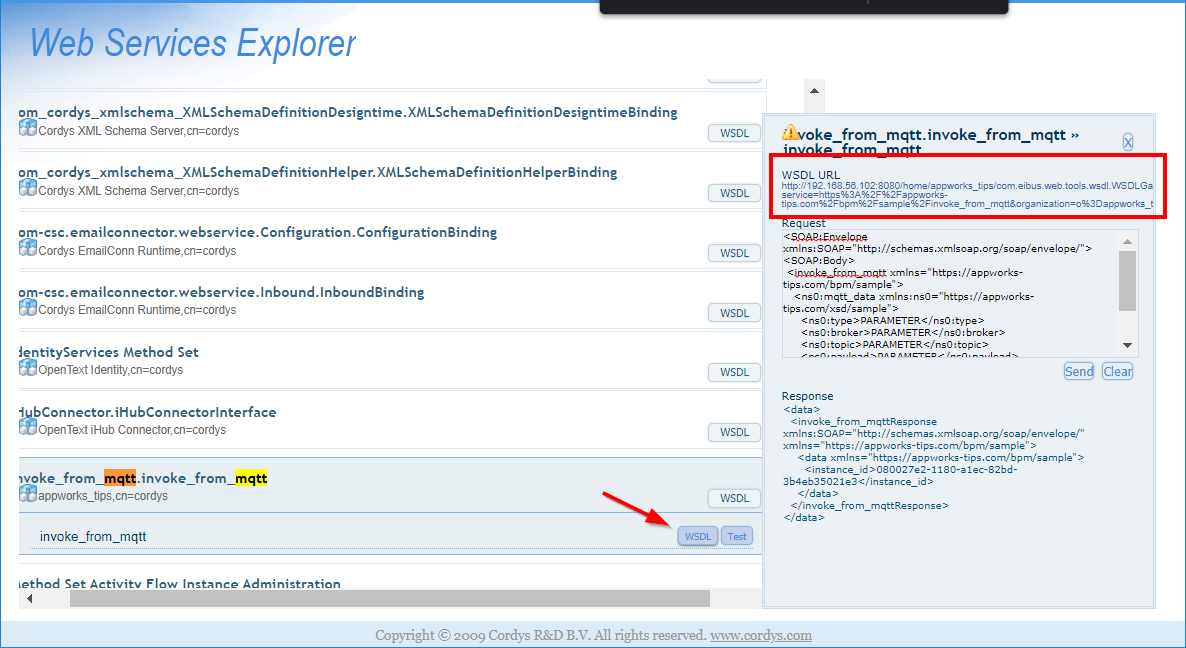
The initial WSDL URL can be copied from here:
Hit that OK button to see some interesting generated stuff!
Once there, we can execute our first request:
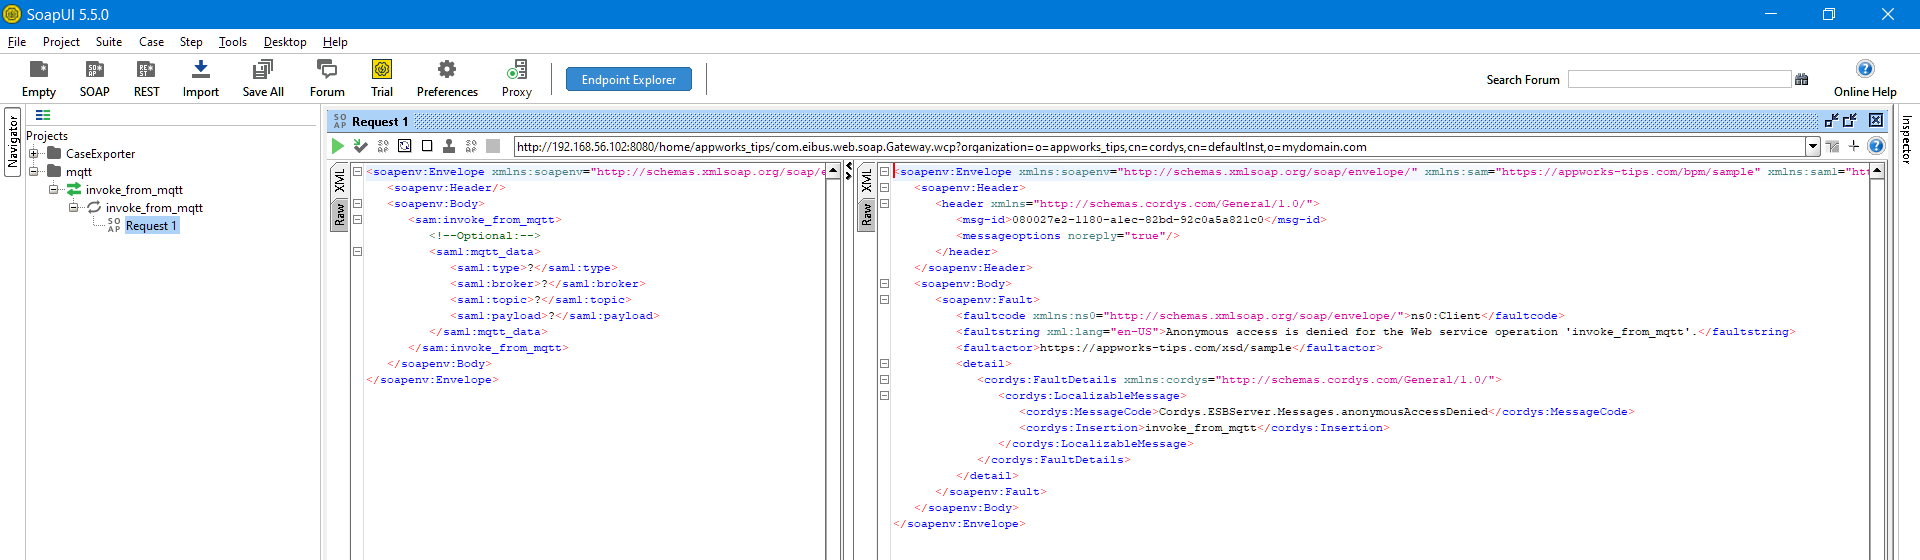
That’s an expected error as we don’t provide any credentials…Time for an update in the request:

2
3
4
5
6
7
8
<wsse:Security xmlns:wsse="http://docs.oasis-open.org/wss/2004/01/oasis-200401-wss-wssecurity-secext-1.0.xsd">
<wsse:UsernameToken xmlns:wsse="http://docs.oasis-open.org/wss/2004/01/oasis-200401-wss-wssecurity-secext-1.0.xsd">
<wsse:Username>awtest</wsse:Username>
<wsse:Password>admin</wsse:Password>
</wsse:UsernameToken>
</wsse:Security>
</soapenv:Header>
Niceeeee, but a bit of cheating…Maybe you noticed it!? Maybe not…Have look again in the security header! There is a small difference in username! From the SoapUI call I use a platform (internal) account. Not the one from OTDS! It doesn’t matter for this post for now (and a bit out of scope), but if you also would like to authenticate with OTDS I recommend diving into this post.
🍺-time, and we can also give this post a “DONE” where we learned about exposing a BPM webservice for the “external system” to give it a call. We even did the external call with the valuable tool SoapUI. Also, this tool is great in use when you would like to play with other SOAP services the platform delivers. If smartly used, you can even replace it for the ‘Web Service Interface’ explorer where you can make webservice calls to a next level! Have a great week-end, and I CU in the next post, next week.
Don’t forget to subscribe to get updates on the activities happening on this site. Have you noticed the quiz where you find out if you are also “The AppWorks guy”?
