Hi there AppWorks fans,
Welcome to a new installment of AppWorks tips.
For this week I have a preparation post on the list before we can start crafting something nice for our “xECM business workspaces” end-goal. We already learned how to install OTCS, connect it with OTDS, and make a documentstore connection for saving content. We didn’t use / see any xECM yet! So, the preparation for this post has all to do with bringing xECM into the picture of both platforms. I had no clue where to start, but after a bit of research, I figured out the trick to be done! Let me share the knowledge of my own journey…
Let’s get right into it…
Let’s first slice the post into smaller sections to keep our work structured (which always helps in these complex scenarios!)
- Bring the xECM module into OTCS
- Enable the module (incl. others) in OTCS
- Expose the xECM webservices
- Update the docstore connector in AppWorks
- Double-check the
/app/adminpart of the platform
Time to follow the plan…
Bring the xECM module into OTCS
On the OTCS side of things there is nothing to be found about xECM (yet!)…Time to make a change for this! Have a look at this software location from OpenText support. Here you will find the package called “Extended ECM Platform 21.2 (Content Server module)”…Exactly what I’ve been looking for in a long time, but never figured it out! I always thought xECM is something running standalone!? Probably that’s also the case for other use-cases, but we only require this module…How easy!
I have OTCS 21.2 up and running (with AppWorks 21.3), but later version show me the same module!
Let’s download the file called 21.2.0_xecmpf64_lnx.tar and upload it (via MobaXTerm) into our VM (just in the home directory of our installation owner sysadmin). Now own yourself some fancy Unix commands:
1 | mv ~/21.2.0_xecmpf64_lnx.tar /opt/opentext/cs/ |
That’s it!…next step…
Enable the module (incl. others) in OTCS
Open OTCS directly into the correct modulesetup function via: http://192.168.56.107:8282/livelink/cs?func=admin.modulesetup and have a look on what we can do…It’s magic my friends!
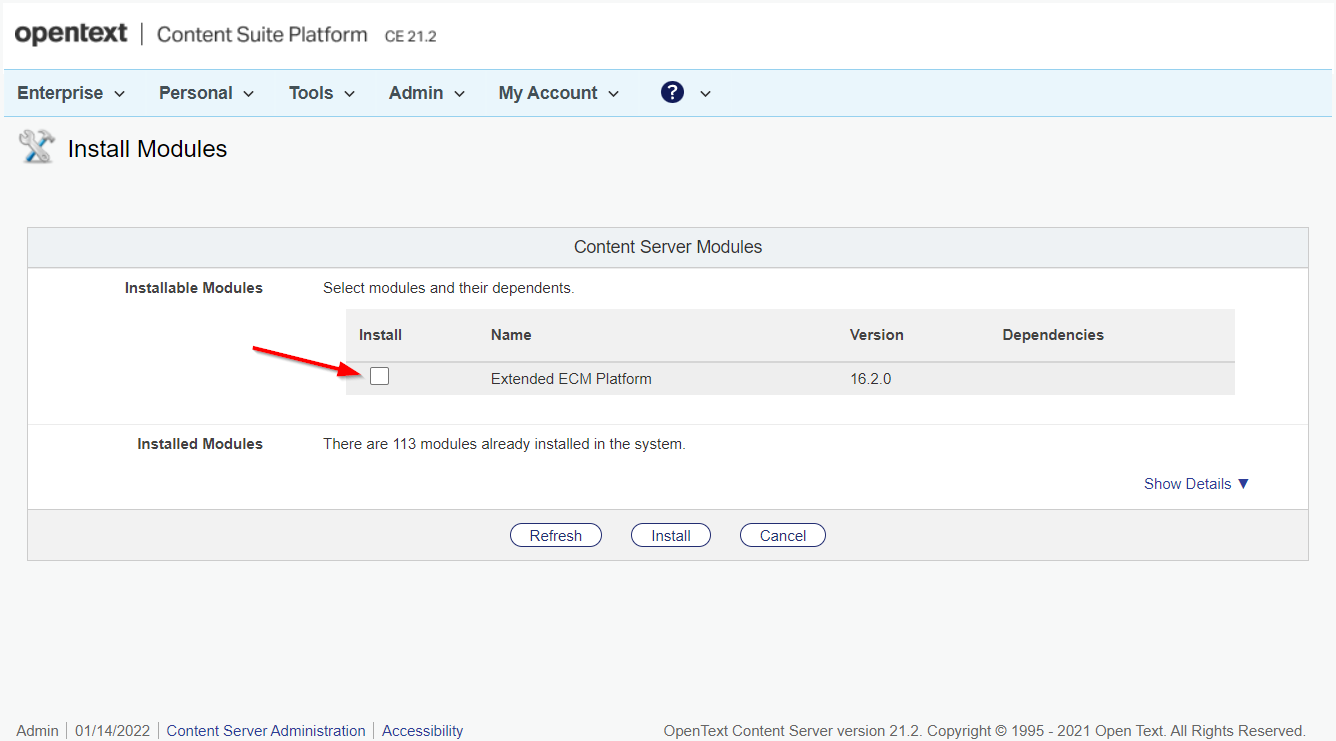
Let’s mark it and hit the ‘Install’ button like a pro…Eventually you’ll get the next screen:
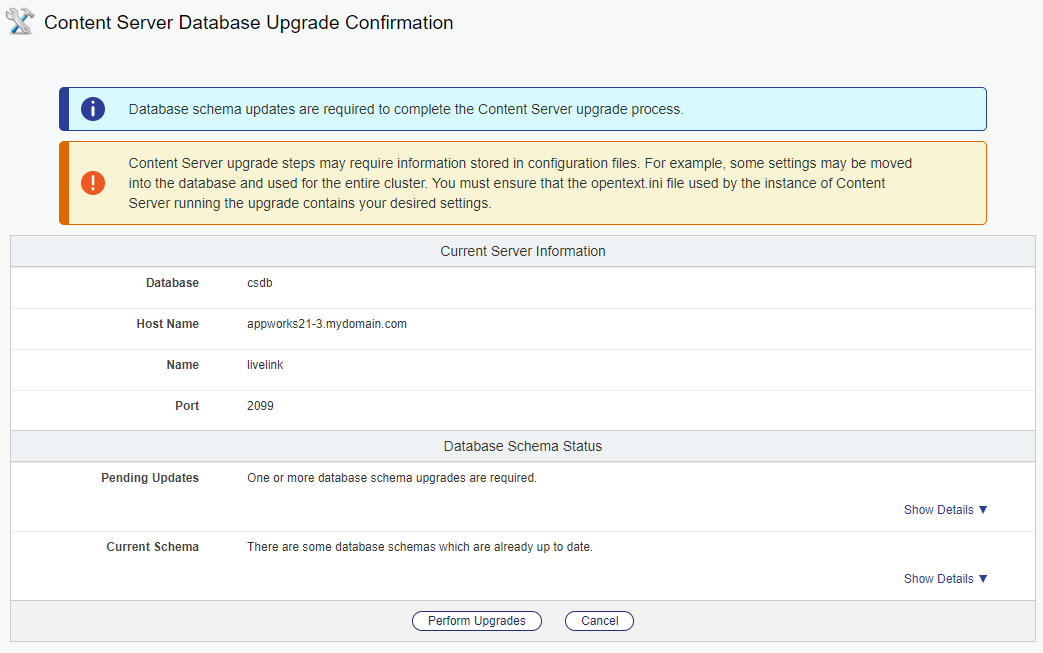
Hit the gas pedal and run the ‘Perform Upgrades’…After this you can restart the content service instance:

…
Now what? How about a coffee first? ☕
After that short break I’m proudly presented with a green flag again:

Let us ‘Continue’ our lives as the button is telling me…
We get another in between ‘Continue’ screen…just hit it:

The content server restarts again…OK!? Other coffee? 😁
Again a ‘Continue’ screen:
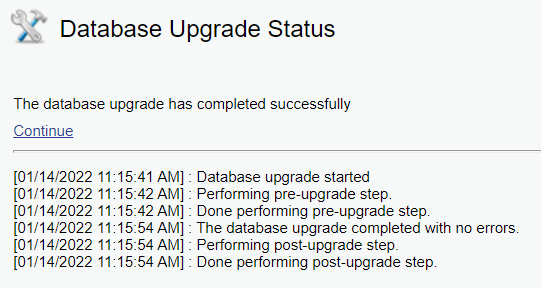
Hit it, and you’ll land at a required (to be) configuration screen:

‘Continue’ again…It’s getting boring!
…And a restart (again!) 🙃
I don’t know the magic behind this all but was one restart not sufficient?…Smells like ‘Windows’, but we are on a Linux VM! 🤔
…
Now what? Well the first things we see which ‘smells’ xECM:
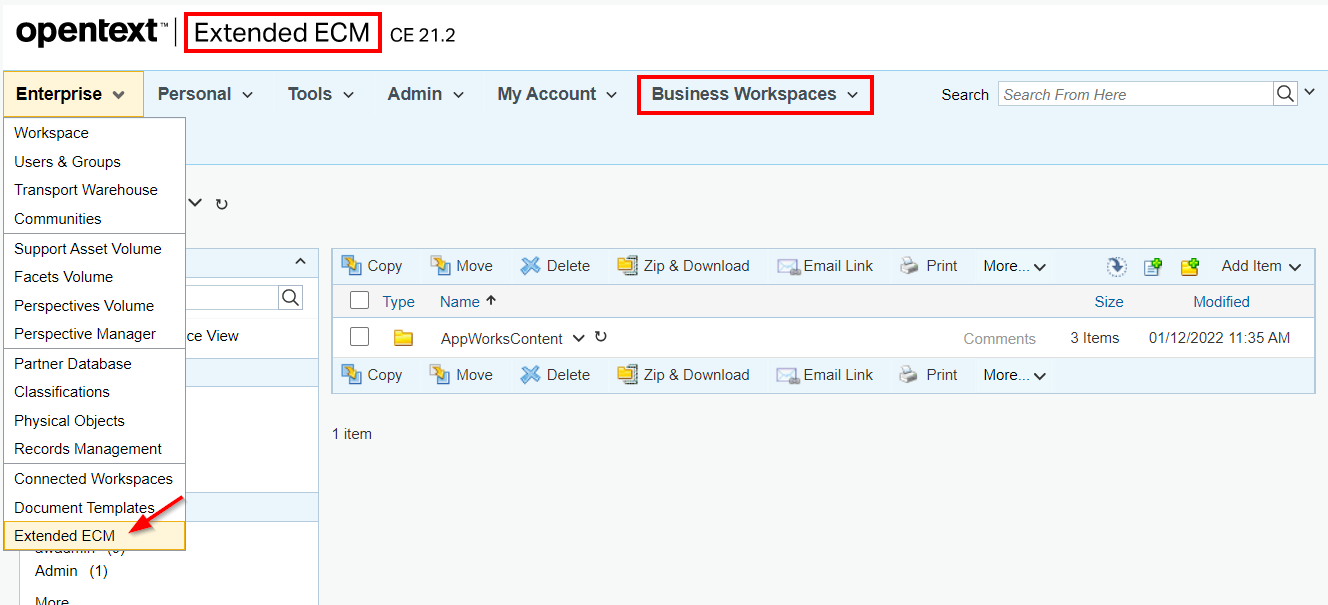
From the Smart UI perspective, we start to see something I always see at all the fancy OpenText demo’s. I always wondered where the “Extended ECM” header came from, but now I know!:

If you don’t see (yet) what I see? Have a look at the function URL
http://192.168.56.107:8282/livelink/cs?func=doctemplates.enableTwsConws, which brings you to the ‘Enable Connected Workspaces’ administration settings.
During my ‘enablement’ search, I also found out about this function
http://192.168.56.107:8282/livelink/cs?func=RecMan.AdminConfigureRecordsManagement, where we can enable ‘Records Management’ stuff. Not required for the post (I guess!), but as we already deployed this service (http://192.168.56.107:8282/cs-services-rmsecmanagement/services/RMSecManagement?wsdl) during the post about ‘OTCS with OTDS’ two weeks ago, it would be nice to enable it too…just because we can! Ohw yeah!…With a required content server restart…again!
Expose the xECM webservices
Webservices?…Yes, we’ve just enabled the xECM module for OTCS, but to make a call from AppWorks to xECM, we need some xECM webservices up and running. Have a look here for the download location. I use version 21.2 because my OTCS is also running this version.
- Download the file
otsapxecm.war - Upload it to the VM
- Deploy it on a Tomcat instance:
cp ~/otsapxecm.war /opt/tomcat_cs/latest/webapps/
You see I just reuse the Tomcat instance which serves the UI of my OTCS instance…Works great! You should have this URL available after the exploded .WAR file into the webapps directory: http://192.168.56.107:8282/otsapxecm/services/ECMLink
Next…
Update the docstore connector in AppWorks
Back to AppWorks (inside our own organization). Open the ‘System Resource Manager’ again, and get the properties of our previous created documentstore service container and have an update on the ‘Extended ECM configuration’ section:

1 | External_system_ID: xECM |
Where did I retrieve the ‘livelinksupport’ URL? Well, we’ve created this URL ourselves during the OTCS installation. Have a look again in this file:
vi /opt/tomcat_cs/latest/conf/Catalina/localhost/livelinksupport.xml.
Save it and restart the service container.
That’s it, except for one extra double-check in the /app/admin part of the platform.
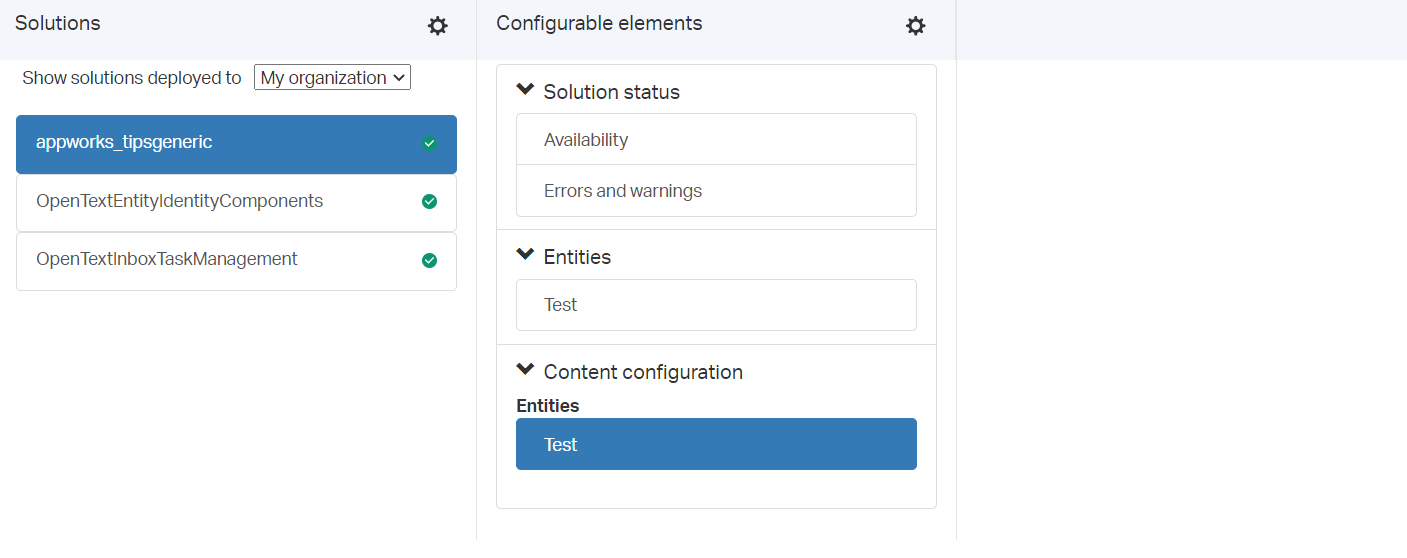
Hmmm…Still empty!? I guess we need to double-check again once we have xECM connected to a business workspace in our next post! I thought we would really start to see something here, but maybe I was just dreaming…Let’s see when we continue our journey! For now the xECM part is ready for consumption!
A “DONE” in the next step towards our xECM end-goal. This was a small, but highly efficient step where we blew life into xECM (as module in OTCS). We also exposed the xECM webservices already, so our AppWorks platform has the ability to communicate data from one end to the other end of the line. Great stuff we learned again, let’s find out in the next post if it all benefits us all in a nice business workspace connection. Have a great week-end, and I see you in the next one…
Don’t forget to subscribe to get updates on the activities happening on this site. Have you noticed the quiz where you find out if you are also “The AppWorks guy”?


