
Hi there AppWorks fans,
Welcome to a new installment of AppWorks tips.
In this installment we’ll make a Content Management System available as storage location for our data. The CMS is called ‘Documentum’ and is globally used at enterprise companies. Documentum saves data in a structured way in 1 location called a ‘repository’. All data in a repository is saved as an ‘object’ where the metadata is saved in a relational database, and the content stored on a file storage.
Remember the intro?…Well, we follow our own blog page with some minor changes and because it’s a long time ago I did a Documentum installation from my side we’ll probably will face some bumps in the road as we play along…Let’s see…
Quoted again from the other blog: AppWorks has connectors available to connect several CMS systems and Documentum is one of them. AppWorks is an Enterprise Service Bus that makes working with processes really easy but saving data in a structured way is something else. So, both systems working together is the best solution of all.
Let’s get right into it…
Start your AppWorks VM and make connection with the MobaXTerm client with the in the created user ‘sysadmin’ and related password ‘admin’. In the RHEL installation post you can read why I switched from the ‘otadmin’ to ‘sysadmin’.
Go to the ‘Download’ section on the OpenText support site and start looking for ‘Documentum Server’. We go for the latest (AppWorks supported) 21.2 release (on CentOS 64-bits with PostgreSQL) which is always one version behind on the compatibility matrix of the support notes!
‘Documentum Server for LINUX64 Postgres Version 21.2’
Accept the license and start downloading the file ‘content_server_21.2_linux64_postgres.tar’
Upload the downloaded file to the image in the home directory of in our case ‘/home/sysadmin’
Now we need to extract the file to some nice folder structure. Create a new folder with mkdir content_server_21.2_linux64_postgres and go into the folder with the cd command. Now extract the file tar xvf ../content_server_21.2_linux64_postgres.tar
This post will help you install Documentum, but make sure you also have the documentation available somewhere. This can again be found on the OpenText support site under the documentation section. Make sure you search for ‘Documentum Server’. The main PDF you need for now is the installation guide ‘Documentum Platform and Platform Extensions 21.2 Installation Guide’, and the release notes ‘Documentum Server 21.2 Release Notes’.
The release notes refer to the ‘Product Compatibility Matrices‘ where you can find an Excel sheet ‘OpenText Product Compatibility Matrix (Current Maintenance).xlsx’ that covers all the compatibilities with the several software packages. Nicely to have a look, but not required for now.
Pre-check list
Make sure you are administrator.
You have this privilege when you use the ‘sysadmin’ user that we introduced in the posts on this site.
Install ‘TCL’ and ‘Expect’
The EPEL repository is required for this, but already installed in other posts…These commands should run fine.
Just install and don’t ask…I know…Sometimes it’s just what it is with Linux.
sudo yum install tcl -y
sudo yum install expect -y
XWindows on CentOS
Documentum uses an installation UI. Like we also saw for the AppWorks installation. You are covered when you use the MobaXTerm client! Make sure your export DISPLAY points to the correct value.
64-bits architecture
Make sure your VM has the 64-bits architecture with uname -m where the result should be x86_64
Environment variables
Make the $DOCUMENTUM and $DM_HOME variables available and extend the $LD_LIBRARY_PATH with the Documentum bin directory. You can use these steps:
- Create a directory:
sudo mkdir /opt/documentum - Own it to the sysadmin user
sudo chown sysadmin /opt/documentum/ - Edit the bash_profile of the ‘sysadmin’ user:
vi ~/.bash_profile(this one is already updated based on the AppWorks installation, but both platform can run seamlessly on 1 CentOS VM!)
1 | # .bash_profile |
- When done reload your profile via the command:
source ~/.bash_profile - Check if it’s all OK via:
env | grep DM_HOME
Database
Meat the PostgreSQL version from the compatibility matrix. The AppWorks database we use (PostgreSQL 11.1.0 64-bits) should be fine.
ODBC connector
Make the PostgreSQL ODBC 64-bits connector available with these steps:
sudo yum install postgresql-odbc.x86_64 -yWe also install this specific version
sudo yum install postgresql11-odbc -y.- Why? Because of this issue I faced!
- This site provided you with more info on this package, but it just installs a more compatible drive for our PostgreSQL 11 database
- A deeper dive can be found here
Check if the availability is OK:
sudo find /usr -type f -name psqlodbcw.so1
2/usr/lib64/psqlodbcw.so
/usr/pgsql-11/lib/psqlodbcw.so #We need this one!!Check the odbc.ini location
odbcinst -jCreate a new odbc.ini
sudo vi /etc/odbc.iniwith this content:1
2
3
4
5
6
7
8
9
10
11
12
13
14
15
16[MyPostgres]
Description = PostgreSQL connection to MyPostgres
Driver = PostgreSQL
Database = postgres
Servername = localhost
UserName = postgres
Password = admin
Port = 5432
Protocol = 11
ReadOnly = No
RowVersioning = No
ShowSystemTables = No
ShowOidColumn = No
FakeOidIndex = No
UpdateableCursors = Yes
DEBUG = YesFinally, we update the correct driver location:
sudo vi /etc/odbcinst.ini1
2#Driver64 = /usr/lib64/psqlodbcw.so
Driver64 = /usr/pgsql-11/lib/psqlodbcw.soNow we should be able to test the ODBC connection settings like this:
isql -v MyPostgres. A trick found here.
Fix command
Do a fix command sudo ln -s /usr/lib64/libsasl2.so.3 /usr/lib64/libsasl2.so.2
Directory availability
Create a mandatory directory for the repository and own it to the ‘postgres’ user
sudo mkdir /var/lib/pgsql/11/data/db_aw_repo_dat.datsudo chown -R postgres:postgres /var/lib/pgsql/11/data/db_aw_repo_dat.dat‘aw_repo’ will be the name of our Documentum repository!
Setup services
Edit the services table sudo vi /etc/services and add these 2 lines at the end of the file
1 | dm_repo1 47625/tcp # 21.2 Repository native connection |
Application Server (Optional)
Can be a supported Tomcat version….Used for clients like the DA and Webtop, but not required! Later in this post we’ll use this “appserver” for the deployment of the ‘new workflow editor’…So, keep on grinding!
We will run an extra Tomcat instance (e.g. apache-tomcat-8.5.63) locally on our computer outside the VM as it makes the image rather heavy and is not needed for our AppWorks instance.
Documentum has several clients available where the Documentum Adminstrator is used for managing the environment, but you’ll see, also other tools are available in ‘the scene’.
Port availability
Make sure you have 20 follow-up ports available for the JMS installation (standard port 9080)
With
sudo netstat -ltnp | grep 90you can check if ports are availableAppWorks uses a java instance on port 9090, so our JMS should run on 9060!
Documentum installation
Now the major step of this blog post.
Go to your extracted installation files: cd ~/content_server_21.2_linux64_postgres
Give the bin file execution permission chmod +x serverSetup.bin
And execute the magic command: ./serverSetup.bin
2 notes:
- Don’t run with the sudo command as sysadmin should be the owner of it all!
- As the installer uses a graphical installers, you need to make sure your DISPLAY variable is correct!
export DISPLAY=IP:0.0- …
- This is my future me writing (during a DCTM 23.2 installation!):
- When you run Java
17.0.9, you can see this error running the setup:java.lang.ClassNotFoundException: com.zerog.lax.LAX- Solve this by adding this to the bash profile classpath:
export JAVA_TOOL_OPTIONS=-Djdk.util.zip.disableZip64ExtraFieldValidation=true
Now just follow the steps of the wizard and make sure to update the port number from 9080 to 9060!
NOTE: I only make screenshots of the important steps this time!

Select your JAVA_HOME location and Click ‘Next’

Use password ‘admin’ and update the port to 9060!…Then hit ‘Next’

Leave the ‘No’ option and click ‘Next’

Choose the ‘Configure later’ and click ‘Done’
As you can see in the last screenshot run this command: sudo /opt/documentum/dba/dm_root_task_cs16.4
Now the software installation part is done. Next is setting up a connection broker and a brand-new repository.
Connection broker
This is the component that runs as a broker between the repositories (if you have multiple) and the end-users. It makes it possible to only show those repositories related for the correct users. You always need one. Also, if you only run one repository like we do for our VM.
So, it’s time the run the server configuration program at: /opt/documentum/product/21.2/install/dm_launch_server_config_program.sh
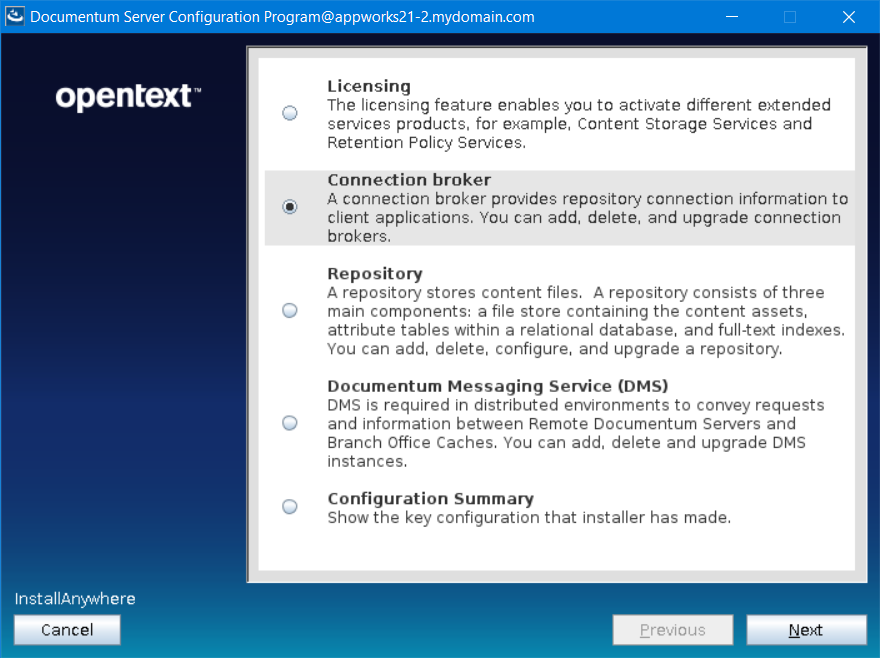
Select the ‘Connection broker’ and click ‘Next’

Give the broker a name and leave the port as is. Click ‘Next’
Just continue the steps, and (also you) will have an up and running connection broker available!
Check the logging: tail -999f /opt/documentum/dba/log/docbroker.appworks21-2.mydomain.com.1489.log
You might find some startup issues for the appserver instance. This has to do with IPV6! (I see it also in the connection broker log!)
Have a look in the logging of the appserver instance
ls -ltr /opt/documentum/tomcat9.0.43/logs/…
YES, looks like we’re back on the good old Tomcat again! 😘
…
Edit
vi /opt/documentum/tomcat9.0.43/bin/setenv.shand add-Djava.net.preferIPv4Stack=trueto the JAVA_OPTS
Now start this appserver again to see if things run better
/opt/documentum/tomcat9.0.43/bin/startMethodServer.shMight be the case you also need to start the connection broker again with
/opt/documentum/dba/dm_launch_ConnectionBroker
Service for the ‘Connection broker’
Let’s create a new file sudo vi /usr/lib/systemd/system/dm_connectionbroker.service and add this content:
1 | [Unit] |
Reload the service’s daemon: systemctl daemon-reload
And enable the service: systemctl enable dm_connectionbroker.service
Also Start/Stop/Status are available now: systemctl start|stop|status dm_connectionbroker.service
Repository
This is the component that will store all our information. Everything you save in a repository is called on object. An object contains 2 parts! This first part is the metadata which is stored in the database. The second part in the optional content which is saved on the file storage.
It’s time the run the server configuration program for the second time: /opt/documentum/product/21.2/install/dm_launch_server_config_program.sh

Select the ‘Repository’ option and click ‘Next’
Continue the screen with all the default values will you reach this one:

Fill in the form like this, but might be anything you like except for the service name which should be the same as added to the /etc/services
- Repository name: aw_repo
- Repository ID: 1234321
- Description: AppWorks Repository
- Service name: dm_repo1
Hit ‘Next’

Select the ‘Native’ connection mode (the Connection Broker supports both) and click ‘Next’

Let the setup create the database information. Hit ‘Next’

Provide the passwords. In my case ‘admin’ and hit ‘Next’
If you are able to continue without an error you can call yourself a champion…If not? It’s time to be a champion! The champion challenge for your solvation (and I experienced it myself!) is all about reading log files in a particular location:
ls -ltr /tmp/{id}.tmp/. The {id} is a generated ID for the current running installation, but if you double-check the latest updated file in this folder you’ll probably find your solution as I did!

Leave as is. Hit ‘Next’

Remember those paths? Leave them as is and hit ‘Next’

Provide the ‘dm_bof_registry’ user account with a password. We use the same password as the username. Hit ‘Next’.
The dm_bof_registry user is part of the Business Object Framework. BOF make it easy to extend Documentum functionality!
Time to get yourself a coffee…And watching all the screens passing by for about 15 min. at least!
Or have a look at some logging:
tail -999f tail -f /opt/documentum/product/21.2/install/sysadmin.ServerConfigurator.logtail -999f /opt/documentum/product/21.2/install/logs/install.logtail -f /opt/documentum/product/21.2/install/logs/UniversalServerConfigurator_Install_*.log

Hit the almost final ‘Next’
Hit the final ‘Next’ for ending the repository creation part and starting the final services!
tail -999f /opt/documentum/tomcat9.0.43/logs/catalina.{date}.log
Create a service for the ‘Repository’
Give this command sudo vi /usr/lib/systemd/system/dm_repository.service and add this content to the file:
1 | [Unit] |
Reload the service’s daemon: systemctl daemon-reload
Enable the service: systemctl enable dm_repository.service
Start/Stop/Status: systemctl start|stop|status dm_repository.service
Logging can be found here tail -f /opt/documentum/dba/log/aw_repo.log
Create a service for the ‘Java Method Server (JMS)’
Yes…It’s the appserver instance created during the ‘Connection Broker’ setup!
Give the command sudo vi /usr/lib/systemd/system/dm_jms.service with this content:
1 | [Unit] |
Reload the service’s daemon: systemctl daemon-reload
Enable the service: systemctl enable dm_jms.service
Start/Stop/Status: systemctl start|stop|status dm_jms.service
The Tomcat appserver console can be reached on the URL: http://192.168.56.107:9060
Deploy a Documentum client
Now it’s time to create a client on our local machine (not the VM). We will not cover this part in this post as it is not needed for the AppWorks platform!
For Documentum, we can use the Documentum Administrator client to login on our repository. This client can be downloaded also from the support side. It’s a .war file which can be deployed on a Tomcat instance (which we could optionally run locally on our laptop). Make sure you run the correct java version with the correct Tomcat version. After! the .war deployment you need to make sure the ‘dfc.properties’ of the clients point to the correct repository. Here is an example for my installation:
1 | =192.168.56.107 |
Extra note: don’t forget to update the ‘web.xml’ in the config directory of that Tomcat instance with these settings (it’s also in the manual, but I also forget this every time!):
1 | <servlet> |
Expose ports (Optional)
It could be that both the repository and connection broker service are not reachable from outside the VM. Run these commands:
sudo netstat -ltnp | grep 1489
sudo netstat -ltnp | grep 47625
1 | tcp 0 0 127.0.0.1:1489 0.0.0.0:* LISTEN 5231/./dmdocbroker |
Then 127.0.0.1 is your problem here. It should be 0.0.0.0 or the correct IP.
For the connection broker you can start it like this to solve the problem:sh /opt/documentum/dba/dm_launch_default -host 192.168.56.107
For the repository you need to edit the server.ini:vi /opt/documentum/dba/config/aw_repo/server.ini
Add 2 lines:
host = 192.168.56.107in the [SERVER_STARTUP]host = 192.168.56.107in the [DOCBROKER_PROJECTION_TARGET]
After! restart of both the services they should be reachable from outside the VM.
IDQL and IAPI
It is not required to have an end-user client because Documentum provides some basic tooling to view things in the repository. These tools are the IDQL and IAPI tools.
Documentum Query Language
DQL is a subset of SQL with specific Documentum functionality. So, we can do all kind of query statement like a SELECT or on UPDATE. A DQL reference guide can be found in PDF format on the support side.
Application Programming Interface
API is the low-end communication from client to server. With this tool you can call specific function on 1 object. Like a SET or a CHECKOUT. Also, for API there is a reference guide available. Both tools can be called by these 2 commands:
/opt/documentum/product/21.2/bin/iapi aw_repo/opt/documentum/product/21.2/bin/idql aw_repo
Type ‘quit’ to exit
Also make sure that your ‘dfc.properties’ vi /opt/documentum/config/dfc.properties is pointing to the correct IP address or hostname dfc.docbroker.host[0]=192.168.56.107.
Should all be fine from the initial installation!
Performance tweaks
As a last step we will do some tweaking as I see the VM we’ve created gets a bit slow on the resources it was initially applied too. That was 9Gb of RAM with 2 CPUs.
You can add extra memory to the machine, but we can also tweak the services of (in this case) Documentum.
Let’s start with the JMS service
Edit vi /opt/documentum/tomcat9.0.43/bin/startMethodServer.sh and update the memory settings:
1 | export CATALINA_OPTS="-Xms512m -Xmx512m" |
Restart the service systemctl stop|start dm_jms.service
Then we have the Repository service
Edit vi /opt/documentum/dba/config/aw_repo/server.ini and update these values
1 | method_server_threads = 3 |
Restart the service systemctl stop|start dm_repository.service
Mail settings
Documentum can use an SMTP server for sending out mail. If it sends out a mail is configured in the server.ini with the option mail_notifcation = T. When it’s not configured, TRUE is the default value.
Only Documentum and specific the repository is not yet aware of an SMTP server. So, we’ll add one to the service with the IDQL tooling.
Start IDQL as explained before and run this DQL query:
SELECT r_object_id, object_name, r_host_name, mail_method, smtp_server FROM dm_server_config
Give a ‘go’ command after the
<Enter>to run the query!
You’ll see the SMTP server is empty. Let’s update it:
UPDATE dm_server_config OBJECT SET smtp_server = 'localhost'
The ‘mail_method’ can be left empty as the default value will be ‘dm_event_sender’. This one is pointing to a script located here:
less /opt/documentum/product/21.2/bin/dm_event_sender.ebs
Then the installation owner ‘sysadmin’ needs to have a mail address to send information to
SELECT r_object_id, user_name, user_address FROM dm_user WHERE user_name = 'sysadmin'
You’ll see the mail address of the user is not valid. Update can be done like this:
UPDATE dm_user OBJECT SET user_address = 'sysadmin@mydomain.com' WHERE user_name = 'sysadmin'
Restart the repository to apply the changes!
Now regularly check your mail for the ‘sysadmin’ user with the already configured Thunderbird client from another post.
In case of other %^^$&%
Not needed, but when %^^$&% hits the fan on database level sudo -u postgres psql
\lfor listing the databases\c dm_aw_repo_docbaseto connect to the databaseDROP DATABASE dm_aw_repo_docbase;select * from pg_tablespace;DROP TABLESPACE dm_aw_repo_docbase;select * from pg_roles;DROP ROLE aw_repo;
The ‘new workflow editor’…cherry on the cake!
Now, to finalize this post (and got really curious after all the OpenText communication) it’s time to bring life to the ‘new workflow editor’. As a Documentum guy I always get excited because I know the history behind this new tool, and the combination with a client called D2 (we don’t dive into this client for now…I leave it for you to explore!). My inspiration came also from this blog post where valuable information is shared about OpenText products…So, keep it on your radar!
NOTE: EVALUATION ONLY – NOT FOR PRODUCTION USE
You read it correctly…This editor is for evaluation only!!
…
Before! we can use it, we need some pre-installed data into our ‘aw_repo’ repository…just a bunch of object types where this tools leans on. These are installed with the tool called ‘Process Engine’, and I see it’s delivered with a windows-only installer, but as we are on CentOS we just use the Linux variant of (again another Documentum client) xCP. You can get the download from here: Process engine 21.2 (from xCP as it has a Linux version!) with filename: ‘process_engine_linux.tar’.
Upload that file to your VM in the home folder of our ‘sysadmin’ account. After this we can execute these commands:
Make sure your Documentum repository is up and running as the installer needs a connection to it!
1 | mkdir pe_21.2 |
Just follow the wizard…Not hard as it all speaks for itself. The installation owner account will be our ‘sysadmin’. I also installed PE without shutting down the JMS service.
The installation will create a logfile in the installation files directory: tail -999f logs/install.log
Our JMS is updated with PE data, so we need to do a restart:
1 | sh /opt/documentum/tomcat9.0.43/bin/stopMethodServer.sh |
Keep track of the JMS logging: tail -f /opt/documentum/tomcat9.0.43/logs/catalina.{DATE}.log
After restart JMS you should have these URLs available with a set of required modules for the new workflow editor!
…
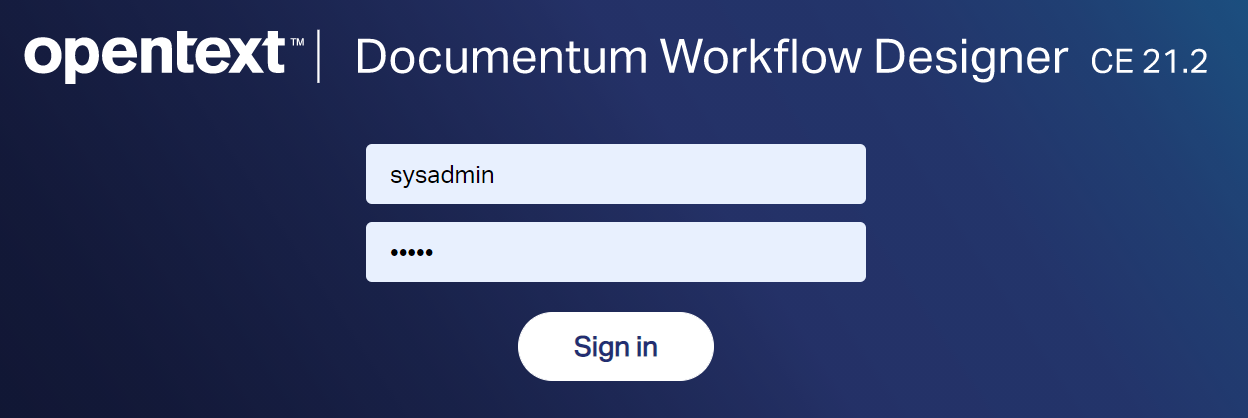
Now for the editor itself. It’s just a web-client like every other Documentum client and needs some property updates, so the client can ‘find’ our repository and make a connection to it. First for the download which can be found here: Documentum workflow 21.2 with filename: ‘dctmworkflowdesigner.war’
After download, we open the WAR file with 7-Zip and we’ll edit these files:
I use 7-Zip because in my career I experience it’s the only archive editor which rebuilds the WAR file correctly for further deployment! Another approach is to deploy it first and update the files after Tomcat ‘exploded’ the WAR file to a corresponding directory.
\dctmworkflowdesigner.war\WEB-INF\classes\dfp.properties:
1 | =192.168.56.107 |
\dctmworkflowdesigner.war\WEB-INF\classes\deployment.properties:
1 | =aw_repo |
YES, I hear you thinking!!
C:/Tomcat/temp??…I have my tomcat running locally…Outside the VM!
\dctmworkflowdesigner.war\WEB-INF\classes\rest-api-runtime.properties:
1 | #uncomment this line! |
Once the WAR file is prepared, we can deploy it to Tomcat (just copy the file in the /webapps directory of the Tomcat instance). Start the tomcat instance and go with the flow by this URL:
http://localhost:8080/dctmworkflowdesigner
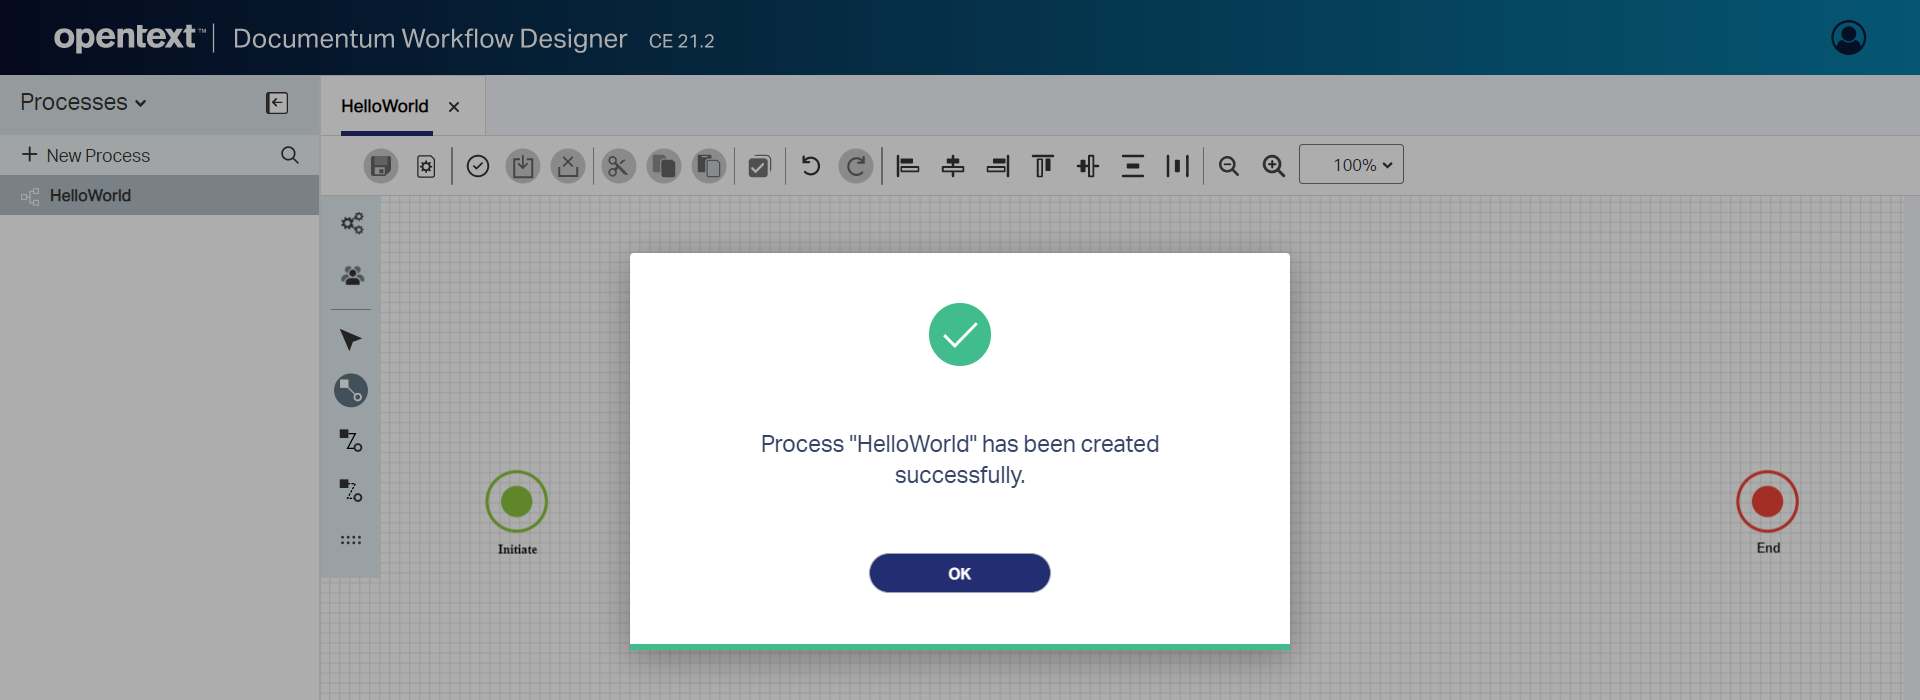
Playground is open…I leave it for you to play around with it (as it’s a bit outside the scope of AppWorks where this blog is all about)
To give a short glimpse…So I have a look & feel compare with the BPM editor of AppWorks! 😎
Just a basic flow with parallel activities example:
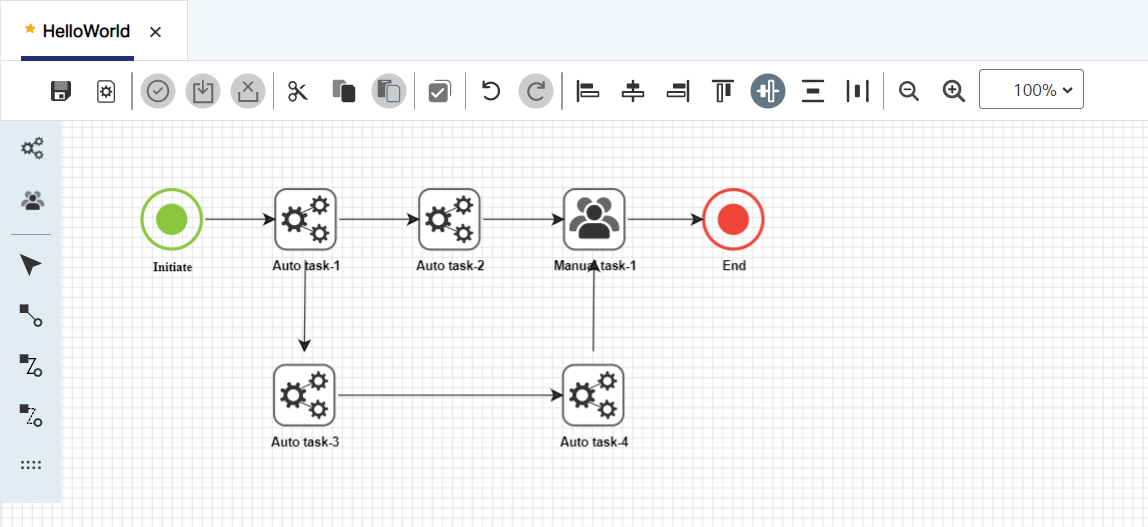
I leave the rest for you to evaluate!
That gives us a ‘DONE’ we can be proud of. We have made Documentum available for our AppWorks platform where we can save our data in a structured way for the future. Next step is to connect these 2 platforms to each other. Have a great day, and I see you in the next post. Please let me know your thoughts in the comments and weather you would like to get more information about the end-user clients for Documentum.
Don’t forget to subscribe to get updates on the activities happening on this site.
