
Hi there AppWorks fans,
Welcome to a new installment of AppWorks tips.
This time we just do a dive on the HTML5 SDK that is available on our AppWorks platform. With this JavaScript! SDK it should be possible to create your own HTML pages that are tightly connected to the platform. Meaning AppWorks authentication and calling AppWorks functionality is directly available under our fingertips from a custom HTML-page with JavaScript and CSS to style it out…Nice! How does it work and how can we bring it into advantage with the entity modeling principles? That’s where it gets interesting so let’s find out!
Let’s get right into it…
…where we first try to find some quick answers to these questions:
What is the HTML5 SDK?
It’s just a JavaScript library designed to work with AppWorks…nice! It uses standard libraries (like jQuery and KnockoutJS) that we see a lot these days in web application (like our ‘runtime’!), but also in mobile applications where we see support of libraries like Sencha Touch and jQuery Mobile. Also, well-known libraries for mobile development. When you take a closer look at the SDK you will see that a lot of features are built-in already, like calling entity models, webservices, translations, workflow tasks, etc. Most interesting is the already available authentication part which handles a user login! This means that it should be possible to reuse our user session with the platform and do all kinds of fancy custom creations on a basic HTML page. This HTML page can of-course be called from our own runtime, but if you typed in the URL from a mobile perspective it would also work…That is where the fun starts! 😜
Where can we find it and what does it look like?
Well, a search on my VM brought me to a location where I find these 2 files:
/cordys/html5/cordys.html5sdk.js/cordys/html5/cordys.html5sdk.debug.js
The debug variant is not minified (a minified JS file is faster!) and is readable directly in runtime by calling this URL:
http://192.168.56.107:8080/cordys/html5/cordys.html5sdk.debug.js
Take some time to get familiar with it as we will use it during this post!
What else?
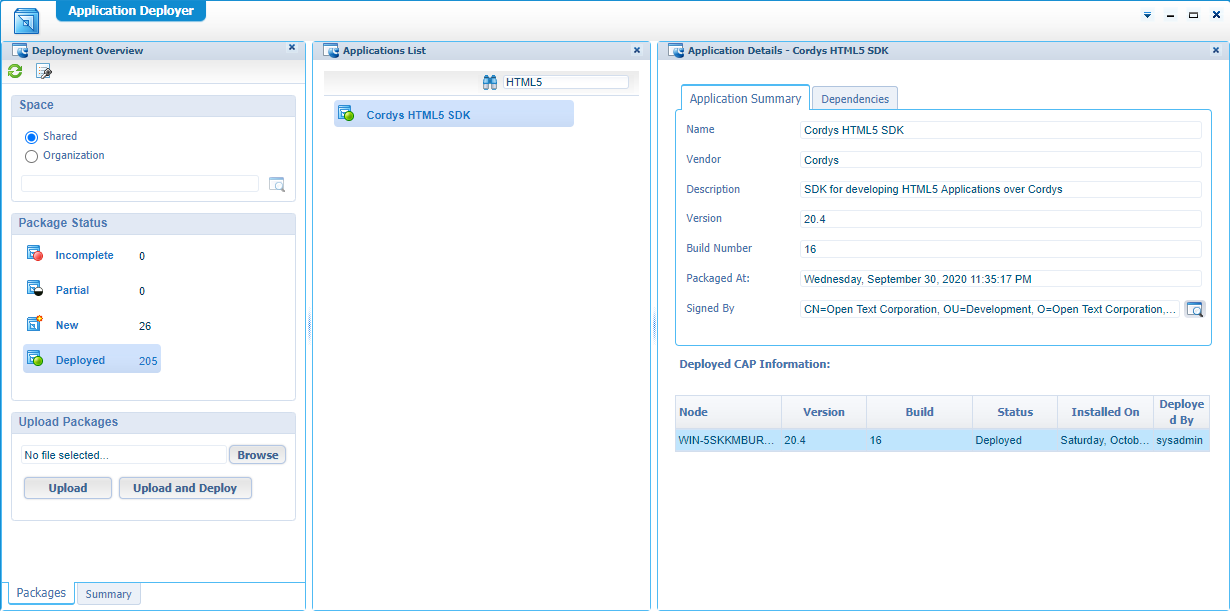
Well, after some research I see there is a specific CAP-file for this SDK (deployed by default!) with the fancy name: Cordys HTML5 SDK
What else?
After some browsing thought the files in that VM directory I see a lot of these kinds of calls passing by…Interesting…What do they do and how are we supposed we call them? Most of them are pretty logic, but some raise questions!?
1 | $.cordys.ajax(..) |
Where can I find documentation?
A dive into the AppWorks help (opened from design time in that left small panel) will give me this image:
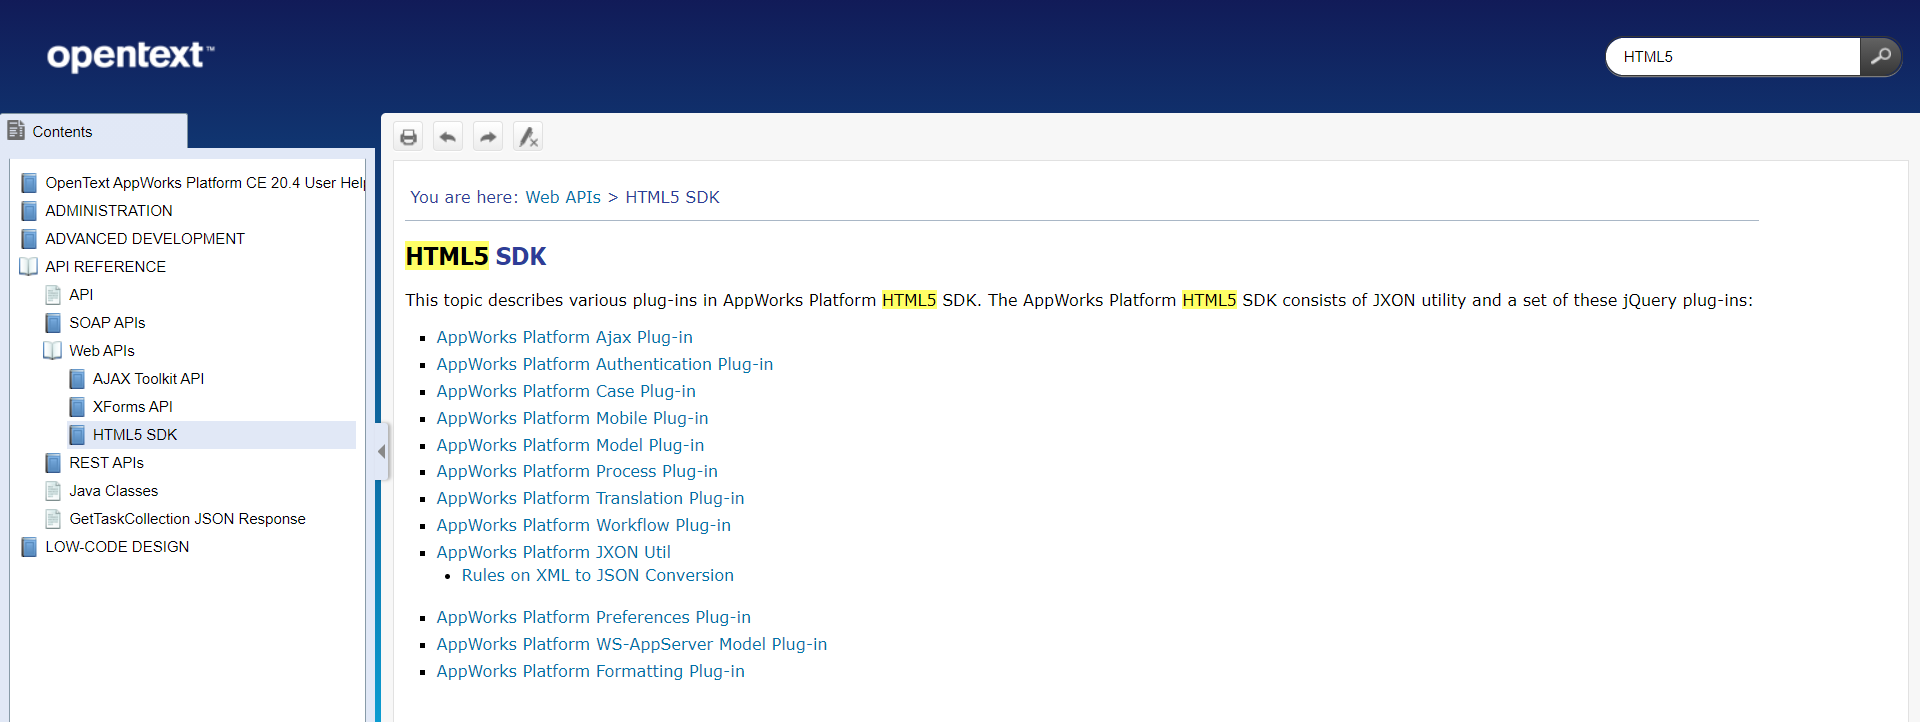
The image already shows us similarities of the
$.cordysexamples from above!
The normal PDF documentation has off-course also these kinds of sections
- The AppWorks development guide sections ‘Working with HTML5 SDK’ and ‘Developing applications with HTML5 SDK’
- The API Reference Guide in section ‘HTML5 SDK’
Other helpful locations will be on the internet
- The AppWorks support side: https://forums.opentext.com/forums/support/categories/appworks-platform
- The Appworks developer portal: https://forums.opentext.com/forums/developer/categories/appworks
Are there any other examples to be found?
A search on Google on the above topics will bring you to some resources, but it looks to me there is not that much information available.
Looks like my best shot is in the demo folder: /opt/opentext/AppWorksPlatform/defaultInst/webroot/shared/html5/demo/emptypage.htm
That can be accessed via URL: http://192.168.56.107:8080/cordys/html5/demo/emptypage.htm
Also, this one is interesting, but it requires to have the Northwind data up and running with the correctly generate webservices:
http://192.168.56.107:8080/cordys/html5/demo/employees.htm
This last one is indeed a great example (even with the post on the Northwind database), but let’s see if we can build something ourselves that calls our own entity model information! 😅
How can we use it with our entity modeling?
We should be able to create an ‘assets’ folder with a ‘html’ subfolder that contains a customized HTML file. The assets will be published into runtime with a web library definition, and we can use a ‘Web content’ panel on an entity layout to call this HTML file via a relative URL. That is our entrance!!
Ok, looks like the bar has been set with this last Q/A!
Let’s start simple!
By ‘simple’ I mean…Let’s call a basic HTML file (created in our project ‘Assets’ folder) from an entity layout as a start!?
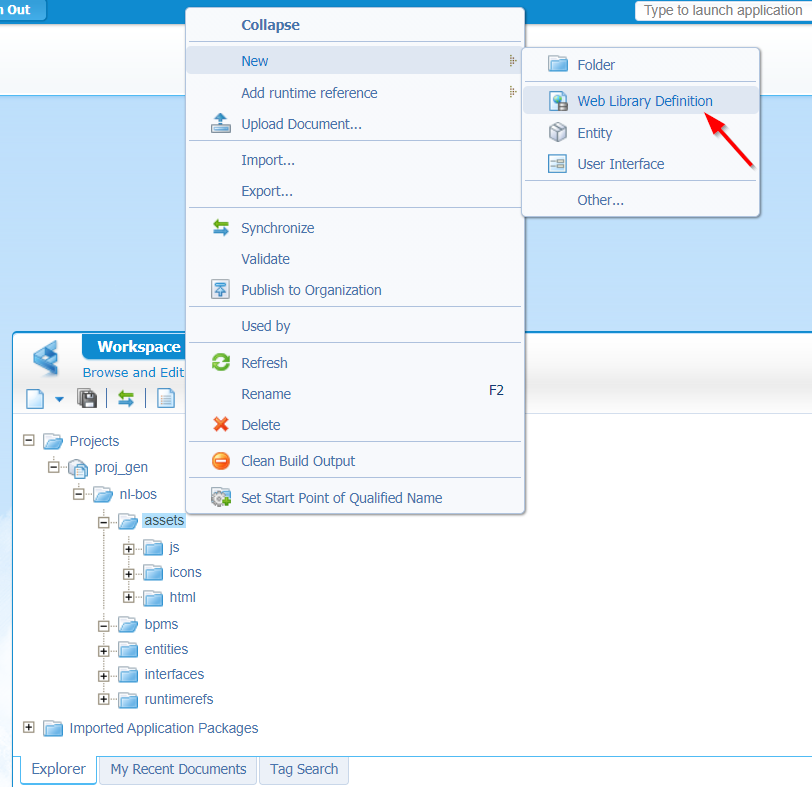
So, spin up the VM, enter design time with ‘awdev’ and create that first folder structure where we start by creating a new ‘Web Library Definition’ in the ‘assets’ folder:
This is how it will look like:
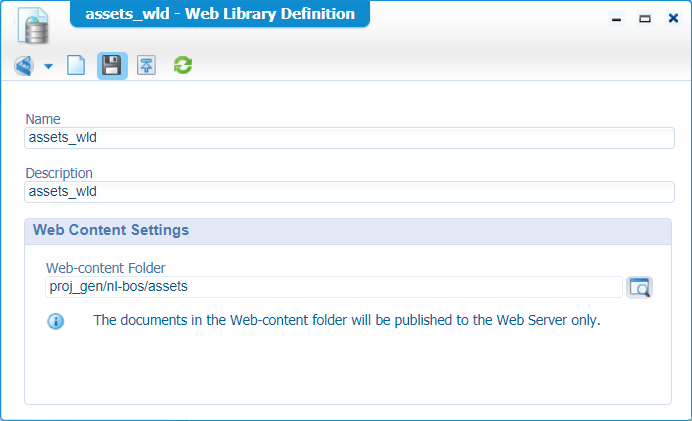
Just make sure to point to that ‘assets’ folder and save it…Publication is not (yet!) needed.
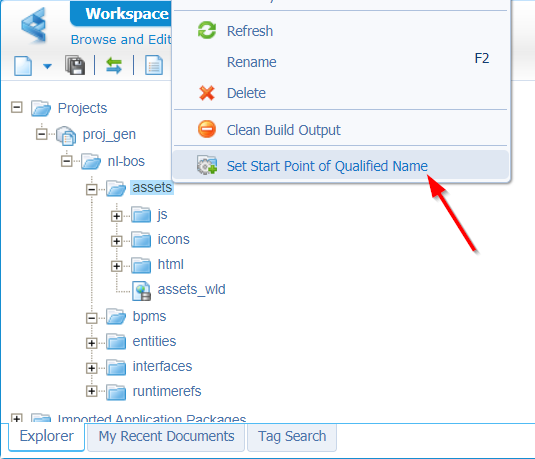
We also set the ‘Start Point of Qualified Name’…Remember that one?…check this post on the WLD or this post where we use that ‘Start Point…’ option!
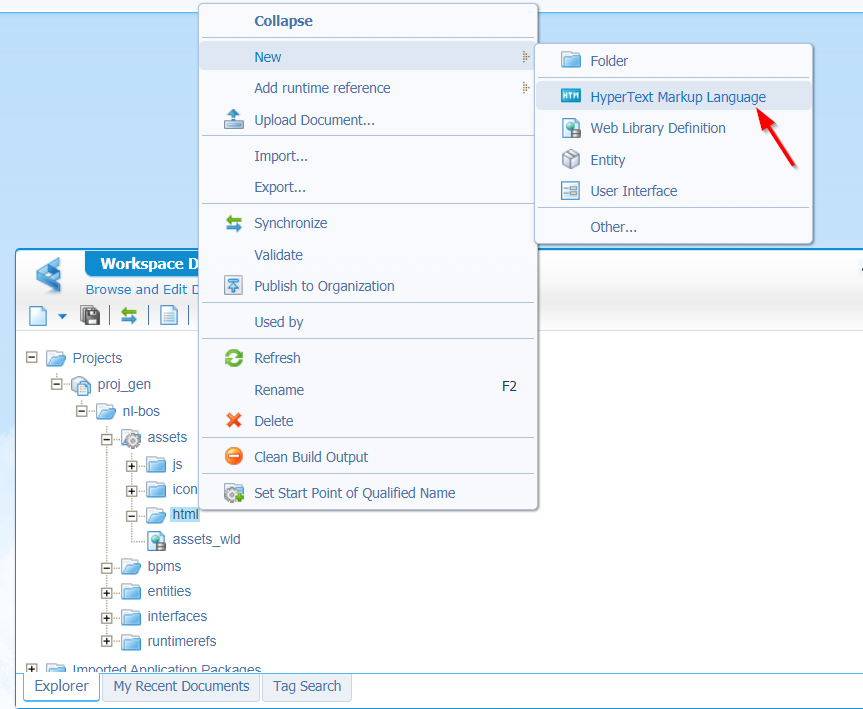
Now we create a new ‘HyperText Markup Language’ file (in the ‘html’ folder)
For now, we just add some basic HTML that we copy from w3schools
1 |
|
We save that new document with a nice name ‘playground.htm’ and now we can publish our project…
Result in runtime?
http://192.168.56.107:8080/home/appworks_tips/html/playground.htm
Hooray! Our first step towards greatness! 😏
Call HTML file from entity layout!?
Ok…For this one we create an easy ‘person’ entity in the ‘entities’ folder with 2 fields ‘age’ of type integer and ‘name’ of type text. When all the default BBs, to create new instances in runtime, are crafted/generated, we can start this section in the ‘DefaultLayout’ BB where we add a new panel of type ‘Web Content’.
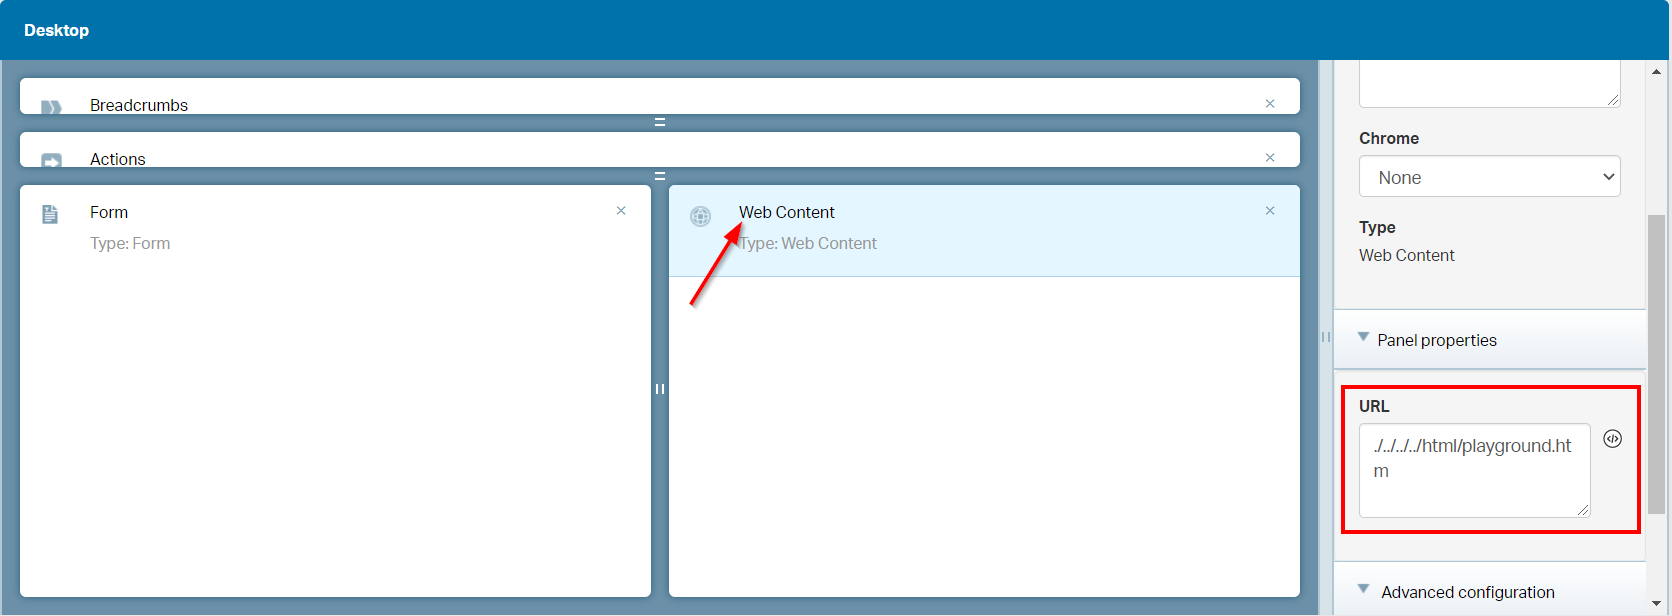
We use this relative path:
./../../../html/playground.htmAs
/html/playground.htmwill resolve into a URL like this: http://192.168.56.107:8080/html/playground.htm
./html/playground.htmwill have this URL as result: http://192.168.56.107:8080/home/appworks_tips/app/start/web/html/playground.htmSo, we just need to be 3 folders upwards to get our result!
Result in runtime?
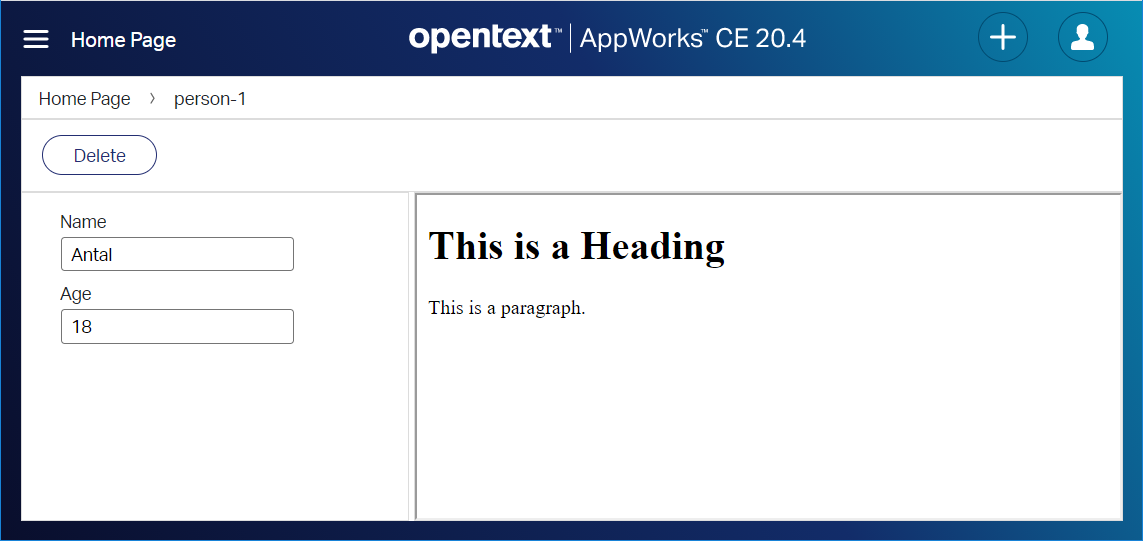
Nice!…next?
Faster development?
Nice, that we can edit the HTML file in design time, but we’re much faster with a nice external HTML editor like Notepad++, Visual Studio Code, Eclipse, IntelliJ IDEA (CE) or the great IntelliJ Webstorms (not free!)
Approachable options:
1. Directly edit the file from server (in ‘webroot’)
After a first publish to runtime our ‘assets’ folder is available in this location:
/opt/opentext/AppWorksPlatform/defaultInst/webroot/organization/appworks_tips/html/playground.htm
We can create an SSH connection with ‘MobaXTerm’ and edit the file directly!
The advantage is that we see the file directly getting updated in runtime after a refresh of the page and no extra actions need to be done. The disadvantage is our project is out of synch and republish from design time will lose changes if you didn’t upload the latest version eventually into the project.
2. Directly edit the file from server (after CWS synch)
On our project we can do a ‘synchronization’ action on the project. This action makes our ‘assets’ folder available on the server in this location:
/opt/opentext/AppWorksPlatform/defaultInst/cws/sync/appworks_tips/aw_dev_ws/proj_gen/nl-bos/assets/html/playground.htm
Again, we can create an SSH connection and edit the file in this location directly.
The advantage is that the content is more under control of our platform as a resynch will upload the content directly back into our project. The disadvantage is we need to do more manual action like an extra publish from our project after that synch.
In my opinion it’s best to first go for option 1 for quick prototyping and when done, you upload the document into the project. You can do this via the synch (option 2) or manually with the ‘Upload Document…’ on the project!
3. Use a maven project with install/upload task
When you are on a bigger project it’s better to have a local Maven project and let Maven handle the upload to the server!
How?
Well, make sure you have installed Maven locally on your system. When ready you should be able to do a call from your terminal/command line: mvn -v with this kind of output:
1 | Apache Maven 3.6.1 (d66c9c0b3152b2e69ee9bac180bb8fcc8e6af555; 2019-04-04T21:00:29+02:00) |
Go to a nice directory where we will create a new maven ‘webapp’ project with this command:
1 | mvn archetype:generate -DgroupId=nl.bos.webproject -DartifactId=AppWorksAssets -DarchetypeArtifactId=maven-archetype-webapp -DinteractiveMode=false |
This will create a new skeleton project with a ‘webapp’ folder, and a clean ‘index.jsp’ where we can also create new HTML files!
Make sure you are in the project folder (where the ‘pom.xml is generated) and try the command: mvn clean package. This will clean the latest output and will generate a new WAR file which can be uploaded to a webserver for further deployment/testing. This last thing is not that interesting for this post, but what is interesting is that we can also make use of Maven tasks! This makes it possible to connect to a remote server and upload data to our ‘webroot’ location with a call like: mvn clean install
For this to happen we need to update our ‘pom.xml’ that was generated for our new maven project!
First we add a ‘properties’ section:
1 | <properties> |
The
aw.passwordis retrieved from a local variable from my local system. You can also use a password directly, but it not a recommendation to add hardcoded passwords in these kinds of files as in a later moment you might want to share this project through GIT or SVN.
Next we need to add a ‘build’ section where we reuse those properties and make use of the ant-jsch dependency to copy files to a remote server!:
1 | <build> |
You can clearly see the reusability of the property values, and my playgound.htm file being copied. Here is some more information on the SCP parameters!
My Maven project can be downloaded here.
Add some JavaScript…
OK, back to our ‘playground.htm’ file where we will add some basic JavaScript to play around with. First we add the basic scripts, and a CSS file:
1 |
|
NOTES:
- You will see relative paths because these files are all available on our server already…great!!
- I added a ‘playground.js’ file, so we can play around in our own JavaScript file! For this…
- …I created also a ‘js’ folder on the server in the ‘webroots’ location.
- …I also added a second ‘scp’ node in the ‘pom.xml’ to copy this JS file too.
- It’s also better to have a Chrome incognito tab available, so you have better control of the cache on these type of files.
Let’s create a simple function in our ‘playground.js’:
1 | $(document).ready(function() { |
This function will be called on page load be default…That’s how jQuery works with the $-sign! More here.
After deployment and a refresh of the browser you should see the output in the developer tools console (with <F12>) of Chrome…Ready and steady? Next…
Let’s call some ReST with 2 calls in our $(document).ready(function() {..} function (both do the same, but then you see a bit more of the possibilities):
1 | let url = "https://jsonplaceholder.typicode.com/todos/1"; |
We use the JSONPlaceholder open API to play around…Deploy and check out the dev console in Chrome! If you want to know more on these type of calls…Check this!
Let’s continue the grind as we don’t do any fancy AppWorks stuff (yet!).
A rewrite of that last function:
1 | $.ajax({ |
An even nicer way of that same call (when we need to extend the code):
1 | $.ajax({ |
Great…Looks like we’ve understood the basics of calling jQuery stuff and playing around with some functions.
Now let’s dive into our demo examples that were found on our AppWorks VM!
We will try it with a call like this:
1 | $.cordys.ajax({ |
Here you see we switch to another ‘ajax’ call, the one in scope of ‘cordys’ which is our AppWorks platform. The advantage? Well, authentication is handled for us within this ‘cordys’ scope and that makes it much simpler to call any webservice that is exposed…Like the webservices we can expose with the ‘Webservice’ BB on our entity!
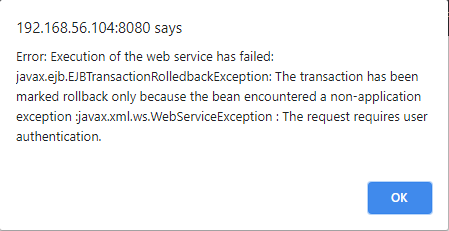
Now we’re getting somewhere…Did you see already the call to the method ‘Allpersons’ with that namespace parameter? Where did we get that information from and how can we build this call in our AppWorks platform? That’s our next section…For now just publish it all, but when you call it you will get an error like this one (when not authenticated):
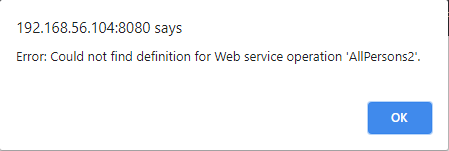
Or you get this error (where I manipulated the method to raise the error!)
I first log into the platform (the regular way) and then calling my page externally like this http://192.168.56.107:8080/home/appworks_tips/html/playground.htm. Later on we include this page in runtime, but for testing this link refreshes faster, but first requires a session!
So, the next section will explain how to make the ‘AllPersons’ method available…
Expose the ‘AllPersons’ webservice
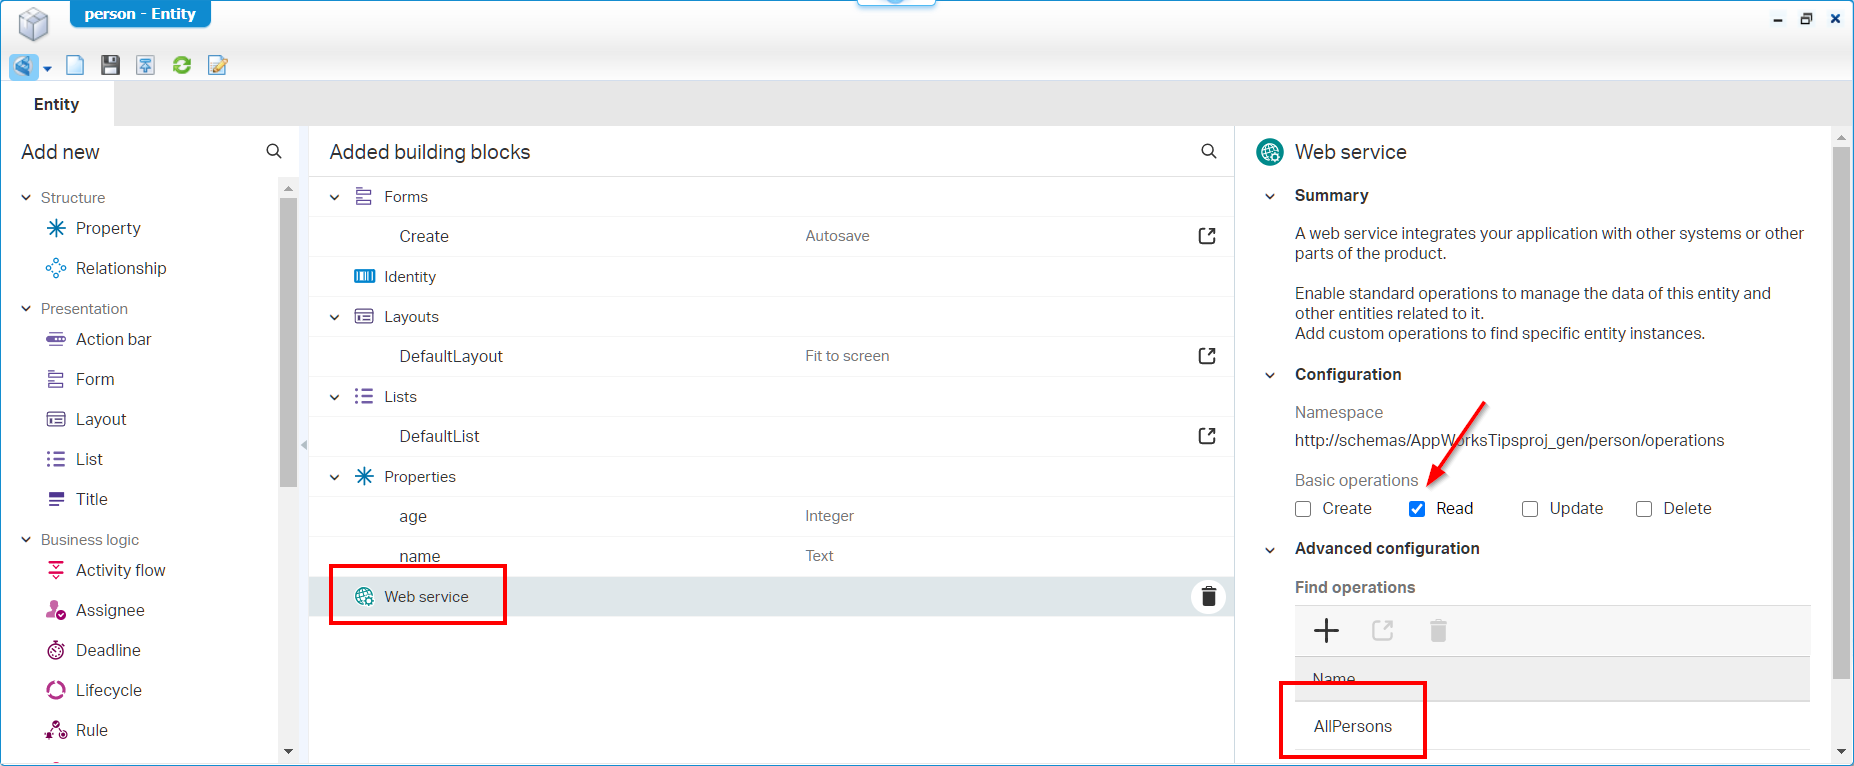
For this to happen we go back to our simple entity ‘person’…Nicely saved in the ‘entities’ folder. On this entity we add the ‘Webservices’ BB which we configure with a new find operation called…Yeah…You guessed it correct!…’AllPersons’.
It should all look like this (where I also enabled the ‘Read’ operation):
Now we have this BB enabled, we are also required to create a new service container that can help us to execute on this service operations.
In quick steps (as we covered this already in another post!):
- Open ‘System resource manager’ in your organization space
- Create a new service group
- Connector type: Application Server Connector
- Name: AppServer
- Web interfaces: Only the one for our ‘person’ called ‘Method Set Entity person’
- Make sure to assign it to OS process ‘Application Server’ which can handle web requests through our TomEE instance!
- Let it start automagically
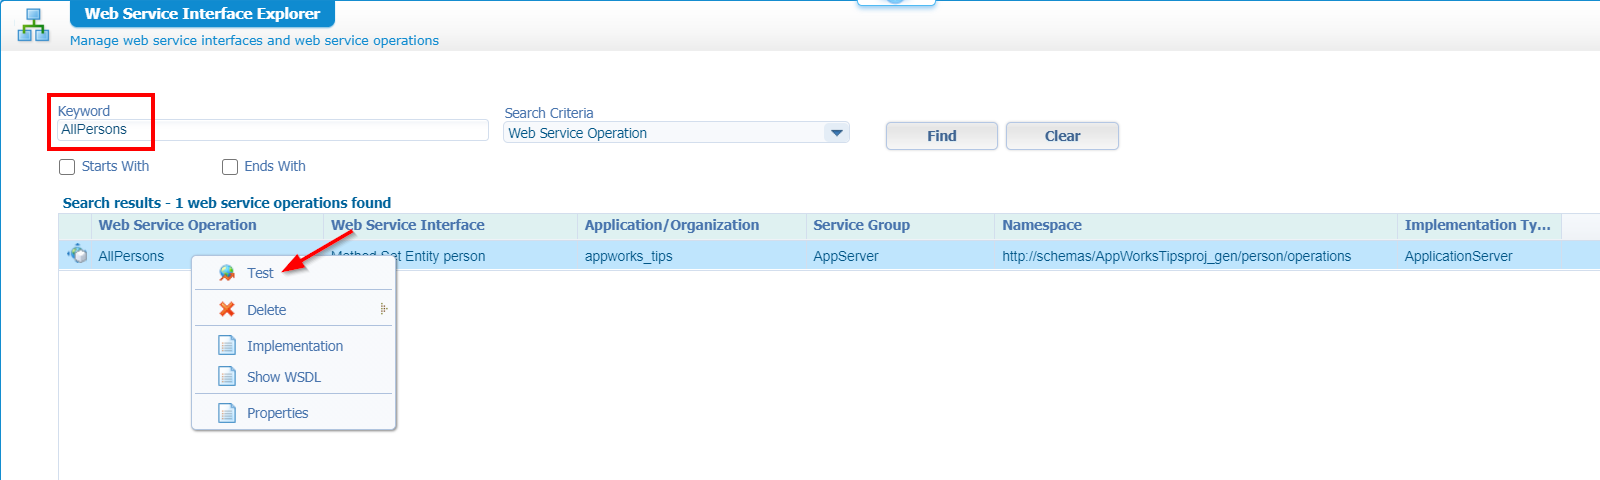
When the new service container is up and running you should be able to test our webservice with the ‘Web Service Interface Explorer’ artifact.
You should see a SOAP request like this:
1 | <SOAP:Envelope xmlns:SOAP="http://schemas.xmlsoap.org/soap/envelope/"> |
Now, have a look again in our ‘playground.js’ file, and you will recognize that ‘namespace’ value and ‘method’ value!
Well, where are you waiting for…Let’s invoke it like a pro with an output like this (I hope you understand you need to create person instances in runtime first…duh!?) where I cleaned the XML namespace parts:
1 | <data> |
Nice…Back to our ‘playground.htm’ in runtime and see if we don’t see any errors…
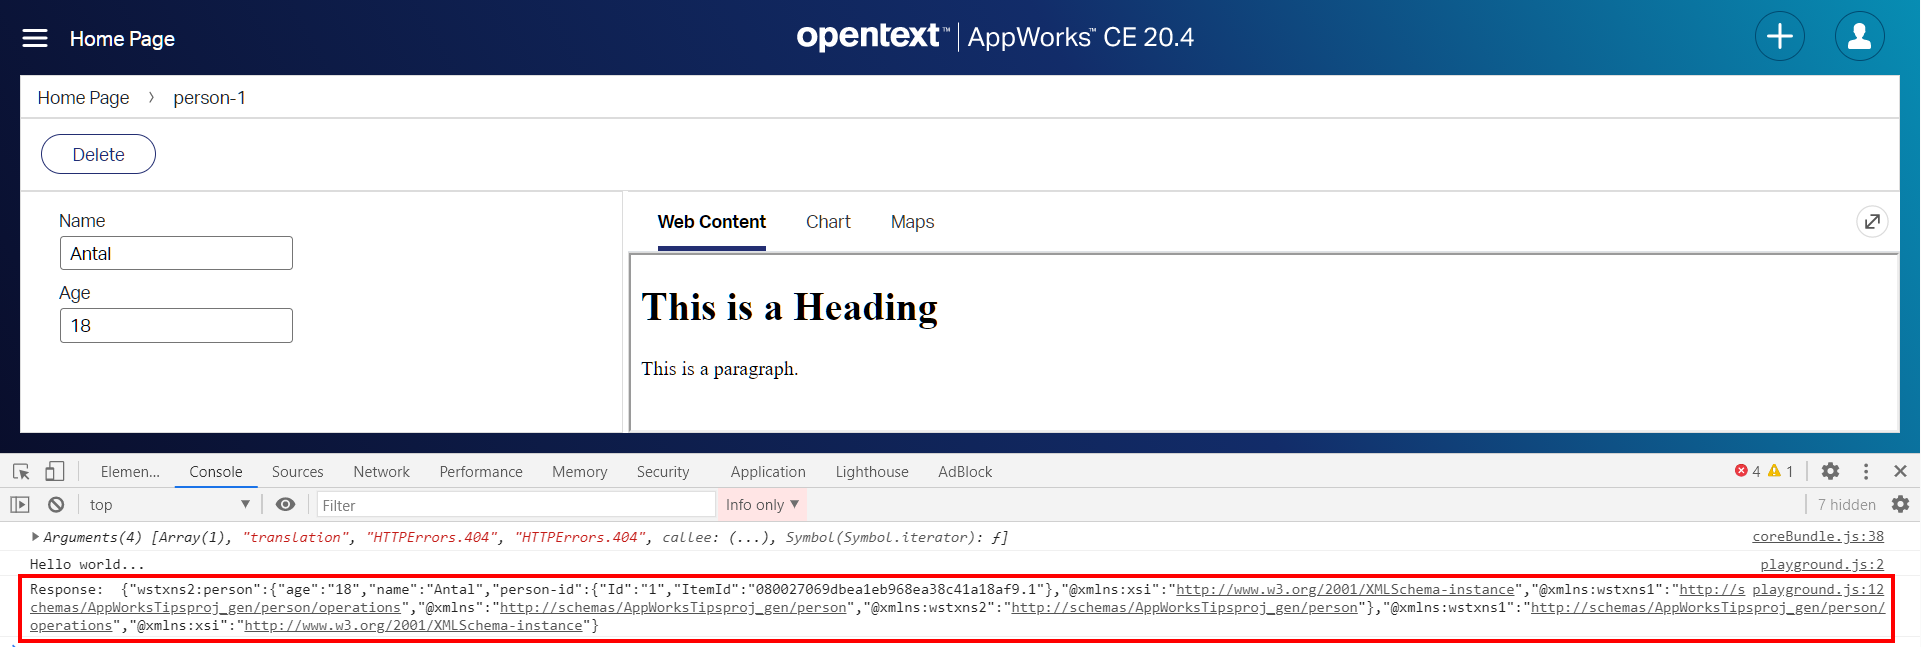
Ohwww YEAH…😍
Add a table view (and bind the data to it!)
For this section we can extend our ‘successFunction’ with this content in the JavaScript file:
1 | function successFunction(response) { |
What do we do here? Well, we use ‘KnockoutJS’ to bind our response data to a ‘persons’ object. To have a better understanding it’s recommended to read some documentation on this site. On our HTML page we can use that ‘persons’ object to read all the data from it and plot it on a table in the ‘body’ tag:
1 | <body> |
The only thing we now need to add is the ‘KnockoutJS’ library by adding this line in the ‘head’ tag:
<script src="/cordys/thirdparty/knockout/knockout.js" type="text/javascript"></script>
You see this library is also already available on the platform.
Now, publish and check the result in runtime:
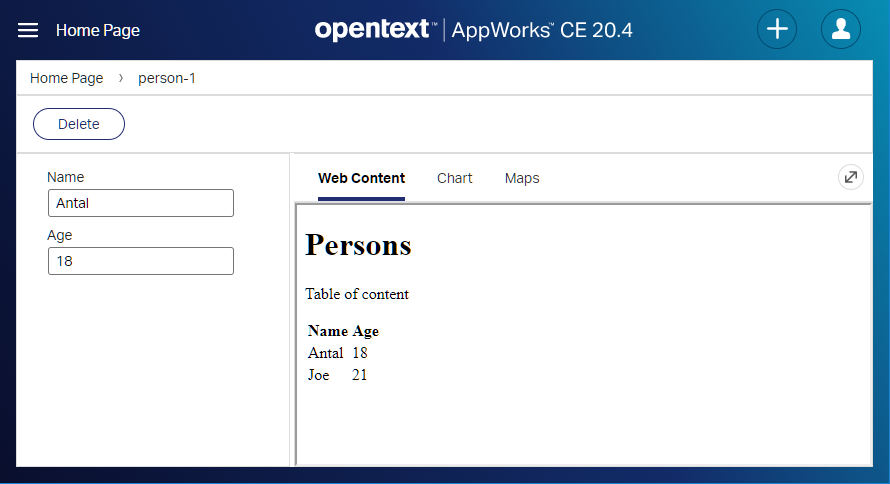
Ohw mama…do we learn some stuff today! 👊
Another nice library to play around with is JsRender, but also this (included) third library is ‘binding based’, which makes it much easier to pass data around in your Single Page Application. It’s all about automatic refreshing the UI when data in the back-end is changing.
<script src="/cordys/thirdparty/jsrender/jsrender.js" type="text/javascript"></script>Have a look on the server for other interesting libraries to play around with (It’s like entering a new world of knowledge!):
cd /opt/opentext/AppWorksPlatform/defaultInst/webroot/shared/thirdparty/
An example call with JsRender
The ‘successFunction’ in the JavaScript file:
1 | function successFunction(response) { |
The HTML update in the body:
1 | <body> |
And a JsRender template to build the table (with the inclusion of the library itself!):
1 | <script src="/cordys/thirdparty/jsrender/jsrender.js" type="text/javascript"></script> |
After deployment, we will get the same result in runtime, but now you see another approach is always possible!
Next…
Call some styling!?
You see our table a rather clean and styleless…It would be great to be in line with the rest of the runtime UI…correct?
Let’s start with the font type…Real simple and efficient:
<body class="ui-body-c">
The updates the body style from the included CSS /cordys/thirdparty/jquery/cordys.min.css
The end-result will look like this:
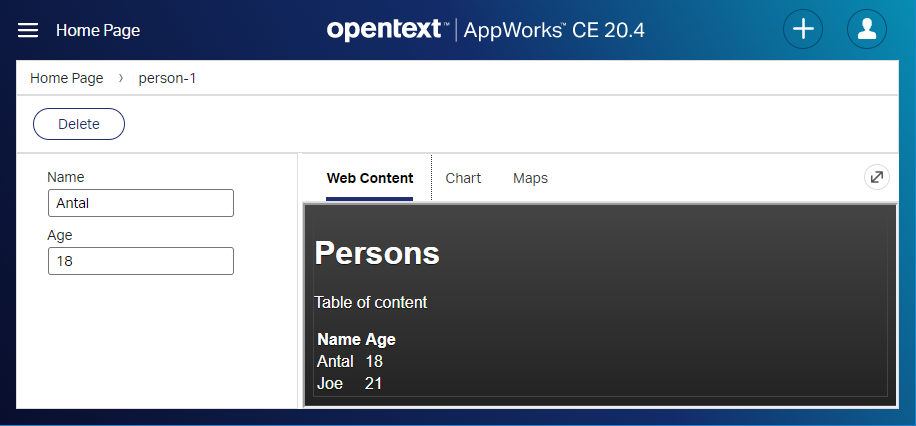
This is a mobile style from jQuery mobile which gives you a nice head start but is intentionally meant to be used for mobile interfaces, but that’s not wat we really want…Let’s do another approach with another CSS file!
Let’s start with the inclusion of this CSS file…Do you recognize this one?:
<link rel="stylesheet" href="../app/start/web/startup.css" type="text/css" />
After we remove the ui-body-c class from the body we get a nicer “look and feel” in line with the rest…
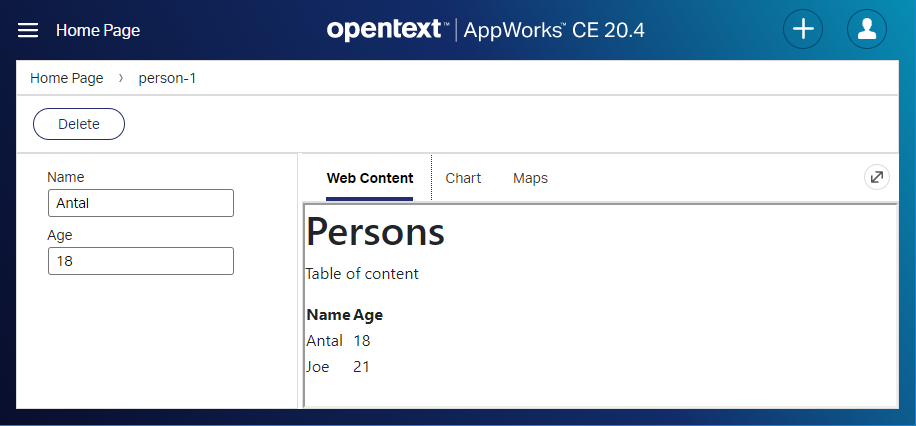
Great stuff…Next…First a coffee break! ☕
Push the ‘current entity ID’ as parameter
We see in our table filled with all the entries of the persons. Nice, but in our screen we are only interested in our current person. Let’s see how we can filter our data!?
The first thing we need to check (as your already did this if you followed the steps) is the exposure of the ‘Read’ operation on the ‘Webservice’ BB on the ‘person’ entity! With this operation enabled you should be able to test the ‘Readperson’ webservice with a SOAP request like this:
1 | <SOAP:Envelope xmlns:SOAP="http://schemas.xmlsoap.org/soap/envelope/"> |
Great, but how do we get the ‘ItemId’ value into our ‘playground.htm’ file!?
Well, for that setting we jump into our default layout BB for the ‘person’ entity with we update the line behind the ‘Web Content’ panel like this:
./../../../html/playground.htm?itemid={item.Identity.ItemId}
After deployment, we clearly see nice information in the developer console of chrome:

To grab the ‘itemid’ parameter value into our ‘playground.js’ file, we can add this piece of code in the $(document).ready(function() {...}
1 | $.urlParam = function(name) { |
Finally, we’ll update this JS file further with a call to the ‘Readperson’ operation (including the correct parameter!)
1 | let itemId = decodeURIComponent($.urlParam('itemid')); |
Take a note of the ‘parameters’ input where you can clearly see a match in naming of the earlier SOAP request!
Publish and double check in runtime, but you probably did this already!
Final result (after some small style changes!)
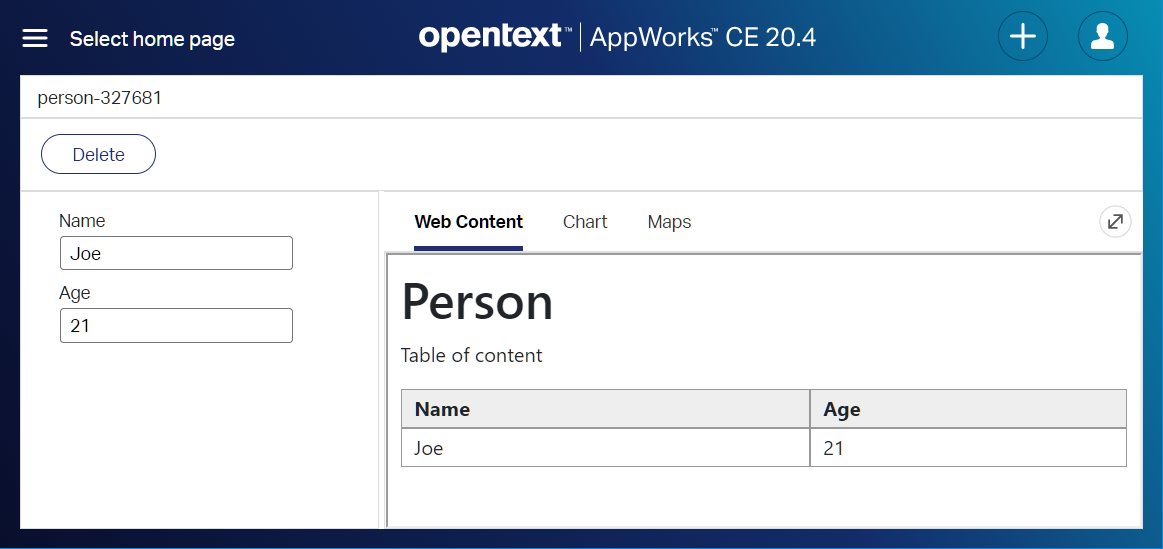
My ‘playground’ project can be downloaded here. Is there more to explore? For sure, like a call with all the other $.cordys functions, but that is something I’ll leave with you. The same for a dive in all the external JS libraries you saw passing by in this post…A whole new world to dive in, but not for this post…I leave it with you, but don’t hesitate to share some nice coding examples, so others can learn from your experiences too.
That’s it…Hard work to figure out all this stuff, but what a learning experience! That’s a “DONE” where we can be proud of. We really learned some baby steps on how to start working with the HTML5SDK that is delivered with the platform. We also saw a lot of other frameworks that can be used to add some efficient development to create the most creative SPA deliveries that we can craft. Great stuff to play around with, and we opened a whole new perspective on the AppWorks platform…Have a great week-end, and I see you in the next one where we continue to play around with all the greatness that the AppWorks platform is delivering us…Cheers!
Don’t forget to subscribe to get updates on the activities happening on this site. Have you noticed the quiz where you find out if you are also “The AppWorks guy”?
