
Hi there AppWorks fans,
Welcome to a new installment of AppWorks tips.
In this installment we dive into the SOAP and ReST requests that make a call to the exposed services from our beloved AppWorks platform. These services can be called from an external sources and for us it’s highly important to understand how this works so we can instruct other people how they need to communicate to our platform. Most important here is off-course the authentication and this post will walk you through it. This post will give you the first steps to call end-points of the platform with a tool called ‘Postman’. This tool is your main entrance for calling authenticated SOAP/ReST services and when you understand the principles it’s not hard to understand the rest. Also, when you would like to build some fancy UI with any latest and greatest JavaScript framework, this post will give you a head start…
Let’s get right into it…
This post will be divided is several sections as we need to craft things in AppWorks as well as understanding what is exposed at service level. The end result will be a small set of requests that help you start calling any other SOAP / ReST end-point of the platform from the ‘Postman’ tool. You will see the ReST service layer is already there for you to consume, the SOAP service layer must be extended with our own entity webservice BB. Watch and learn…
Entity creation and webservice exposure
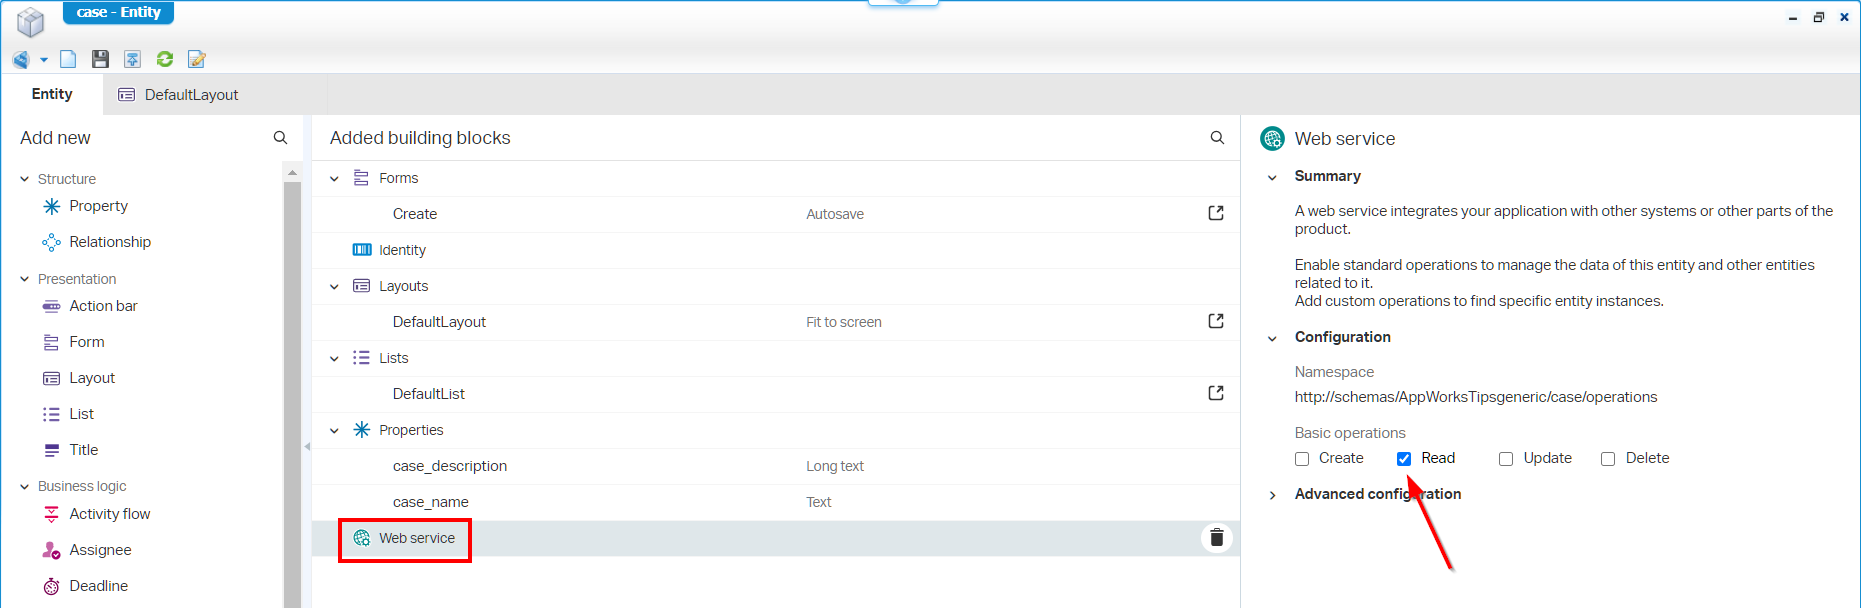
First we dive into the entity (named ‘case’) creation on a new brand-new project in our organization and workspace. It looks really simple like this where we also exposed the ‘Read’ operation of the ‘Webservice’ BB:
As we all know by now we also need to create an ‘AppServer’ service container in the ‘System Resource Manager’ artifact so, the platform ‘knows’ how to handle the requests that are send to this end-point. In short steps as we already did a post on creating an ‘AppService’ service container:
- Open ‘System Resource Manager’ from your own organization (you need to have the ‘Administration’ role)
- Create a new service group (top left button)
- Type: Application Server Connector
- Name: AppServer (or any other fancy name you like)
- Interfaces: Just select the method set of our ‘case’ entity (or select any other interfaces if you created something fancier!?)
- Let it start-up automagically
- Make sure to ‘Assign’ it to the OS process (as our application server TomEE is pretty good at handling SOAP calls)
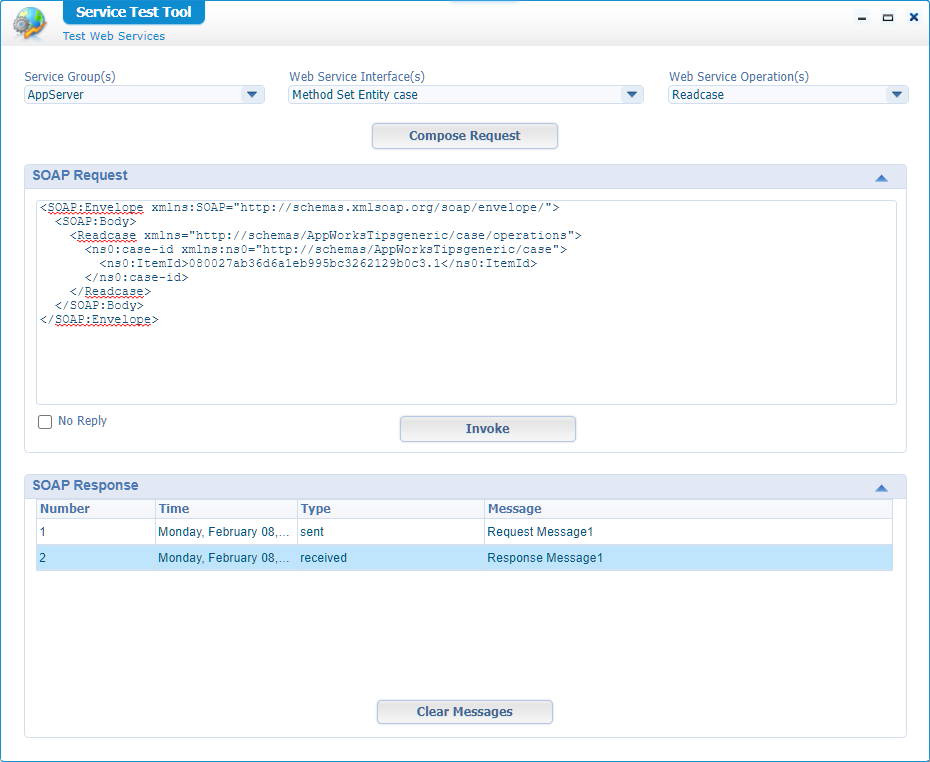
Once we have it up and running we should be able to test our just exposed SOAP service with the ‘Service Test Tool’ artifact:
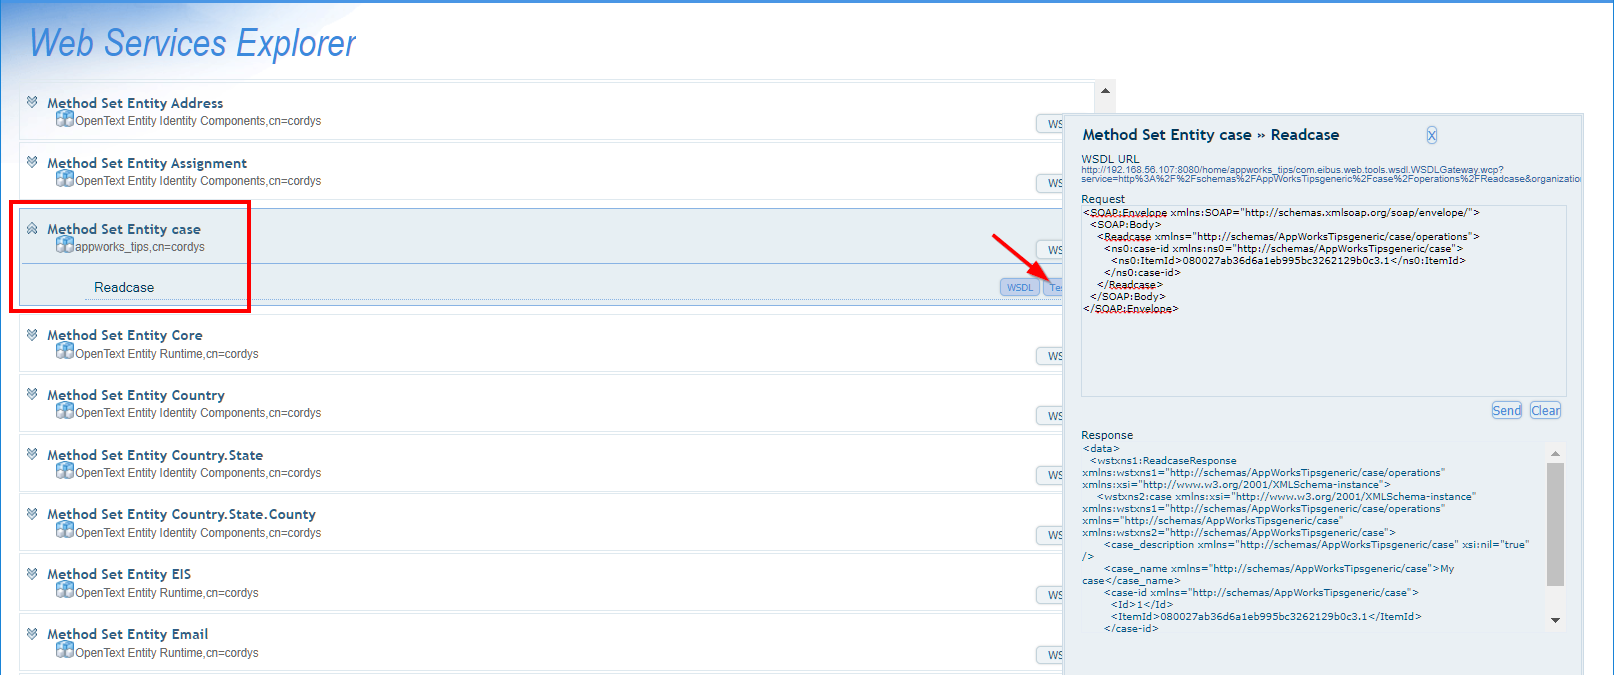
You can also access the service via the service layer of the platform http://192.168.56.107:8080/home/appworks_tips/services/
With the availability of our SOAP end-point it’s time to publish our entity to runtime.
Once ready we dive into the /app/admin part of our platform to gain access to our ReST API part on that same entity!
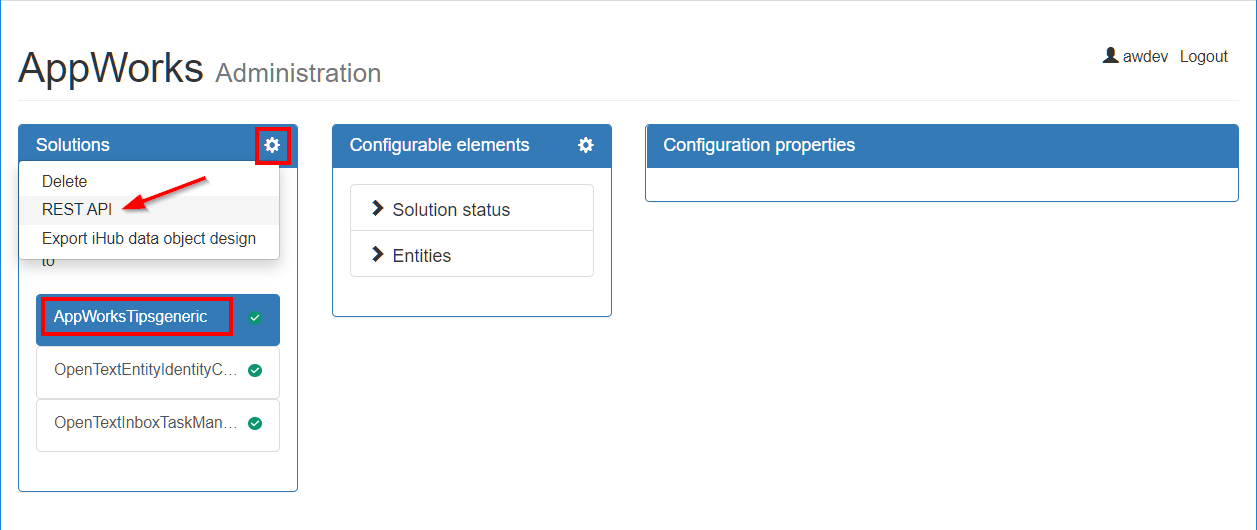
Note: This API is available since version 20.4! We already did a post on this ReST API layer.
You get an overview of entities, and the operations that are available for try-out.

We just try a ‘GET’ and give the entityId as input to see a result like this (as expected):
You might have that valid question why the ReST API is in its full glory exposed with all the CRUD operations without assigning any service group container!? Well, that’s because the ReST API totally runs on its own and does not need any service group to handle the request. You will also see that the requests we will do with Postman for ReST are not posted through the AppWorks main service called the ‘Gateway’ where the SOAP requests normally will be executed!
Great…All ready!…get set…next…
Postman (initial setup)
To grab the installation package of Postman, I would like to redirect to this site. For this post I use the postman app on my Windows machine (Postman-win64-8.0.4-Setup.exe). After installation and that first start-up you see a screen like this one where we just skip the account creation:
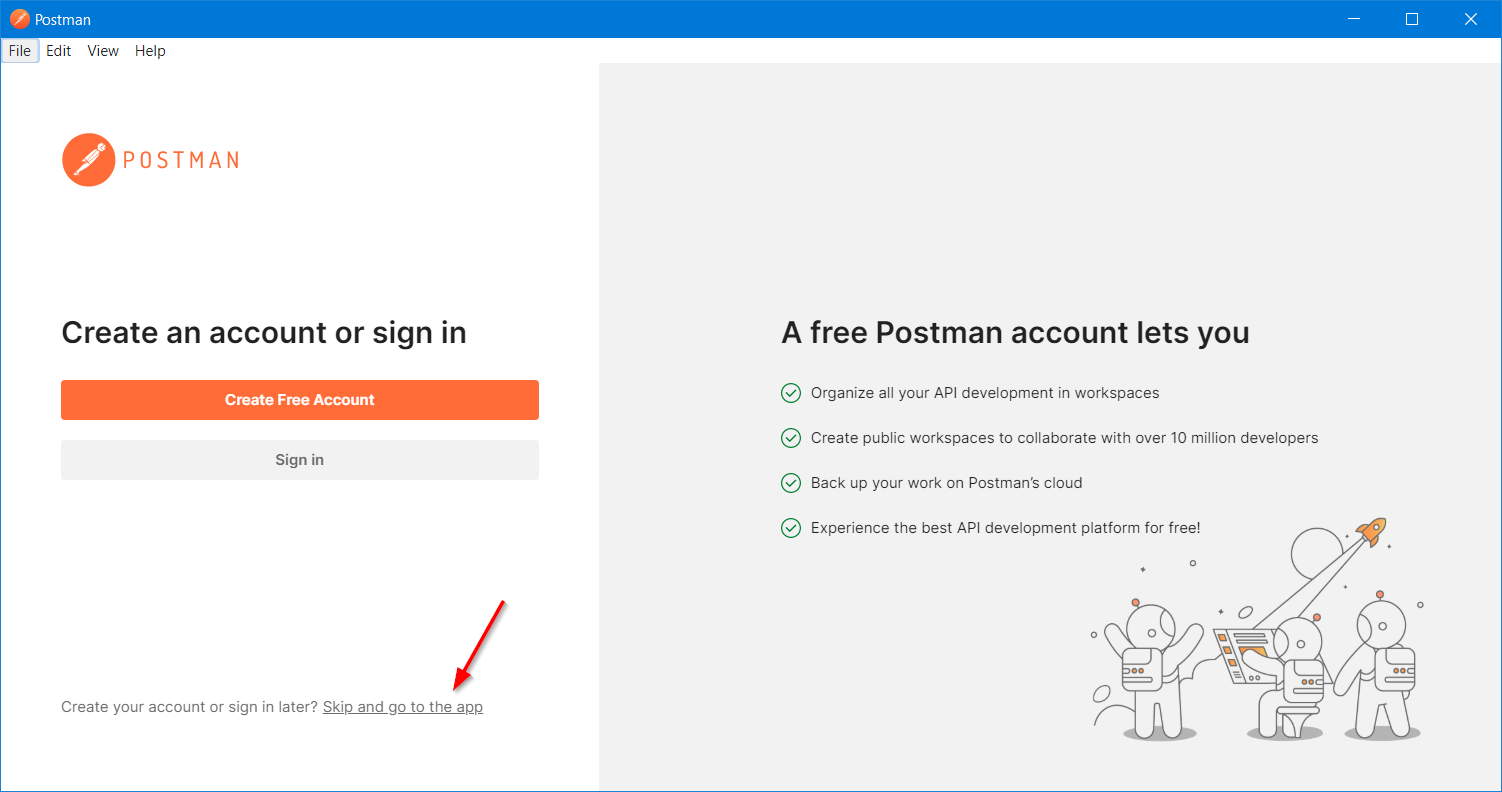
You are always free to create an account that will bring some cloud benefits, but it’s not required for this post! You will also see some annoying yellow message that you really want to work in a “workspace”…Trust me…It’s not required at all.
Start-off by creating a new ‘Environment’…
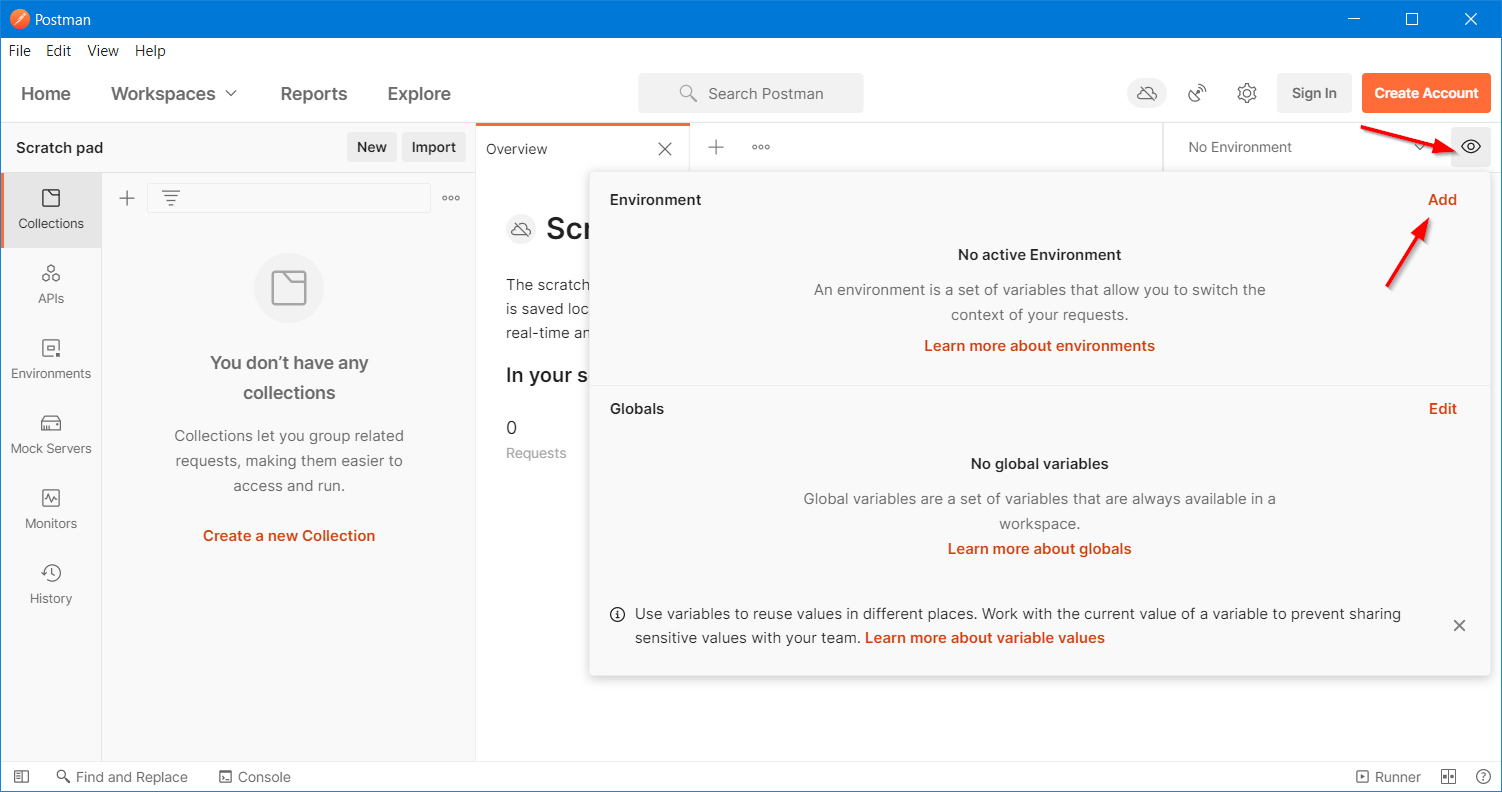
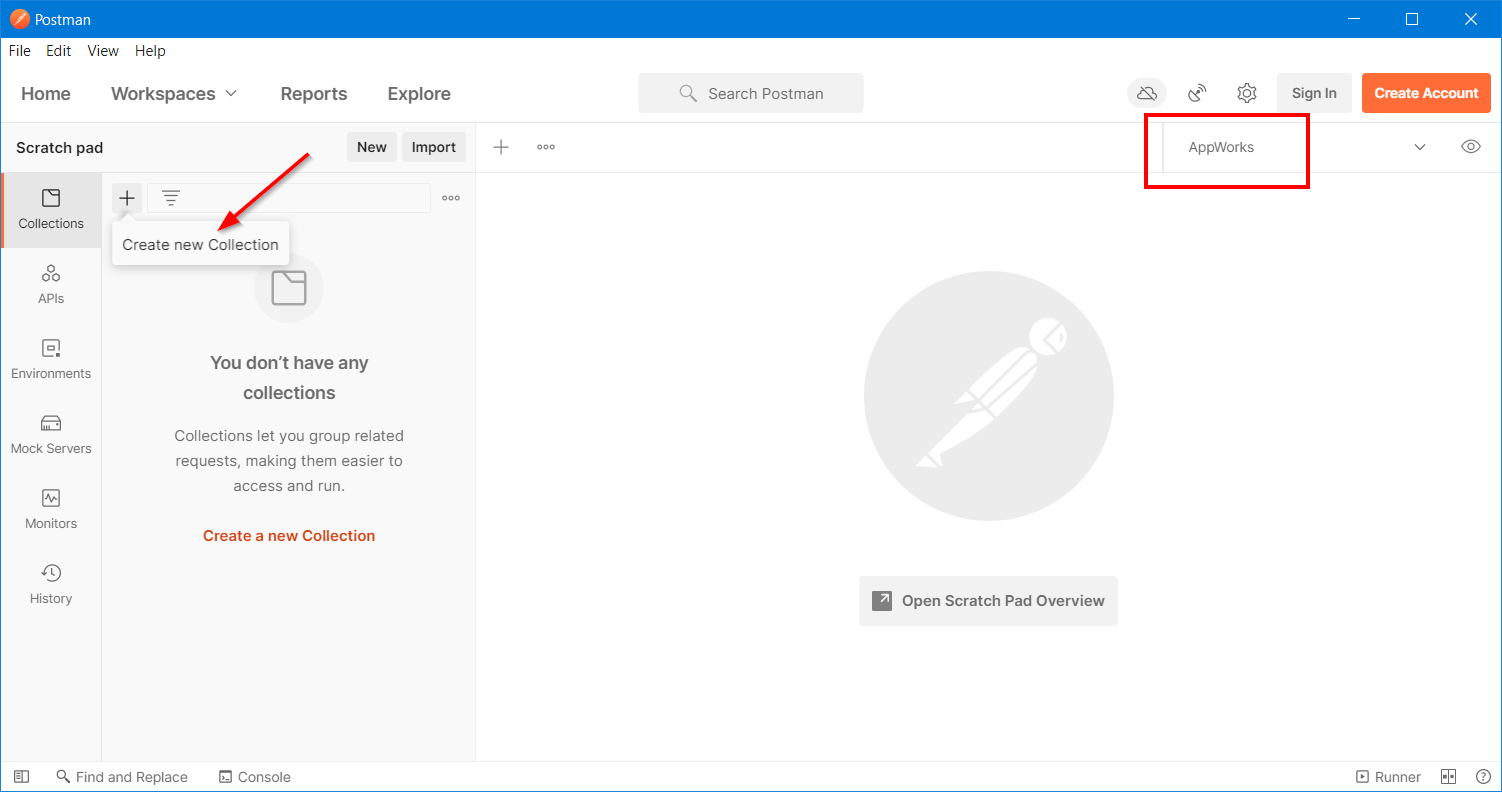
We call the environment ‘AppWorks’, and we leave all the variable as is (we will use a so-called ‘Collection’ variable for this post). Switch to this new environment and close all the other tabs so, we have a fresh start like this where we start to create a new collection:
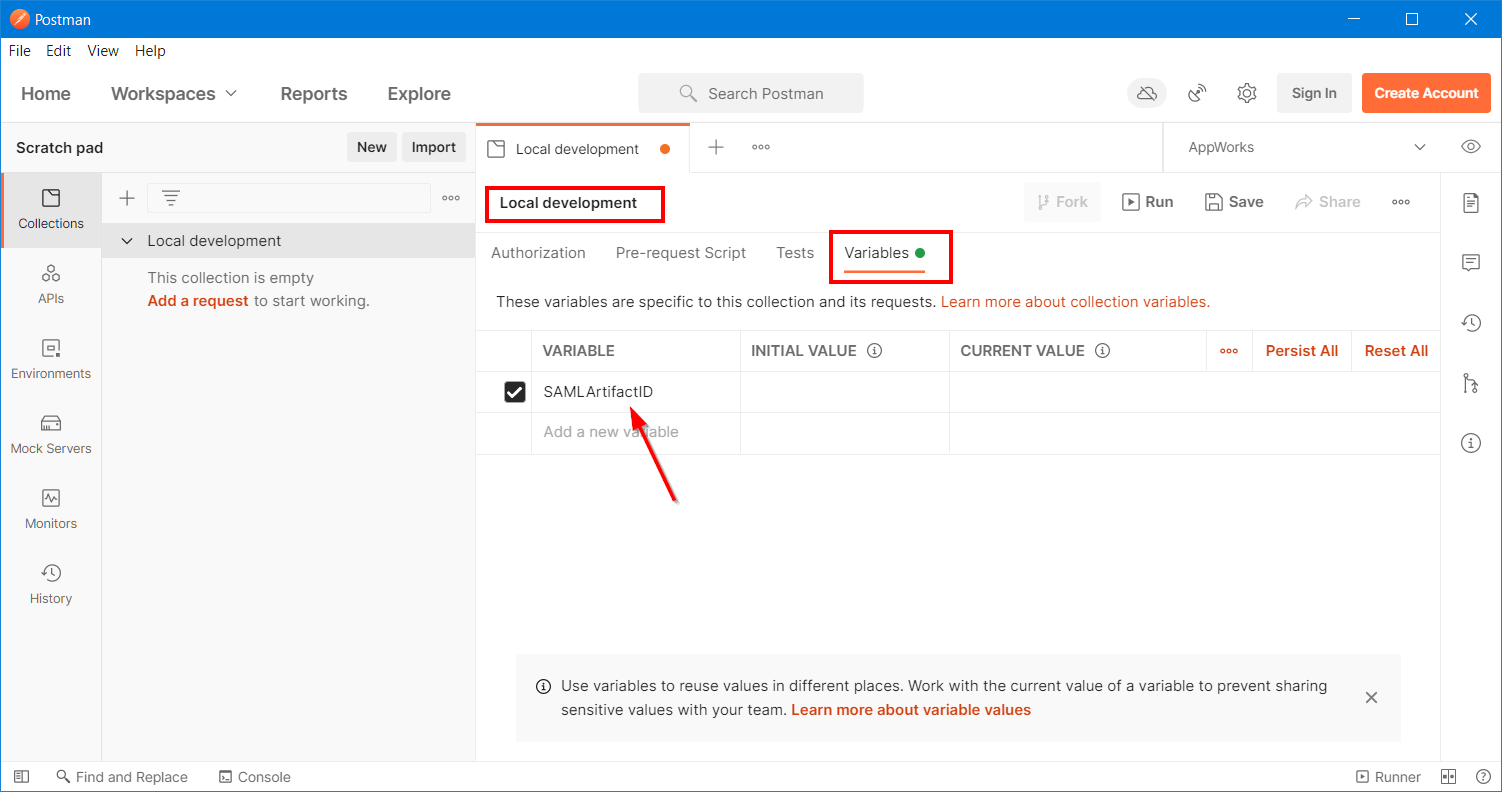
Give a name like ‘Local development’ and make sure to add a collection variable called ‘SAMLArtifactID’…Like this:
Authenticate (via SOAP)
After this step you we can add our first new ‘Request’ in this collection! This first request will be an ‘Authentication’ request to grab a SAML artifact ID. Read more about SAML here, but it’s just a standard for authentication and authorization between the client and server.
So, add that new request with the name ‘Authenticate’ and make sure it’s a POST request to http://192.168.56.107:8080/home/appworks_tips/com.eibus.web.soap.Gateway.wcp
You see it’s a post request to the AppWorks ‘Gateway’ end-point which handles all the SOAP messages requested to our platform. So, with this request we also need to pass some XML data in the body looking like the next XML. Have a look at it and see it contains the username and password of the platform user I normally use for all my posts.
1 | <SOAP:Envelope xmlns:SOAP="http://schemas.xmlsoap.org/soap/envelope/"> |
Where did I gain this wisdom? Well, check the Chrome developer tools during your login procedure in runtime

This is how it looks like in Postman after I’ve triggered the ‘Send’ button!
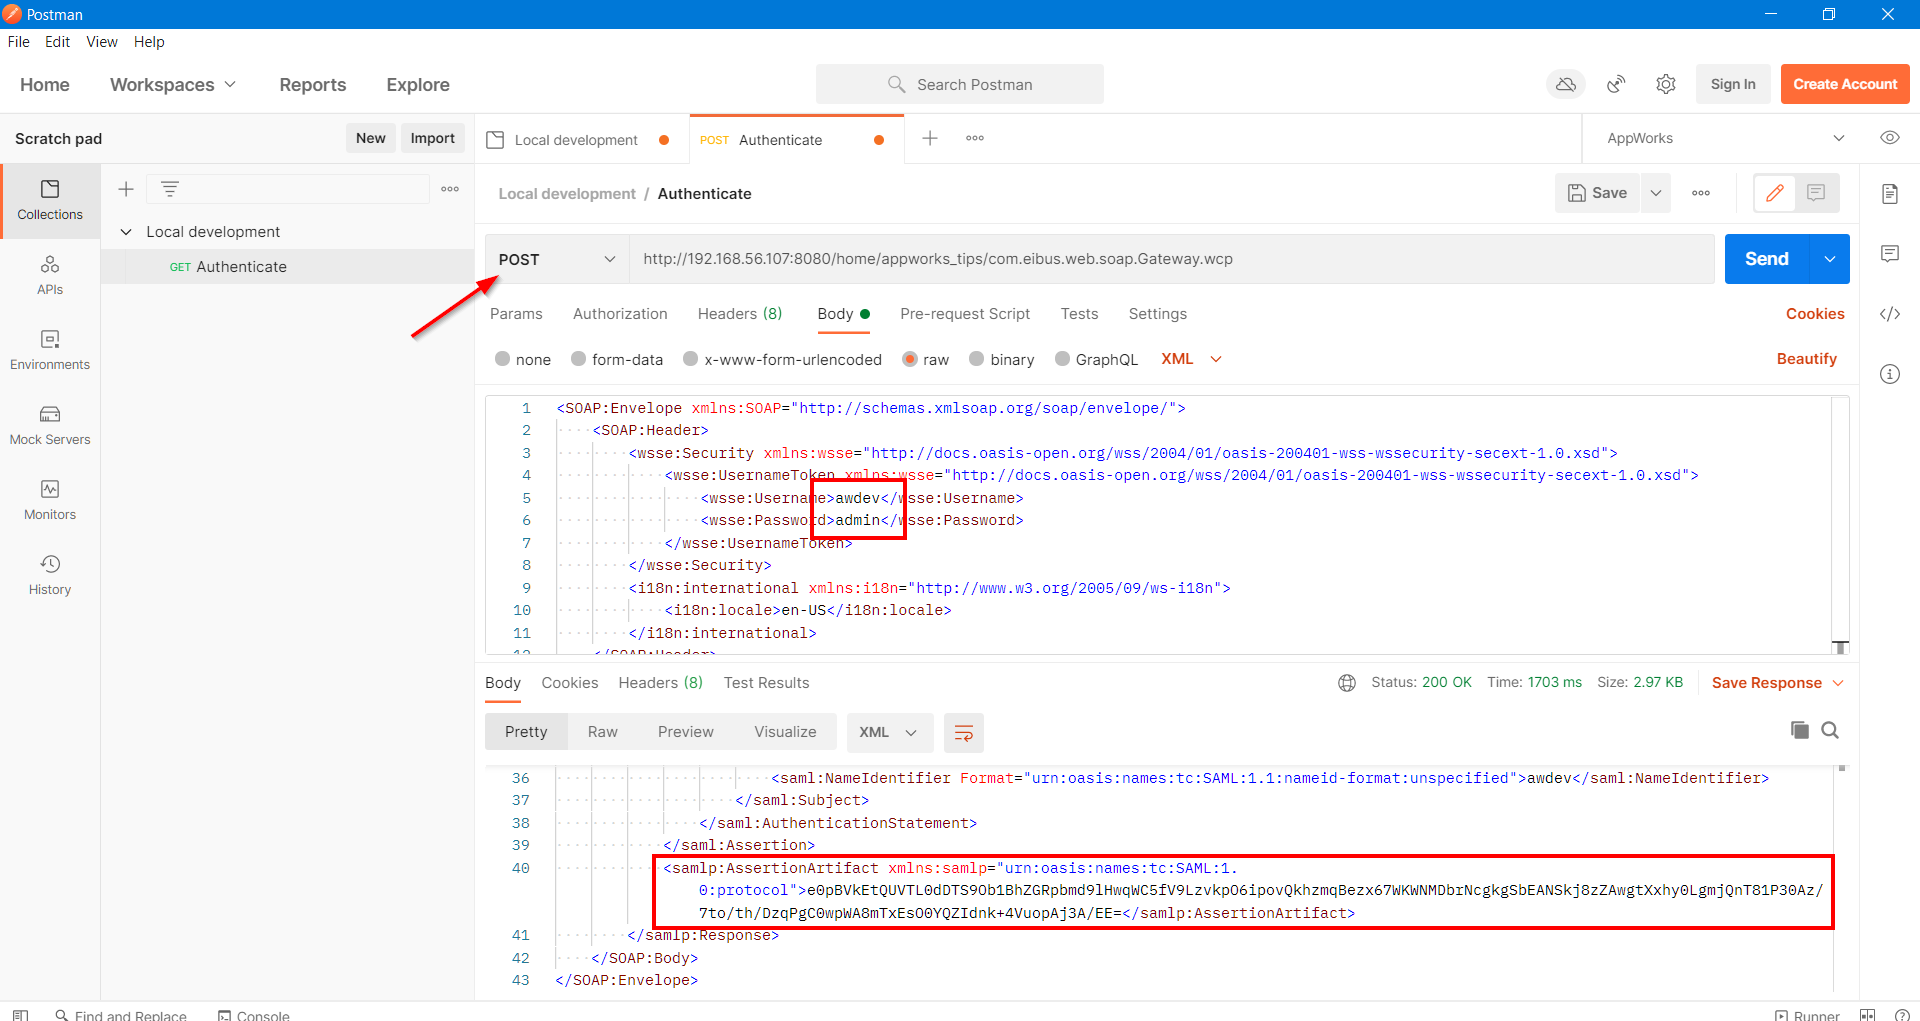
There is nothing changed in the ‘Params’, ‘Authorization’ or ‘Headers’ tab!
You can clearly see I get a response back with the ID of the AssertionArtifact (aka our SAML Artifact ID!)
Next step is to save this ID in our collection variable and reuse it in our next requests…
Let’s jump to the ‘Tests’ tab of our ‘Authenticate’ POST request and add a simple JavaScript part in the test section to grab the ‘SAMLArtifactID’ for further requests:
1 | var jsonObject = xml2Json(responseBody); |
What does it do? In simple words:
- Turn the XML response into JSON and log it out in the console (this can be opened in bottom bar of Postman…If you didn’t have noticed!?)
- From the console output you can easily follow that path to grab the ID of the ‘jsonobject’ that we also log for verification
- Finally, we set out collection variable with the ID. Where ‘pm’ is just a shortcut for ‘postman’
- You also see a commented line where we set the same variable on environment level (if you prefer to save it in that scope)
Finally, you will have a filled in variable on your collection that can be reused in further requests:

Next…
ReadCase (via SOAP)
Now let’s call our exposed SOAP service on the entity ‘case’ with that already tested ‘Readcase’ operation!
For that we add a new POST request to our ‘Gateway’, but this time with an extra parameter called ‘SAMLart’ that we fill with our retrieved variable. The URL looks like this: http://192.168.56.107:8080/home/appworks_tips/com.eibus.web.soap.Gateway.wcp?SAMLart={SAMLArtifactID}
All we need to do is adding a body which contains the same data as the early tested SOAP request from the ‘Service Test Tool’ artifact in AppWorks (I striped the namespaces in the example below):
1 | <SOAP:Envelope> |
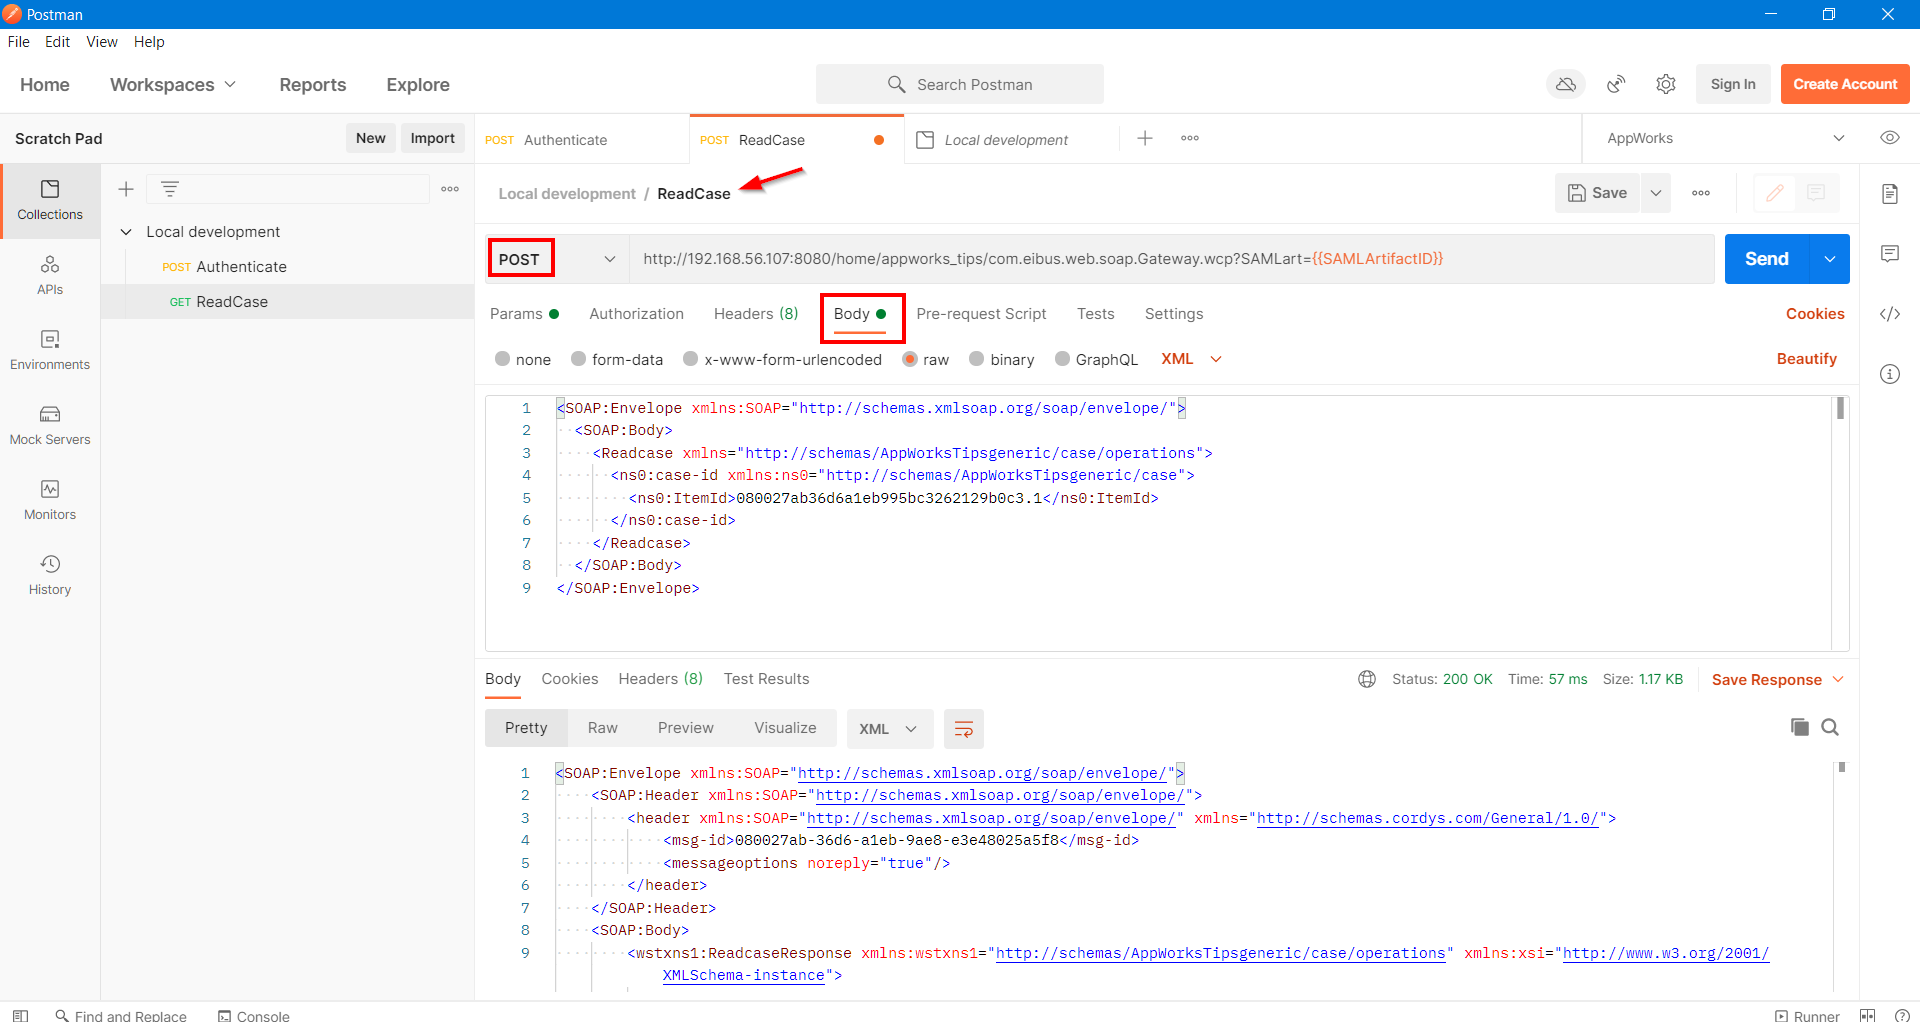
In my screenshot you see a green ‘GET’, but it’s a ‘POST’…I don’t know why Postman isn’t updating the flag…even after a restart!?
This is the response I get in XML (I striped the namespaces again):
1 | <SOAP:Envelope> |
You can clearly see my ‘case’ properties passing by in the response…great!…next…
ReadCase (via ReST)
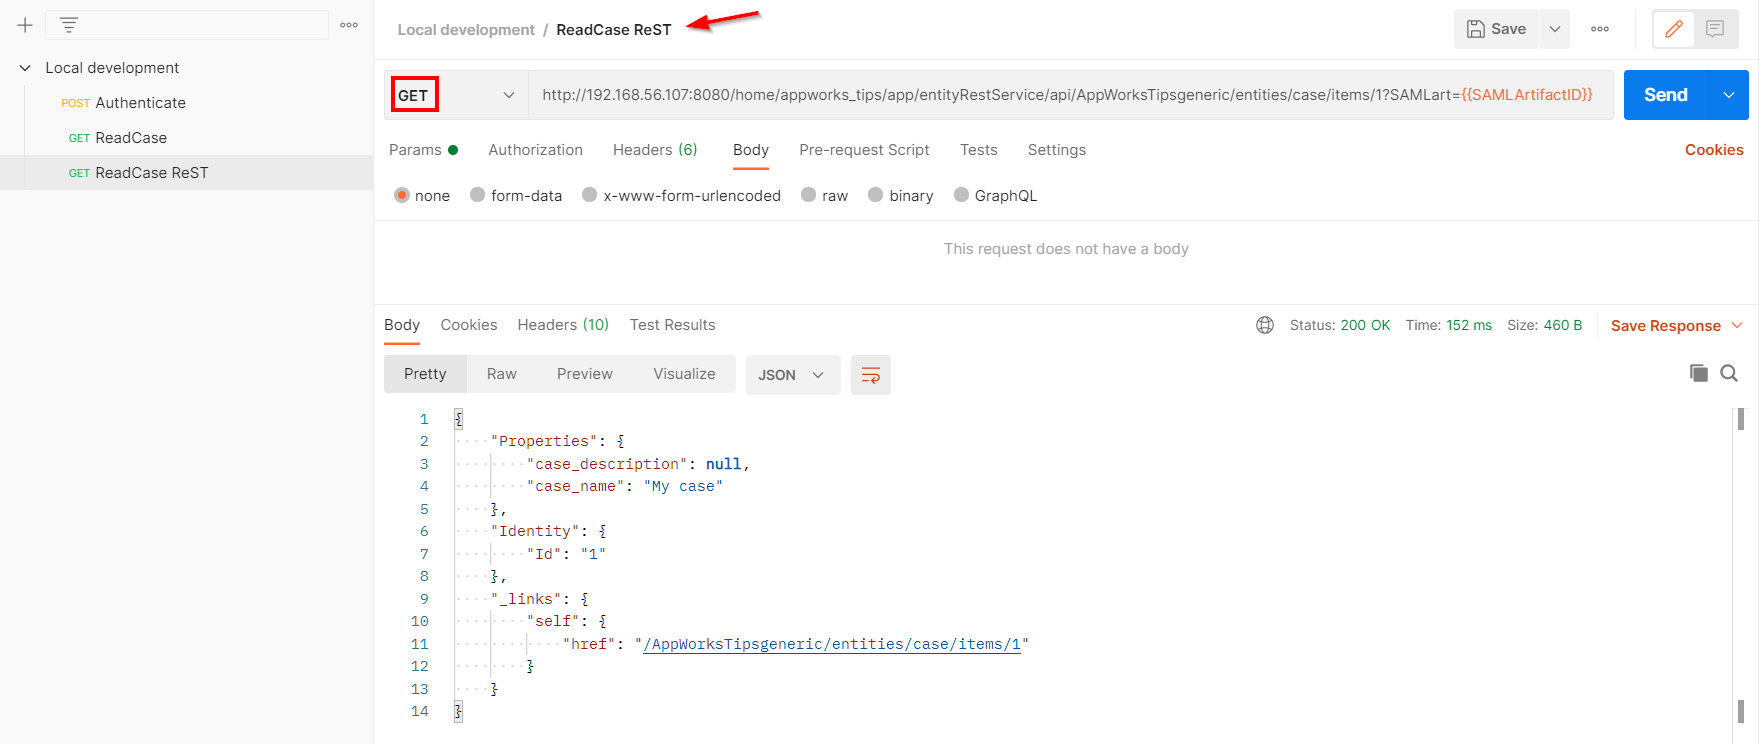
Well, it’s the same exercise, but this time a real GET request to this URL (with again that ‘SAMLart’ parameter!):
http://192.168.56.107:8080/home/appworks_tips/app/entityRestService/api/AppWorksTipsgeneric/entities/case/items/1?SAMLart={SAMLArtifactID}
No ‘body’ (also no extra headers) is required as the URL already ‘knows’ we’re in the ‘case’ scope, and we already define a certain ID…In my case a ‘1’…Check the URL again on this thought!
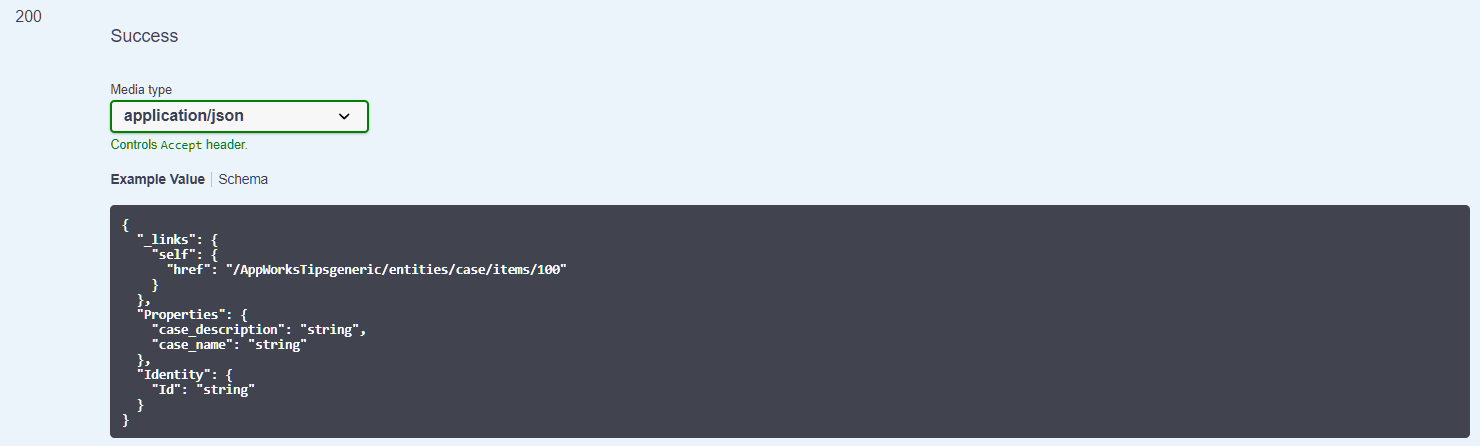
Behold the power of ReST as this is the response I get back…nicely in JSON (almost a standard these days in JavaScript web development):
1 | { |
Nailed it…Next…??
…
Well, that’s it…The world of AppWorks API’s is open for consumption from your best of all JavaScript framework.
Other resources
Before I went into the API walhalla also I had my struggles and that’s why I also would like to share this interesting forum question which is in line with this post where we find 2 interesting, shared knowledge articles. There we also see how to retrieve a SAML artifact with an OTDS token. If it’s unclear let it know in the comments, and I create a new post out of it on how to achieve also that challenge!
Since the delivery of the new ReST API with the platform we also get a new PDF manual called: OpenText AppWorks Platform 21.1 Entity REST API Developer Guide.PDF. A great start document which gives hope for the future of AppWorks. You see not all functionality is already available, but it’s a big step in the correct direction of the platform. For the “documentation readers”: There is also a document called ‘OpenText AppWorks Platform 21.1 API Reference Guide.pdf’ which also contains a ReST APIs section in chapter 4, but this is another API which required a deployment of the ‘BPMService.war’ (included in the software package). This API has no relation with the entity modeling principles and is an older API (which is still a valid one to be used but be careful in combination with Entity modeling!)
That’s it from my side…I give it a “DONE” where we exposed all the handles to start consuming the API layers (SOAP and ReST) from your own development toolset. On my backlog is a post about Aurelia and how to start with it together with DataTables which is an interesting combination to create fancy tables with a steady front-end. Why Aurelia? Well, maybe you already notices, but our AppWorks runtime is crafted with it. So, if you really want to have a good understanding how it all works it is best to play along with it…I see you in the next post! Have a great API consumption week-end.
Don’t forget to subscribe to get updates on the activities happening on this site. Have you noticed the quiz where you find out if you are also “The AppWorks guy”?
