Hi there AppWorks fans,
Welcome to a new installment of AppWorks tips.
In this post we’ll do some customization again. This time we’ll do some nice things on a result list panel within a homepage layout. It’s a feature that is available since 16.7 that looks like this:
It’s a long-listed item on my backlog that we bring forward with this post. We just create a nice ‘HelloWorld’ example for you to spin off the basic startup for you to continue to build with.
In overview what we need to build:
- Create an entity with some building blocks and a required list.
- Create a homepage with a result list panel.
- Add some JavaScript code to the project.
- Customize the results panel with that JavaScript.
Let’s get right into it…
We’ll just jump through the overview and see what nice things we can build with this post!
Starting with section 1…
Create an entity with some building blocks
We want to create a simple ‘HelloWorld’ example for the post so, we just create a new entity with the name ‘project’…Yeah…Could also be ‘hello_world’, but the ‘project’ entity was already available in my project!
For my ‘project’ entity (that is saved in the ‘entities’ folder of my project) I added these properties
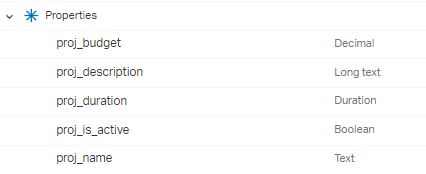
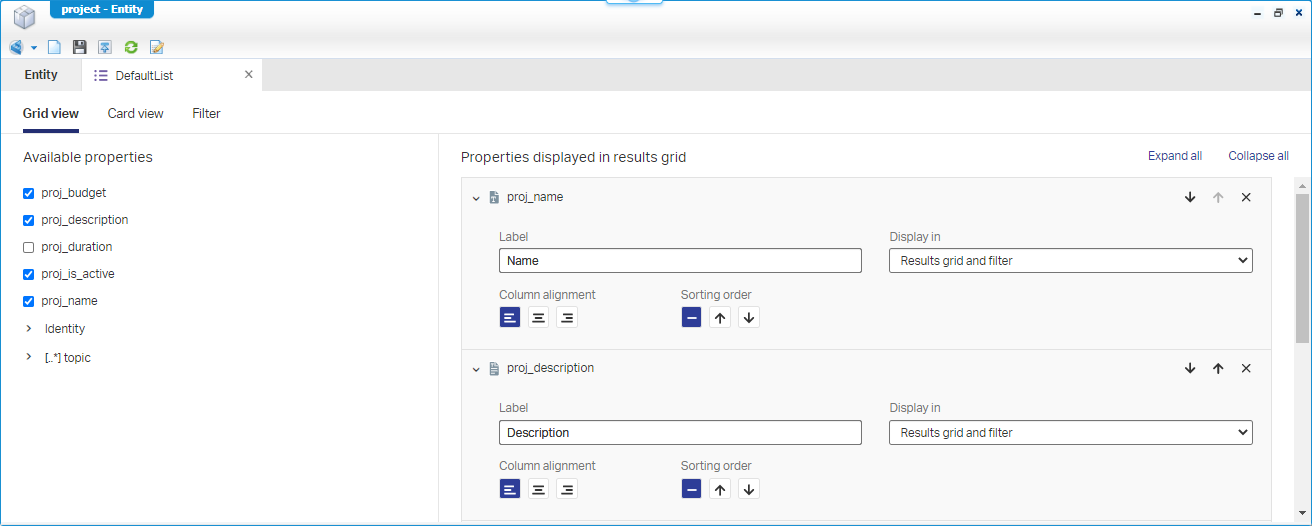
Next is adding a new list building block with for example the name ‘DefaultList’ to view instances in runtime. Make sure you add (at minimal) the properties ‘proj_name’ and ‘proj_description’ as we use them later on in our scripting!
As last step for this section we add the Create/Default forms with this craftsmanship where the Default form will just show the ‘Create’ form…You know how to build this…correct?…Let me know in the comments otherwise!

Publish the ‘project’ entity and make sure you create some new instances in runtime before we go to the next step. Make sure you create instances where the project name/description is filled with some data as we will use those values later on!
Next…
Create a homepage
We start with a new ‘homepages’ folder in the project and in that folder we create a new document of type ‘Home Page Layout’. Give it a value like ‘Homepage’ and hit the blue ‘Configure’ button!
You get a clean page where we need to drop a ‘Results’ panel on (dragged in from the left panel).
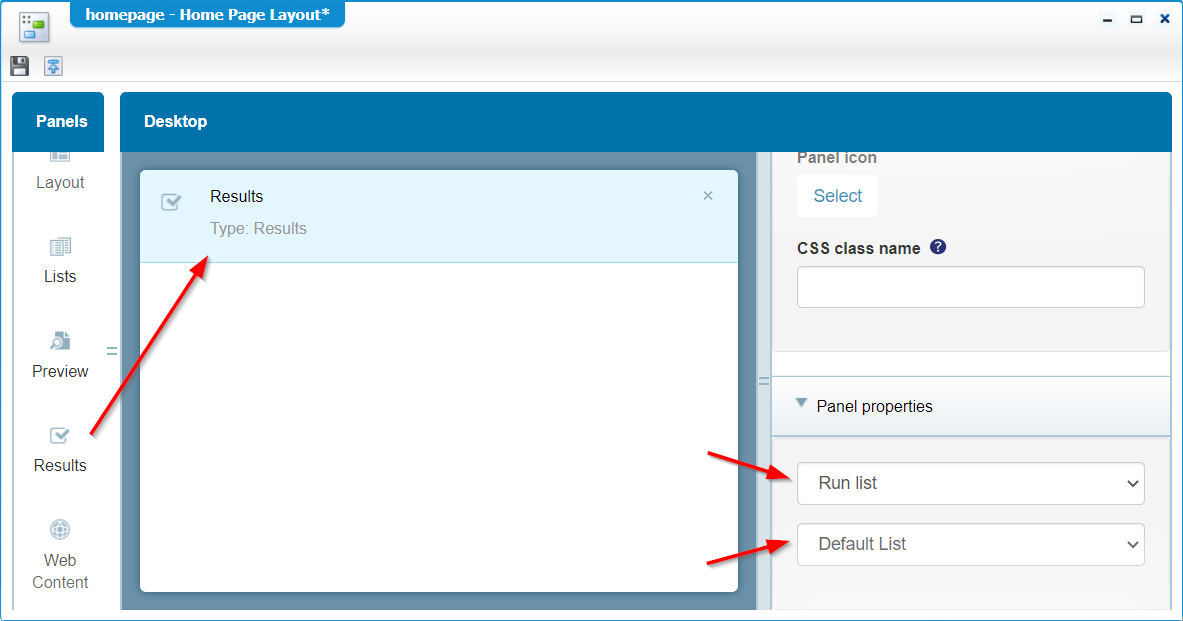
Make sure to select to run a list on this panel and select the previous created ‘Default List’ from our project entity.
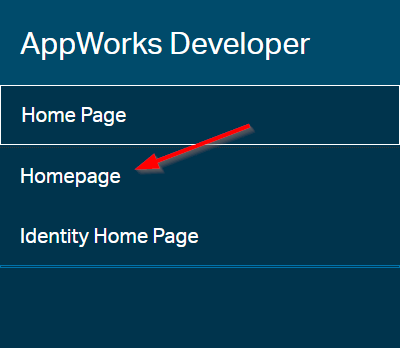
Save it, publish, and test it in runtime…Where you can select the new homepage from the hamburger menu.
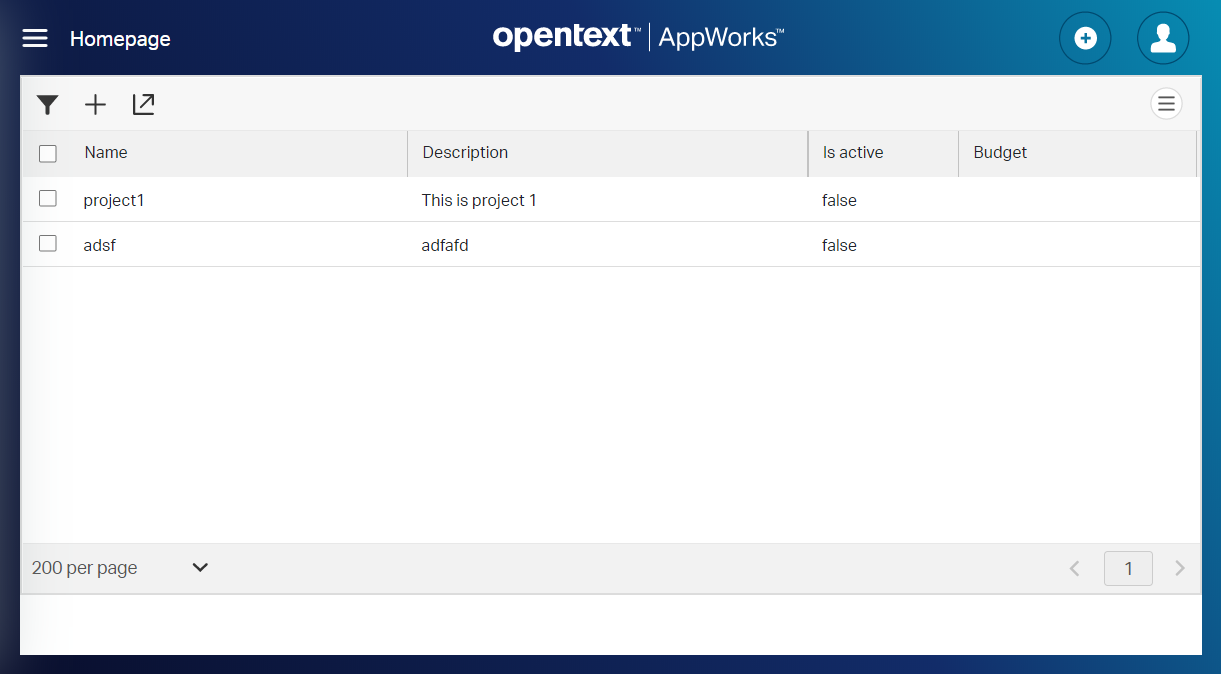
You should see something like this where we just show our project entity instances with some values for the ‘Name’ and ‘Description.’
Next…
Add some JavaScript code
We’re getting close on customizing the results panel, but first things first!
From experience, we know that our customization will evolve some XML, and some JavaScript code (in my case a ‘my-control.js’ file). The XML will be crafted in the next sections, but the JavaScript is something else as it needs to be found by our solution in runtime! That’s where it gets tricky because the “my-control.js” file must be available in this location in runtime: http://192.168.56.107:8080/home/appworks_tips/custom%20components/my-control.js
You read it correct…That is a ‘custom components’ folder somewhere on the server. To be more specific in this location (under ‘webroot’) on the server: /opt/opentext/AppWorksPlatform/defaultInst/webroot/organization/appworks_tips/custom components/my-control.js
How do we get it there from design time!? Just follow the steps!
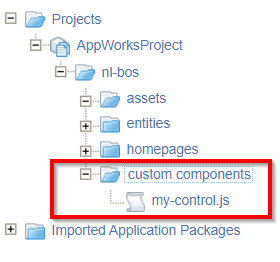
First start with the ‘custom components’ folder in your project structure.
Create a new document of type ‘JavaScript Source’; keep it empty and save it with the name ‘my-control.js’
![custom_result_008]()
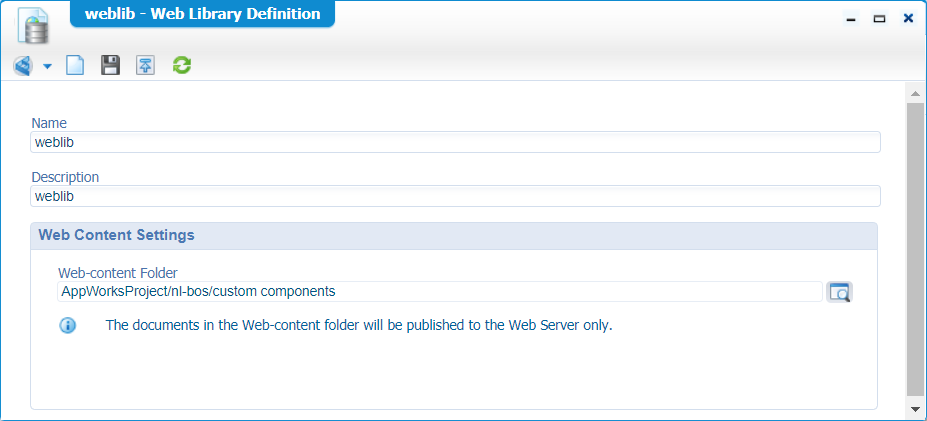
In that same ‘custom components’ folder you create a new document of type ‘Web Library Definition’ with the name ‘weblib’ that will point to the current folder
AppWorksProject/nl-bos/custom components![custom_result_009]()
When you would publish this thing now you will see that the ‘my-control.js’ file is published on the server in this location
/opt/opentext/AppWorksPlatform/defaultInst/webroot/organization/appworks_tips/nl-bos/custom components/my-control.jsIt’s indeed in the ‘webroot’, but not the correct location! Check the next step.
Right click the ‘nl-bos’ folder and set it as ‘Start Point of Qualified Name’
![custom_result_010]()
Now do you publish again and check the server for the correct location…it’s fine…correct?
This should be it:
/opt/opentext/AppWorksPlatform/defaultInst/webroot/organization/appworks_tips/custom components/my-control.js
Next…
Customize the results panel
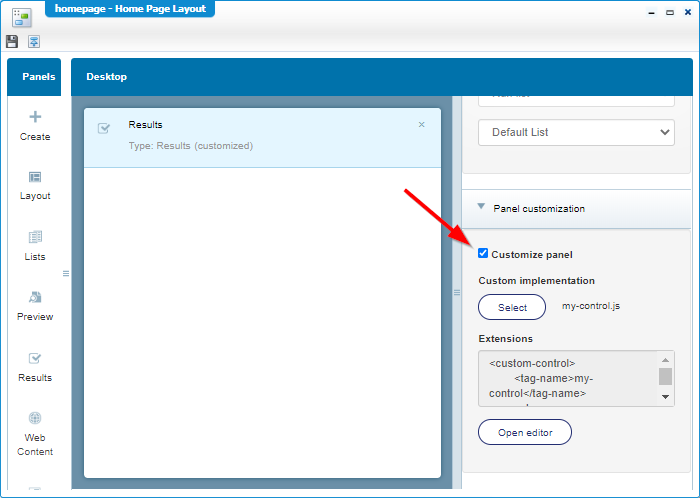
Let’s go back to our homepage in design time and click on the ‘Results’ panel for some customization magic.
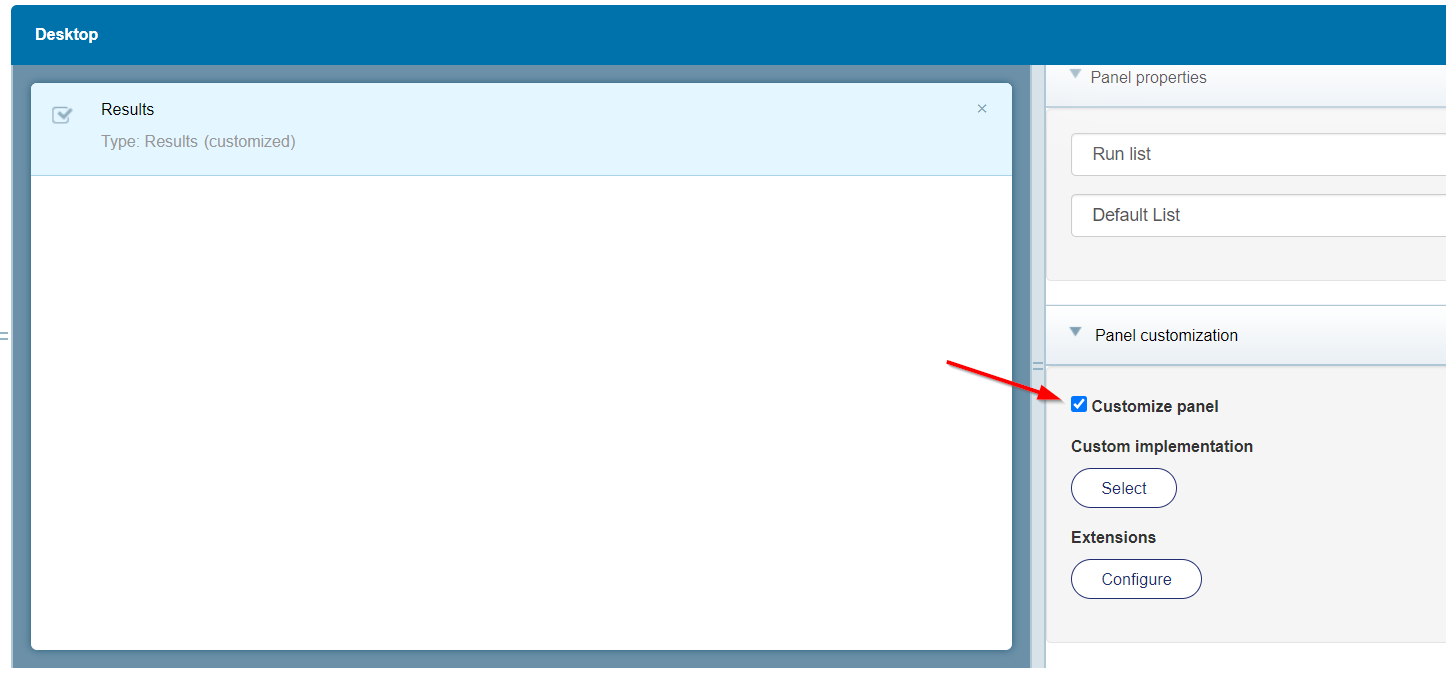
For the ‘Extensions’ we can use the next XML part with these explanation bullets:
- The value of tag-name is ‘my-control’ and needs to match the ‘customElements.define(‘my-control’, MyControl);’ in our ‘my-control.js’ file…You’ll see it later!
- The ‘true’ value for ‘show-actions’….well….will show the actions; I guess the actions that can be used normally on a list like the creation of a new ‘project’ entity in my case.
- Those properties match the property names (not the labels) of the properties on our ‘project’ entity. Those tag names for each property can be found back later in the JavaScript file.
Extensions XML
1 | <custom-control> |
For the ‘Custom implementation’ you just need to select our created ‘my-control.js’ file
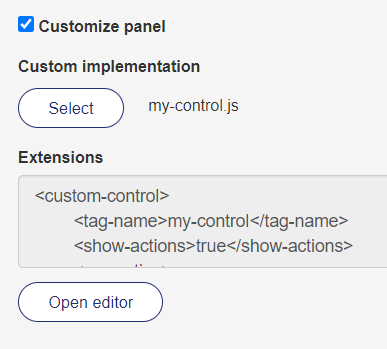
Connections are made, let’s do a publication of the homepage again and check out the runtime.
In runtime we take a look in the developer console with <F12> to see if our file can be found in the correct location:
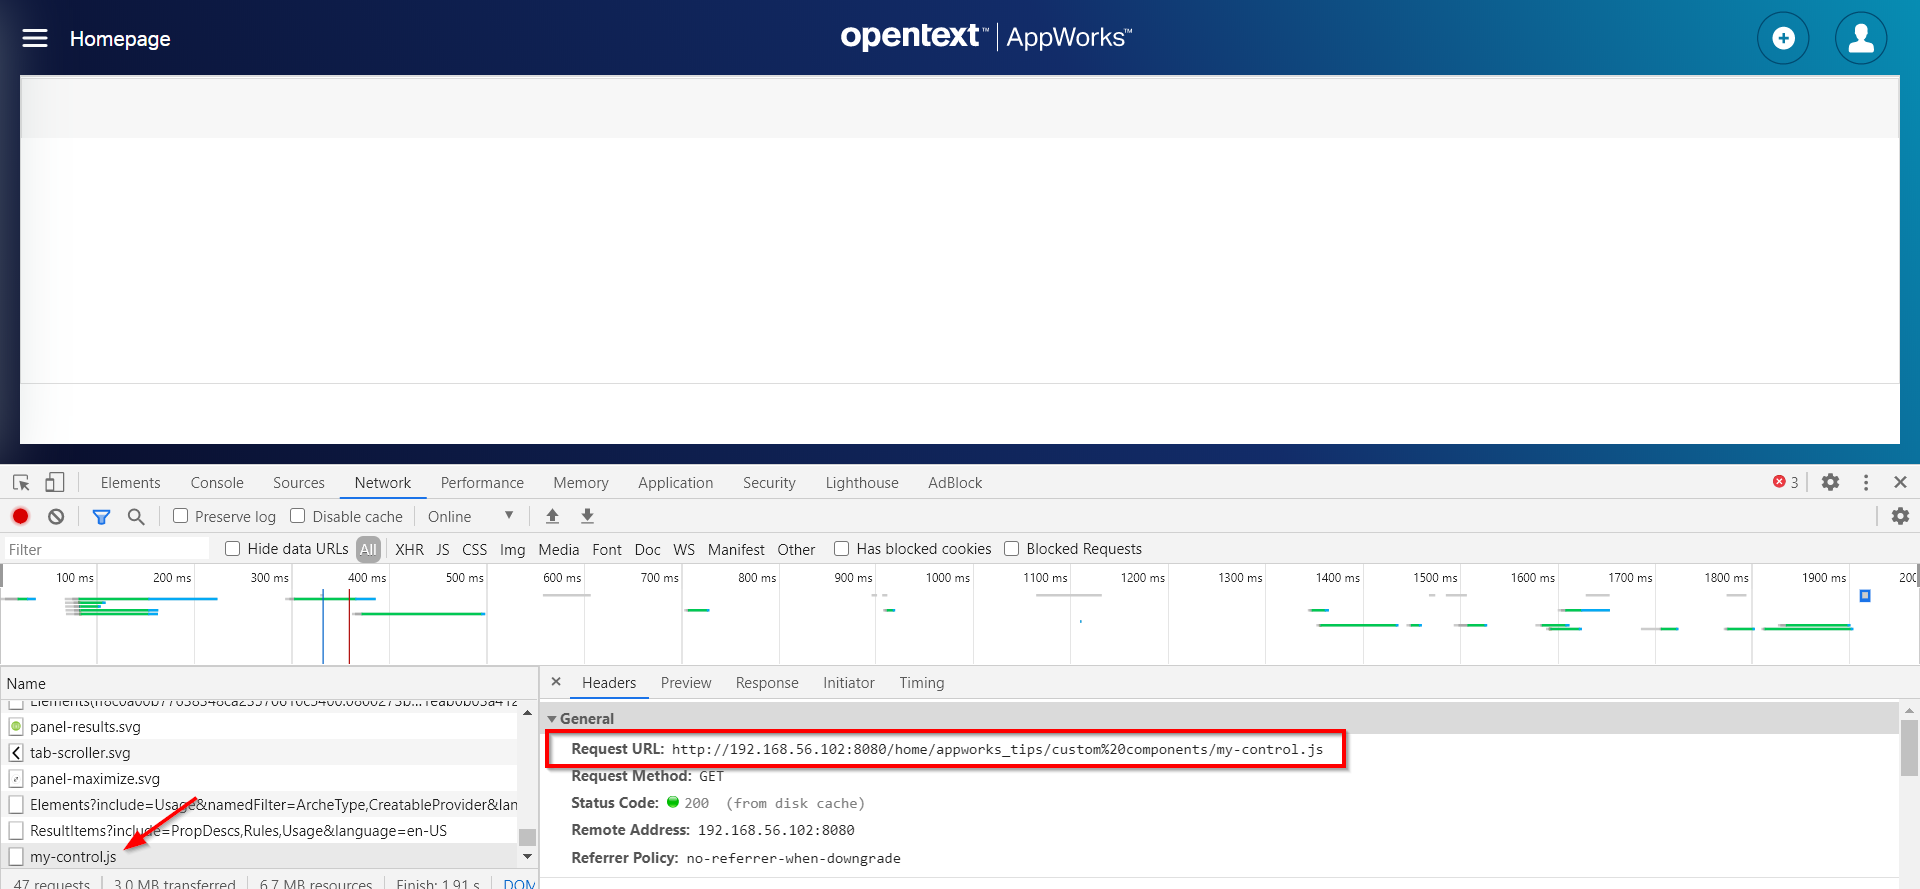
Only the result list is rather clean and empty? That’s correct because we don’t have any implementation of our JavaScript (yet)
Next…
The JavaScript implementation
Let’s start with a simple to understand change in the ‘my-control.js’ file!
The below code defines a new extended HTMLElement with the class name ‘MyControl’. That class is defined in the end of the code, so it’s ‘known’ within the UI.
The ‘innerHTML’ is the basics for our new page implementation that we can manipulate with JavaScript.
The ‘constructor()’ of the class is the first call on the opened page; just make sure you add those lines to spin off with a clean start page.
my-control.js
1 | const template = document.createElement('template'); |
Just copy that piece of code in the ‘my-control.js’ file that we already created and publish it to runtime.
Do a refresh of the page, and you should get this start result from the HTML and the console log.
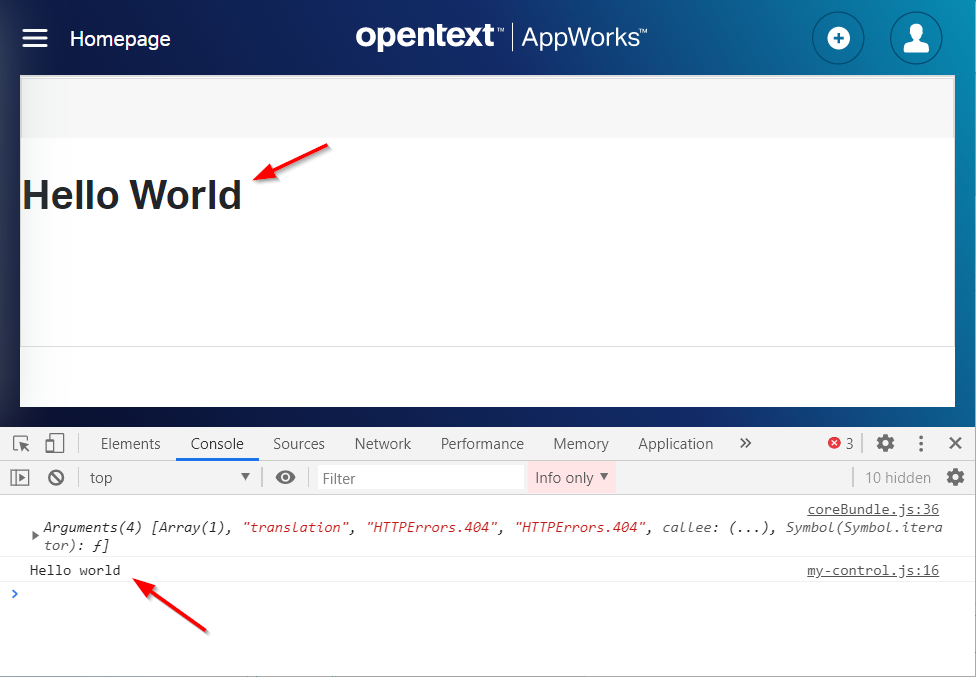
“That’s one small step for man, one giant leap for mankind.” as Neil quoted it when he landed on the moon!
Might be that you need to clean the browser cache, so the latest JavaScript file gets a download again after publishing
Next step…
Extending the JavaScript
Let’s first see if we can get a grip on our ‘project’ entity data!
For this we add these 2 methods in our ‘MyControl’ class
1 | /** |
You see that we can read our ‘extensions’ XML from design time with the ‘this.settings’ variable (you can see the mapping back in the XML tags for the ‘properties’ and ‘projName’). The console.log will output this data in the developer console, and you see that it matches the values as expected!

Great…next step…Let’s add two other methods:
1 | connectedCallback() { |
Publish again, clean cache and check the runtime developer panel
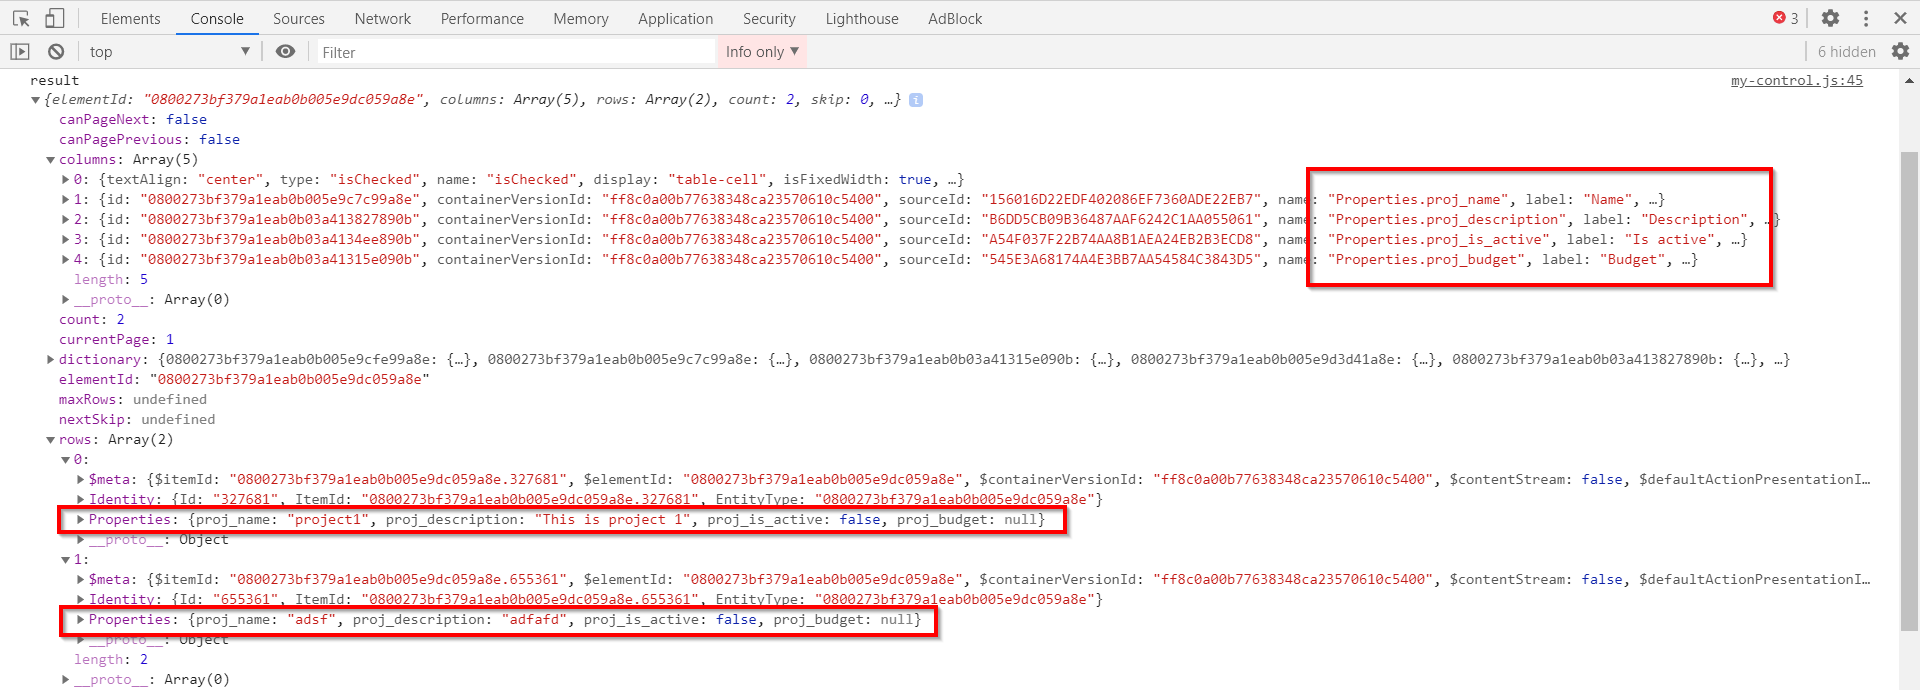
Now we’re getting somewhere! 💪
Let’s see if we can get this data into our page instead of in the developer console!
Update console.log('result', result) with this.generateView(result); and add a new method with this piece of code:
1 | /** |
You see we use a variable this.$projectRowsContainer that matches the variable that was introduced in the constructor of the ‘MyControl’ class. We fill it with our crafted HTML content in this ‘generateView’ method!
After a publication in runtime….

Ohhhh mama….How nice! 😍
This is the ‘my-control.js’ file so far. Version 1.
Next step…
Triggering actions from the JavaScript
Wouldn’t it be nice to call a ‘Create’ action in our customization, so we can create a new instance of our ‘project’ entity!?
Let’s add a button in our HTML template in the top of our code:
1 | <div> |
Now we need to make sure it triggers something when we click that thing in runtime…correct?
For that we add some more code in the end of our constructor. Just after that other variable: this.$projectRowsContainer
1 | this.$myCreate = this._shadowRoot.querySelector('.project-create'); |
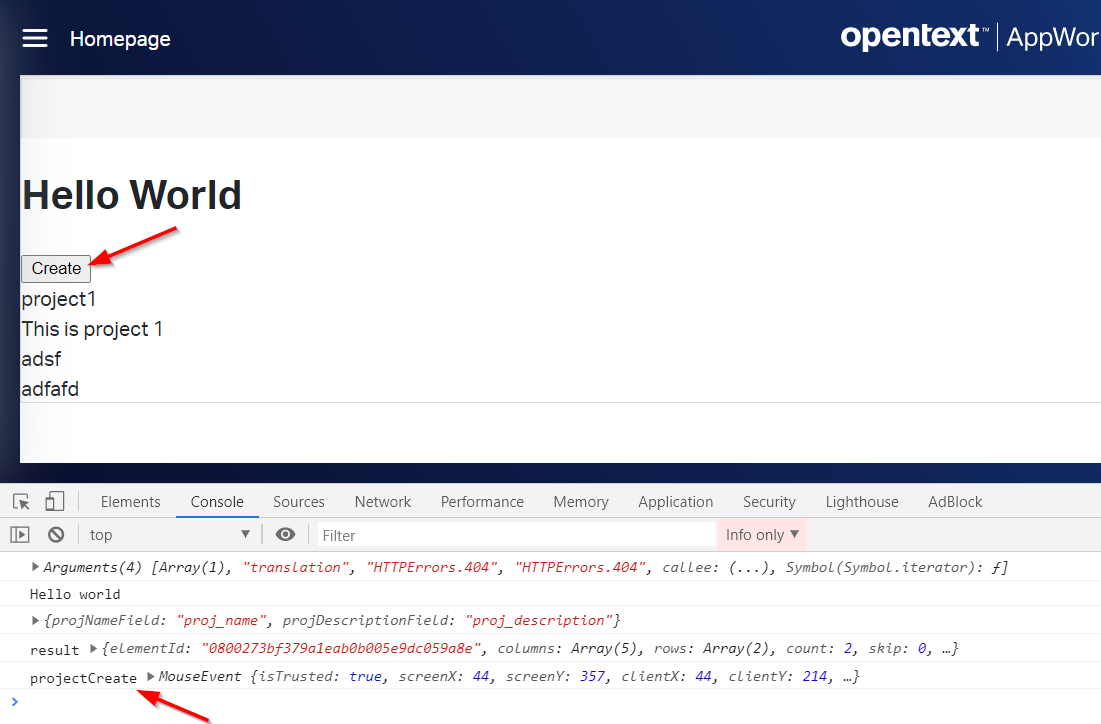
Nice to see that things work in runtime too!
Add some more code with these 2 methods in our class:
1 | /** |
Make sure the createItem is triggered from our event:
1 | this.$myCreate.addEventListener('click', e => { |
Publish to runtime and check it out…
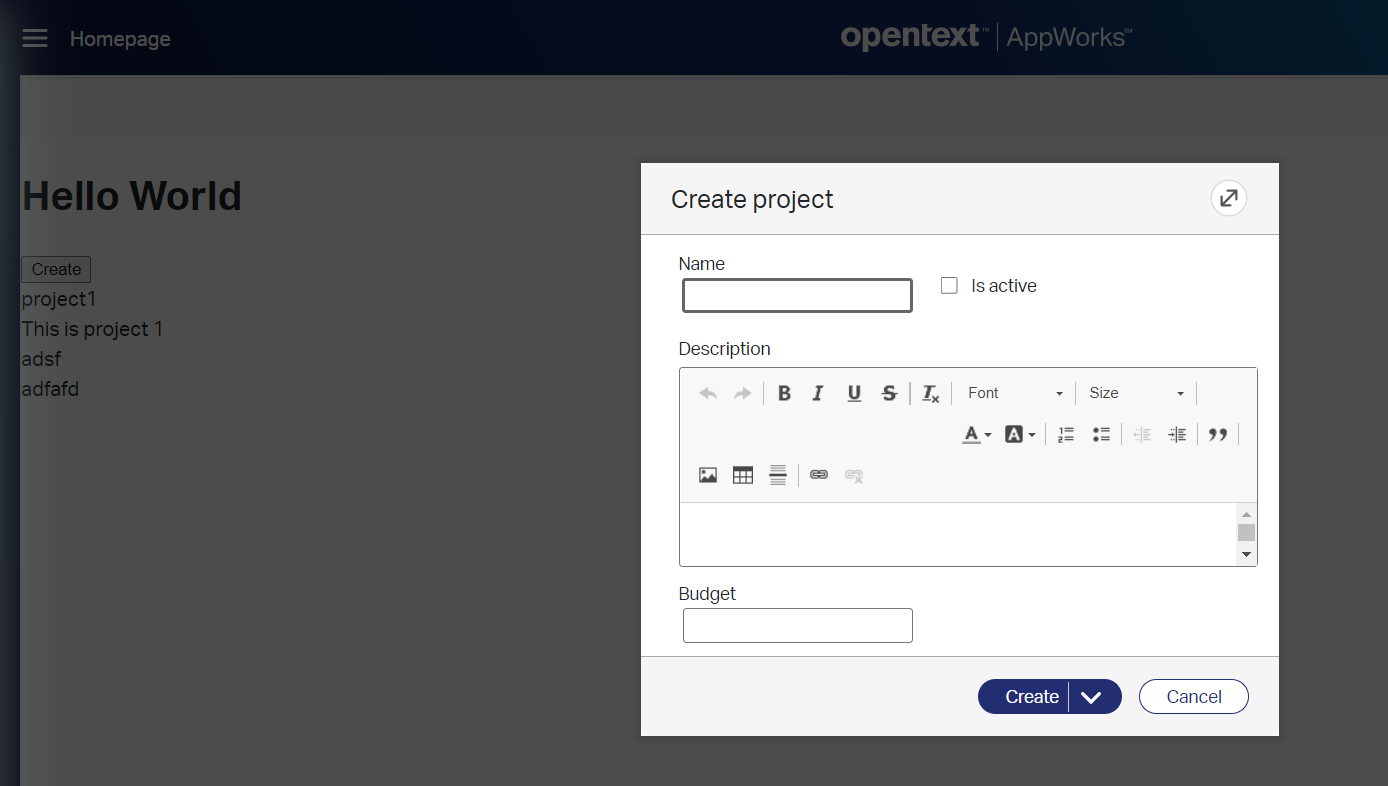
And that’s ‘beer time 🍺’ as we just triggered the new project screen from our entity modeling building blocks with some simple JavaScript commands…How nice is this stuff!?
Well…where are you waiting for?…Create the thing and refresh the page (for now manually, but we’ll fix that!)
Next…
This is the ‘my-control.js’ file so far. Version 2!
Refresh that page after entity creation!
Real simple?…Sure…Just add these 2 methods in the ‘MyControl’ class, and the page gets a refresh automagically when a new instance in created…How nice!
1 | /** |
Style the data like it’s a table view
Also, pretty simple with this piece of CSS. You need to add it in the top of our ‘my-control.js’.
Just after :host { display: block; }
1 | .project-rows-container { |
After a new publish and clean cache you will get this result that looks much more like a table!
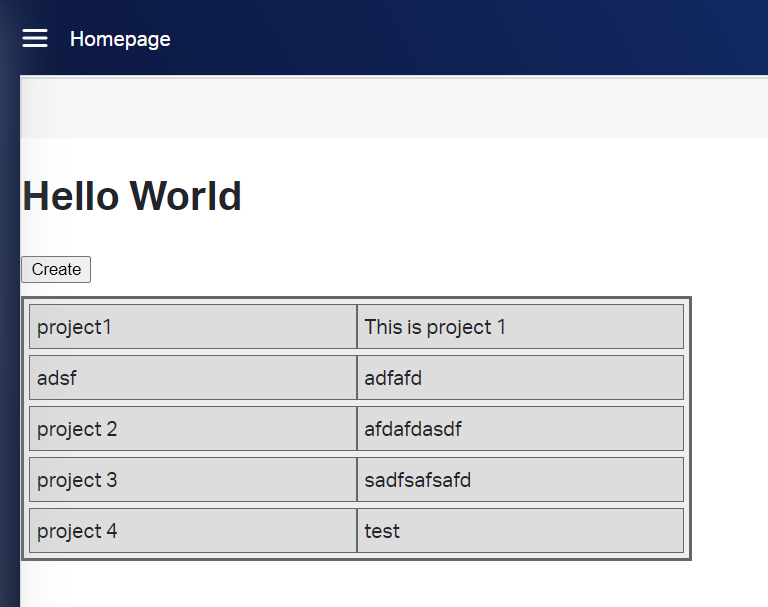
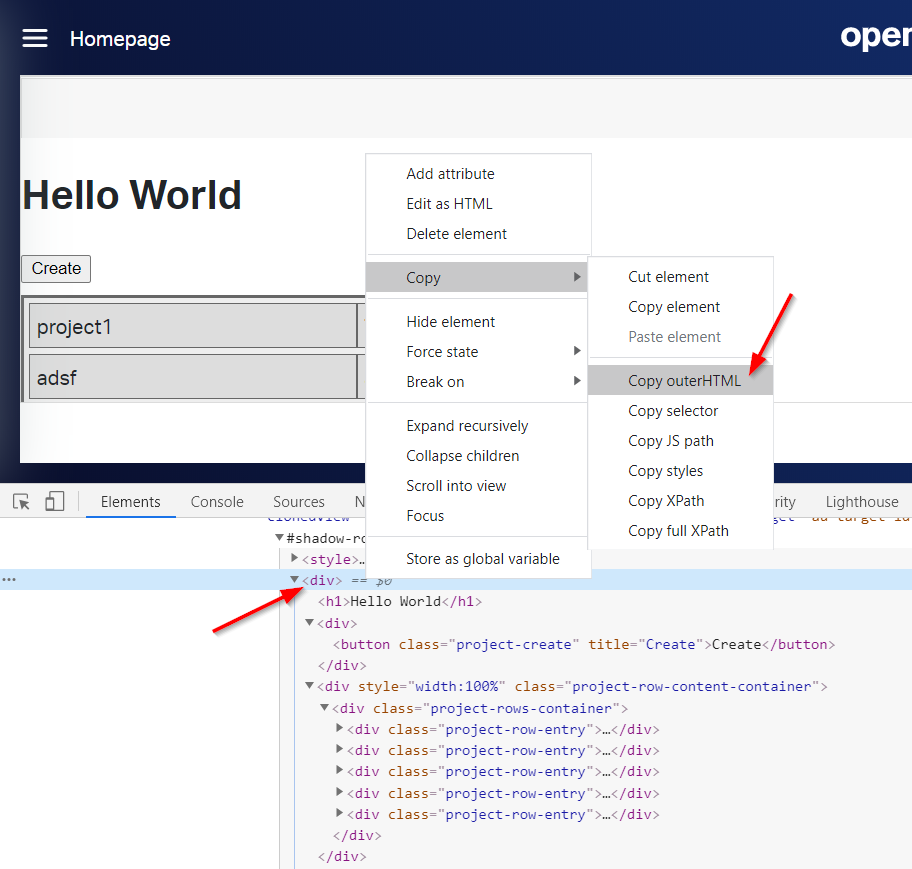
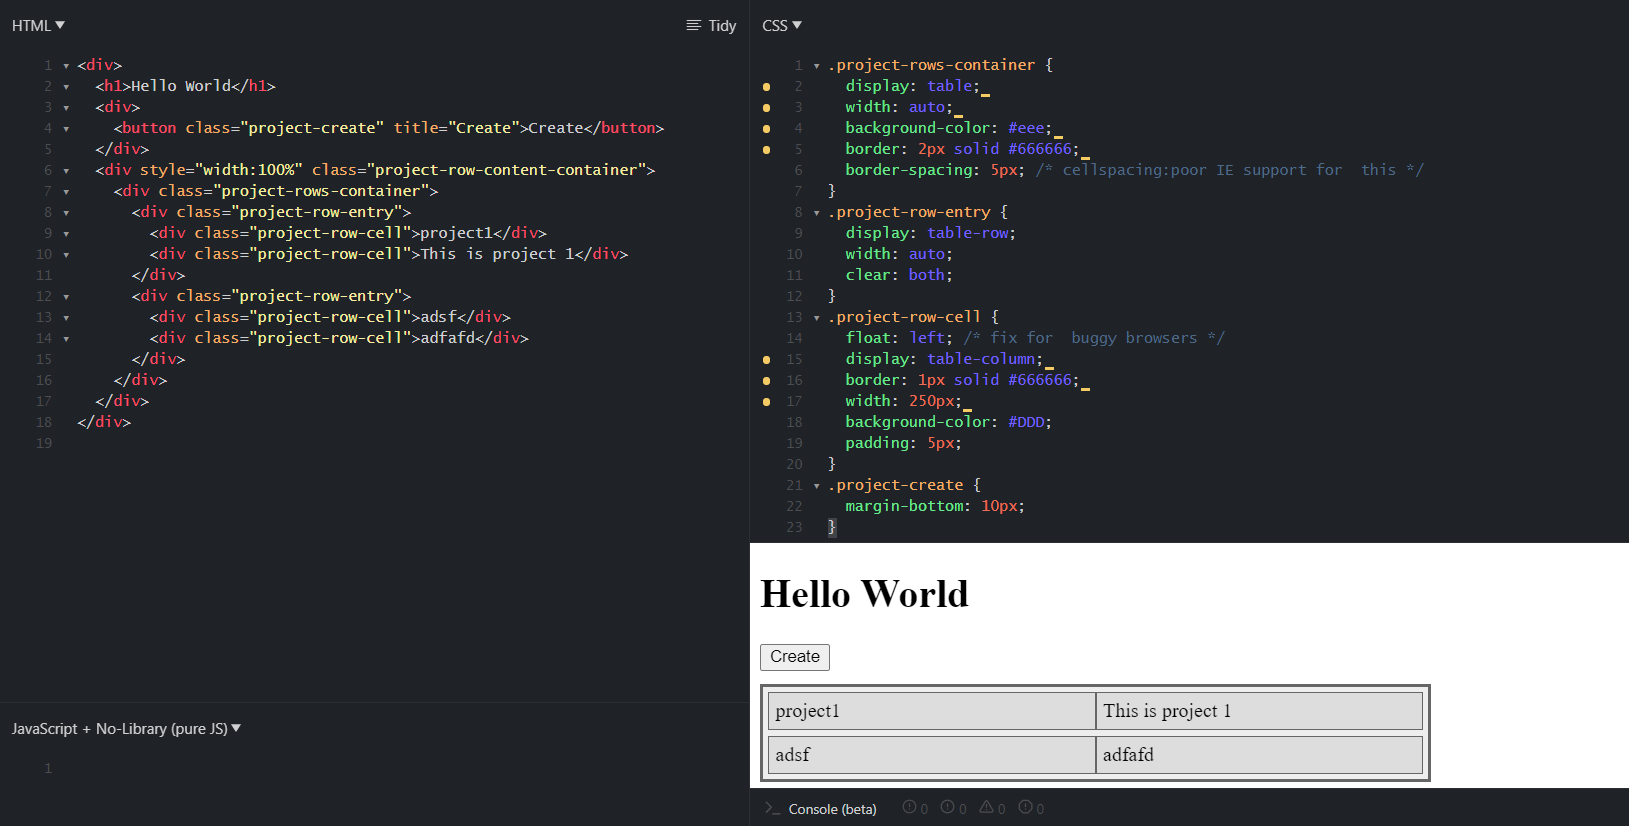
To play a bit around with that styling I recommend to use JSFiddle where you can just paste in the <div> structure of our generate page in runtime.
This is what you need to copy:
And this is how it will look in JSFiddle to play around a bit!
Is there more to explore!?
Off-course…there’s always more!
But that is for you to explore, and you can start by checking out my full ‘my-control.js’ file that can be downloaded here
These are the features that are updated in this file:
- View the entity by clicking on the row
- Export the entity list data to CSV with an export button
In the ‘Advanced Developer Guide’ you can also find some information about this customization topic in the ‘Customizing a grid control’ section, but it’s not a full explanation of it all…to bad!
What was most helpful was a shared project by OpenText that can be found here with 2 sample JavaScript files ‘project-timeline.js’ and ‘gantt-control.js’.
Oh yeah…Before I forget is…This type of customization is also applicable on a form when you craft a ‘Grid’ component on it. See the screenshot where I dropped the ‘multi-related’ contents entity on the form.
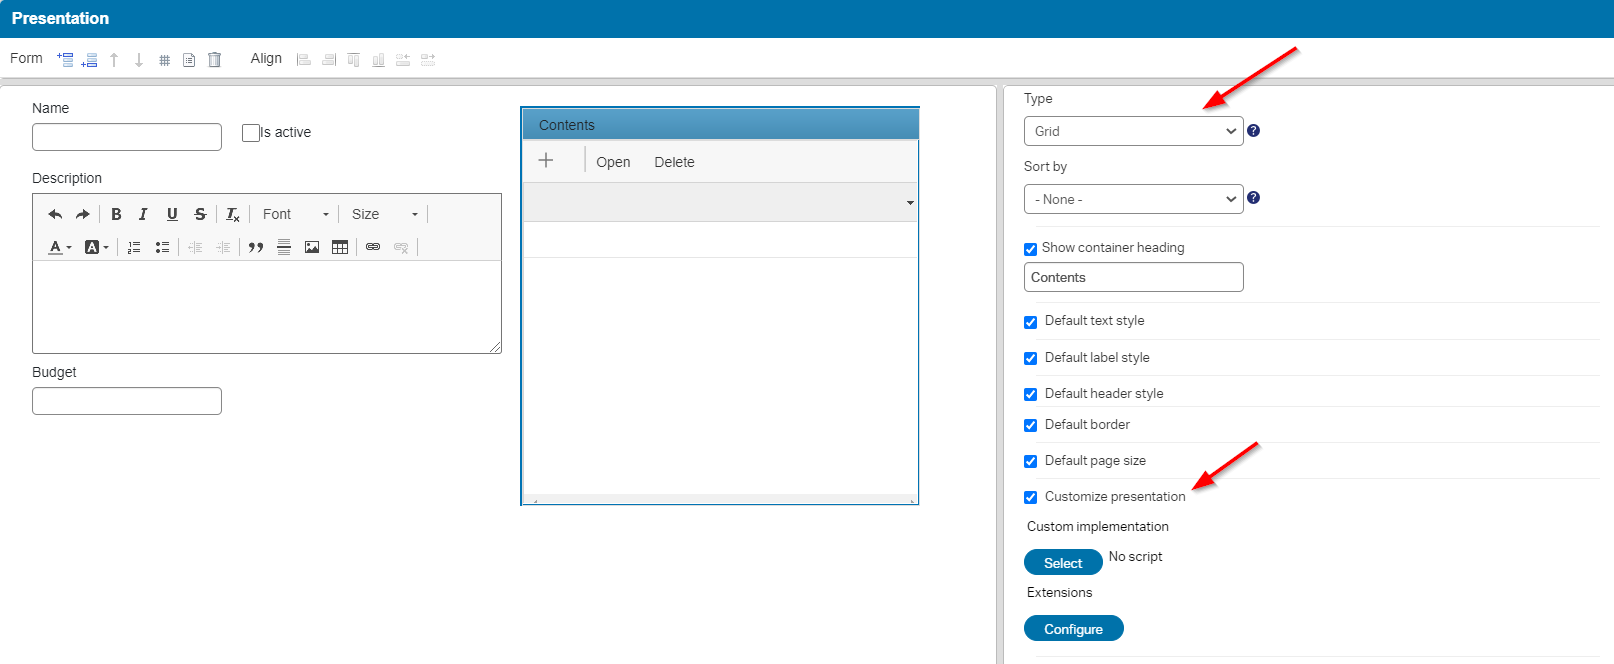
I didn’t try out this feature for this post, but it should work all the same as the example from the homepage result list.
That’s it for this post, and I give it a well “DONE”! Benefit from the information in this post as it is not a very well documented feature, but probably a widely asked question on how to customize your result list. Well, here you have it and now you also know how to continue with it. Have a good week-end, and I see you in the next one…Cheers!
Don’t forget to subscribe to get updates on the activities happening on this site. Have you noticed the quiz where you find out if you are also “The AppWorks guy”?


