
Hi there AppWorks fans,
Welcome to a new installment of AppWorks tips.
This time something different and nice which is called ‘testing’. We can do this manually, but this post will show you that it can also be done automatically. For this we’ll jump into the well-known Selenium tools to test our AppWorks UI. More specific the solution that is published in runtime.
I tell you upfront this is also my first time to play with ‘Selenium’ so, we’ll just see how far we get with it. From what I hear it’s not that hard to do, but if your never did it, it’s hard to talk with the big-boys that are experts in the field. Testing is not my main course, but it’s always good to know some basics around it and that’s exactly what we try to find out in this post. Because we are never too young to learn new things we just add it to our AppWorks journey!
Let’s get right into it…
First for some search on google to explore what we can find about ‘How to start with Selenium’. You’ll quickly see results that point into these directions:
- https://www.selenium.dev/ which is your home base for the Selenium software
- ‘Selenium WebDriver’ that we will use in this post which makes automatic regression testing possible
- ‘Selenium IDE’ is more of a recorder browser plugin; simple to use and recommended when you want to do some exploratory testing
- ‘Selenium Grid’ is for scaling your testing to a next level with distributed testing on multiple environments (overkill for this post, but nice to know it’s available!)
- https://www.guru99.com/selenium-tutorial.html
- Very good 7 days all in Selenium testing tutorial. One step too far for this post, but if you really want a deep dive…This is your next thing to follow!
- https://www.browserstack.com/guide/selenium-webdriver-tutorial
- For a quick understanding of the ‘Selenium Webdriver’ that we want to focus on in this post!
Looks like we need to get into some programming here and because I like to program in Java in the IntelliJ IDE with the maven dependency framework attached I also searched for these bullets in google:
- ‘selenium testing with intellij’
- ‘intellij maven selenium’
- ‘start chrome with selenium webdriver java’
Looks like this is for me the best starting point to start with Selenium Webdriver as it uses the maven dependency framework as an example, and it also makes use of Chrome as the default browser that I also use when I play around in AppWorks!
Next…
Spin up IntelliJ and create our first project to play with
During the startup of IntelliJ, we can create a new project, and we’ll just follow the wizard to create a new maven project:

Make sure to select ‘Maven’ and click ‘Next >’

Fill-in the fields as you like and click ‘Finish’, and you end up with a new project in IntelliJ
Next step is to add the Selenium Webdriver as maven dependency to our project as also the JUnit test framework so, we can write nice tests per use-case!
The dependency XML part can be found in the central Maven repository Selenium
For JUnit you can find the part also in that same central Maven repository JUnit
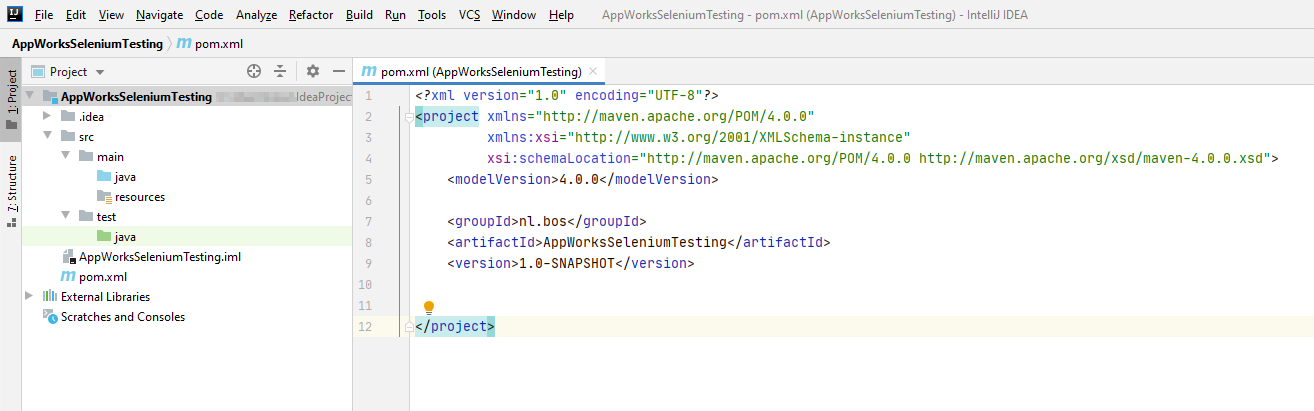
Our final pom.xml will look like this:
1 |
|
Now for our first simple test
The case: starting the chrome browser from our test!
Create new class in the ‘test’ folder with the name ‘AppWorksBasicTests’ and with that a new method ‘startBrowserTest()’; It will all look like this:

This is the code with some logging facilities.
1 | package nl.bos.basics; |
After the first run you’ll see this end-result:

Let’s see if we can start chrome with this piece of updated code:
1 |
|
That’s a failure…
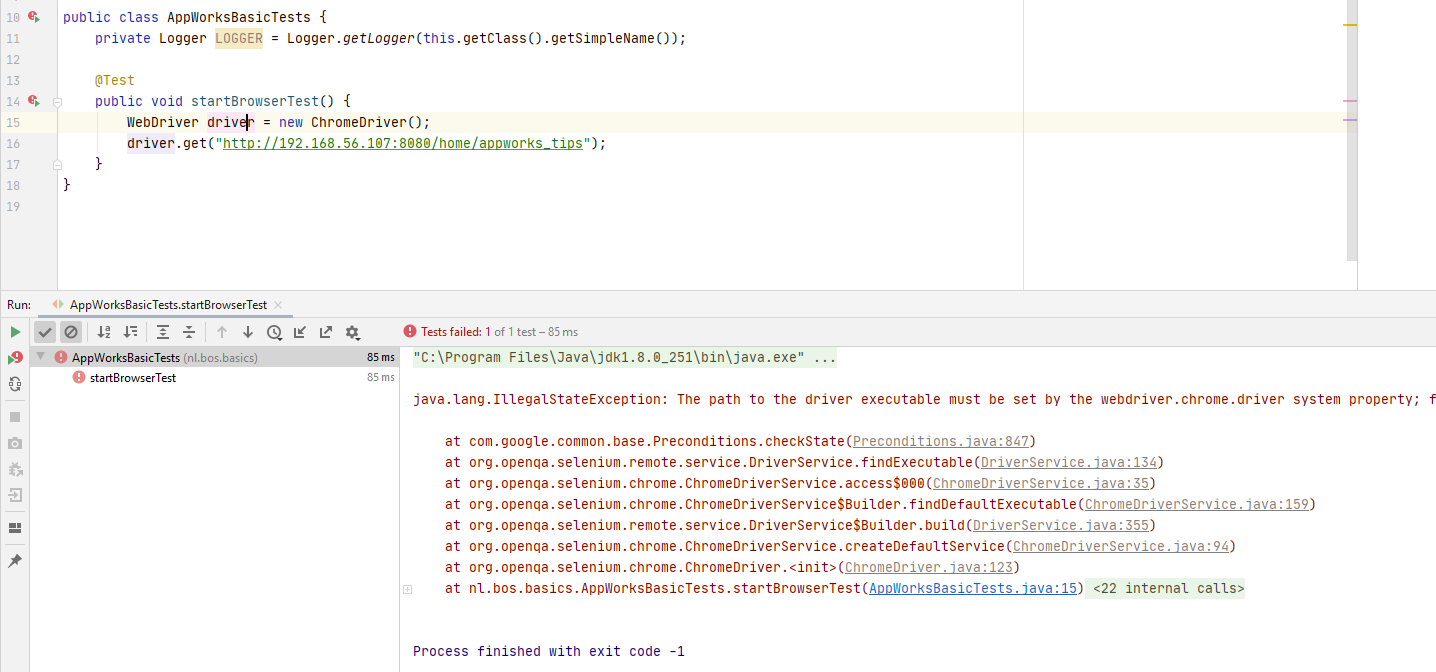
Why…here is why!
We need to download and add the ChromeDriver executable for our project to be found!
You’ll get a ZIP file as downloaded file and after extracting this file you’ll end up with a file called ‘chromedriver.exe’. I just save it locally in my c:\temp directory on my laptop and point to it from my code:
1 | package nl.bos.basics; |
Make sure you update your Chrome browser to the supported version of this ‘chromedriver.exe’. In my case it should be version 84 that you can find in Chrome when you go to ‘about’ page in the setting:

Let’s see what happens when we do a run now!

Oh yeah…that’s nice stuff! Did you notice the info bar saying: ‘Chrome is being controlled by automated test software’?
I heard and read that this ‘browser starting’ feature was possible like this, but that it really works like we just described gives me a smile on my face! 😍
Next…
Login to the platform from code…
Let’s start a new JUnit @Test method from where we can do some login and logout so you have a head start for all the other nice regression tests you would like to write. Check out that new clean method called loginLogoutTest() in the AppWorksBasicTests class:
1 | public class AppWorksBasicTests { |
You see I cleaned up the code a little and moved some lines in to the
setup()method of the class. This method will be called before each test method we start. That the same for thetearDown()method that is called after each test. That’s why the browser is nicely closed after each test!
Now for this new test implementation…
First in some pseudo code:
1 | open the browser so the login page is shown; we do that already! |
The open browser part will be done in our setUp() method; the other 3 lines should be simple like this:
1 | driver.findElement(By.id("username")).sendKeys("awdev"); |
Run the test and see that you will get a failure with a message like this: no such element: Unable to locate element: {"method":"css selector","selector":"#username"}
So, it can’t find the ‘username’ field by ID, but when I check the developer tools in runtime I really see that it’s available!?

This could mean 2 things:
- Or we are toooo fast with our element lookup
- Or our code will be loaded into an iframe (that is what I saw when I opened the design-time URL!)
Both have a solution!
1 | //For the tooooo fast we can just wait |
I just needed to wait some seconds so, my code looks like this for the login part:
1 | WebDriverWait waitForLoginScreenToLoad = new WebDriverWait(driver, 10); |
Now we’ll get to the next screen (our runtime!)
Again in some pseudo code:
1 | wait for the runtime to be loaded |
In code?
1 | WebDriverWait waitForRuntimeScreenToLoad = new WebDriverWait(driver, 30); |
How did I get those ‘cssSelector’ items (as well as the ‘page-host’)?
Well…Check the developer tools in runtime!

To finalize the test we wait to get back to the login screen again, and we assert the value to be correct…simple as that!
1 | WebDriverWait waitForLogoutIsDone = new WebDriverWait(driver, 10); |
Finally…
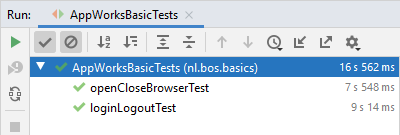
When we run all the tests in our class we should see a nice green output for all of our tests!
The final source code for the samples in the post can be find here and now it’s up to you to extend the code so, your functionality can be nicely tested after all the hard craftsmanship in design-time!
That’s all…That’s our ‘DONE’ on a quick dive into the Selenium Webdriver testing! Nice stuff to play around with and much easier than I thought it was and now you also know how to do it. My advice also is to start with these kinds of tests from the start of your project so, they are synchronized with the features build in design-time. From experience this is a time-consuming task, but with a big project it will benefit you in the future of testing later on! Have a great testing exploration week-end, and I see in the next post on a new AppWorks installment.
Don’t forget to subscribe to get updates on the activities happening on this site. Have you noticed the quiz where you find out if you are also “The AppWorks guy”?
