
Hi there AppWorks fans,
Welcome to a new installment of AppWorks tips.
In this installment we’ll take a quick look on integrating an xForm in our entity ‘View’ layout. Within the xForm we’ll trigger some external ReST data via JavaScript that can be shown in a nice table component.
Why jump into the ‘xForms’ as it’s the old-school way of working with the platform!?…Agree, but it can also solve problems where the ‘standard’ way of working is not matching your requirements! As a consultant we then have 2 option…Go for it or change the requirement!!
Let’s get right into it…
Start your VM; Open your favorite workspace and project in design-time…
Make sure you have an entity available to work with. You should be able to create an instance out of it and view it from a list building block…Easy for you to create…correct!?
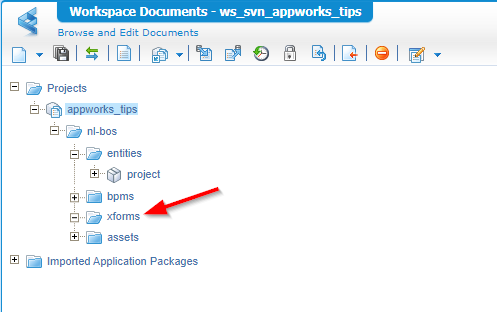
My starting point looks like this where I have a ‘project’ entity available to play with. I also crafted that ‘xforms’ folder already.
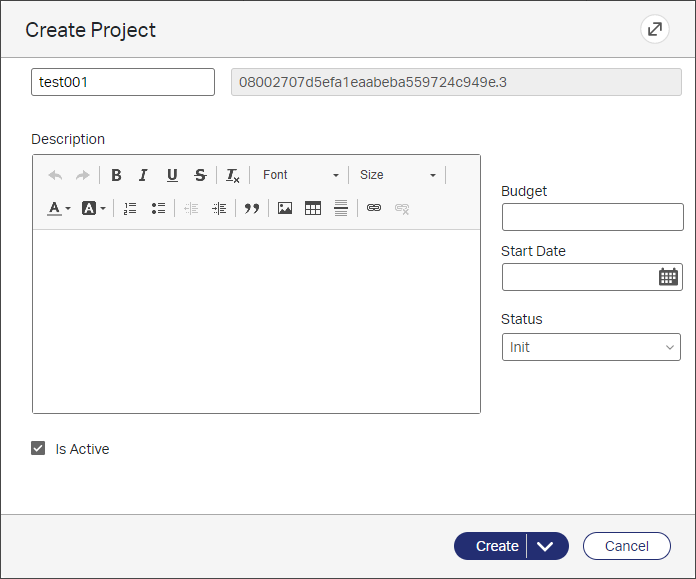
With this form for creation…Just something nice to start off with!
Once this is in place we go to the next step….
Make a ReST end-point available
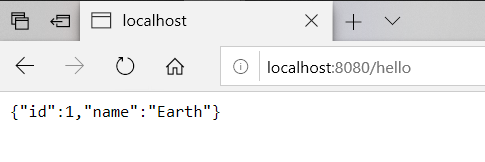
In our xForm we want to call a ReST endpoint, but then we need to have something up and running. You can choose your own, but 2 months ago we created our own ReST app where we are able to consume some JSON data. See this post where you are directed to make a local ReST end-point available that can spit out this JSON sample {"id":1,"name":"Earth"} with this URL http://localhost:8080/hello
Ok…something I forgot!….The above ReST app is not “ready” for us to use as it’s not CORS proof!…CORS??…Yes…read about it here. In dummy talk: it’s just a security mechanism in the browser so you can’t do unrestricted calls to everything that is available in the API world. I don’t want to dive into this, but as our server runs on IP
192.168.56.107and we do a HTTP request to192.168.56.1we get those CORS issues. Can we solve it? Yes, run the ReST app on the same host or make sure the ReST App is CORS ready!Or…Just make it simple for this post and move to a standard open API on https://jsonplaceholder.typicode.com/ 😜
Next…
Create and connecting our xForm
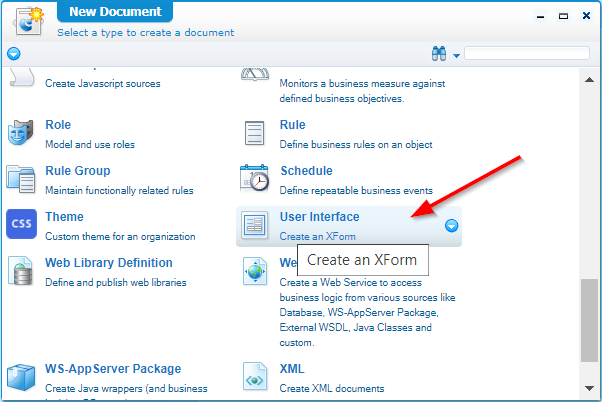
Let’s just create a new document in the ‘xforms’ folder of “type”?…No, not type ‘xForm’, but type ‘User Interface’
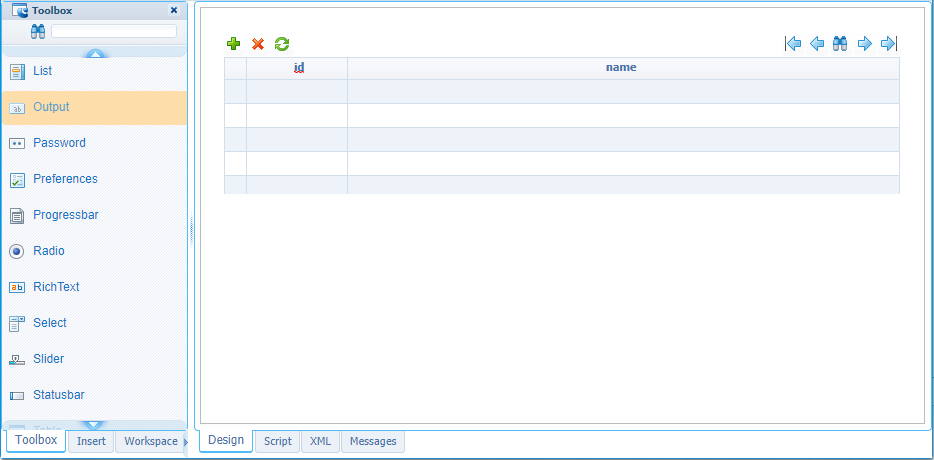
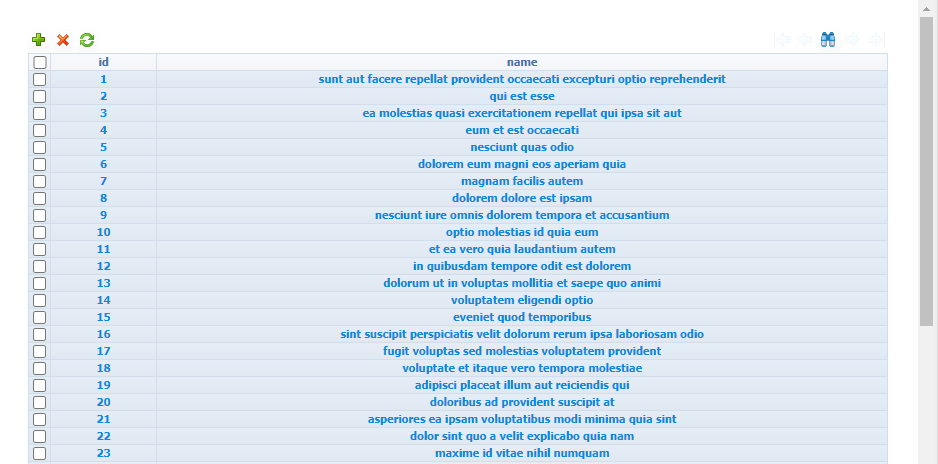
You get a new blank xForm and from the left panel we will insert a new ‘Table’ component. And on that table component we drop 2 ‘Output’ components for each column we want to view. The end result will look like this (with that ‘id’ and ‘name’ column):
We can save this result with a nice name ‘project_extended_view’ in the ‘xforms’ folder.
Now we need to connect this form in the ‘Default’ form view of our entity. This can be done via a layout building block. So, on the ‘project’ entity we need to create a new ‘Layout’ building block that will look like this (with the proper name ‘default_view’):
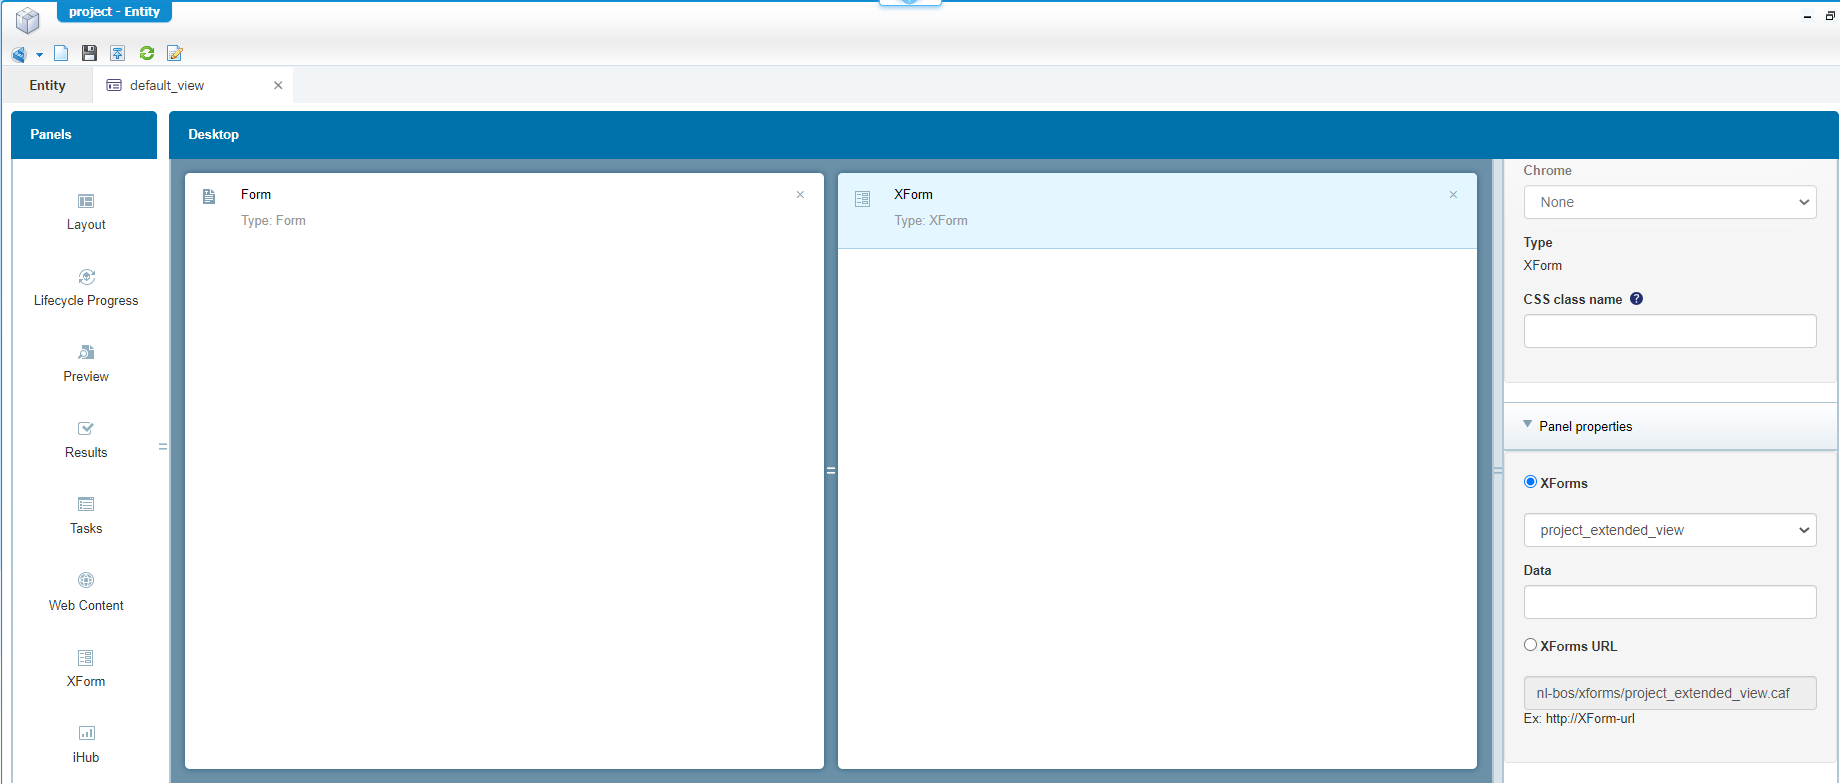
From the left panel we drag & drop a ‘Form’ panel and also an ‘XForm’ panel with these configuration:
- Form: select in the right panel our ‘Default’ form of the current entity
- XForm: in that right panel we select our just crafted xForm (see screenshot above)
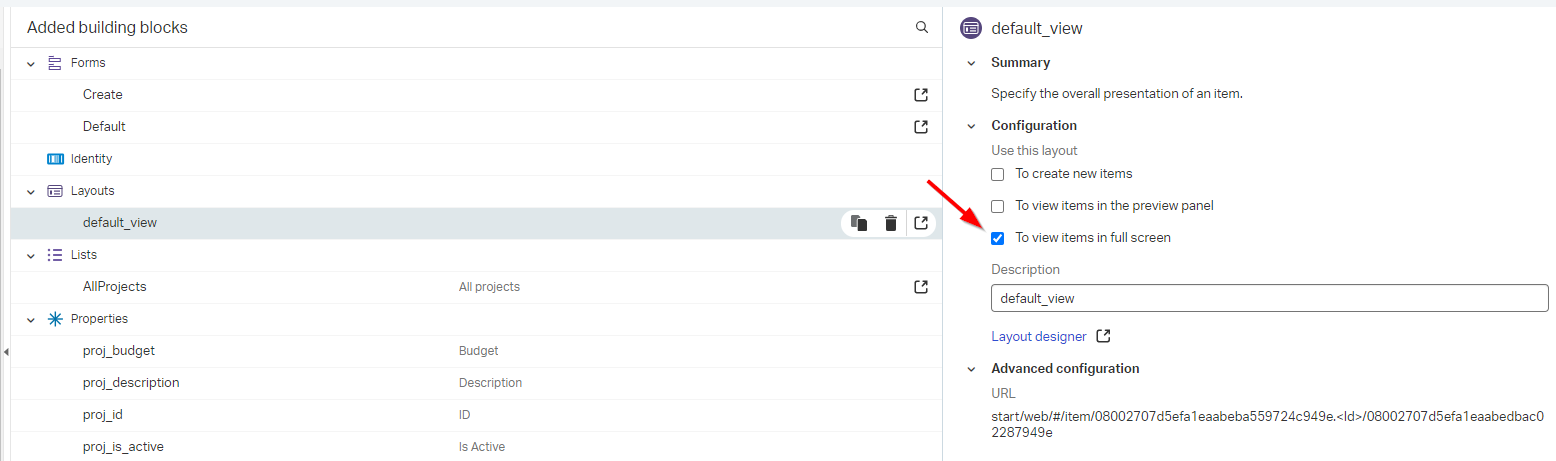
Now we go back to our entity overview where we need to make the layout available for the entity view feature…There is a nice checkbox available for this. See the screenshot below:
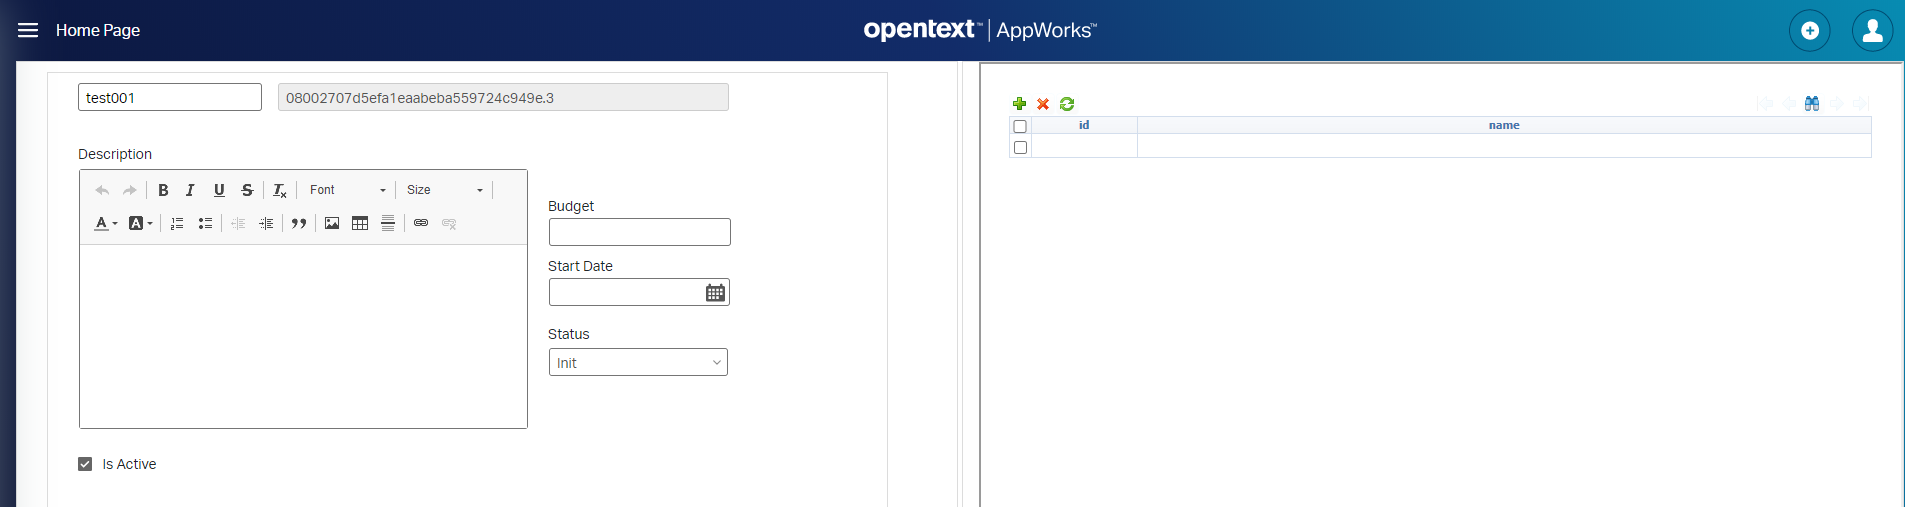
Now save it all and publish the project to runtime so you can also check out this end-result for now.
Next step…
Our first ‘HelloWorld’ output from script
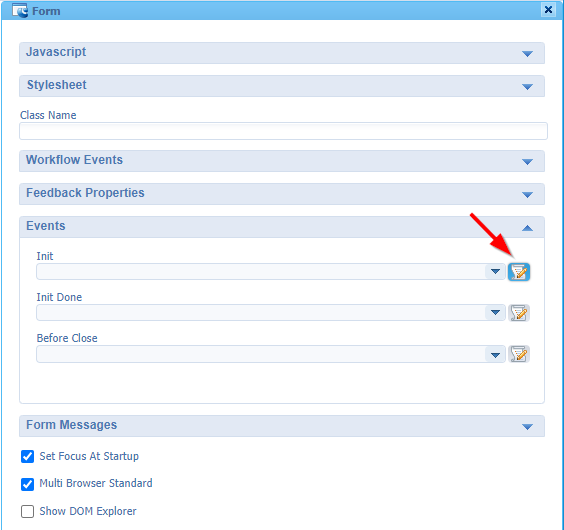
Back in the designer we open the created xForm document. Right click on a black space to get the properties of the whole form in the right panel. Open the ‘Events’ accordion panel and create a new ‘Init’ function.
You will jump to the ‘Script’ tab (see bottom tabs) where we first give the function a proper name ‘formInit’ and you also need to update this in the ‘Events’ selection box.
To make it selectable I needed to close and open the xForm document…Not very user friendly but it does the trick. Maybe it’s better to jump to the script tab yourself; define the function and select it from the dropdown.
So, we have a function ready to do something…Let’s start with a simple console.log output:
1 | function formInit(eventObject) |
Yes, also I have to wake up and use
<ctrl>+<shift>+<v>for pasting stuff…I’m just the messenger here, but if you can detect<ctrl>+<v>why showing a message and not just paste it!?
Well, publish the form and do a refresh in the front-end with the developer tools from Chrome open (<F12>) where you will see your message passing by in the console when you filter out the output level.

Great…we’re getting somewhere…Let’s retrieve some ReST data in JSON format with this nice script:
1 | function formInit(eventObject) |
You also get that data in you developer console in Chrome…correct?
Let’s parse that data to a JSON object that we can later read in our table columns with a for-loop!
1 | var xhttp = new XMLHttpRequest(); |
That
jsonDatawill give you an array of JSON objects that we will loop through later!We can do things like
jsonData[0].idorjsonData[0].titlewhich perfectly fits in our 2 columns.
Next step…
Manipulate that table from our script
For this we need to be able to access the table UI elements and it would be great to do that with some nice id’s…Get the properties of that xForm table and give it a nice ID…Same for those 2 ‘Output’ column elements in the table.
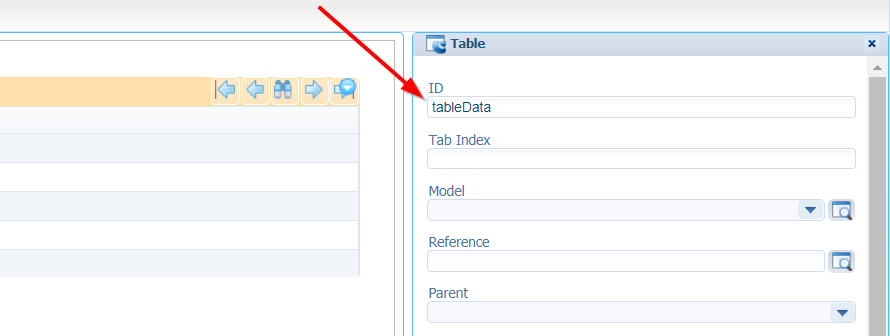
For the ID column I defined ‘outputId’ and name column will be ‘outputName’
For the script part we add a new function that looks like this (Just add it below the formInit() function):
1 | function updateTableRows(jsonData) { |
Now we need to call this function from our formInit()! We can do the next call where we pass the object array ‘LAInfo’ from our ‘jsonData’ object as parameter value:
1 | xhttp.onreadystatechange = function() { |
Ok, you understand the magic code?…Time for some saving and deployment of in this case only the ‘xForm’.
And after a refresh of the runtime you should see this output happening on the fly.
And that’s it…Give it a “DONE”! But is there more!? Yes there is like…
- Adding a ‘model’ to the table where you can define onRequest and onResponse functions with a AppWorks webservice document that retrieves your data via the HTTP connector!
- Playing with ‘cordys’ specific script elements when you hit
<ctrl>+<space>in the script tab (try it out if you didn’t already?) - Passing parameters from the platform into the xForm call (in that right panel on your layout we’ve created for the entity!)
- And all the other toolbox components that you can drag & drop on your xForm.
…but I think that exceeds this post as ‘xForms’ is a bit the ‘old’ way of working with the entity modeling platform that AppWorks currently is. On the other hand it’s not unthinkable that you will get a requirement that can’t be solved via the ‘standard’ entity modeling way of working and now you know that xForms are also a possible way of handling things (as last resolve…in my opinion)!
See you next time and have a nice weekend…
Don’t forget to subscribe to get updates on the activities happening on this site. Have you noticed the quiz where you find out if you are also “The AppWorks guy”?
