
Hi there AppWorks fans,
Welcome to a new installment of AppWorks tips.
In this post I want to show you something nice I learned during a session some time ago. I always thought it was impossible, but the contrary has been proven!
This is the use-case:
Let’s say we have a “ToDo” entity that needs to be reviewed by a project lead before it can be picked up by a developer! For this you will create a lifecycle building block with some states like ‘Draft’, ‘Review’ and ‘Ready’ where the ‘Review’ state will have a manual task for the project lead to be reviewed. Easy to build with just a clean and simple lifecycle and a manual activity in ‘Review’ state…right? I’ll show you in the next section!
But now a ‘smart guy’ is changing the requirement so we first need to do advanced business logic before we get to that ‘Review’ task. The advanced business logic is not something we can do in a lifecycle and that’s why we start a BPM for this! In the BPM we will have the ‘Review’ task but as you might know you ‘normally’ would use an XForm here to show entity related information within the task. And from experience an XForm will never have the same “look and feel” as the forms you craft from your entity form building block.
I hear you asking?…Would it not be possible to use the entity building block form in our related BPM task?
Let’s get right into it…
Let’s do this in 2 steps so you also see the simple variant! First, we create a lifecycle with a simple task and next we add the BPM from where we send out the same task (with our trick!). Spin up the machine, open your workspace with developer role to go and low code our requirements.
Basic lifecycle with task
We jump directly to our entity ‘ToDo’ with a clean list of building blocks!
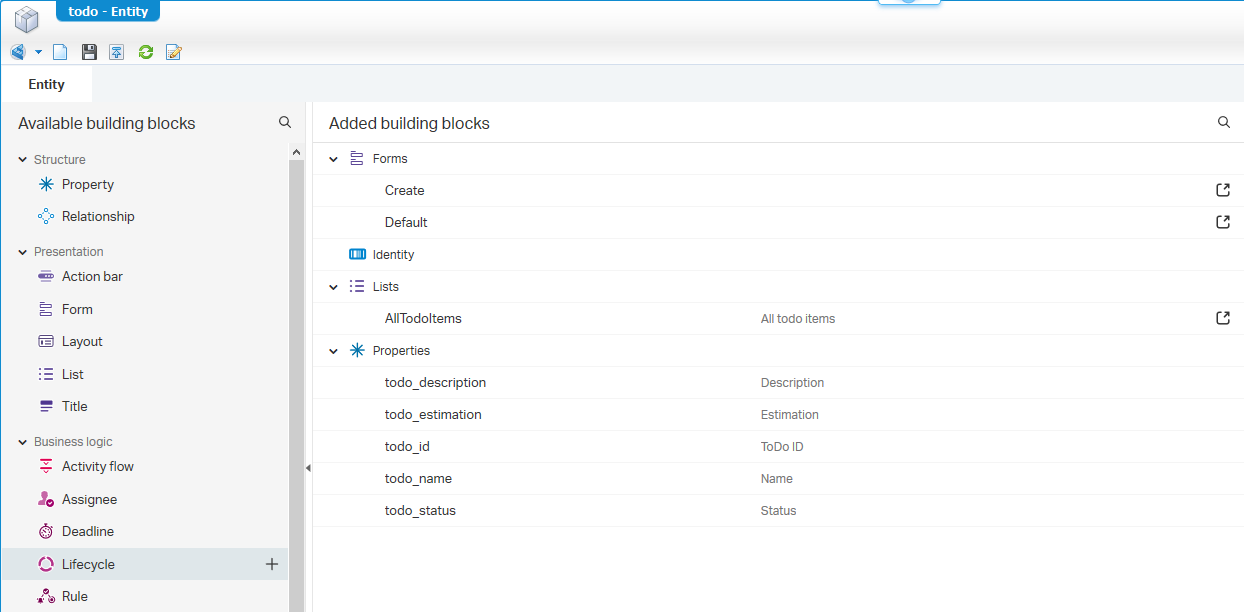
Add a new lifecycle from the left panel which will open de lifecycle modeling panel. We can start with the ‘Initial State’ and add some extra states so it will look in the end like this (Also update those state names!):

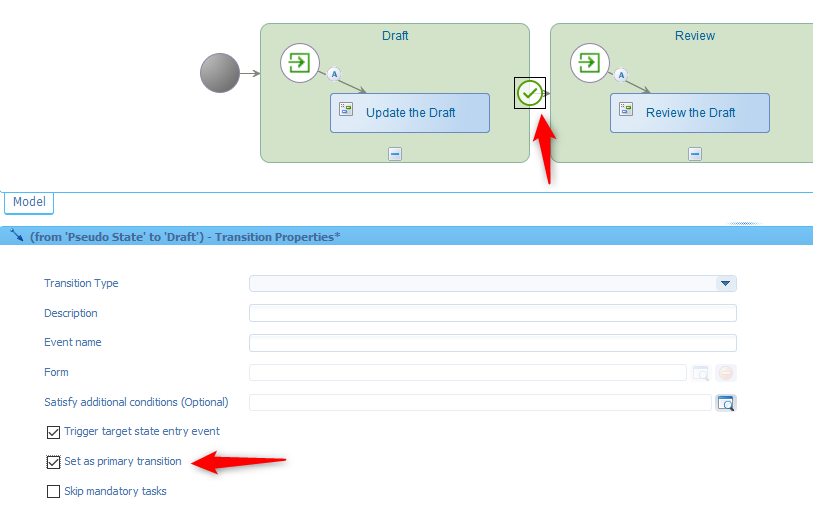
Now let’s add some tasks to the lifecycle states…

And (don’t forget!) to update the flows (the arrows from state to state) to be a ‘primary transition’. This option makes it possible to read the lifecycle progression that we will use later the layout! You can set this option for each flow.
Now the created activities need to have some layout applied so you can view some related task information, but also some entity information. And maybe a content preview if it is content related (not for now!).
For this craftmanship we go back to the entity overview of all the building blocks where we see an extra building block ‘Task list’. This was added during the lifecycle create option! You can open the ‘related’ task-entity from the red-arrowed link.
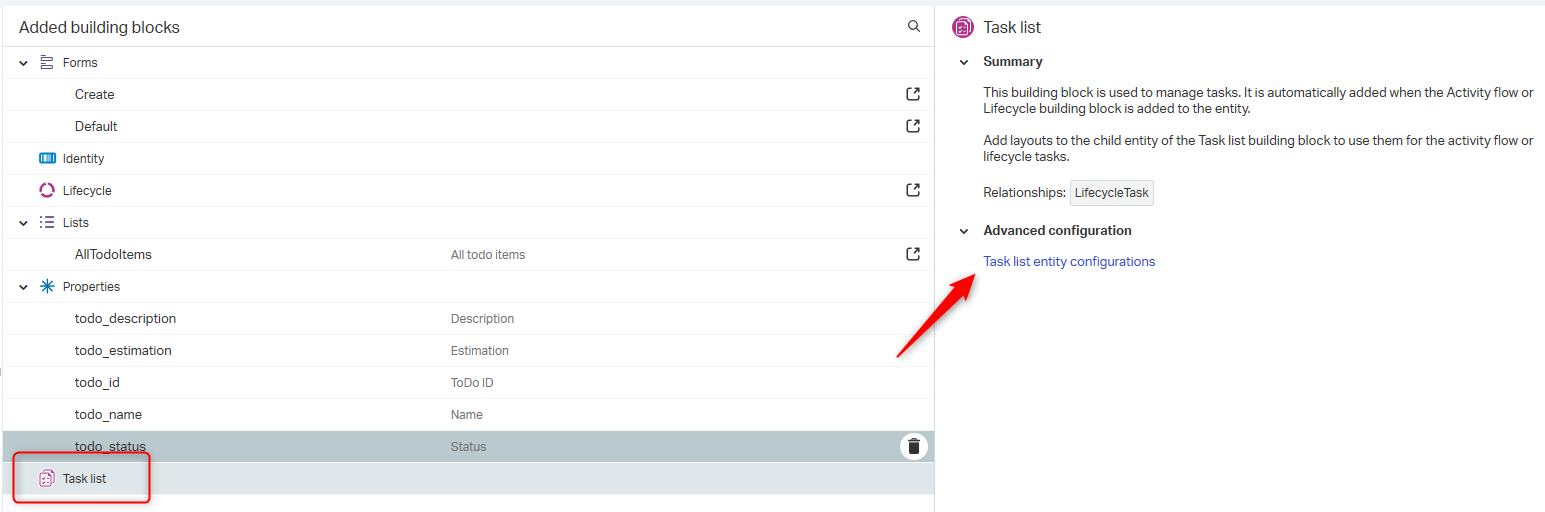
And what do we get? Another full-blown set of building block specific for our task entity…great!
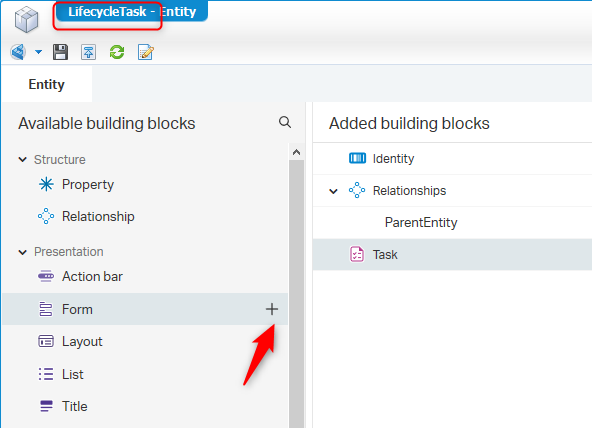
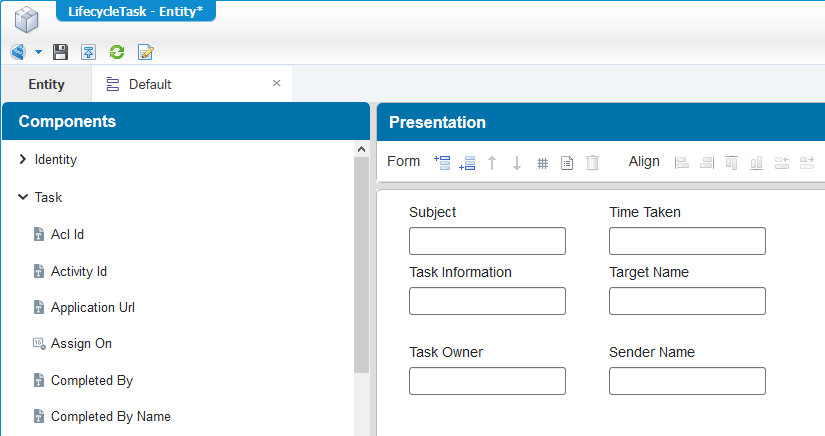
First create a new ‘Default’ task (autosave) form with related task information!
That ‘Default’ form could look like this for now. Just drag & drop some task related properties.
Next step is to create our ‘TaskLayout’ that we can use on our lifecycle tasks…remember?
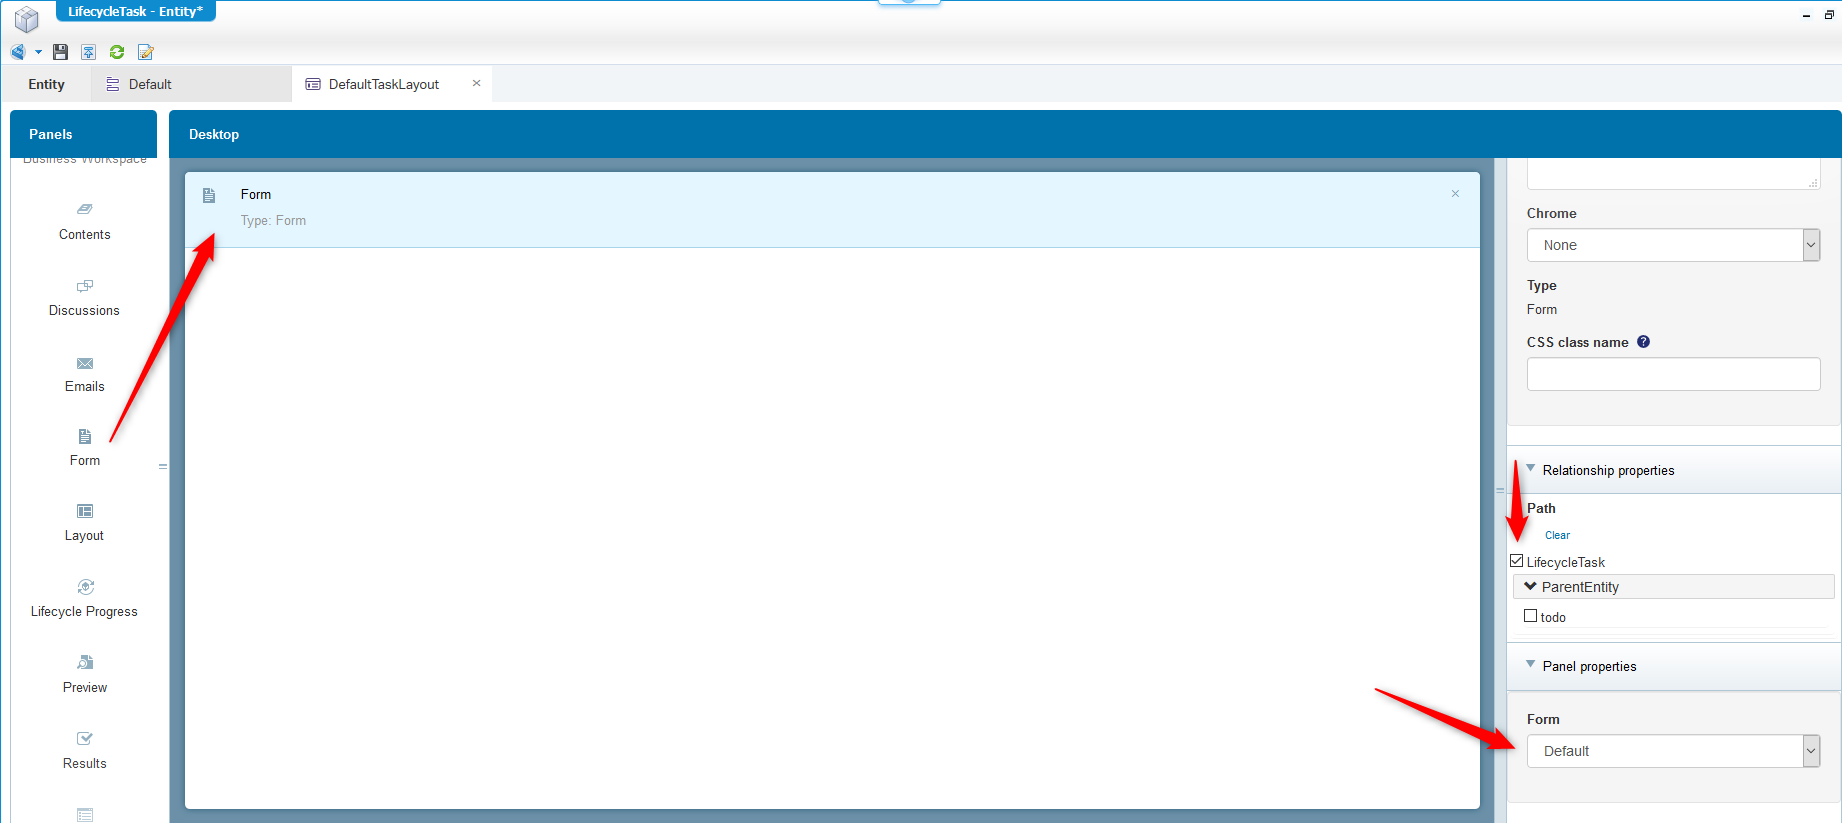
So, again in our ‘LifecycleTask’ entity we also create a new layout with the great name of ‘DefaultTaskLayout’ where we can start by adding a new ‘Form’ panel. Make sure you select the ‘Default’ ‘LifecycleTask’ form!
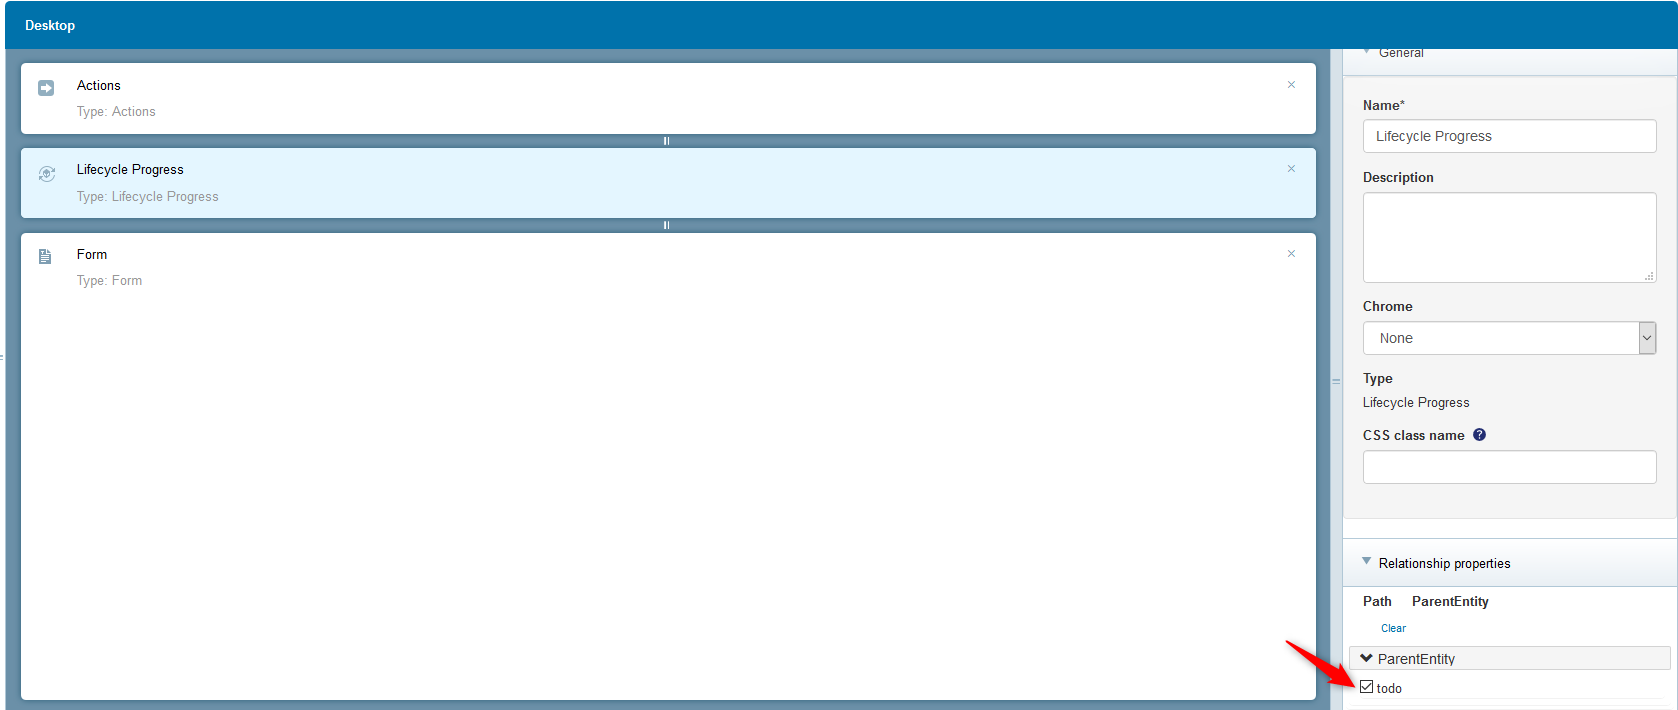
Then we add 2 extra panels to make it all fancy…A ‘Lifecycle Progress’ panel (with the red-arrowed option selected) to view the current lifecycle overview of the parent entity and the ‘Actions’ panel so we are able to complete our current task!
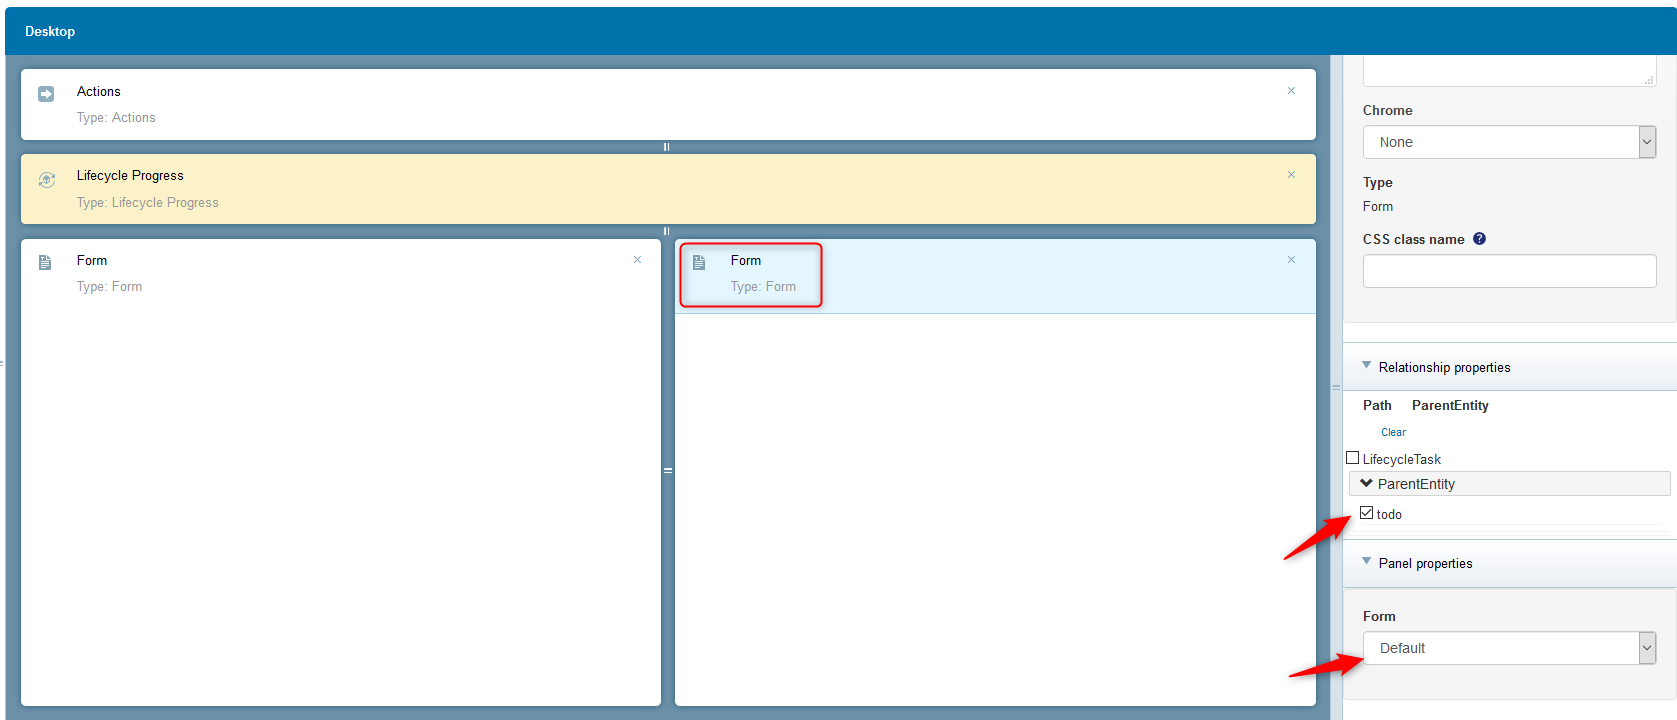
And add a second ‘Form’ panel that will show the current entity information (also the ‘Default’ form!)
Great…let’s save it and head back to our lifecycle where we can open the properties of the activities to select our just crafted ‘TaskLayout’
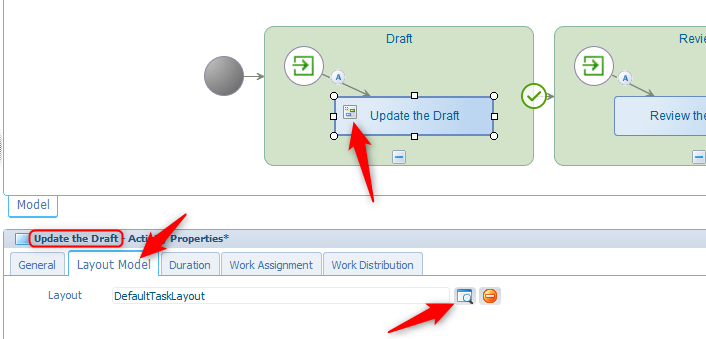
And after the layout is selected you will see a ‘layout’ icon on your activity…Good job…Now we just use the same layout for the other 2 activities on the other states.
The result that we can publish and test!

Open the runtime ‘/app/start’ and create a new ‘ToDo’ entity instance. After hitting that ‘save’ button the lifecycle will start, and the first activity will be available in your own inbox.
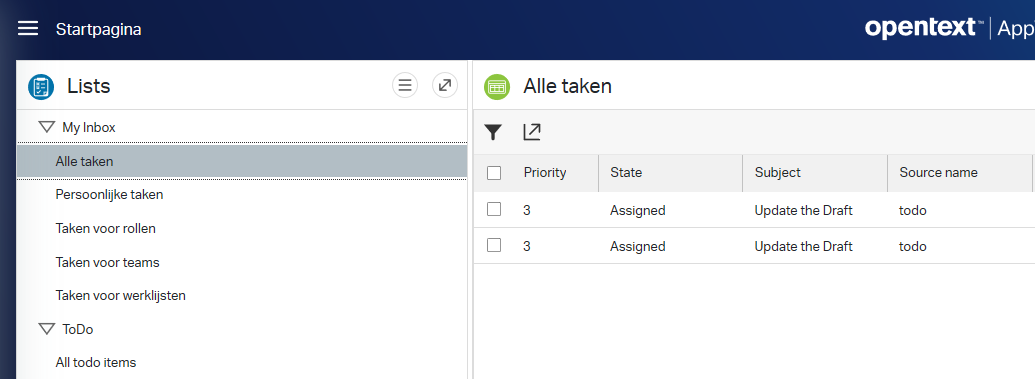
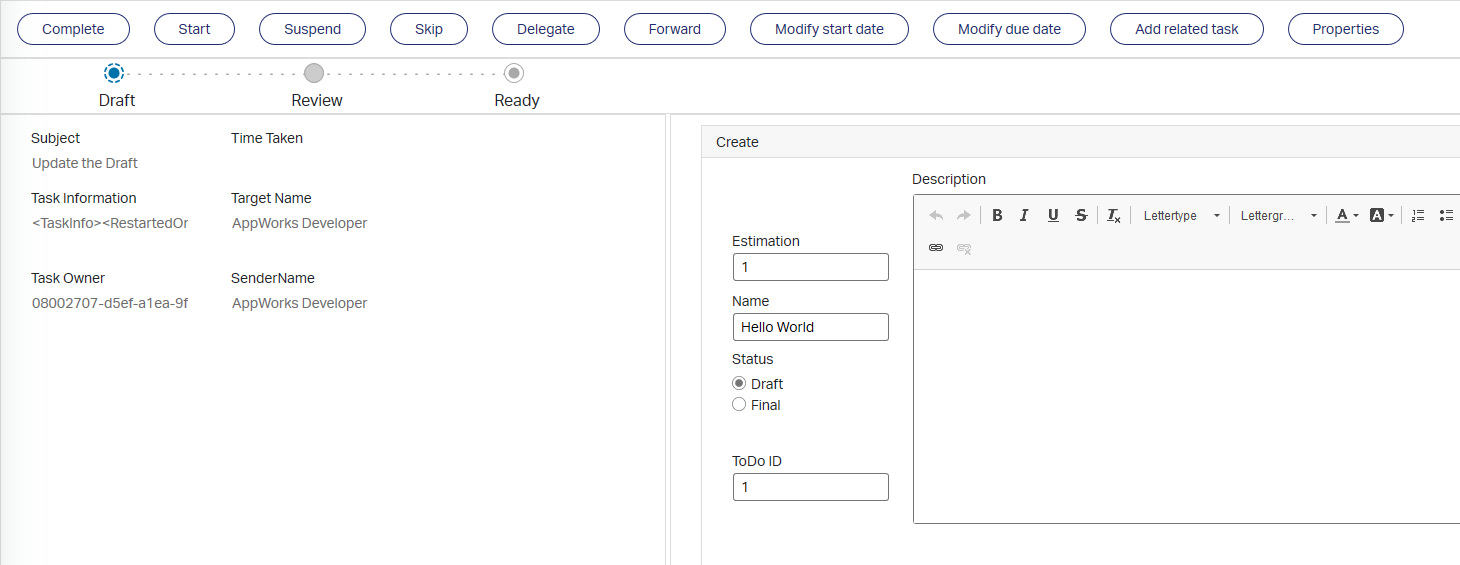
Open it and you will see our bright and shining task-layout…Hooray and cheers on this warm day (when I write this post)! 😅
Lifecycle starts BPM that sends out the task
Now for the next step…Instead of adding activities to the lifecycle we now start a new BPM! And in this BPM we add a new activity!
So, back to the drawing table and opening our lifecycle building block on our ‘ToDo’ entity.
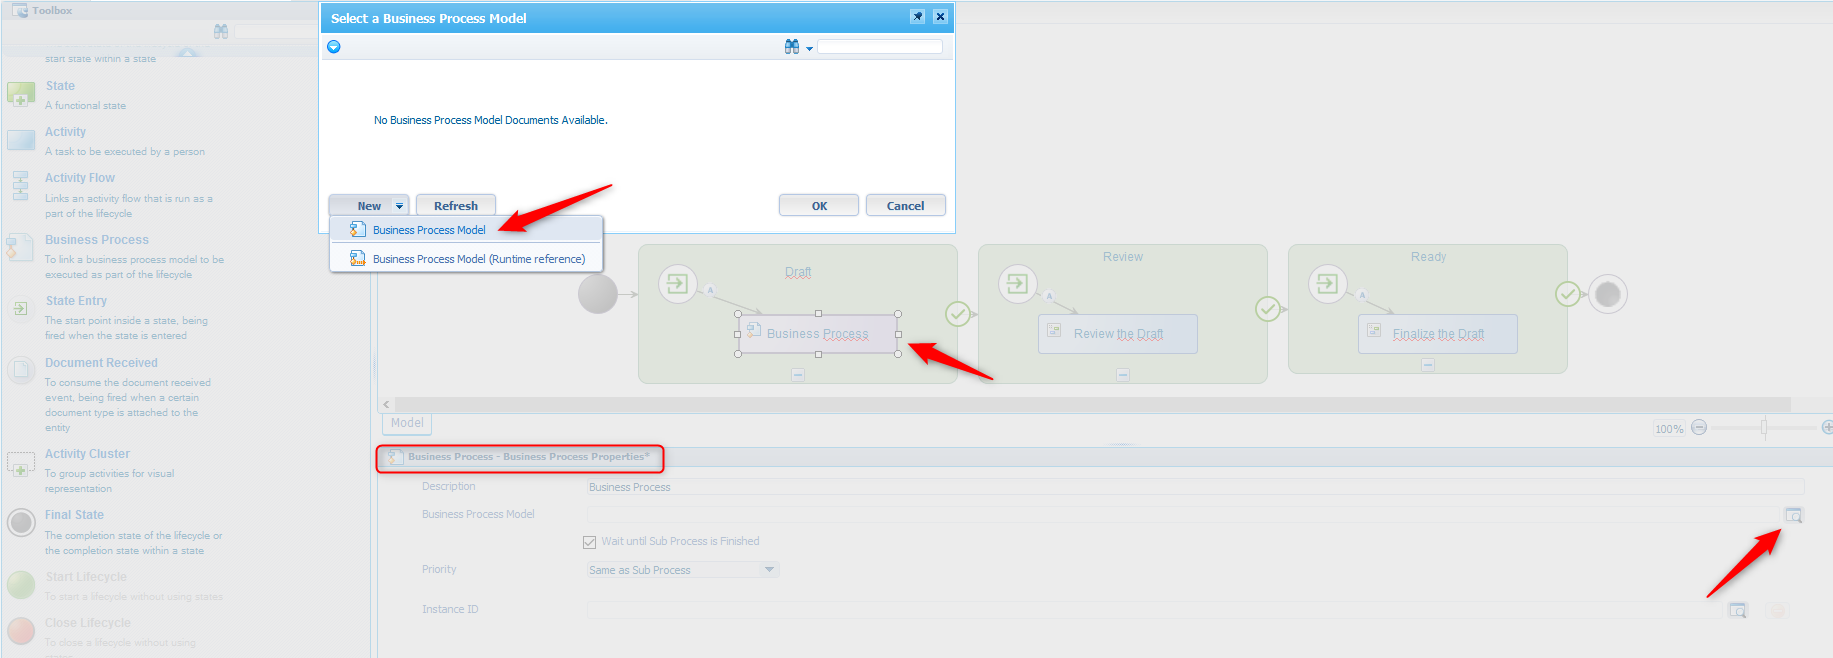
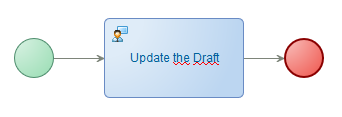
Remove that first ‘Update the Draft’ activity and replace it with a ‘Business Process’ activity. So it also automatically starts (you can see that by the ‘A‘ as you can also have ‘Intermediate’ and ‘Manual’ follow-up tasks, but that’s another post!)

Get the properties of that new BPM activity and select a BPM process (that we will newly create in that screen!)
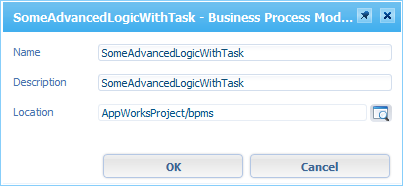
You get a new BPM modeling panel where we first save the BPM in the correct location!…Remember the ‘bpms’ folder? Save it in there with a name like ‘SomeAdvancedLogicWithTask’
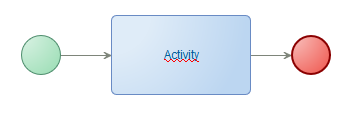
And make that BPM simple like this
Now the magic touch as we want to use that same ‘TaskLayout’ from our entity…right? And don’t want to play with XForm stuff!
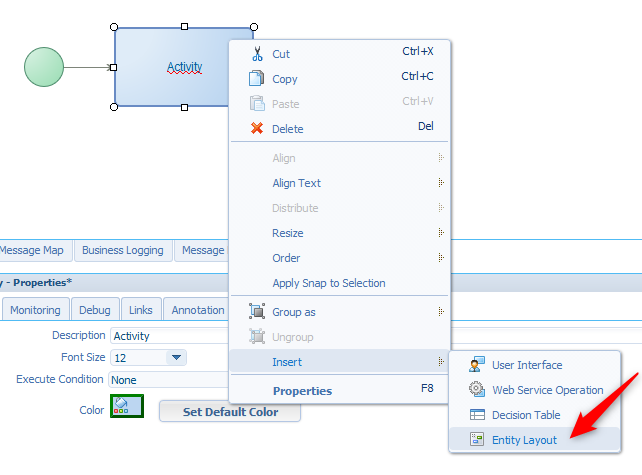
If you get to the properties of the activity you won’t find anything relative to this feature…Now right-click the activity and check out the interesting option called ‘Insert > Entity Layout’…Our savior!
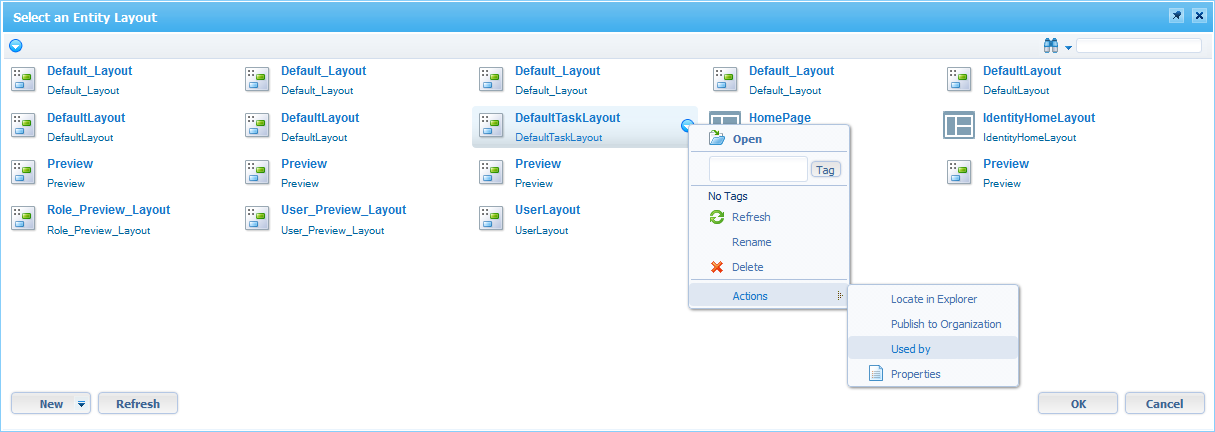
You get a bunch of layouts to choose from, but we only need ‘the one’…If you are unsure you can always check the ‘Used by’ action to check if you have the correct one!
After some name polishing you end up with this (incl. that user layout icon)!
Done…I guess? save it all, publish it all and test this new feature!
Ohh yeah baby…You make me happy!

Open that task like a pro…
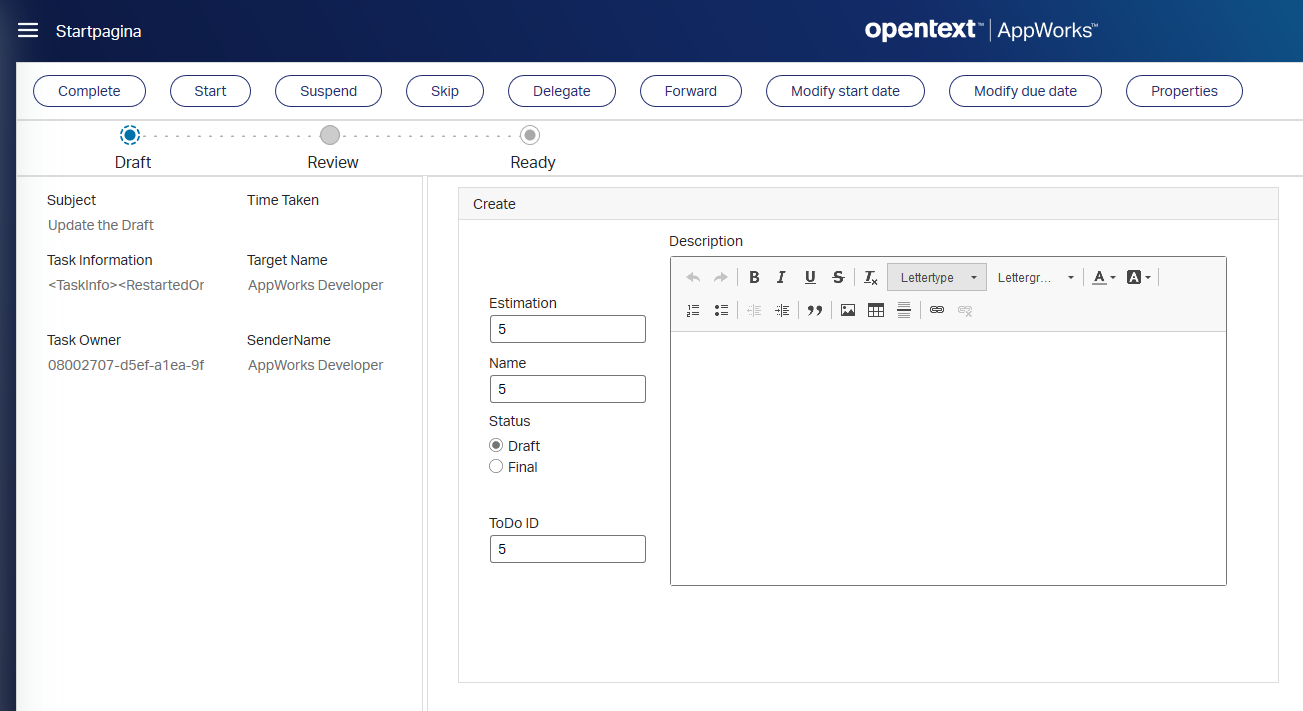
Looks the same…right? Not completely as we miss 1 button in the top called ‘Add related task’. And exactly this button is required for the ‘Intermediate’ follow-up activities in a lifecycle which is indeed not possible in a BPM. And that is also exactly the difference between BPMN and CMMN where CMMN can have ‘optional’ tasks where BPMN is a fixed sequence of tasks! So, be wise before you use these constructions, but now you know the limitations!
There is our “DONE” for today…Great info on how to use an entity task layout within a BPM. I didn’t know it was possible as I was always told that only an XForm can be applied as task screen for the end user. And we probably know that an XForm will never have the same look & feel as an entity modeling form will have without styling it properly with the correct CSS. Also, the ‘myth’ that you lose track from your entity when you start with a BPM is ‘busted’ if you accept the limitation that comes with it. Have a great day and I see you in the next one!
Don’t forget to subscribe to get updates on the activities happening on this site. Have you noticed the quiz where you find out if you are also “The AppWorks guy”?
