
Hi there AppWorks fans,
Welcome to a new installment of AppWorks tips.
Today we make an iHub server available for our AppWorks platform.
iHub?…Yes, the ‘information hub’ where OpenText pushes ‘Business Intelligence’ and ‘Reporting’ to the AppWorks platform through software called ‘Magellan™’
So, this iHub service makes it possible to create nice dashboards with reports of fancy graphs that can be shown in the AppWorks platform. The dashboard and report creation itself and the use of it in the platform will be placed in the backlog.
iHub is delivered with several modules that we will install in this post:
System Console
Provides a GUI (web-app) to configure one or more ‘BI & Reporting system’ instances. Here you can do some administration, licensing, and monitoring.
Business Intelligence (BI) & Reporting system (also called the ‘Information Console’)
Also, a web-app GUI (the iPortal) where we can create fancy looking dashboards of the available/published reports. This module also serves dashboards and reports that are published by the designer. AppWorks will point to this system to show the reports and dashboard in its platform.
But there is more to do here:
- An ‘Analytics Studio’ for presentation and permission management
- Viewing sample applications, dashboard, and reports
- Job and schedules
- Volume management as we can handle “bit data” also with this system!
- etc…all the great stuff on analytics!
Also, nice to know that it all runs on a Hadoop Distributed File System with Apache Spark. ‘Spark’ is the unified analytics engine for large-scale data processing (as the website tells us)!
Magellan Dataflow
This product is installed on top of the ‘BI & Reporting system’ as an extra extension so you have more support on scalable graphs, data routing, transformation, and system mediation logic. You read this also on the Apache Nifi website as Nifi goes by the name of ‘Megellan Dataflow’ and powered by OpenText.
Analytics designer
To make the picture complete there is a (Windows only) designer available under the name of software package ‘magellananalyticsdesigner-1670.exe’ where you create those new applications that include dashboards, reports, and data objects. The applications are published to the ‘BI & Reporting system’!
But now for the installation…
Let’s get right into it…
Just follow the steps as they are provided end you end up with a fine iHub system!
Make sure you have enough space, memory, and CPU available as iHub is a rather heavy service to run. It requires a minimum (on your VM):
BI & Reporting Server
- 8Gb Memory
- 5Gb HDD space
- 1 CPU
Information console (included war in ‘BI & Reporting Server’)
- 1Gb Memory
- 300Gb HDD space
System console
- 1Gb Memory (better 2Gb)
- 1Gb HDD space
- 1 CPU
Download software
All the required software can be found on the OpenText support side Magellan BI & Reporting 16.7
Yes, it’s 16.7 as at the moment I have only a 16.7 version of the platform available for the installation, but my experience is that the installation will not be that different from a 20.3 release.
Make sure you download these components:
- magellanbireporting-systemconsole-1670.tar.gz
- magellanbireporting-1670.tar.gz
- magellan-dataflow-1670.tar.gz
- (Not recommended for this post for now) magellananalyticsdesigner-1670.exe
- It’s in the Windows section and will run locally on your (Windows) laptop!
Pre-install steps
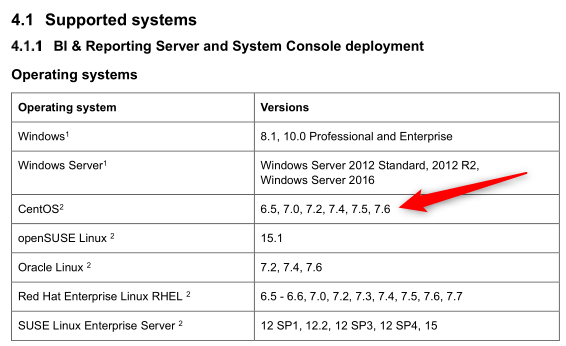
Make sure your VM is up and running with the supported OS cat /etc/centos-release. We already have the AppWorks platform up and running with our ‘otadmin’ administrator user and the correct supported OS.
Upload the downloaded files to the image in the ‘/home/otadmin’ directory
- magellanbireporting-systemconsole-1670.tar.gz
- magellanbireporting-1670.tar.gz
- magellan-dataflow-1670.tar.gz
You need both 32-bit and 64-bit support on libraries ‘libstdc++’ and ‘glibc’ for CentOS. So, make sure to run these commands to get the support (you probably are already supported, but just in case!)
sudo yum install -y libstdc++.i686
sudo yum install -y libstdc++
sudo yum install -y glibc.i686
sudo yum install -y glibc
Now we add a new folder structure next to the already available folder structures!
sudo mkdir /opt/opentext (probably already there!)
sudo mkdir /opt/opentext/ihub
Install ‘System Console’
Go to the home directory of ‘otadmin’ cd ~
Extract the content from the file with tar xvf magellanbireporting-systemconsole-1670.tar.gz
And move the content to our crafted location sudo mv SystemConsole/ /opt/opentext/ihub
Now we open an installation properties file for editing. Nothing fancy, but you need to make sure to accept the license! vi /opt/opentext/ihub/SystemConsole/acinstall.properties
1 | ac.package=a |
Let’s go to the directory cd /opt/opentext/ihub/SystemConsole/
Run the installer sh ./install.sh and follow the procedure
I used for the password ‘admin’
1 | Install will start now... |
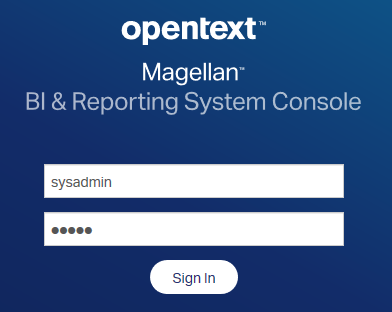
When ready you should be able to enter to system console UI from this URL
http://192.168.56.107:8500/sysconsole/ that redirects you to
https://192.168.56.107:8501/sysconsole/
- Username: sysadmin
- Password: admin
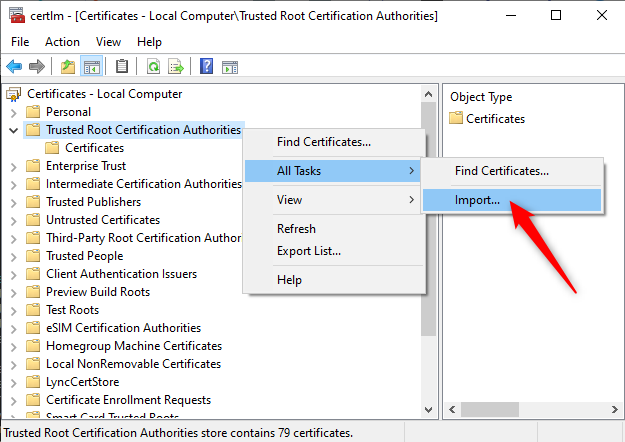
You probably also get a certification error in the browser because the SSL connection uses a self-signed certificate. Which can be a pain in the ass!
Solutions to fix this:
- Download the self-signed certificate
/opt/opentext/ihub/SystemConsole/modules/SystemConsole/credentials/sysconsole.crtand install it with the certificate manager in Windows to avoid a MOZILLA_PKIX_ERROR_SELF_SIGNED_CERT error. Make sure to place it in the ‘Trusted Root Certification Authorities’
- Update your ‘hosts’ file on your laptop in
C:\Windows\System32\drivers\etcwith an entry like this192.168.56.107 win-5skkmburvo7.mydomain.comwhere you can use your own IP and hostname. That hostname should be ‘recognized’ by the browser to avoid an ERR_CERT_COMMON_NAME_INVALID error on the certificate!- Close all browsers and restart a new one (might also be an incognito tab!)
- And…Have the best of all the luck with you! 😜
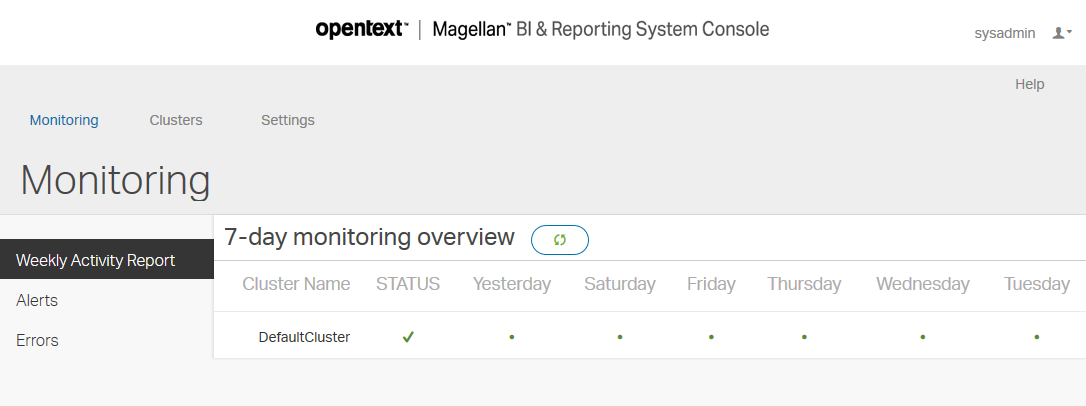
After login you see this screen (with one ‘Default Cluster’ available) for you make proper changes (not for now!)
For more Logging
cat /opt/opentext/ihub/SystemConsole/installer.log
cat /opt/opentext/ihub/SystemConsole/modules/SystemConsole/setupSystemConsole.log
To Stop/Start the service
sh /opt/opentext/ihub/SystemConsole/modules/SystemConsole/stopSystemConsole.sh
sh /opt/opentext/ihub/SystemConsole/modules/SystemConsole/startupSystemConsole.sh
The above also starts/stops PostgreSQL, but it can be done directly:
sh /opt/opentext/ihub/SystemConsole/modules/SystemConsole/setup/stoppostgresql.sh
sh /opt/opentext/ihub/SystemConsole/modules/SystemConsole/setup/startpostgresql.sh
Another note: I had some problems on starting/stopping the tomcat instance for the system console in conflict with my CATALINA_HOME variable that points to my TomEE instance (for the AppWorks platform). I temporary removed it with
unset CATALINA_HOME. Then it’s starting fine. You can restore it withsource .bash_profile. I know…it’s not the best solution, but it works for now!
Install BI & Reporting
Again, go back to the home directory of ‘otadmin’ cd ~
And now extract the content from the file with tar xvf magellanbireporting-1670.tar.gz
Also move this content to our crafted location sudo mv InformationHub/ /opt/opentext/ihub
Update some settings for licensing vi /opt/opentext/ihub/InformationHub/acinstall.properties
1 | ac.package=b |
I played with the port (I use 8011 and 8012 because 8010 was in use!) settings, but it give me all kind of problems later in the node configuration with errors like “Unrecognized SSL message, plaintext connection”. I updated my service (tomcat) that uses 8010!
Check with
sudo netstat -tulpn | grep 8010andsudo ls -l /proc/PID/exe
Let’s go to the directory cd /opt/opentext/ihub/InformationHub/
Run the installer sh ./install.sh and follow the procedure
1 | Install will start now... |
When ready you should be able to enter to system console UI from this URL
http://192.168.56.107:8700/iportal/ (or https://192.168.56.107:8701/iportal/)
- Username: Administrator
- Leave the password blank
Also, here (in the HTTPS URL) you get a certification error in the browser because of the SSL connection that uses a self-signed certificate.
You already know the solutions to fix this, but this time the certificate can be found here
/opt/opentext/ihub/InformationHub/modules/BIRTiHub/iHub/shared/config/credentials/birtihub.crt
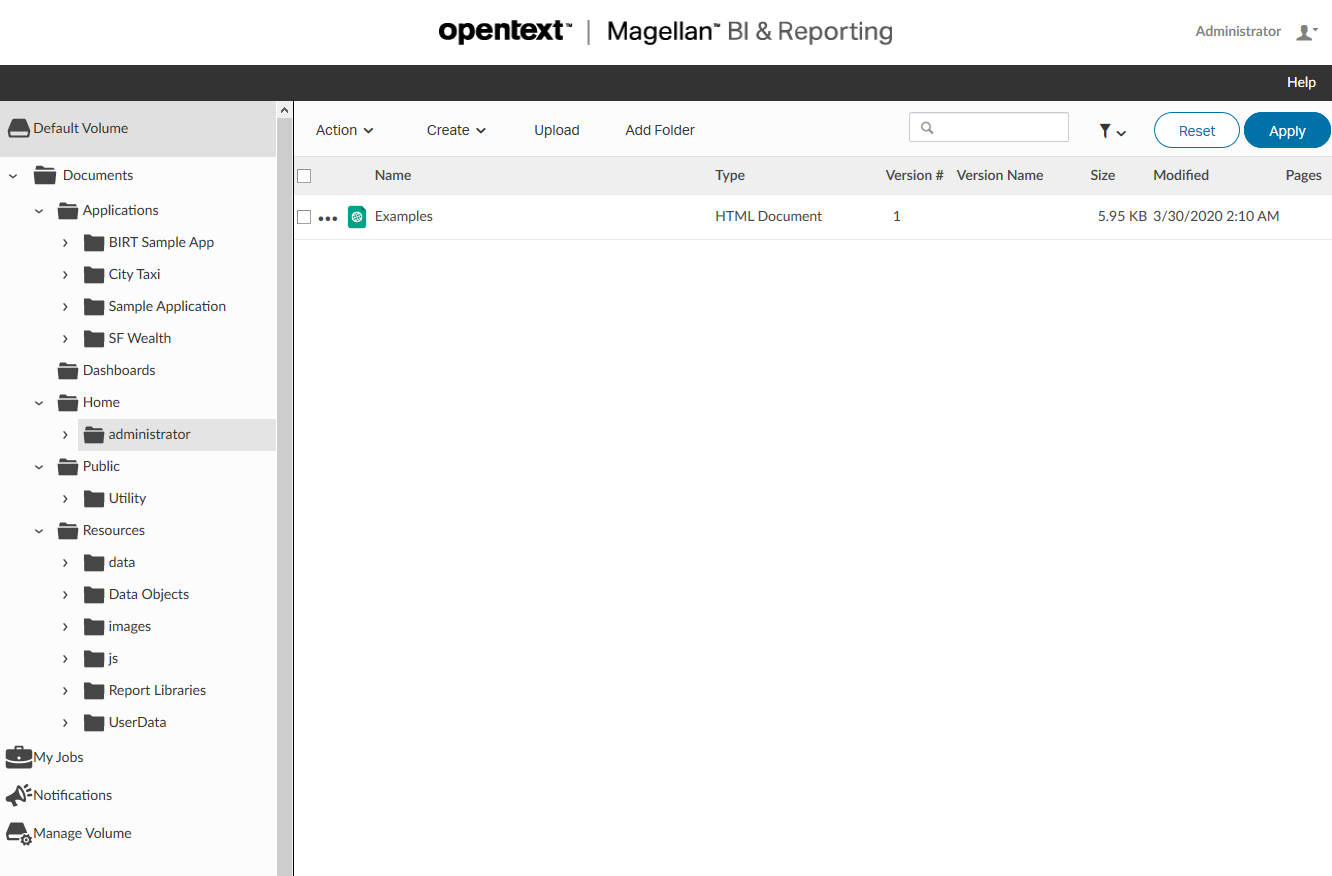
After login you see this screen in front of you. We don’t dive further into this screen for this post.
For more Logging
cat /opt/opentext/ihub/InformationHub/installer.log
cat /opt/opentext/ihub/InformationHub/modules/BIRTiHub/setup.log
cat /opt/opentext/ihub/InformationHub/modules/BIRTiHub/setup.log
cat /opt/opentext/ihub/InformationHub/modules/BIRTiHub/setupiHub.log
cat /opt/opentext/ihub/InformationHub/modules/BIRTiHub/iHub/bin/uploadsamplecontent.log
To Stop/Start the service
sh /opt/opentext/ihub/InformationHub/modules/BIRTiHub/stopiHub.sh
sh /opt/opentext/ihub/InformationHub/modules/BIRTiHub/startiHub.sh
The above also starts/stops PostgreSQL, but it can be done directly (I see that during stopiHub my postgreSQL is not always properly killed!)
sh /opt/opentext/ihub/InformationHub/modules/BIRTiHub/stopPostgreSQL.sh
sh /opt/opentext/ihub/InformationHub/modules/BIRTiHub/startPostgreSQL.sh
Install Dataflow
Next step is to install ‘Dataflow’ over the ‘InformationHub’. It’s an addon/extension and that’s why it is installed ‘over’ the iHub installation directory!
Go to the directory of iHub cd /opt/opentext/ihub/InformationHub/
Now unpack the dataflow package from the /home/otadmin to the current directory with tar xvf ~/magellan-dataflow-1670.tar.gz
Stop iHub sh /opt/opentext/ihub/InformationHub/modules/BIRTiHub/stopiHub.sh and give a ‘yes’ if you really, really, really want to do it!
I first needed to stop the PostgreSQL instance with
sh /opt/opentext/ihub/InformationHub/modules/BIRTiHub/stopPostgreSQL.shbefore iHub does a proper shutdown…Don’t know why that is!?
1 | iHub process id = 2653 |
Let’s install the dataflow component sh /opt/opentext/ihub/InformationHub/installDataflow.sh and give a ‘1’ for the ‘new installation’ option!
1 | Install will start now... |
And start the iHub instance again with sh /opt/opentext/ihub/InformationHub/modules/BIRTiHub/startiHub.sh
A second look in the iPortal gives us 2 new options!
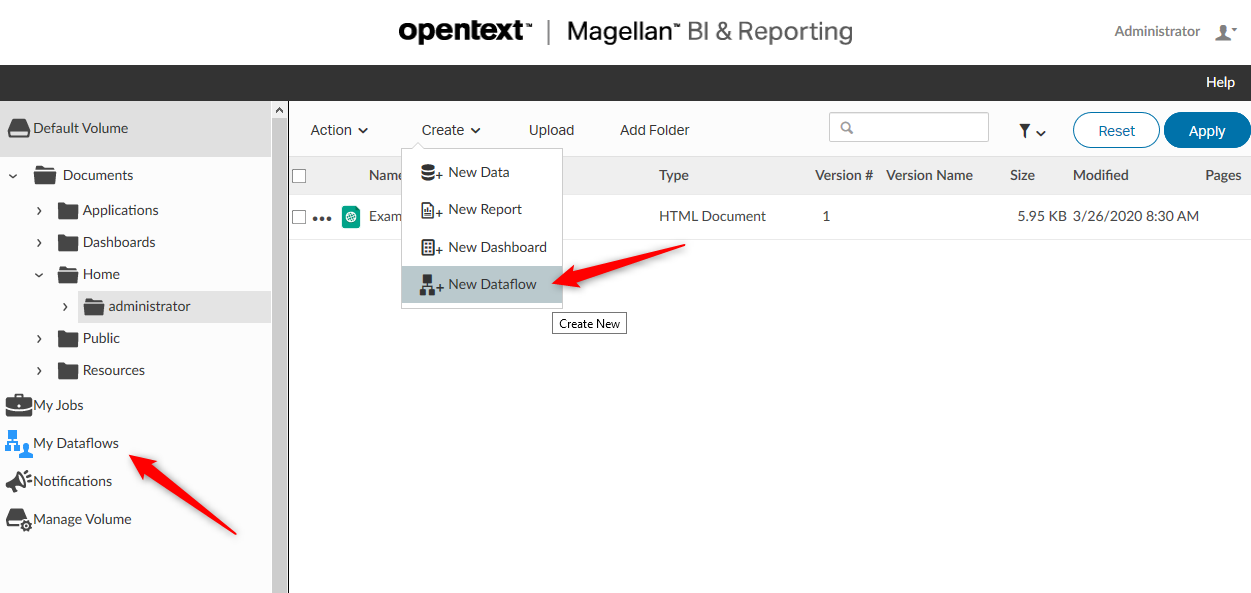
Update Default cluster with our crafted node (= our iPortal!)
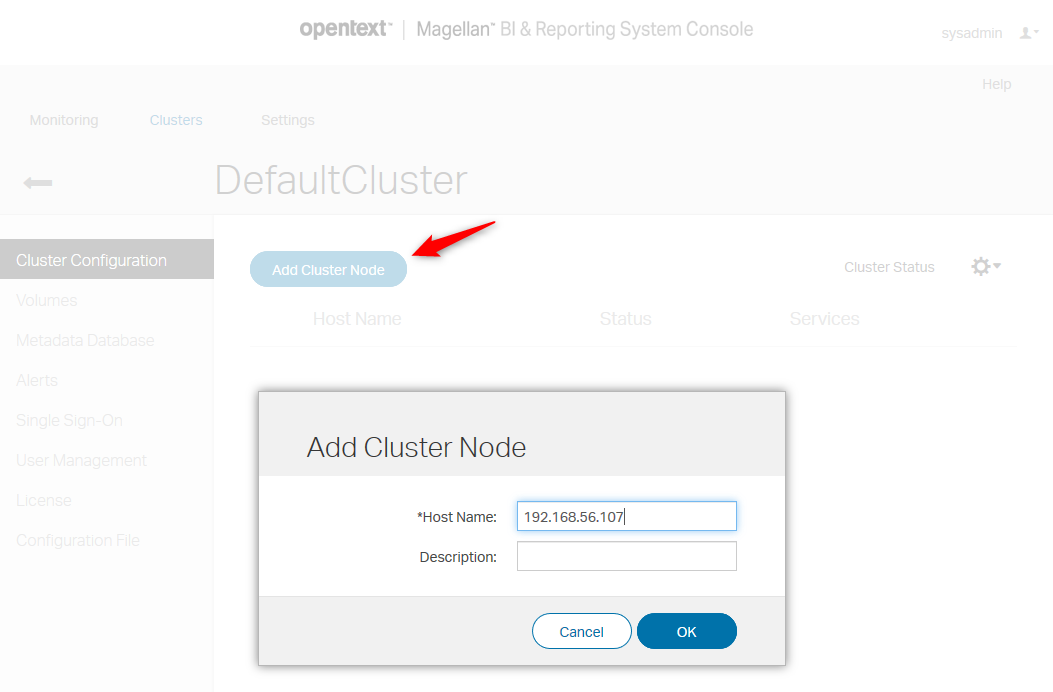
Now, go back to the ‘SystemConsole’ and go to the ‘Clusters’ tab
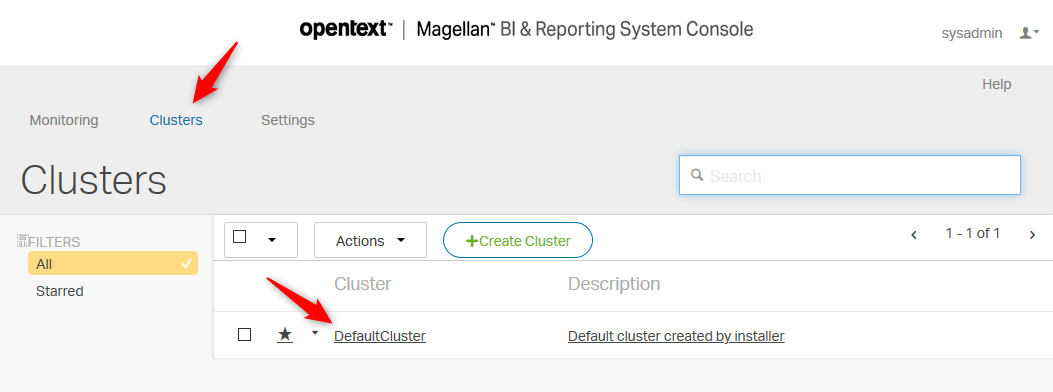
Click on the ‘DefaultCluster’
Here you can add a ‘cluster node’ to the ‘Default cluster’
And now you are also able to start the ‘Dataflow’ service!
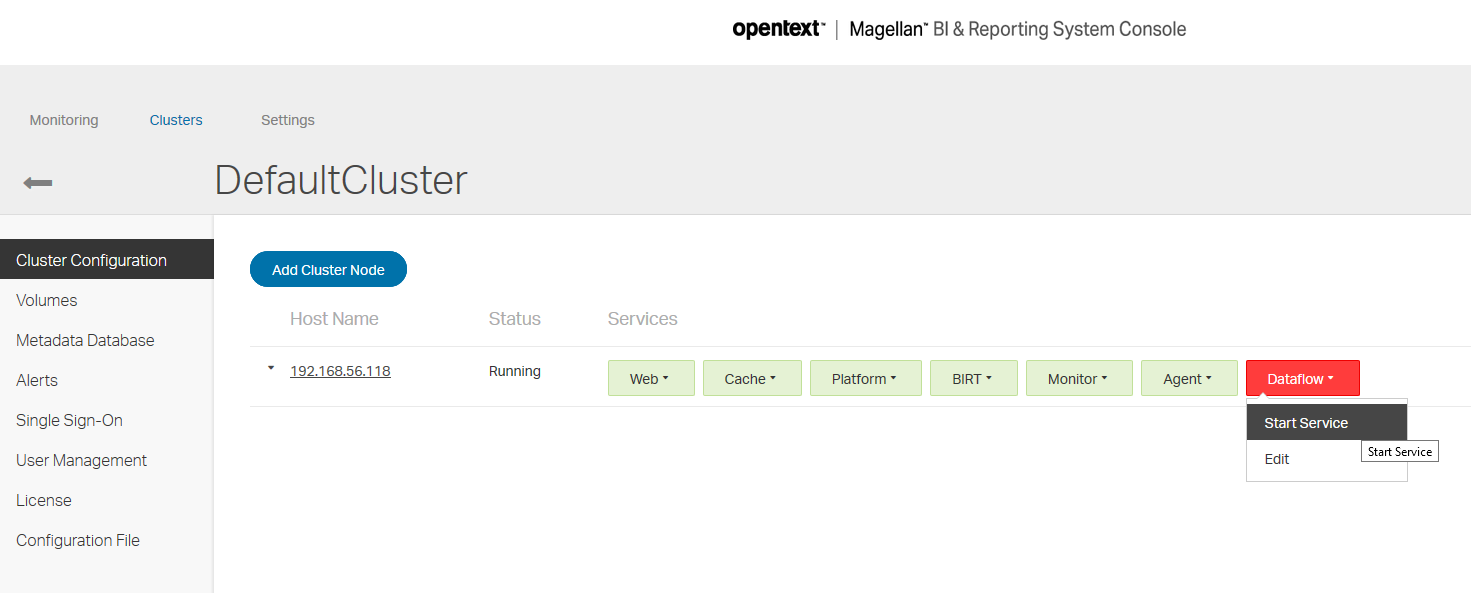
And after some time, you have you iHub cluster node fully up and running fine with all ‘green’ services!

Process Suite Report Server Security Extension (RSSE)
This is a prerequisite for the iHub to AppWorks connector! And as far as I could find only described in the installation Guide for Windows!?…Don’t ask the messenger!
What does it do? It handles the authentication between iHub and AppWorks.
First, we grab the iHub authentication plugin from this location from your AppWorks installation directory.
/opt/opentext/AppWorksPlatform/defaultInst/components/ihubconnector/authentication\ plugin/axis2.zip
Download it if it’s another server and upload it to your iHub server!
Now create a new directory on the iHub server side mkdir /opt/opentext/ihub/InformationHub/modules/BIRTiHub/iHub/web/webapps/axis2
And go to that location cd /opt/opentext/ihub/InformationHub/modules/BIRTiHub/iHub/web/webapps/axis2
Now extract the zip file in the root of that current location unzip ~/axis2.zip
I saved the zip in my /home/otadmin directory!
Let’s update some properties vi /opt/opentext/ihub/InformationHub/modules/BIRTiHub/iHub/web/webapps/axis2/WEB-INF/services/RSSEDriver.properties
1 | OTDS_BASE_URL=http://192.168.56.107:8181/otdsws/v1 |
And update another file vi /opt/opentext/ihub/InformationHub/modules/BIRTiHub/iHub/web/webapps/axis2/WEB-INF/conf/axis2.xml
1 | <transportReceiver name="http" |
That’s all the configuration you need to do for RSSE!
Of yeah…restart iHub and make sure this URL is up and running: http://192.168.56.107:8700/axis2/services/listServices
Update user management on the iHub System Console
Back to the ‘SystemConsole’ again where we go to the setting of our cluster. This time we open the ‘User Management’ settings. These can be updated with this information:
Type: RSSE SOAP Service
Host: 192.168.56.107
Port: 8700
Context path: /axis2/services/ProcessSuiteRSSE
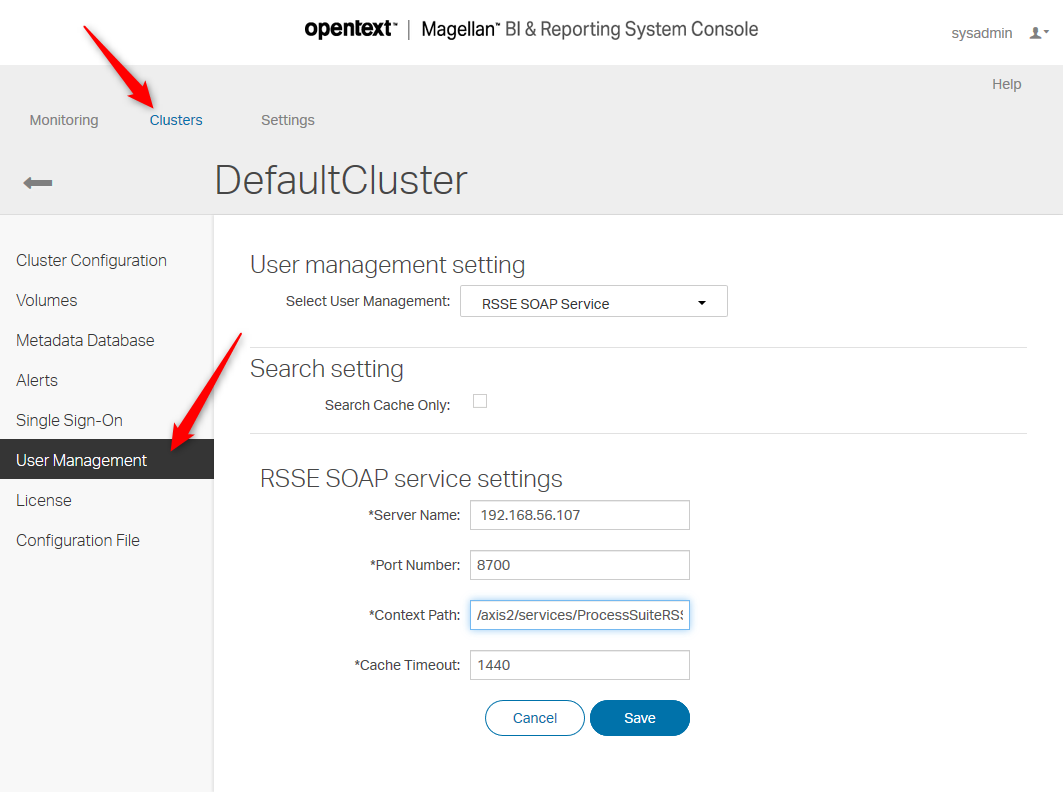
Hit that blue shiny ‘Save’ button like a pro….you earned it!

And we restart iHub again…last time!
iHub in AppWorks
Now that we have iHub up and running we have one extra step to make and that is it!?
Making sure the iPortal is pulled into to AppWorks platform…How? Via the ‘OpenText iHub Connector’!
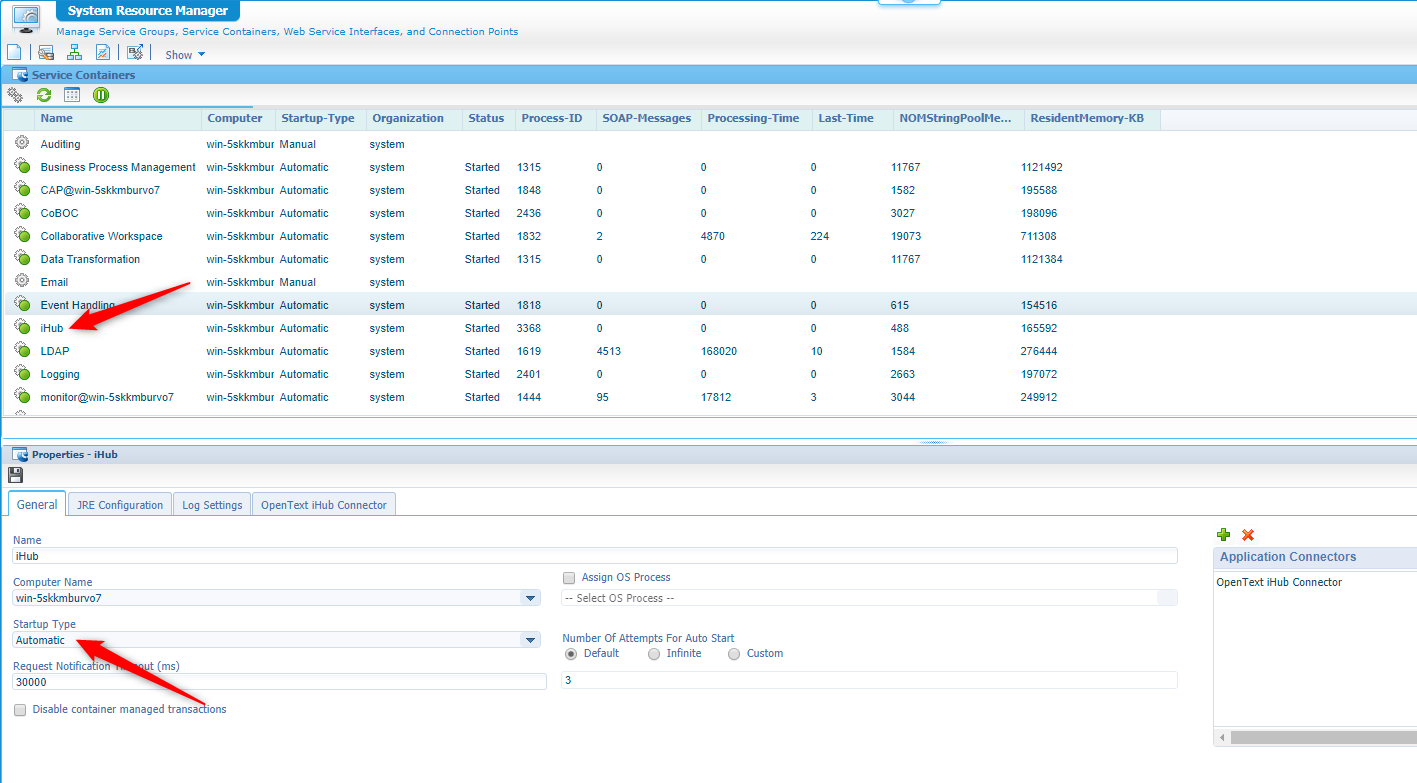
Login with ‘sysadmin’ (the ‘Administrator’ role) to the AppWorks platform in the ‘system’ organization make sure you have the ‘iHub’ service container up and running in the ‘System Resource Manager’…And make it also automatically start!
Now it’s time to open the artifact ‘iHub Connection Manager’ artifact.
Here you can fill-in this information and do a crash-test!
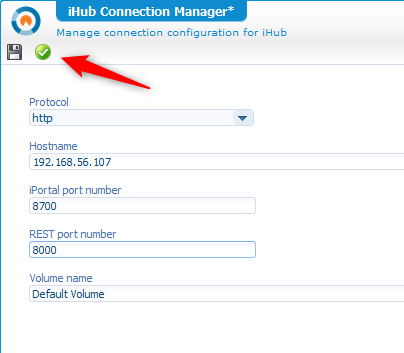
With a final ‘relieved’ message…

More information…
There is off-course a manual from OpenText itself…Where I also got the information from…Let that be clear!
For more logging it always helps to search for the latest 10 changed logfiles with sudo find /opt/opentext/ihub/ -type f -mtime -1 -name "*.log" -printf '%TY-%Tm-%TdT%TT %p\n' | sort | tail -10
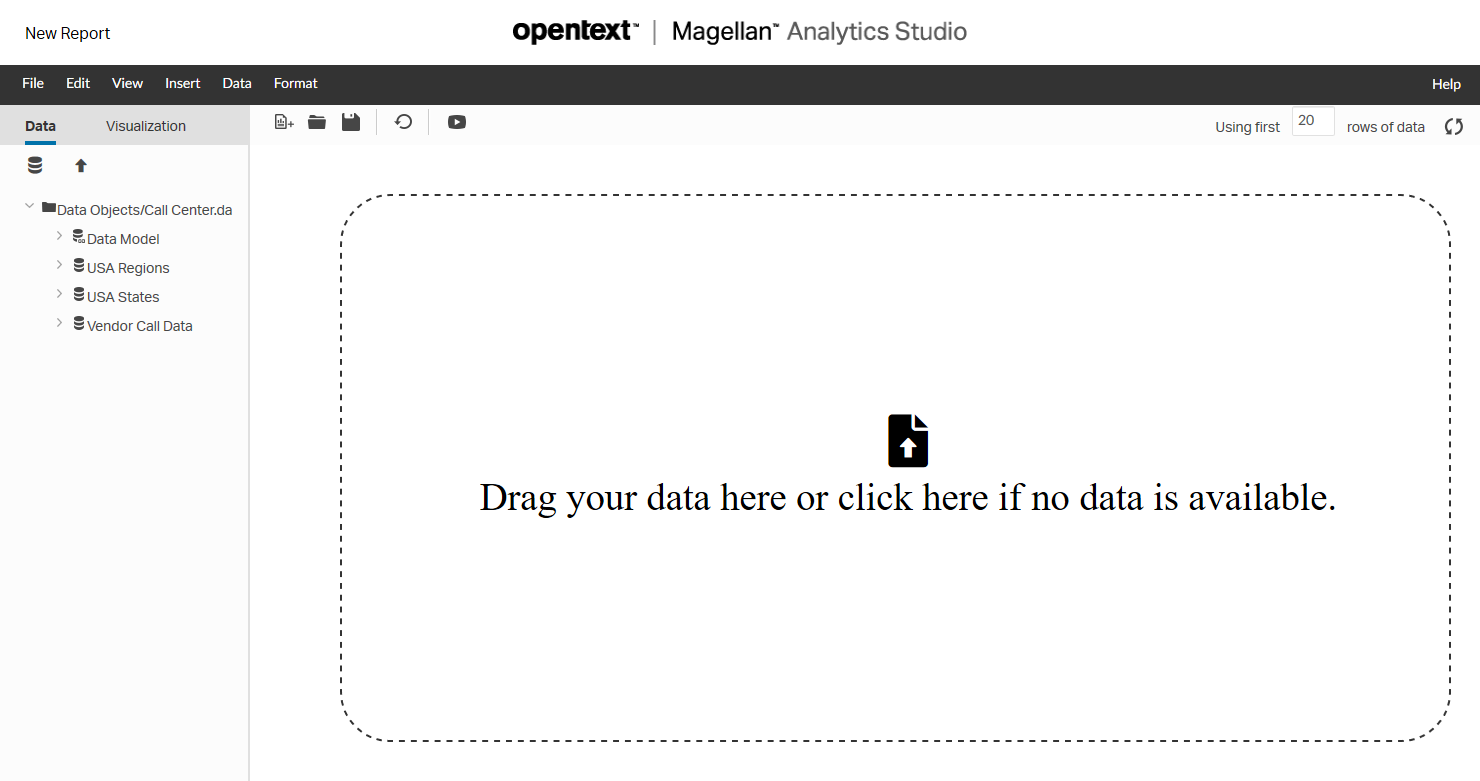
Then we also told stuff about Analytics Studio (a web-app). It manages binary content and performs tasks such as uploading and downloading binary files.
The Analytics Studio is accessible via URL: http://192.168.56.107:8700/iportal/wr
Where you get this screen for you to play with (not for this post!)
The un-install of it all!?
Real easy…Stop the services and just delete everything in the /opt/opentext/ihub folder
1 | sh /opt/opentext/ihub/InformationHub/modules/BIRTiHub/stopPostgreSQL.sh |
And that, my AppWorks friends, gives us the final “DONE”. I know the header told us to have some simple steps, but it got pretty advanced after all. That’s how it goes in life…Stuff is not always as easy as it looks in the first place! I hope you learned a lot again from this post about installing iHub and I also hope you managed to make the installation work for you too. In the future we’ll use this service for reports and dashboarding on our AppWorks platform, but that’s a totally different type of work with a local iHub designer tool we need to dive in…To be continued. For now, I want to give you a happy day with lots of sunny moments…cheers and see you in the next one.
Don’t forget to subscribe to get updates on the activities happening on this site. Have you noticed the quiz where you find out if you are also “The AppWorks guy”?
