Hi there AppWorks fans,
Welcome to a new installment of AppWorks tips.
And a good morning where we’ll see (another) great feature in AppWorks that has to do with webservices. Last time we generated some webservices from ‘Database Masterdata’. This time we’ll create one service on our own. It will be a SOAP service that we can (off-course!) reuse in a BPM. And to make it all work we’ll also create an Universal Description Discovery and Integration service container that serves it all to our end-users.
And isn’t UDDI that standard registry for services in your environment…What you can also accomplish with for example Apache jUDDI? Indeed correct, but AppWorks has its own kind of UDDI service available. We’ll see!
What do we need?
- An UDDI service container…duh!
- A SOAP service
- A webservices document in AppWorks
Let’s get right into it…
First for the SOAP service…
Already have some SOAP service available in your network? Make sure the URL to the WSDL is available!
If you don’t have that you have 2 options:
- For the diehards…You can go for the Spring Boot site solution and get the service up-and-running from your own IDE like IntelliJ.
- For the fast people (who just want to know how to call a SOAP service from AppWorks)…You can use the downloaded JAR file from the introduction of this post.
The instruction for the downloaded JAR
Run the JAR (from a command prompt) with this command from downloaded location: "c:\Program Files\Java\jre1.8.0_161\bin\java.exe" -jar helloworld-0.0.1-SNAPSHOT.jar
You see I’m using java8 for this; that is because JAXB and JAX-WS (required for SOAP requests) are used as dependency in this project and are removed from the later java versions. Could be fixed, but not required for this post.
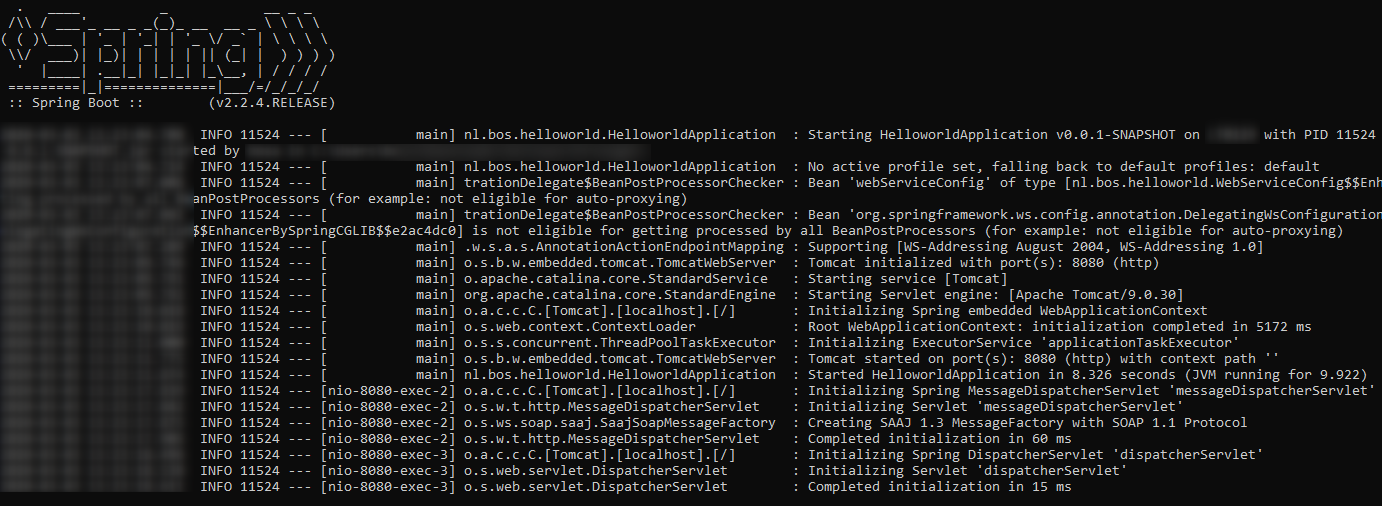
It’s important that we have our service up-and-running and this URL is available for you:
http://localhost:8080/ws/countries.wsdl
Next is the UDDI service container
Open the AppWorks explorer with an administrator role like ‘sysadmin’ and open the ‘System Resource Manager’ artifact.
Create a new ‘Service Group’…Like we also created a new ‘WS-AppServer’ already!
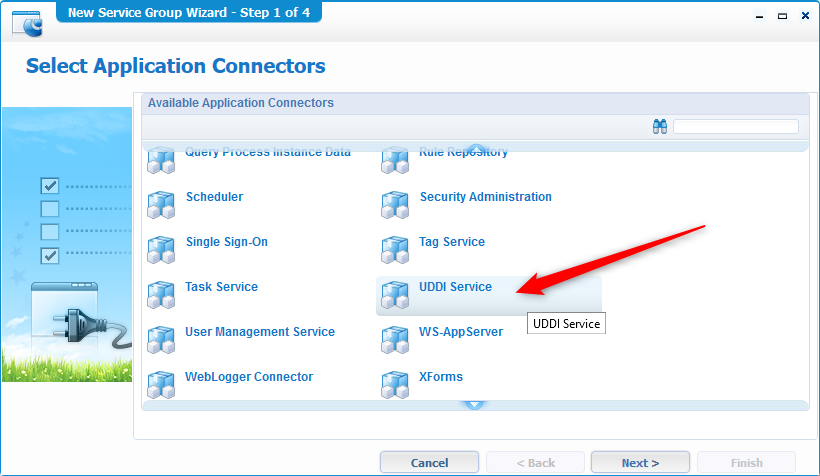
Go for the ‘UDDI Service’ and click ‘Next >’
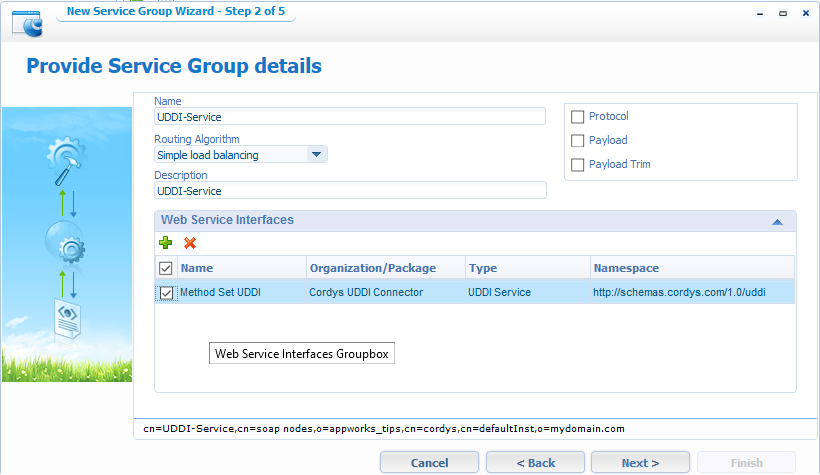
Give it a name like ‘UDDI-Service’ and add the ‘Method Set UDDI’. Click ‘Next >’ when the screen looks the same.
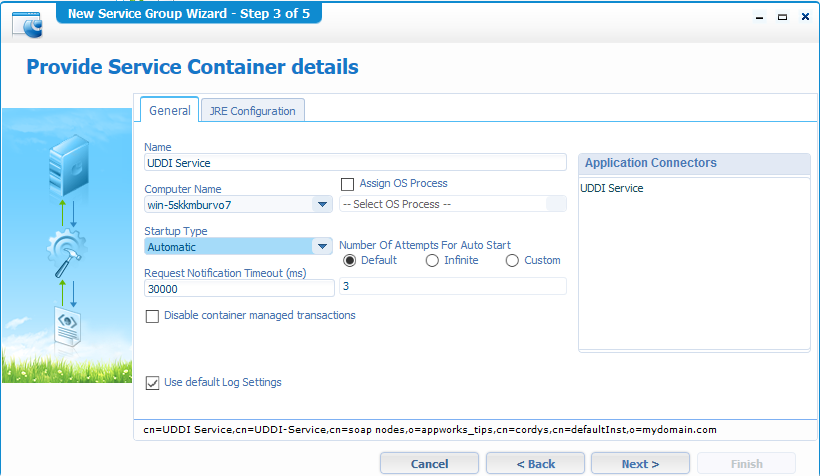
Make it start ‘Automatically’ and click ‘Next >’
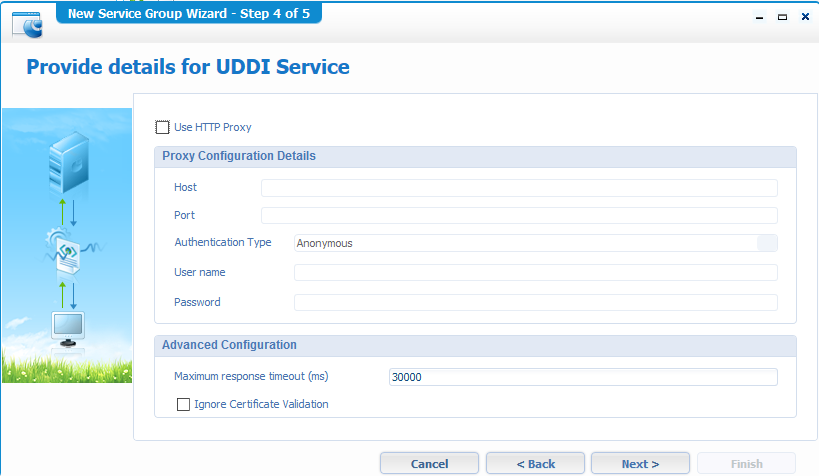
No need for an HTTP Proxy now…just click ‘Next >’
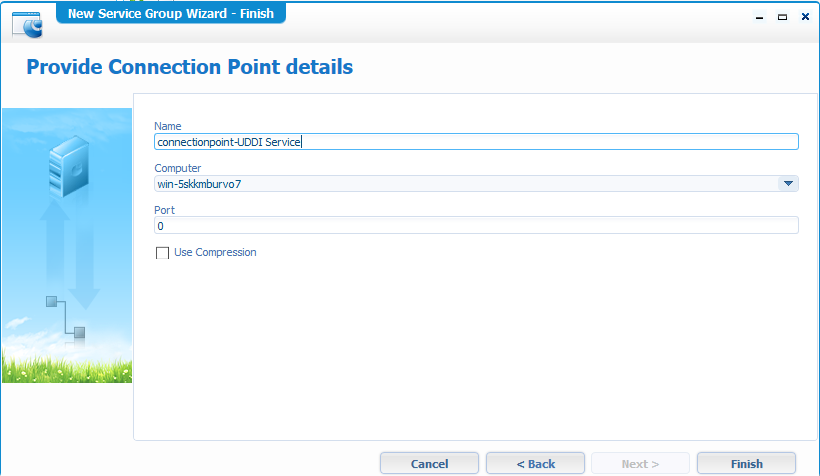
Check the overview and click ‘Finish’
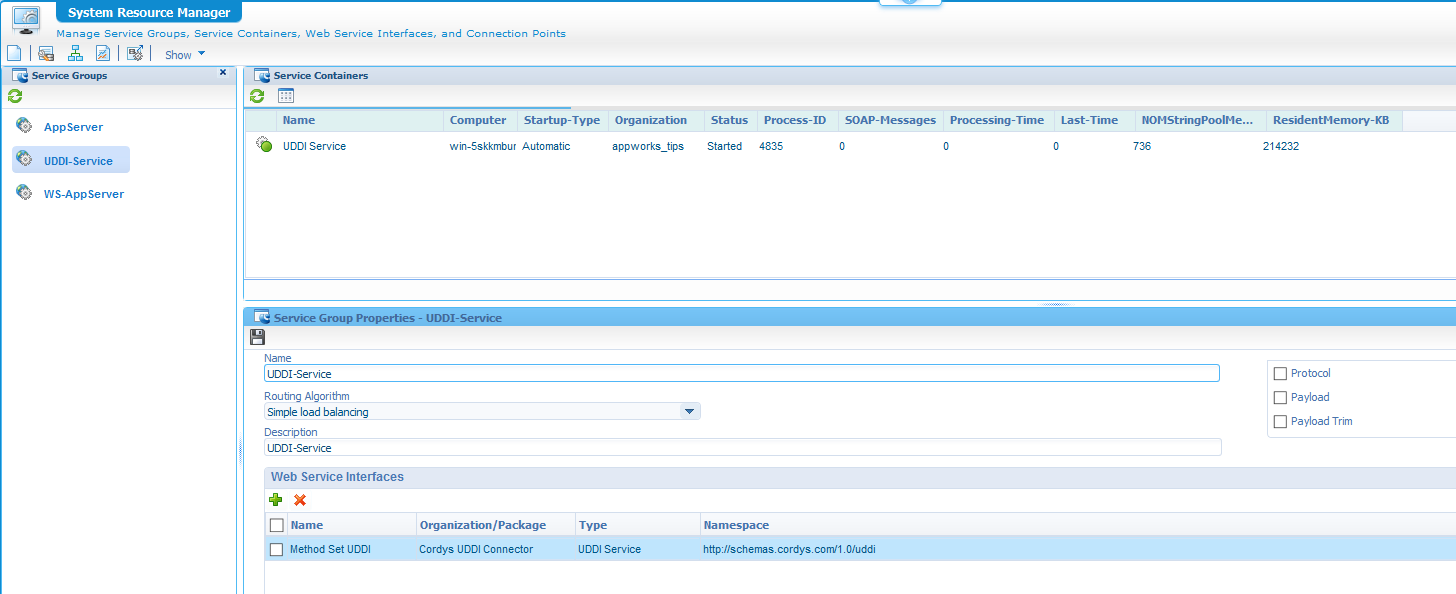
Shining bright like a diamond…great!
Create a new ‘Webservice’ document
Now, we’ll go to our AppWorks project with the ‘developer’ role.
First create a folder with the ‘descriptive’ name ‘webservices’ 😜
Next we’ll create a new document of type ‘Web Service’:
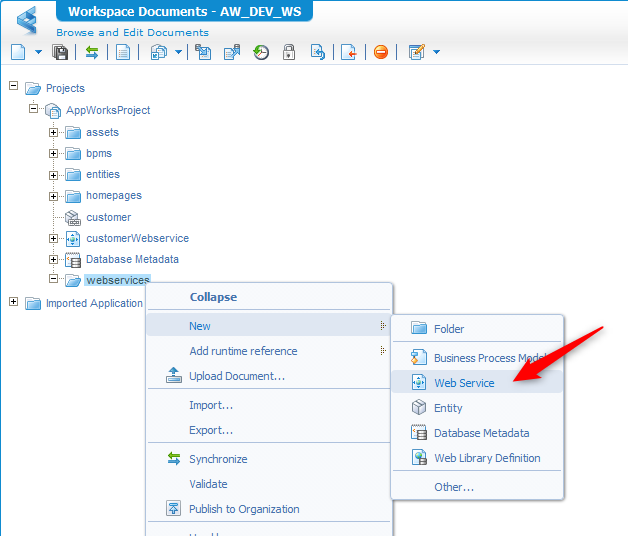
Fill in the screen like this where you select ‘Import WSDL’ as the source for our service
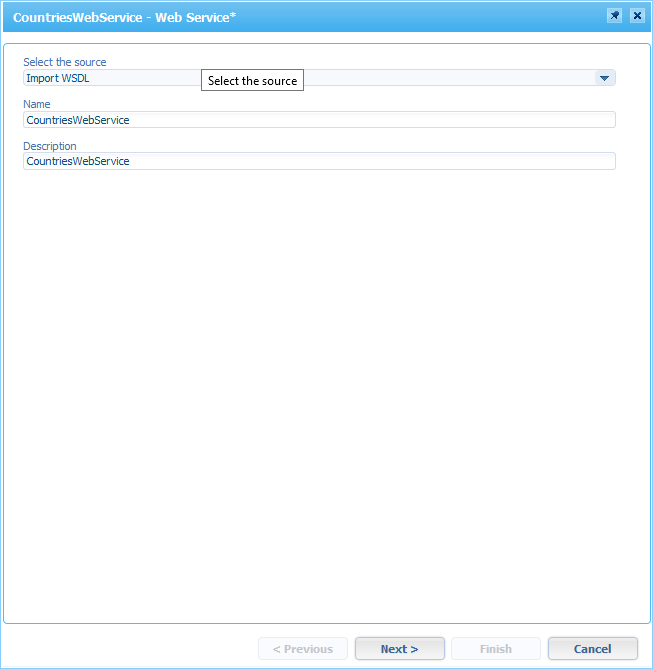
Click ‘Next >’ to continue…
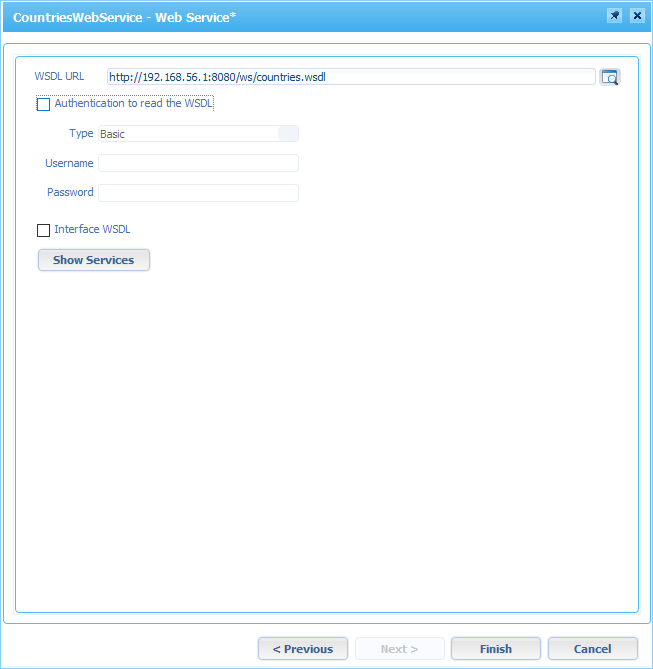
Fill-in the WSDL service URL.
My WSDL service is running locally on my laptop, but the service is called from my AppWorks platform running on my VM. That’s why it’s not ‘localhost’, but ‘192.168.56.1’ (in my case!)
Click the ‘Show Services’ button…
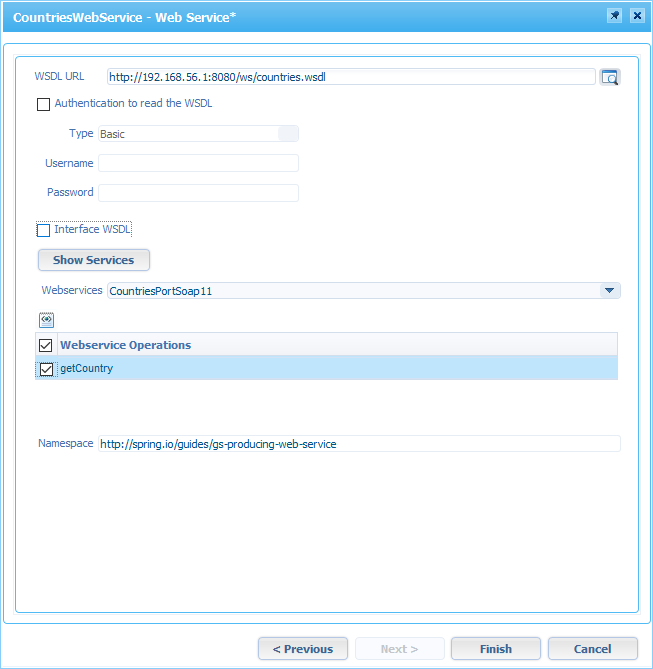
Select the found webservice and hit that ‘Finish’ button for the magic to happen.
This is the end-result you can save and publish to the runtime!
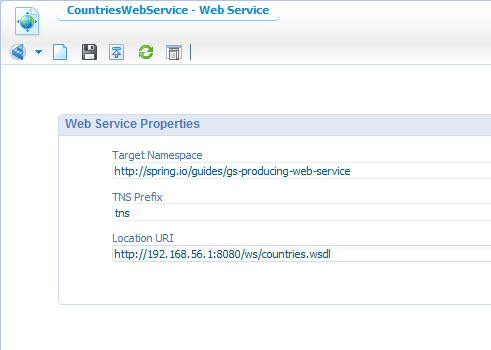
Close this panel and get back to the project overview where you see something like this
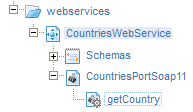
You could right-click the service and test it, but first…
Add the service to the UDDI service container
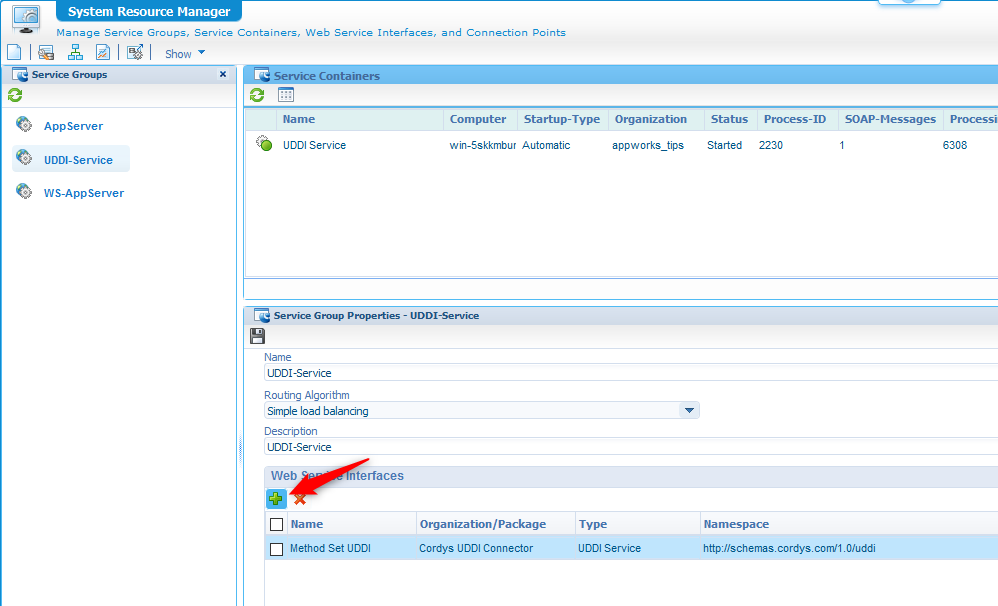
Back to the ‘System Resource Manager’ where we get to the properties of the just created UDDI-Service. Here we can add a new webservice:
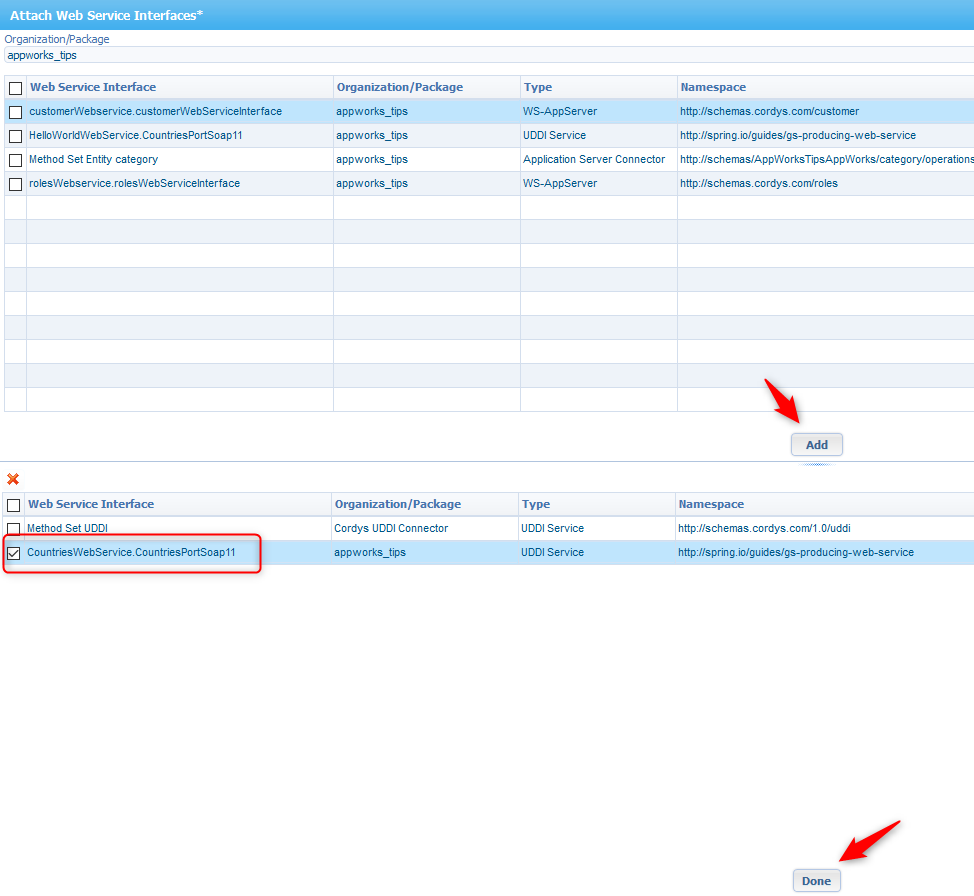
Just select the correct service, add it to the list below and hit that ‘Done’ button…
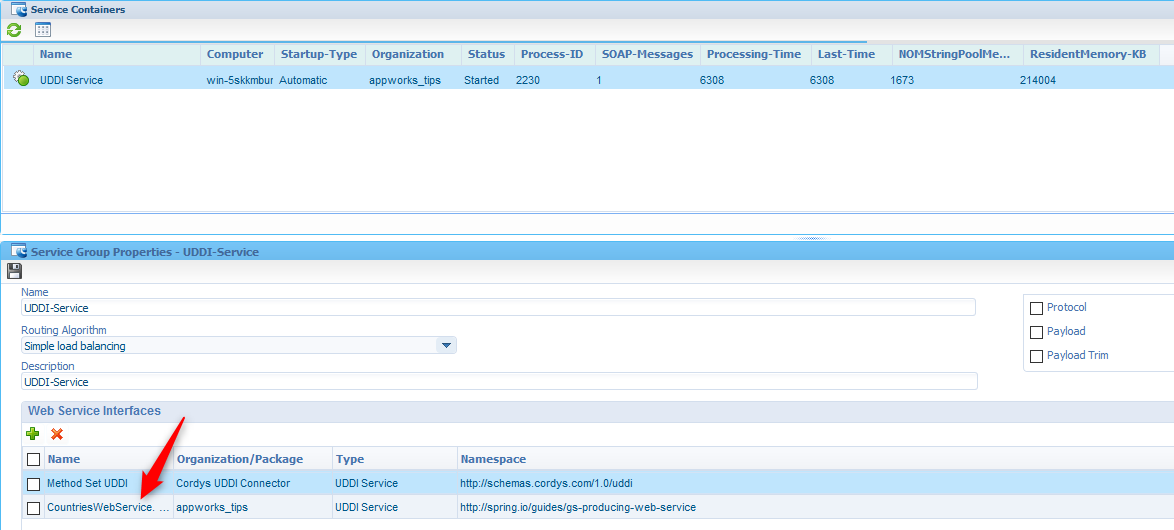
The result should be this and after a save action you can restart the service container.
Now we can…
Test the service
So, back to the project and right click the service to test it.
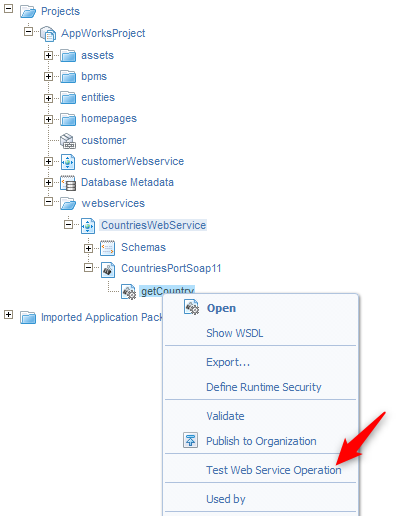
In the test tool panel add this SOAP XML message
Possible input values for ‘name’ are
Spain,PolandandUnited Kingdom; These values are ‘recognized’ by the service from the example!
1 | <SOAP:Envelope xmlns:SOAP="http://schemas.xmlsoap.org/soap/envelope/"> |
Hit the invoke button the get back a result like this
1 | <data> |
How nice…What are the next steps?
The first thing to do (you also do this on a BPM) is to ‘Define Runtime Security’. Right click that service again and open the runtime security settings
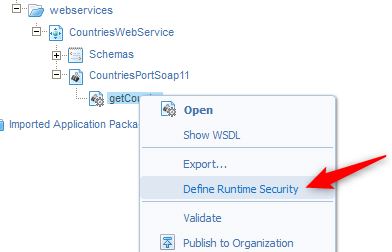
Why? This makes the service also accessible for our beloved end-users to execute and not only the administrator/developer.
We don’t explain this further in this post as this also involves roles in our application and we didn’t play with that already!
The second thing to do is calling the service (for example) from a BPM from where you can loop over the data and bring it to the front-end form in the drop-down box. This is what we already did in a previous post!
Enough for this post where we learned about consuming an external SOAP service from our AppWorks solution…I give it a ‘DONE’ and I see you in the next post where we discover another great topic of the platform.
Don’t forget to subscribe to get updates on the activities happening on this site. Have you noticed the quiz where you find out if you are also “The AppWorks guy”?


