
Hi there AppWorks fans,
Welcome to a new installment of AppWorks tips.
The post will show something nice I played with lately and is not enabled by default. It’s the interaction you can have with a BPM from an end-user perspective. We already saw some BPM interaction with the dynamic enumerator properties, but this time we trigger a BPM when the user changes something in a form and we want to send a message back when something is wrongly filled in…Now you might ask yourself why we don’t just use the ‘Rule’ building block for this. Indeed, a valid question, but when you want to check more complex cases your next step is a BPM. Let’s just dive into it and see what we can accomplish?
Let’s get right into it…
Spin up the VM and open your project with the developer role. Pick an entity (this time I use the ‘project’ entity) where you already created a ‘Create’ and ‘Default’ form.
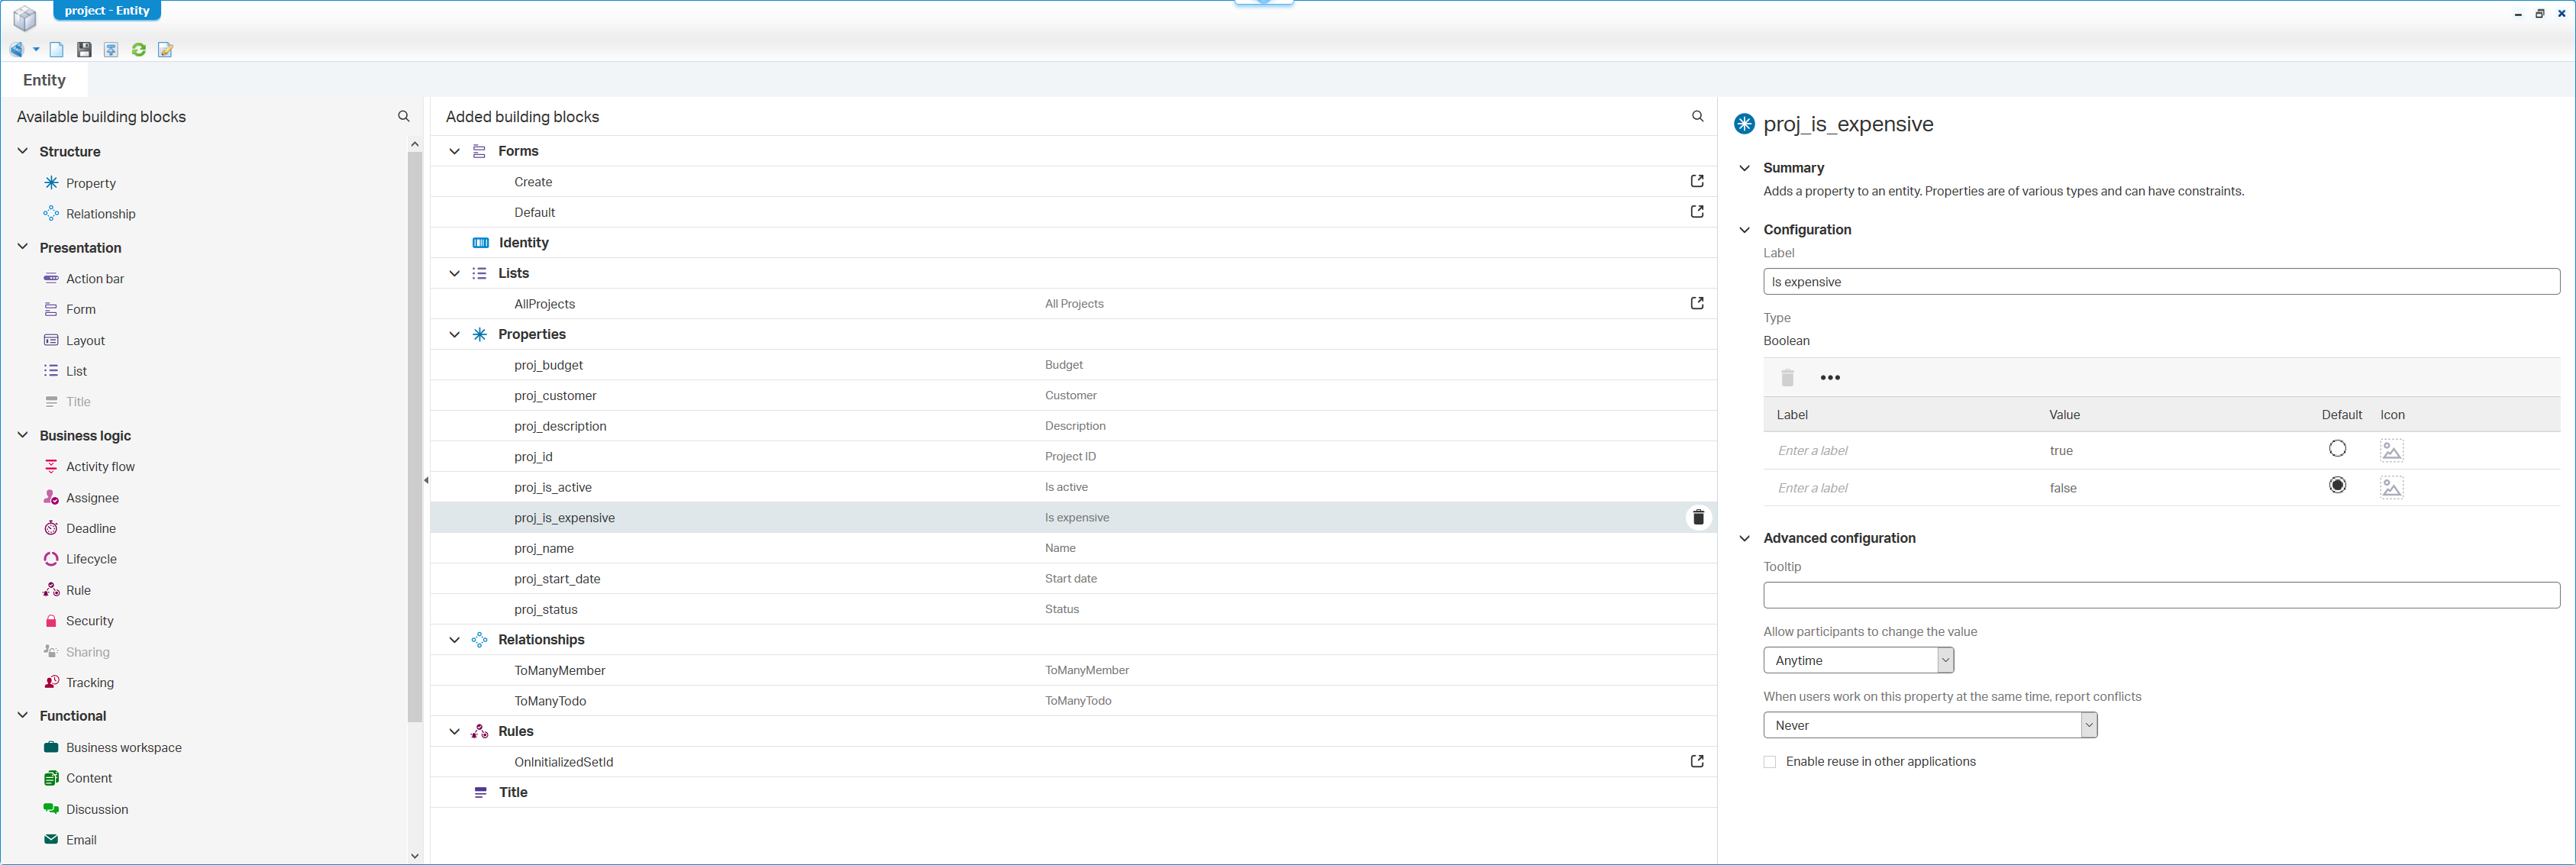
Let’s define our use-case. When the project budget is greater than 10.000 a warning is sent to the user interface and the ‘Is expensive’ property is set to ‘TRUE’
Off-course we can do this with ‘Rule’ building blocks too, but that’s not the point of this post.
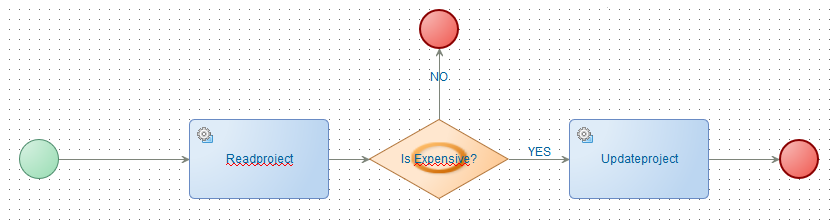
This is our start point with the already created ‘Is expensive’ property
And this is the ‘Create’ form that is also included in the ‘Default’ form

The first thing to do is adding the ‘Webservice’ building block to this ‘project’ entity. Enable the ‘Read’ and the ‘Update’ operations.
Why? Because our BPM needs to get be able to get the information (our budget) from the current entity and update that same entity with an ‘is expensive’ flag…We’ll see that later!

Save the entity and make sure you publish all the changes!
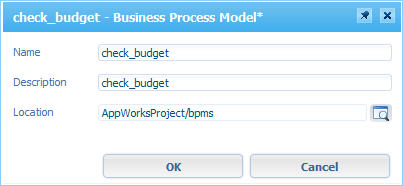
Next step is to create a new BPM in the already available ‘bpms’ folder in our project.

First save it with a proper name like ‘check_budget’
What should our BPM do? It’s a good practice to write it out in pseudo code:
1 | > On start get the ItemID of the current entity instance |
This would be your first clean setup of the basic flow where we only drag & drop all the constructs in place (without any extra configuration changes!)
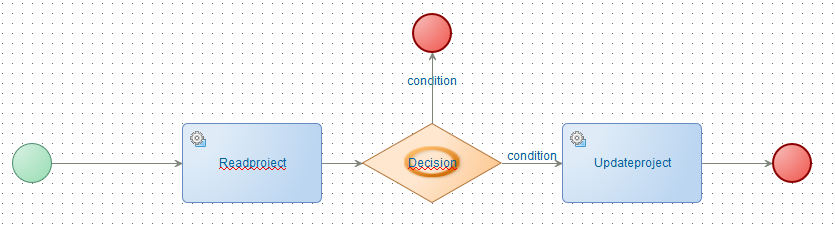
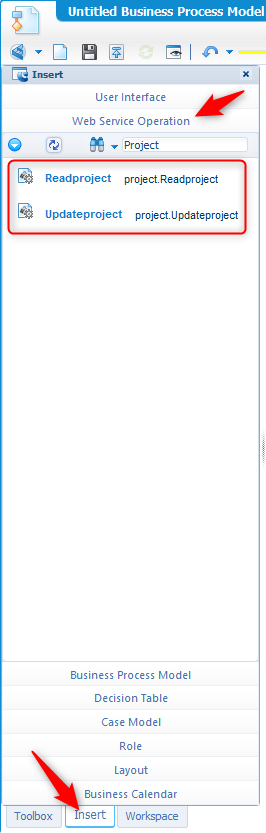
Those ‘Read’ and ‘Update’ project activities are available in the below ‘Insert’ tab. Next to the ‘Toolbox’ tab where we search for it in the ‘Web Service Operation’ accordion tab!
Let’s add some extra configurations:
Update the names
To make the flow more readable
Handle the error path
To send a message to the end-user
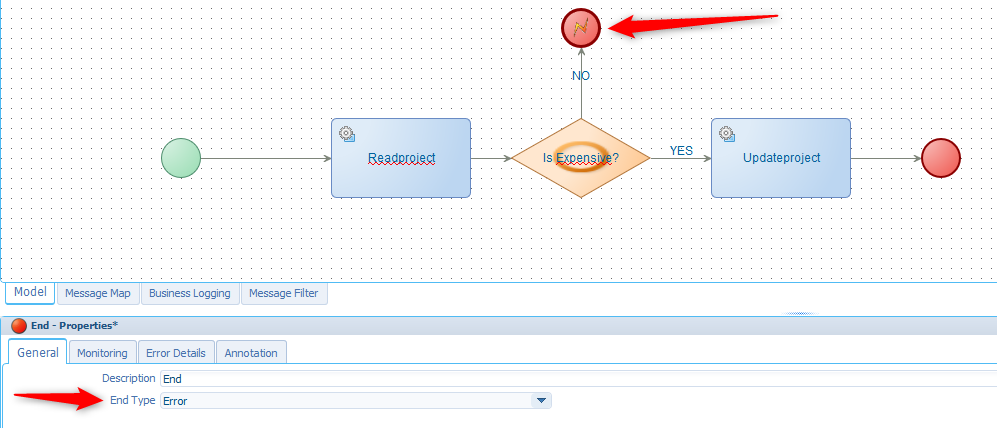
And define that message in the ‘Error Details’ tab

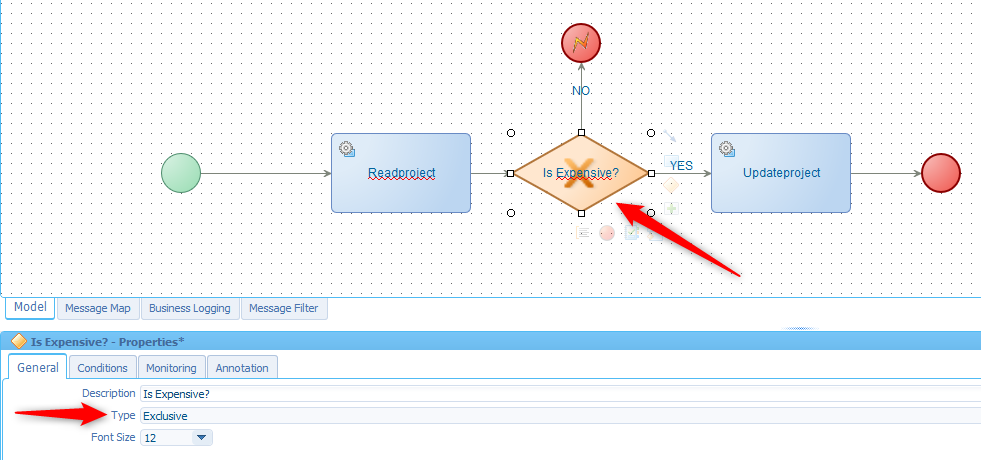
Make the decision ‘excusive’
This makes it sure that only 1 output is chosen based on the applied condition. The difference with ‘Inclusive’ is that all the other conditions are skipped when a condition is satisfied. So, with ‘inclusive’ all conditions are checked and that makes it possible to satisfy multiple conditions with multiply output flows!
Add a condition to the decision
In that same decision construct make the following conditions where we get the ‘proj_budget’ from the Readproject output/response message. We also convert the text to a number so we can easily make a true/false statement.
number(ns2:ReadprojectOutput/ns2:ReadprojectResponse/ns3:project/ns3:proj_budget/text()) > 10000

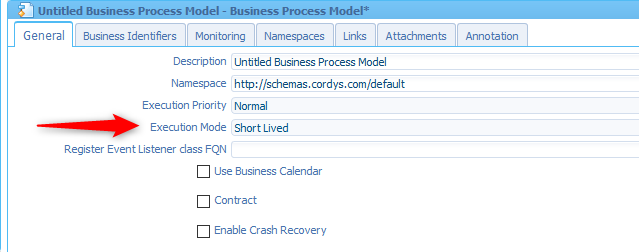
Set the BPM execution mode to ‘Short Lived’
This can be done in the properties of the BPM itself (right-click the BPM itself). ‘Short Lived’ makes the BPM more interactive with the front-end. Think in terms of ‘tightly coupled’, ‘synchronized’ or ‘Stateless’ where an entire role back can take place on failure. This also makes the flow faster, transaction-safe, and atomic! Disadvantage? You can’t have manual tasks in it. Great for our purpose!
Define the ‘Message Mapping’
Per activity we need to update the messages that are passed on through the flow. Open the ‘Message Map’ from the tab in the bottom and make the changes…
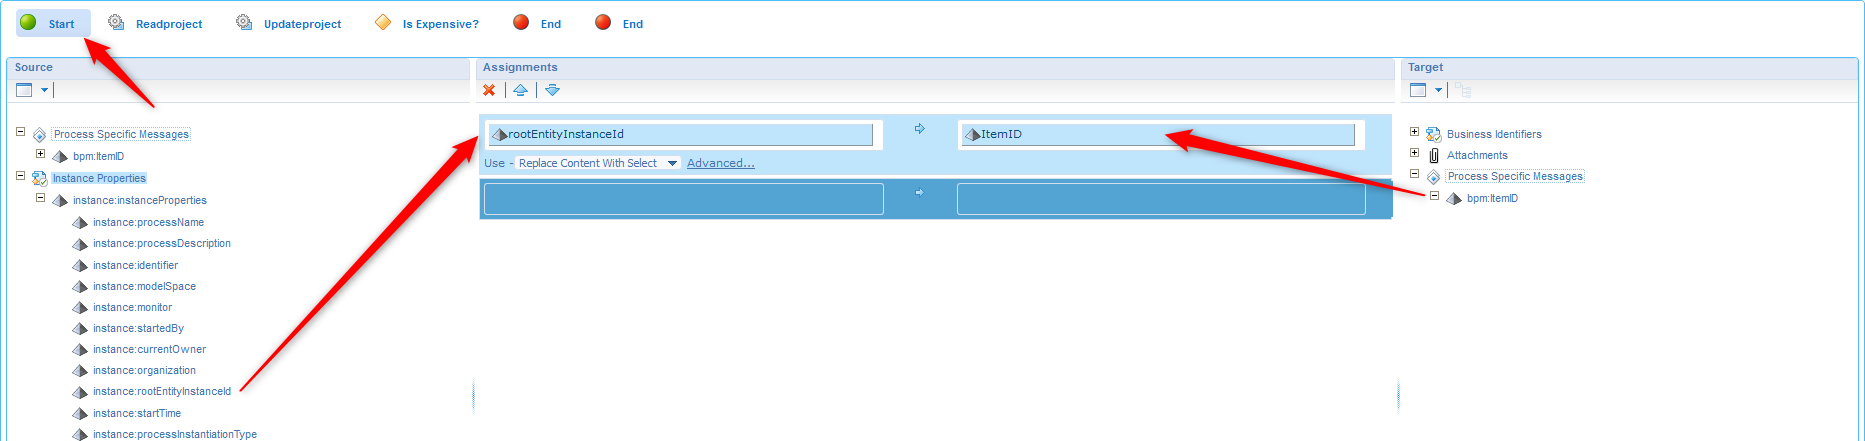
Start
For ‘debugging’ you can do a little trick to save the ‘rootEntityInstanceId’ in a new created ‘ItemID’ element on the process. See it as a temporary constant value. In ‘Debug’ mode we can easy update the value to a ‘real’ instance value to test with.
Readproject
Make sure to pass the ‘ItemID’ of the current object to the ‘Readproject’ operation

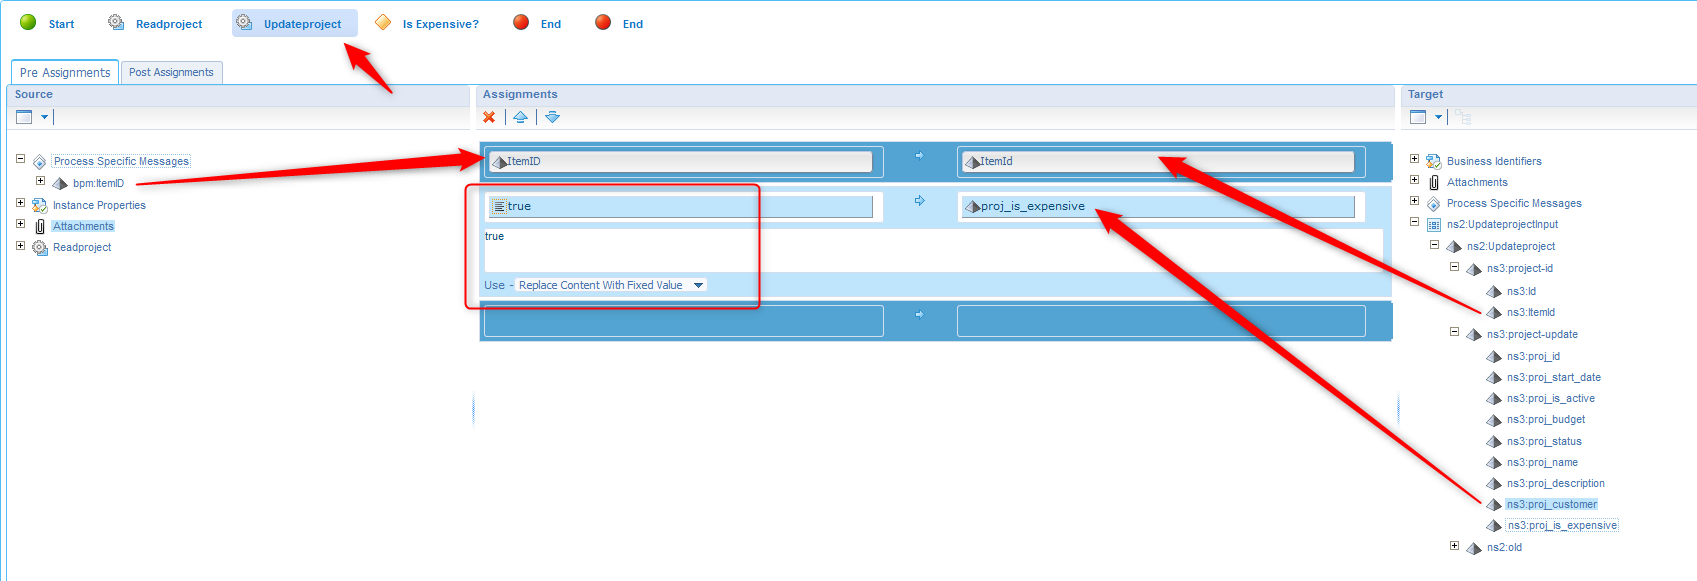
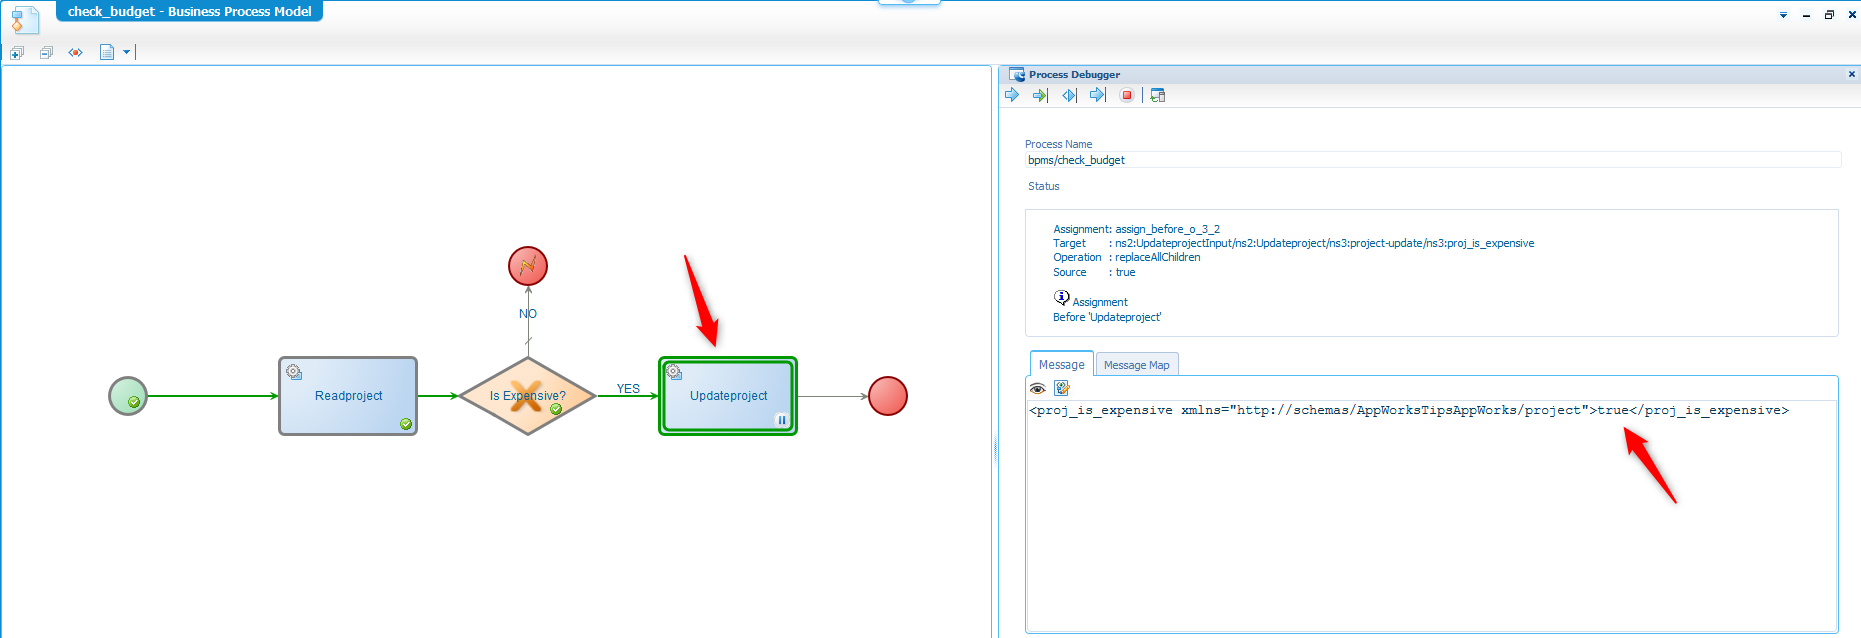
Updateproject
Pass again the ‘ItemID’ and set the ‘proj_is_expensive’ to a fixed value of ‘true’
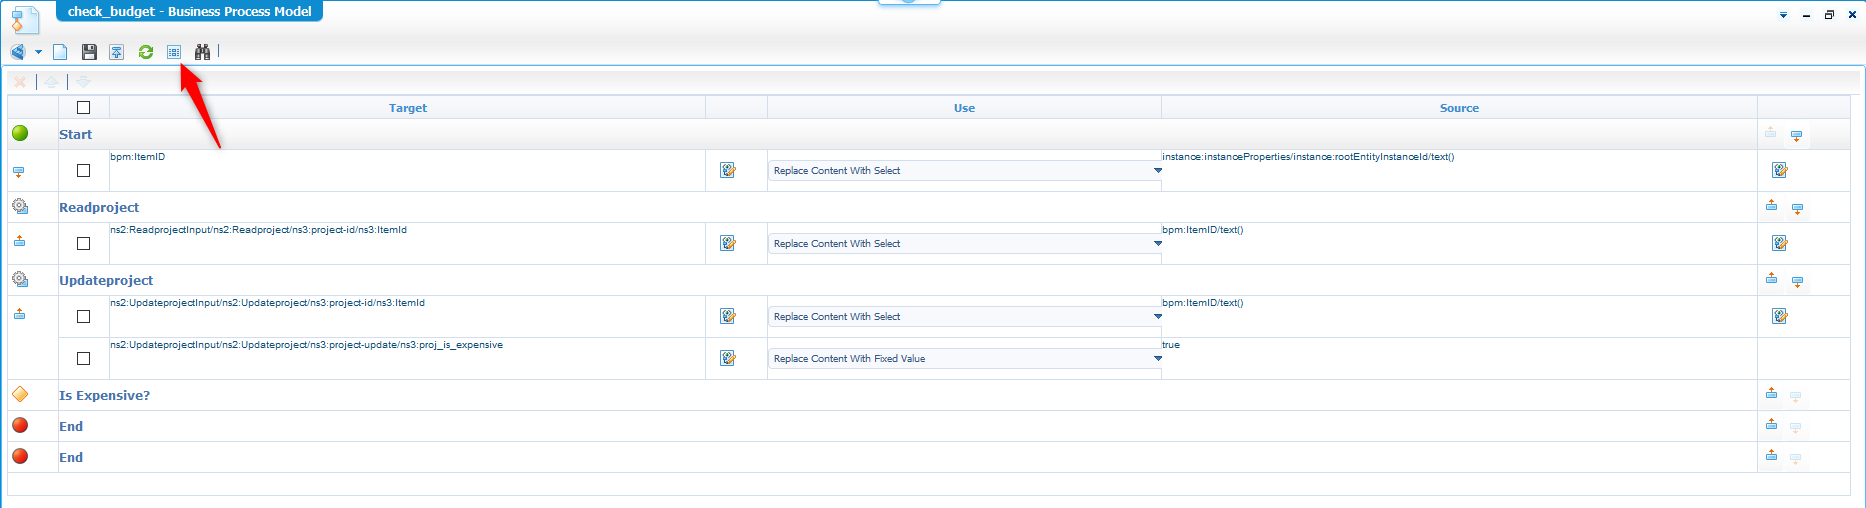
The consolidated view
This option shows the overview of all the configured items, so you get a better impression!
Save the BPM, do a ‘validate and build ‘ and run a first debug session on it!
If you get errors during the those webservice calls you probably need to add the interfaces of the services to the ‘Application Connector’ service container. As we did that also in other posts I suppose you know by now how this trick can be tackled…otherwise you’ll let me know in the comments…right?

In the next screen you just hit the ‘Step’ button to start the debugging.
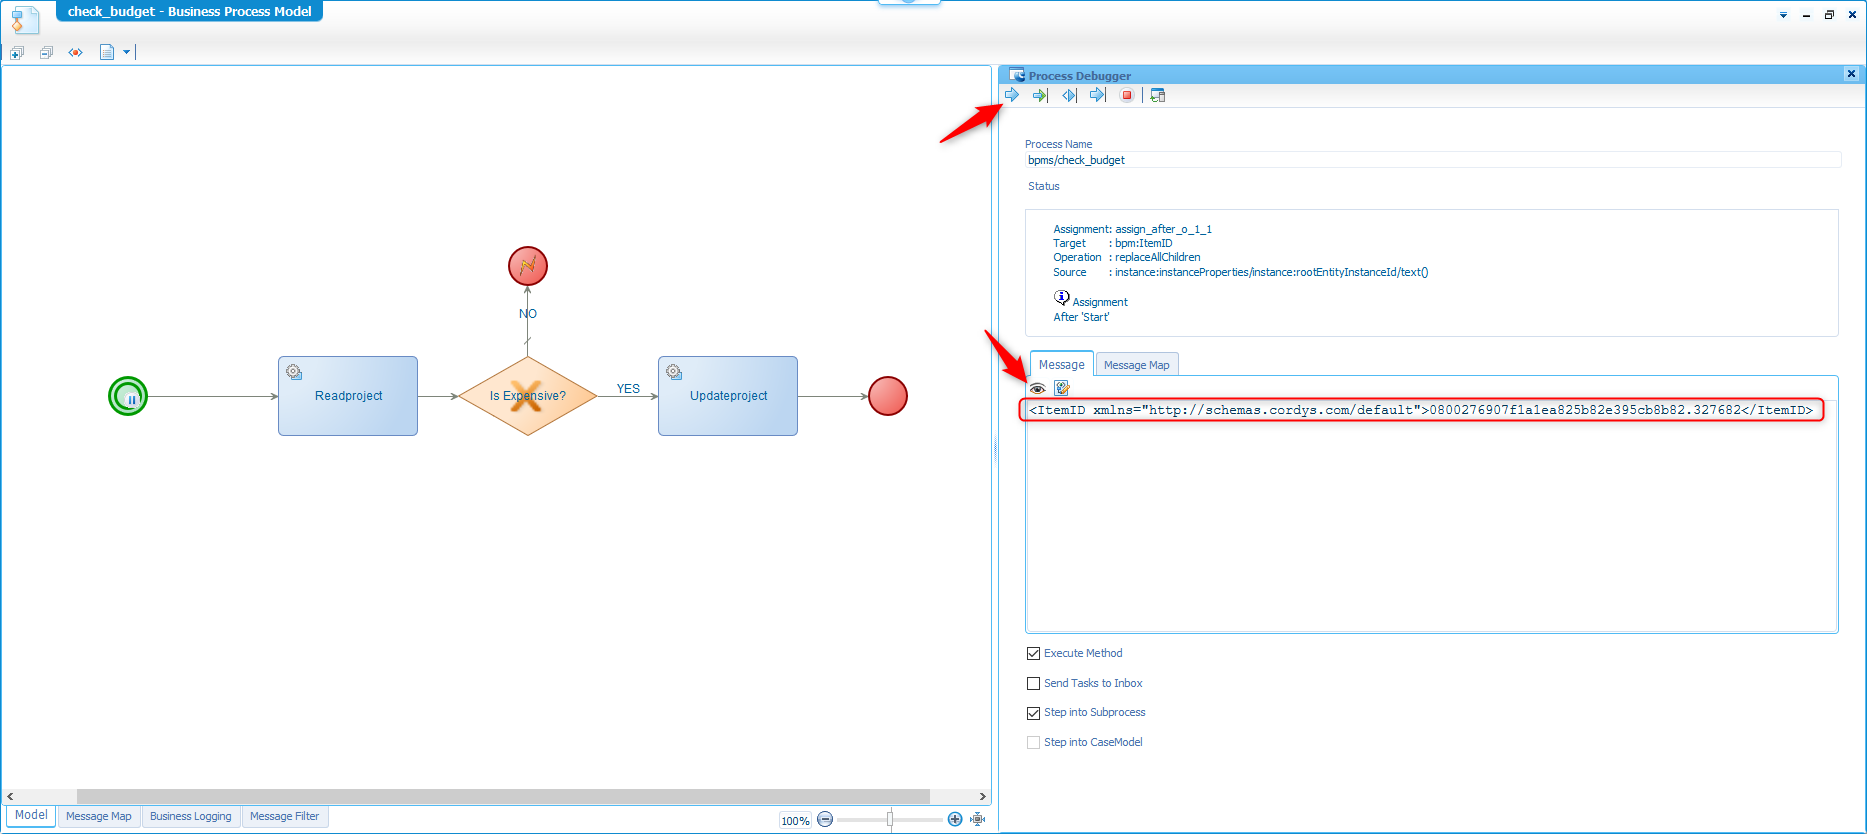
Continue the ‘stepping’ till you see an empty ‘ItemID’ tag passing by. That’s the one you need to update with a valid ID! This can be changed by clicking the ‘eye’ icon.
And where we get the ID from? Go to your runtime ‘/app/start’ and create a new project entity instance. When you open the instance, you need to look at the URL for this ID (with the dot in the middle!):
/home/appworks_tips/app/start/web/item/0800276907f1a1ea825b82e395cb8b82.327682
Let’s continue the debug stepping…
On your ‘Readproject’ step you need to get back the current entity instance data (with our budget information!)
1 | <wstxns2:project xmlns:xsi="http://www.w3.org/2001/XMLSchema-instance" xmlns:wstxns1="http://schemas/AppWorksTipsAppWorks/project/operations" xmlns:wstxns2="http://schemas/AppWorksTipsAppWorks/project" xmlns="http://schemas/AppWorksTipsAppWorks/project"> |
You can see we are over budget (greater than 10000), so when we continue the stepping the entity should be updated properly.
That’s what I say! 💪
Finish it till the end and see the result in runtime (after a refresh)!

And NO!…It was not marked by me to trick you! 😜
You can try the other path yourself where you get a pop-up like this:

Let’s further automate this so the BPM is triggered by a rule.
Back to our ‘Project’ entity where we create a new ‘Rule’ building block with the name ‘OnPropChangeCheckBudget’.
Make it like this:

And don’t forget to remove the mark in the ‘more options’ section. By removing it the BPM is triggered directly when you change the budget field. The default option let’s you first remove the focus from the total form (you need to click somewhere else on the form). For performance reasons the default is better, but to meet our requirement properly it’s better to remove it.
This is always something to consider during your low-code development! You can make it as fancy as you can, but when users start complaining about the performance your solution is planned to be doomed!
You get this when we are within budget:

And we see the ‘is expensive’ mark being set when we are within budget.

If you don’t see all the magic happening in runtime you defined your rule wrongly, or you did not change your BPM execution mode to ‘Short lived’. This last one was my problem too…I’ll admit! 🤨
And that is our ‘DONE’ for today! Maybe not the best feature we’ve build here, but I just wanted to show you how you can directly interact in runtime with a BPM. Great stuff to know and great stuff to see and now you also know how it’s been low-coded. Have the best day of your life and I see you in another great post an a new AppWorks Tips installment!
Don’t forget to subscribe to get updates on the activities happening on this site. Have you noticed the quiz where you find out if you are also “The AppWorks guy”?
