Hi there AppWorks fans,
Welcome to a new installment of AppWorks tips.
Today we’ll dive into a ‘conditional value assistance’ feature where we make 2 entity properties depend on each other. A nice feature to have and a bit complex to create, but this post helps you on your way. We’ll use a BPM flow with an input and output message and we’ll make a mapping with a decision table functionality based on rules…I’ll explain it all as you keep on reading.
Let’s get right into it…
Let have a look at this taxonomy tree where we make it possible to create a ‘filter’ for several typed categories (for our ‘Category’ entity) that are categorized by a priority label.
- prio_1
- bug
- release
- test
- package
- prio_2
- release
- test
- package
- prio_3
- release
- feature
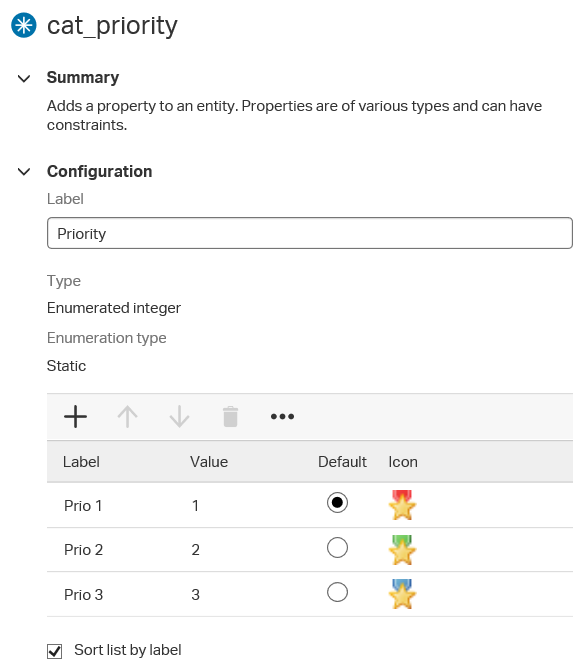
If we want to use this taxonomy we first need to create 2 properties on the ‘Category’ entity. One is a fixed/static enumeration list with those 3 priority items.
The other one is a dynamic type list.
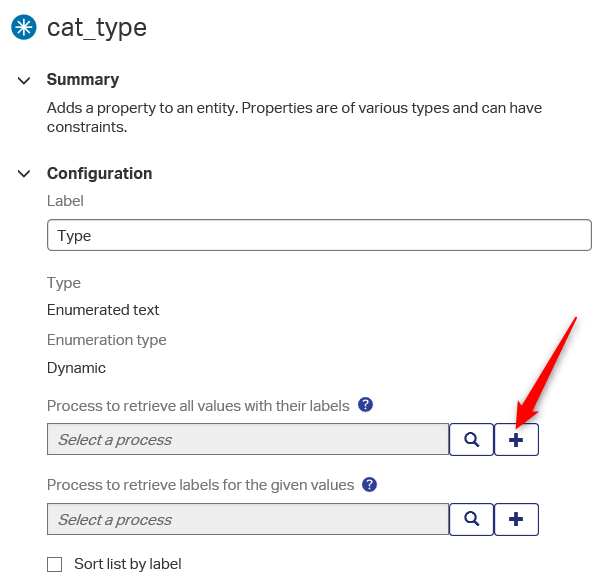
Hit the plus-signed button to create the corresponding BPM flow with an input and output message!
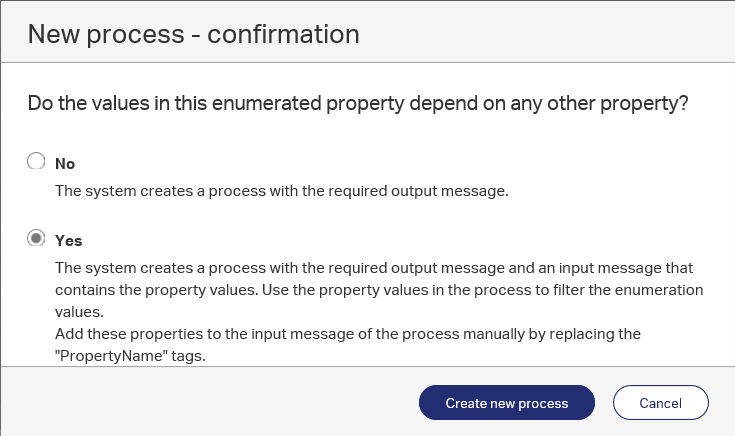
This time (last time we created one with the ‘No’ option as we had no dependency) we choose wisely and that is why we select the ‘Yes’ radio button and after that you may hit that ‘Create new process’ button like a pro.
This is the result for your command. A brand-new BPM process with input and output message.

Now what?
First we do a proper save! And I say ‘proper’ because it is an entity related BPM that we want to recognize easy in a later stadium in our project structure. 2 choices here:
- Give a name with a prefix. E.g. category_populate_types_by_priority and save it in /Project/bpm folder.
- Or create a new ‘category’ folder in de /Project/bpm folder and save it with the same name without that prefix.
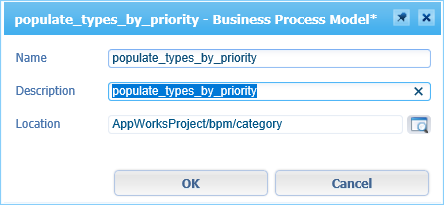
Next step?
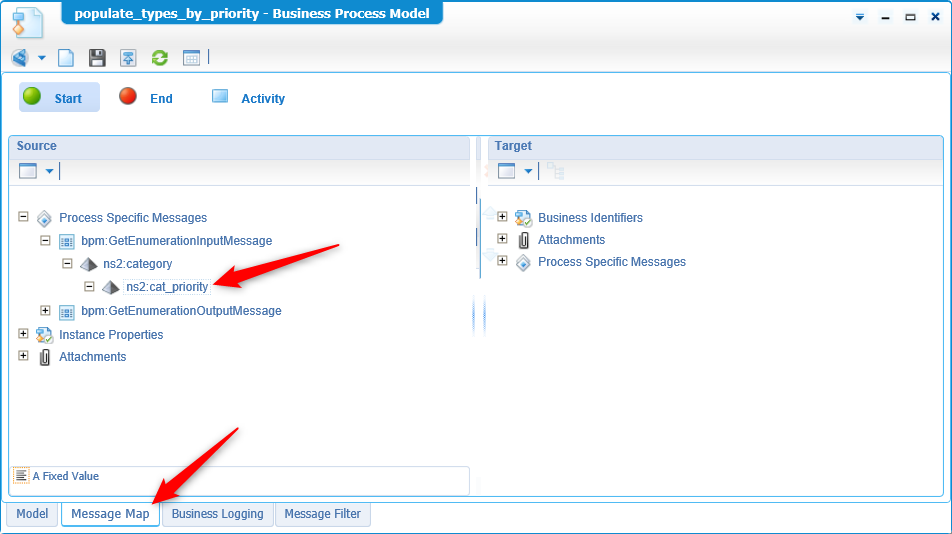
We will update BPM the input message so it matches the correct input property for the flow (as you selected ‘Yes’ in the ‘new process - confirmation’ screen)
If you don’t update this you will end-up in a validation error on the project that looks like this
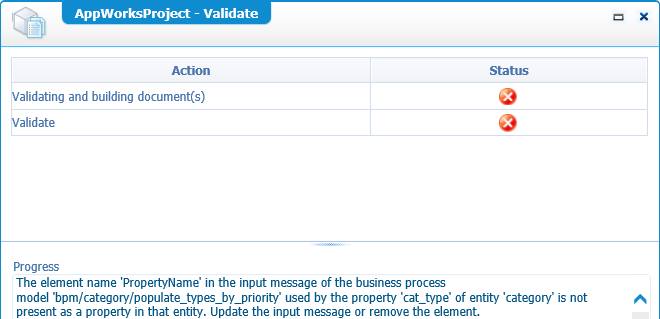
So, enter the ‘Message Map’ tab (in the bottom of the BPM screen) and update the default created property to the correct value ‘cat_priority’.
Now for the dynamic output…For this we use a ‘Decision table’!
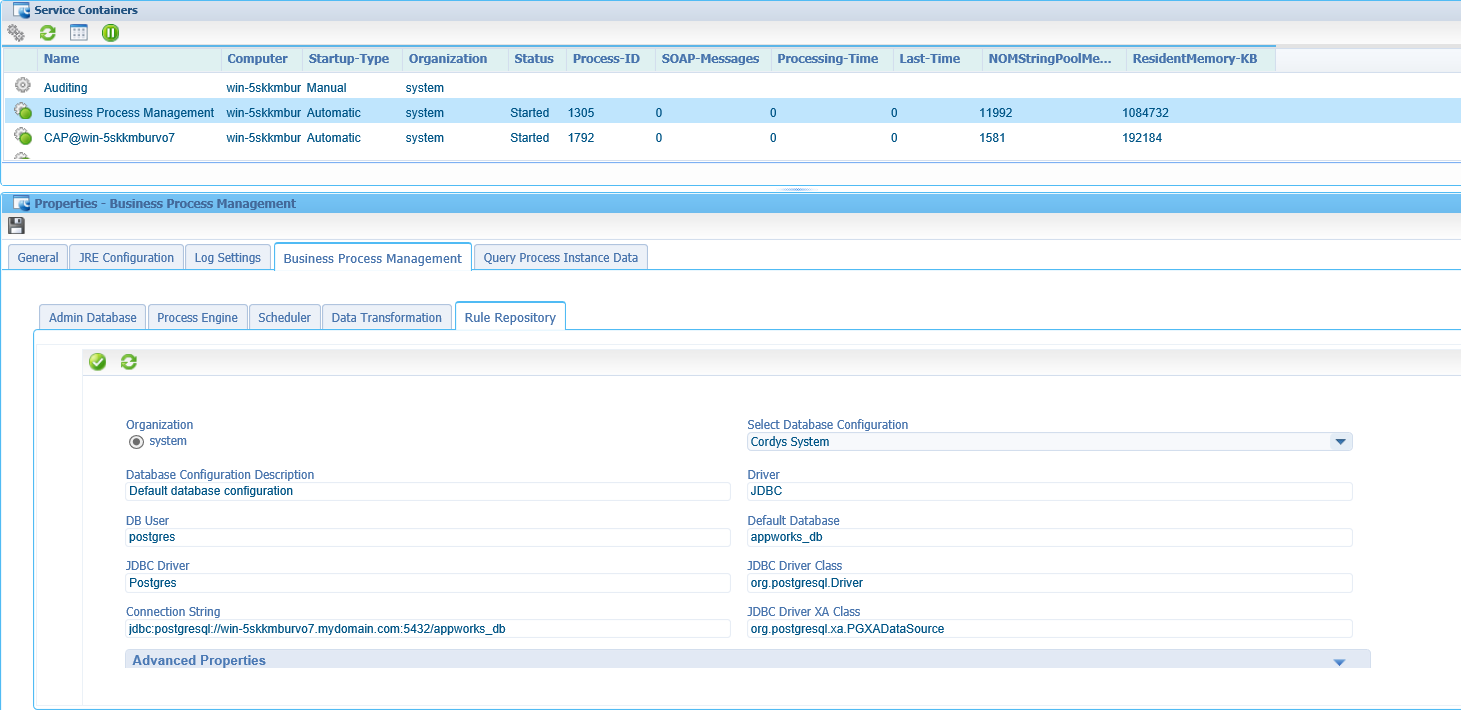
As decision tables use rules we also need to enable the rules engine for our platform
- Login to the
/home/systemorganization with the ‘sysadmin’ account - Open the ‘System Resource Manager’ artifact
- Right-click the ‘Business Process Management’ service container and select ‘Properties’
- Go to BPM tab in the properties window
- And go to the ‘process Engine’ tab
- Now mark the ‘Enable Rule Engine’ option
- In the new ‘Rule Repository’ tab that will be displayed, select the right database (= Data Source Object)
- And Save it all with a service restart!
And now worship…The magic of creating a decision table
For this we need:
A ‘Rule group’
It’s just a new item on the project like we created a new entity
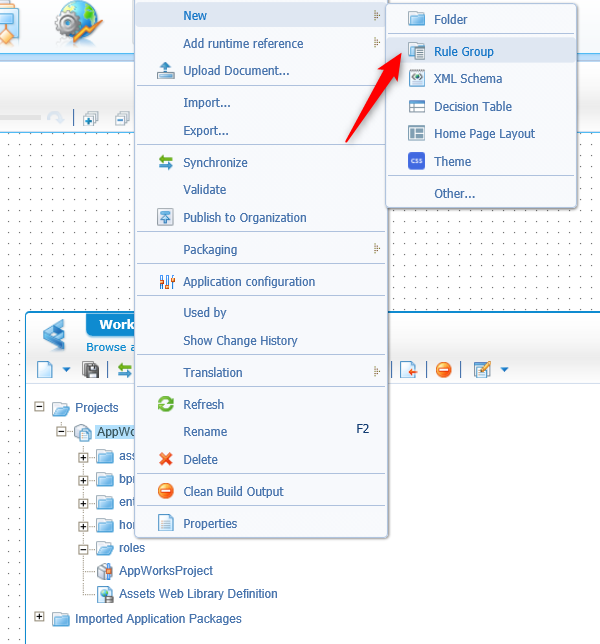
Just give it a nice name like ‘Project Rule Group’ and save it, publish it and close it! Don’t be smart to create a decision table yet from that right panel…We first need the next step!
An ‘XML Schema’
Now create (again in the project) a new XML schema document with the name ‘InputOutput XML Schema’ so it can be reusable for other features also.
Paste in this XML:
1 | <ns:InputOutput xmlns:ns="http://schemas.applicability.com/implementation/1.0"> |
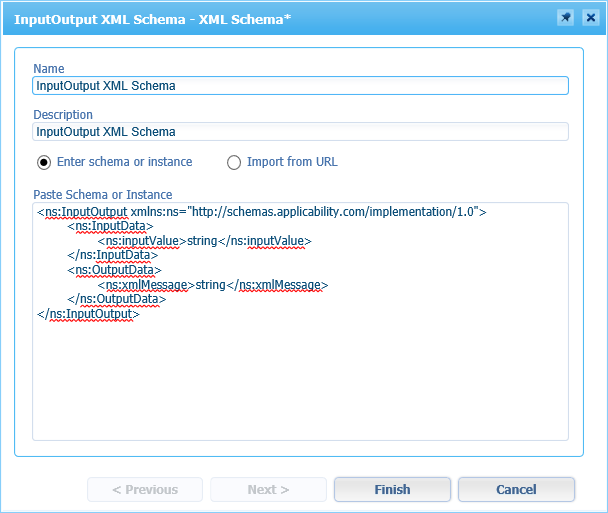
Also, here…save it, publish it and close it.
A ‘Decision Table’
Now on the ‘Rule group’ you can add a new ‘Decision Table’
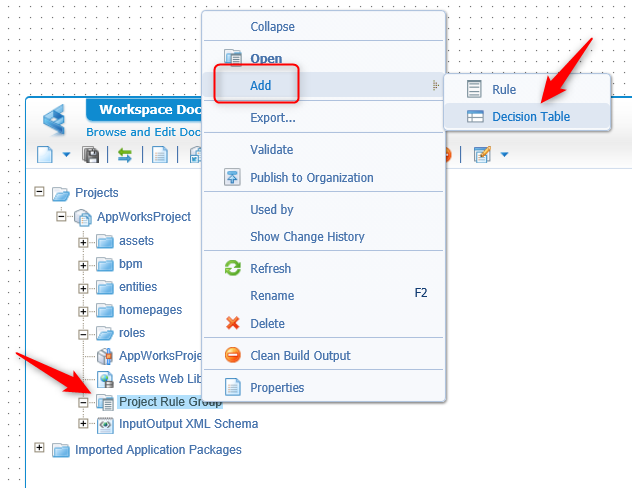
And select the ‘InputOutput’ element for the ‘Schema fragment’
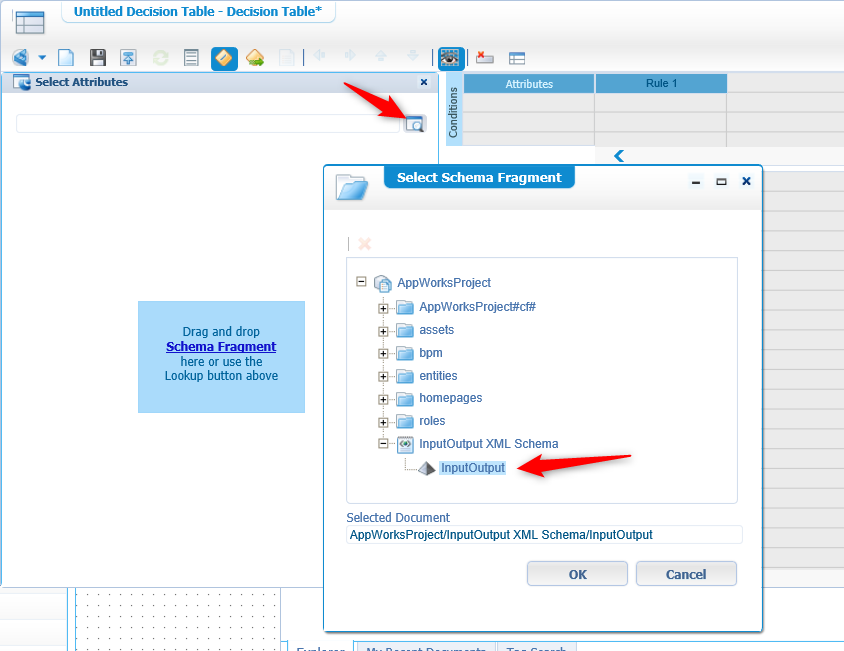
Now drag the ‘ns:inputValue’ on the conditions table
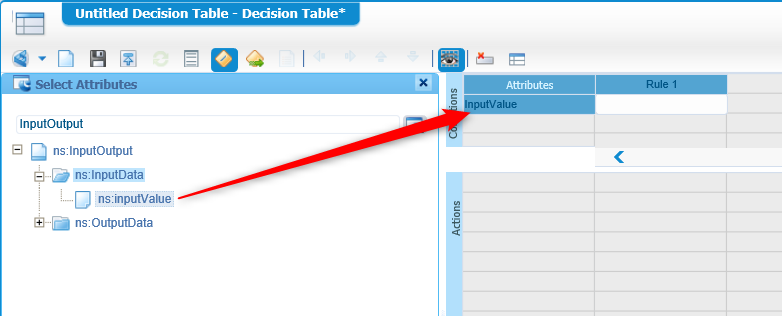
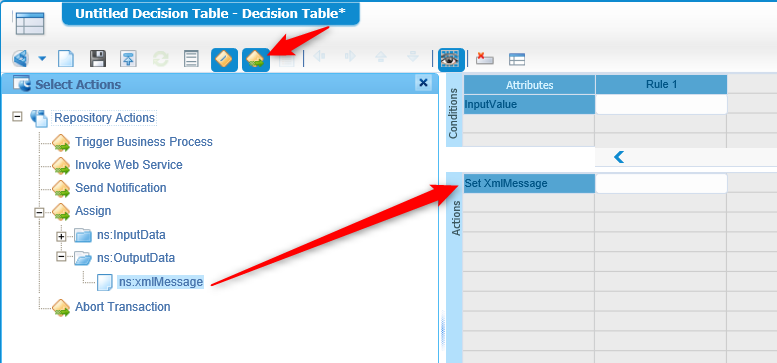
Then we switch to the ‘actions’ so we can drag&drop the ‘ns:xmlMessage’ on the actions table
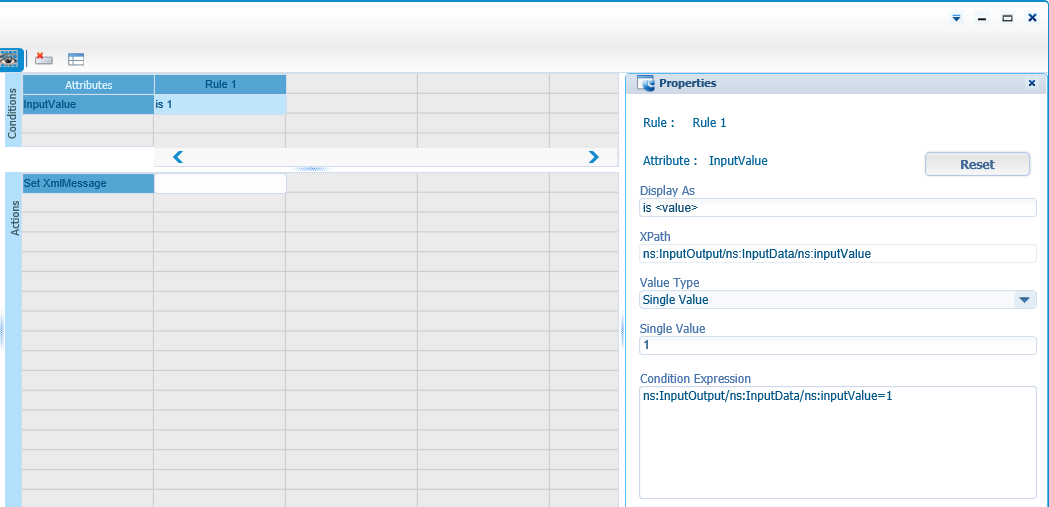
Next is to define a ‘Rule’. Make sure the ‘Properties’ panel is open (You can toggle it with the button next to the switch ‘actions’ button) and give it a value of 1 (it’s our prio 1 from the first level of the taxonomy!)
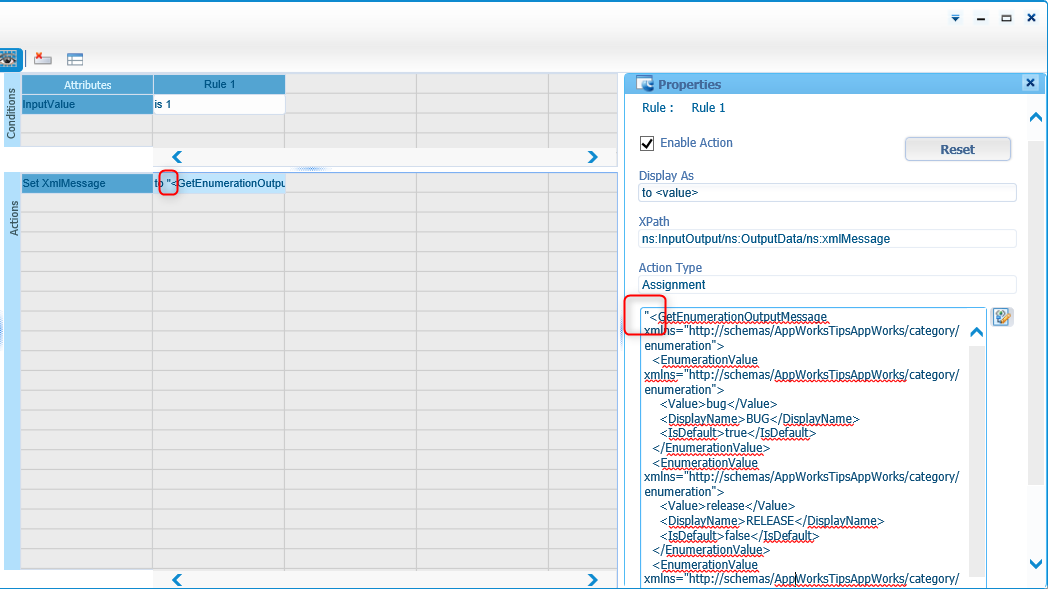
Next is the ‘XmlMessage’ that needs to have a value once the priority is equal to 1. For this you can use this XML for priority 1 which matches our taxonomy tree from the top:
1 | <GetEnumerationOutputMessage xmlns='http://schemas/AppWorksTipsAppWorks/category/enumeration'> |
Extra note: Make 1 value ‘isDefault = TRUE’ and make sure the XML data is handled as a string value by surrounding it with double quotes!…And don’t use those double quotes in the text itself!!
Now continue for the other 2 priority values so it looks like this

Priority 2 XML
1 | <GetEnumerationOutputMessage xmlns='http://schemas/AppWorksTipsAppWorks/category/enumeration'> |
Priority 3 XML
1 | <GetEnumerationOutputMessage xmlns='http://schemas/AppWorksTipsAppWorks/category/enumeration'> |
Save the decision table with name ‘Types by Priority Table’, publish it and close it.
Add the decision table to the BPM flow and create the correct message mapping.
Go back to your initially created BPM and start by removing that ‘Activity’ in the middle and add the new created decision table
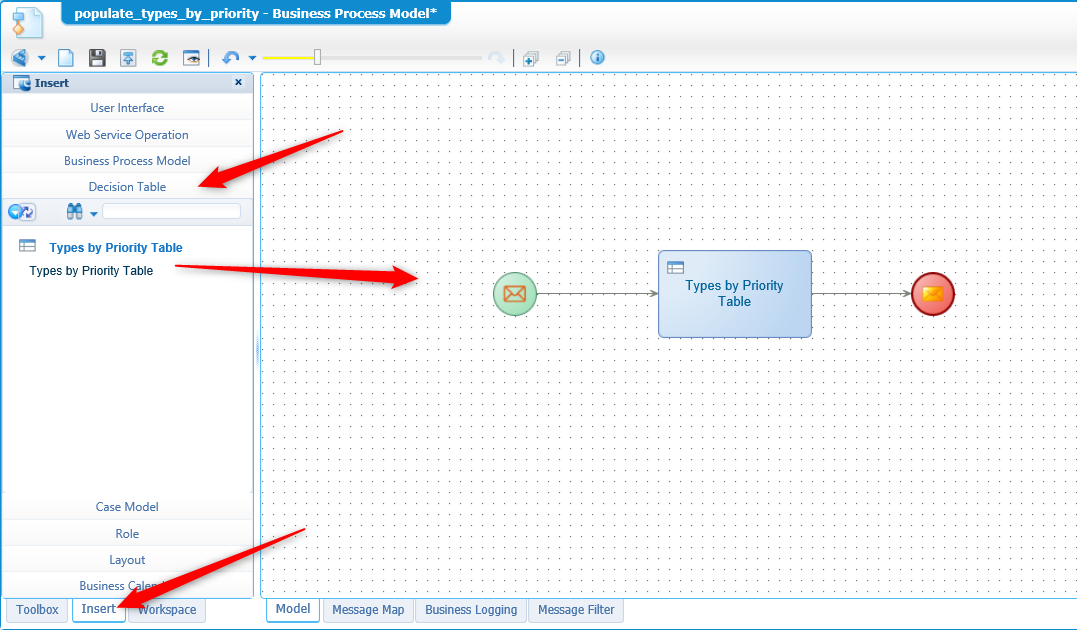
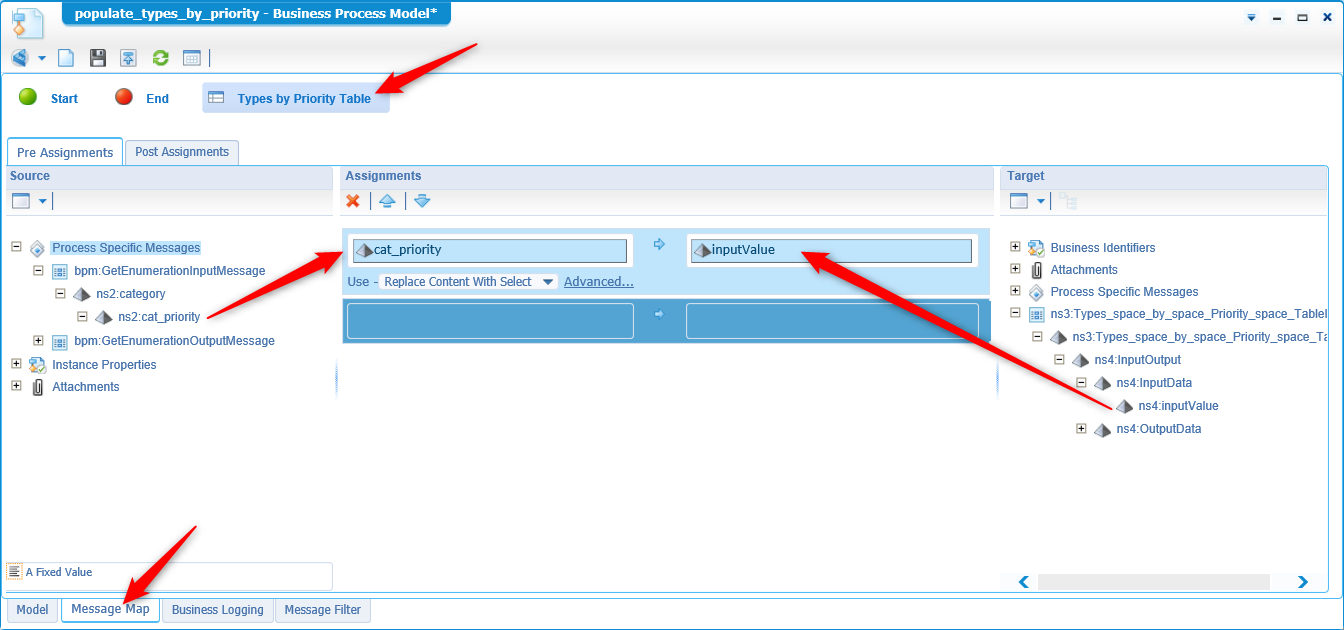
Now go the ‘Message Map’ tab in the bottom and make sure to connect the ‘cat_priority’ integer value to the ‘inputValue’ of the decision table in the correct ‘Types by Priority Table’ step
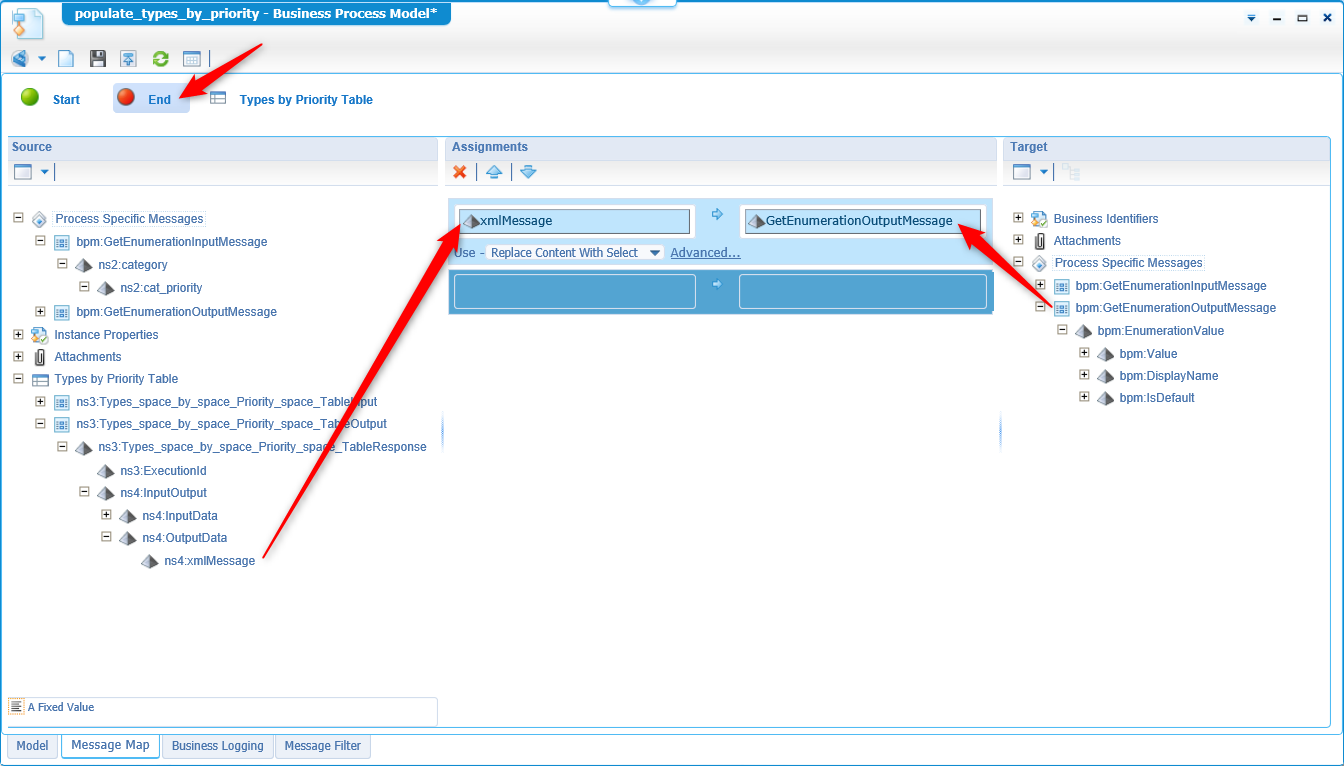
Also, map the correct value from the decision table output ‘xmlMessage’ to the output message of the BPM flow. This needs to be done on the ‘End’ step of the BPM.
Now save it, publish it and…..don’t close it, but first debug it!
Go back to the BPM ‘Model’ tab and hit <F9> for a validate and build action. When all is fine trigger a debug session with <Ctrl>+<F12>.
In the debug panel hit that ‘Step by step’ button to start debugging…
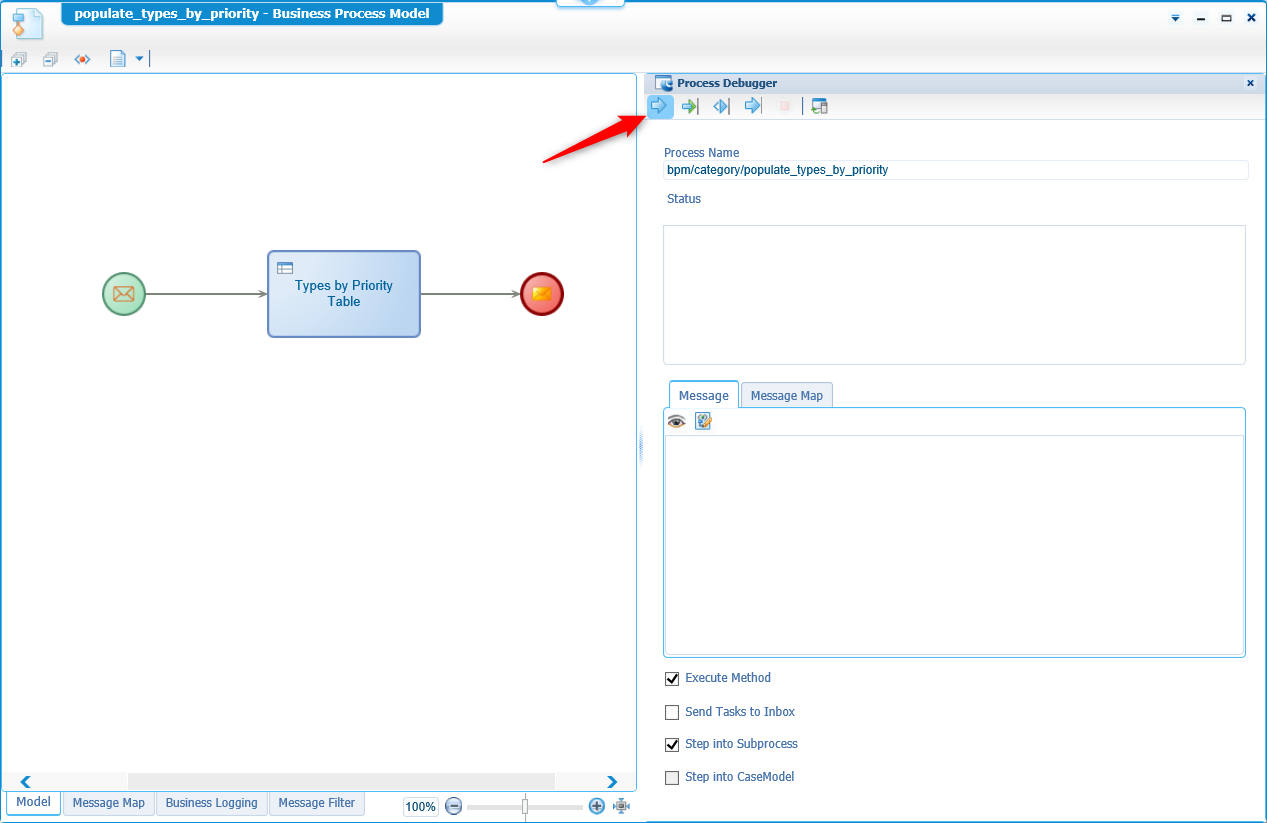
First step is to send a valid value for the input message. In my case a ‘1’ for a priority 1 list

Continue the stepping and make sure the decision table receives the correct input value
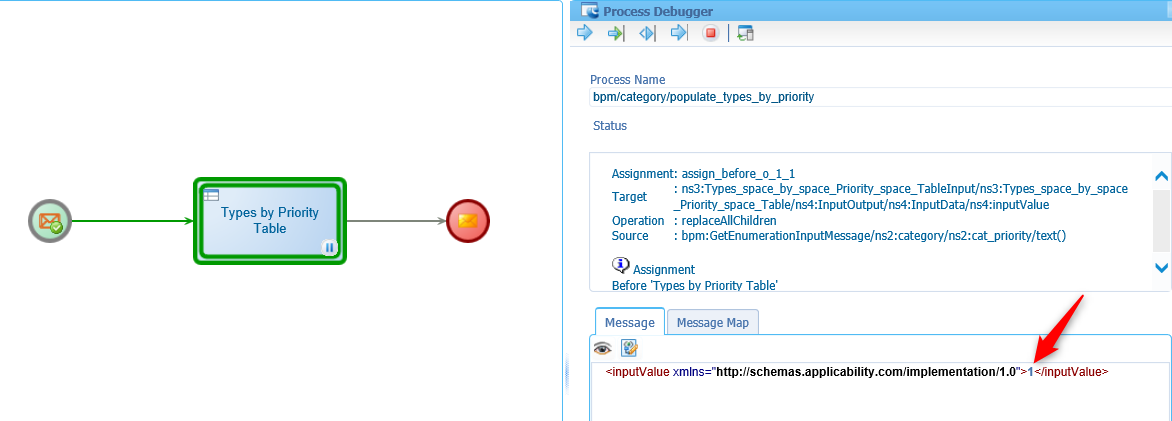
And for the next step you need to make sure the output is also valid and the well-defined rule is applied correctly!
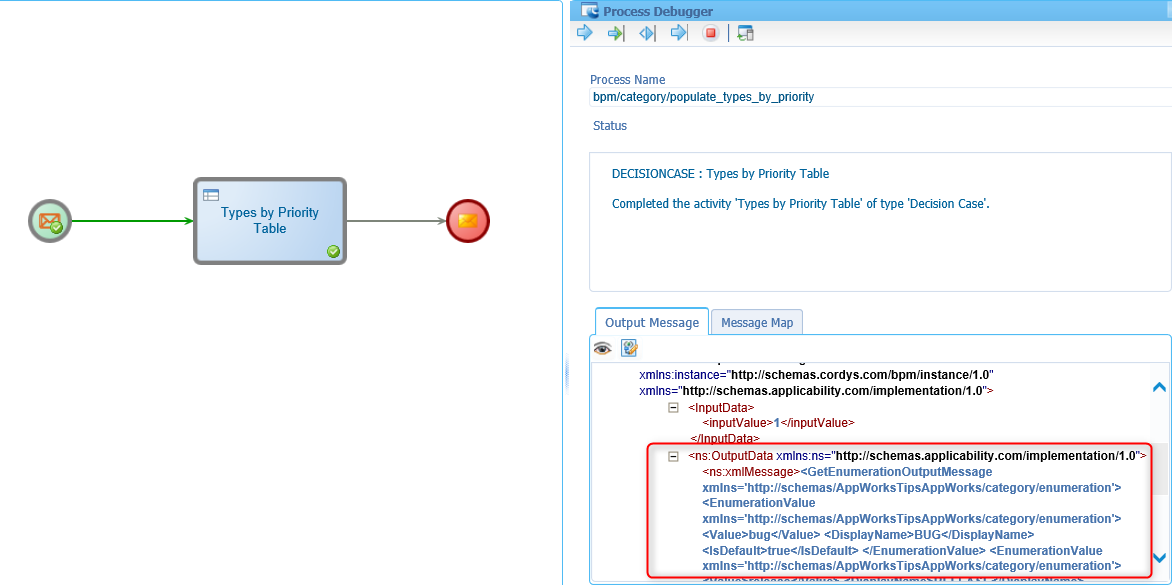
Note that it is ‘String’ data you get back and not (yet) real XML-nodes!
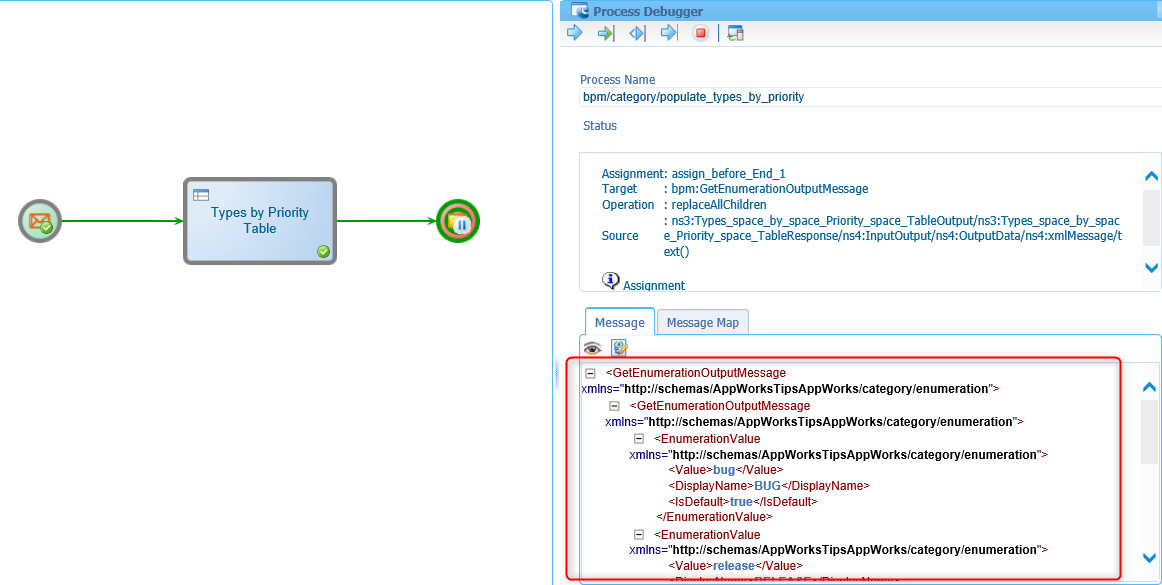
In the next step (the ‘End’) you see that AppWorks updates our string message nicely to XML nodes with the correct values for the input priority value….great!…It’s time to close the BPM panels.
Now for the front-end…but before we can start testing we need to add those 2 properties to the ‘Create’ form!
The end result?…Something like this for now that can be saved.
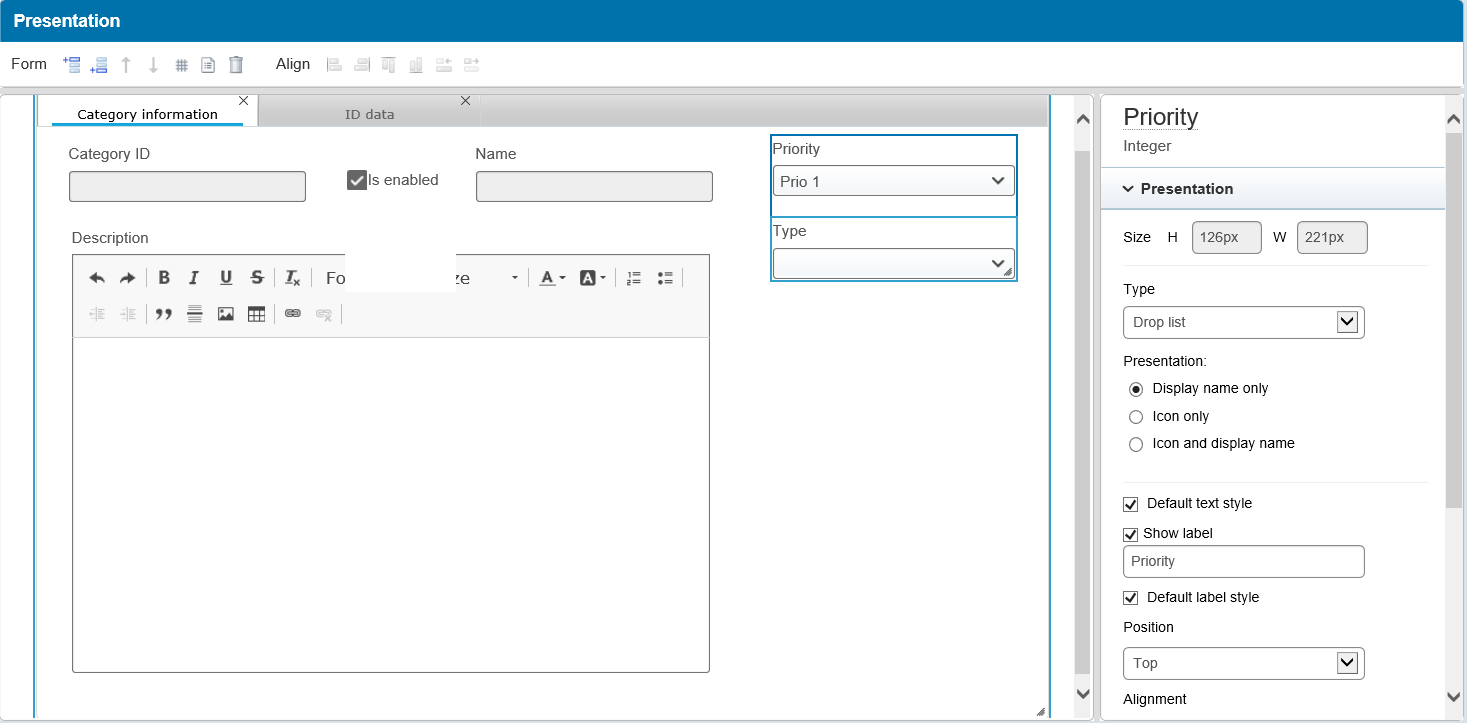
In the front-end it will look and behave as expected as our craftsmanship is published!

And that my dear AppWorks lovers gives us the ‘DONE’ we’re waiting for. Lots of stuff learned again and great things to play with. We saw again some debugging on a BPM flow and played even with a decision table. It was all worth the effort to make this post work out in a nice small demo where value assistance between 2 property lists is crafted.
Have a good one for the rest of your day and I see you in the next post with a new installment of AppWorks Tips!
Don’t forget to subscribe to get updates on the activities happening on this site.


