Hi there AppWorks fans,
Welcome to a new installment of AppWorks tips.
When you get curious, you just want to stay away from the complexity; Only, when you overcome the struggles the trophy is so much bigger to collect!…Keep that in mind reading this blog as it exactly describes the ⏱ (time), 😅 (sweat), and 😂 (tears) for this post! I haven’t even started while writing this introduction, but I already feel the pain…Enjoy it!
Let’s get right into it…
Let me first write down the steps we want to accomplish:
- Start a Maven project for a Java implementation; We need to extend
com.eibus.soap.ApplicationConnectorand implementcom.eibus.soap.ApplicationTransaction; Both delivered in the ‘esbserver.jar’ dependent library of our beloved platform. - Create a document of type ‘Java Archive Definition’ to build a JAR (from our Java sources), and publish it to the server.
- Create a document of type ‘Application Connector’ in your project…In the
connectorsfolder!? - Generate a custom webservice (based on the created ‘Application Connector’)…In the
webservicesfolder!? - Create a new service group/container based on your new crafted connector implementation; Here you select the custom webservice as an interface!
Is documentation available? Yes it is, just have a look at these sections in the manual artifact within the platform, but you have guidance from this post:
- “Creating and configuring a custom connector”
- “Supports JVM sharing”??…Yeah, keep on reading!
First things first…
The Maven project
To save you and me some work, I treated myself (and you!) with a nice new repository on GitHub where I share my Maven project on AppWorks customizations! For our connector in this post the source code is found in the “ConnectorApplication” module.
Let me know what other customizations you would like to see an implementation on, and we’ll just figure it out…
For the good understanding… GitHub shows the latest version (the full implementation of the code). This post simply starts with 2 classes looking like this:
1 | public class CustomConnector extends ApplicationConnector { |
1 | public class CustomTransaction implements ApplicationTransaction { |
Why start minimal as we know it will not work? Well, so you (or better me) fall into all the traps! Intentionally to learn from it!
Add runtime reference
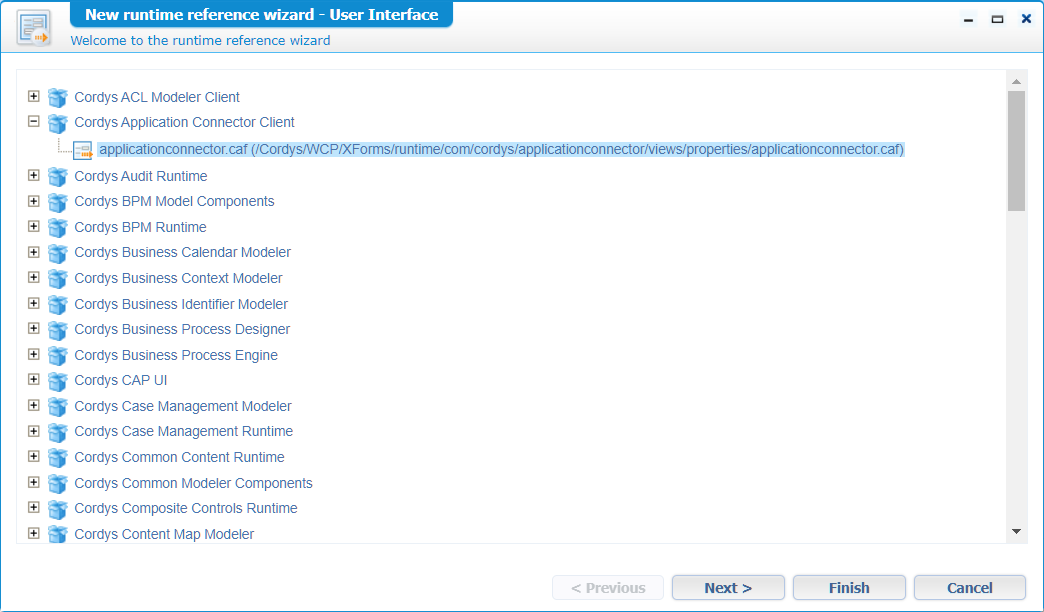
To quickly move into the heart of our post (which is a working connector), we will reuse as much as possible from the platform! One of the things we need for our connector is a configuration page/UI. We won’t read its config from the Maven source code, but we need to point to something looking like UI. It doesn’t matter for now; My quick way would be to add a new runtime reference (right-click your project!) of type ‘User Interface’, and select the ‘applicationconnector.caf’ as reference of ‘Cordys Application Connector Client’:
NOTE: After gaining knowledge it’s better for you to select the ‘ftp.caf’ from the ‘Cordys FTPConn Runtime’ reference…It already has some required authentication fields we need for our purpose and works smoothly with the latest code (see nl.bos.CustomConfiguration) on GitHub!
Other ways would be:
- Create a new document of type ‘User Interface’. Just create it with a nice name
ui_app_configin anxformsfolder, add some information text, save it and publish it.- Add an HTML type of document with an HTML page showing something interesting.
I haven’t tried both ways, but according to the documentation you also need to include
/cordys/wcp/admin/behavior/applicationconnector.jsand add the method initialize() as an event-handler to the application’s ‘onapplicationready’ event…Well, that’s a task for you to figure out! I go for “quick and dirty” for now.
Before I forget…This UI-part eventually requires input fields (like host, port, username, password)…That’s why I moved to the ‘ftp.caf’ UI which already contains these details!
The JAD document
Create a new document of type Java Archive Definition. It makes sure that Java source files are nicely compiled, packaged as JAR, and published on the server for consumption. For this we start with a folder structure in our project:
java(set this folder as the start point for qualified name in the context menu!)nl-bos-customsrcnlbosCustomConnector.java(see the Maven project!)CustomTransaction.java(see the Maven project!)
libext- other JAR dependencies!
jad_app_connector(this is the JAD document!)
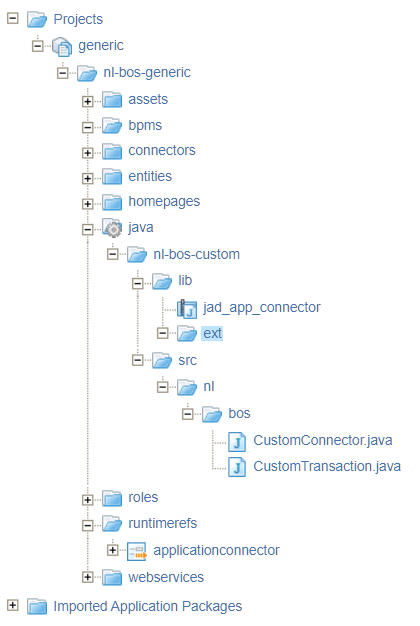
The JAD document itself looks like this; Just make sure to point to the src-folder. Also, make sure the folder structure matches to Java package (nl.bos) directory of the Maven project as well:
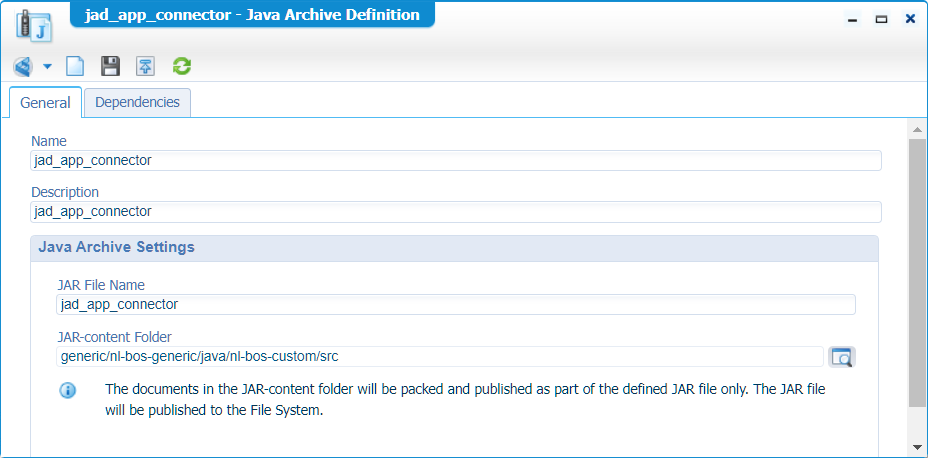
Have a look on the server after publication in this location: /opt/opentext/AppWorksPlatform/defaultInst/nl-bos-custom/lib/jad_app_connector.jar
Here is another example of a post using a JAD document; Section “The power of JAD”!
NICE!!! Are you still with me here?
A document of type ‘Application Connector’
Next, we create a new document of type ‘Application Connector’, name it Custom App Connector, save it in the connectors folder of the project! Do not name it something like ac_custom as this will be visible in the connector types list later!
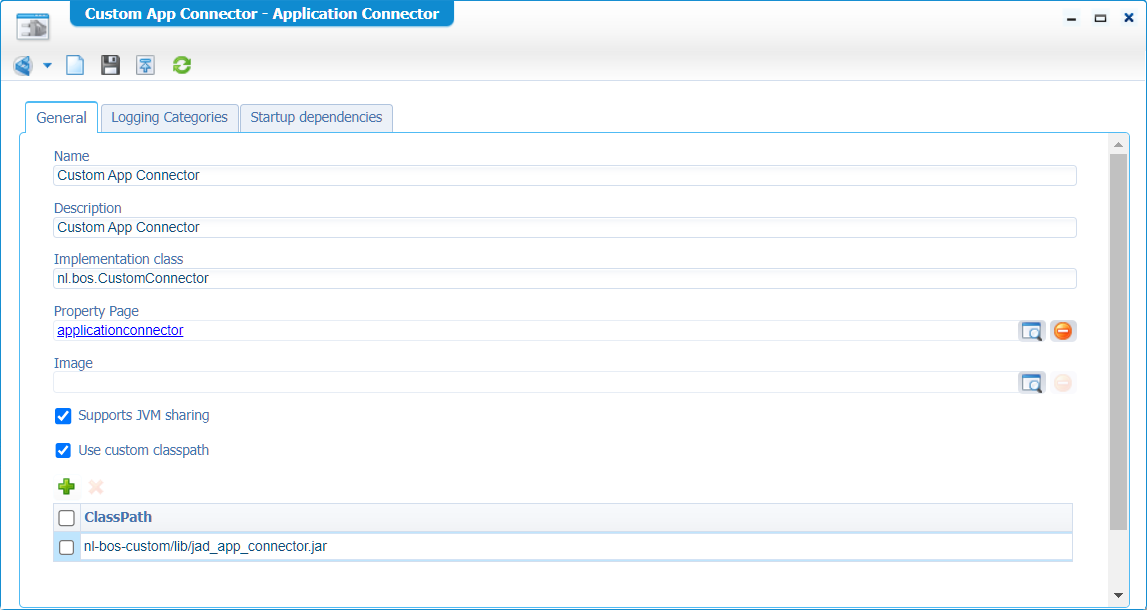
‘Supports JVM sharing’…A copy from the documentation:
1 | If this check box is selected, it indicates that other application connectors |
I just leave it to true because we can, but I think this is also in relation to the ‘Assign OS Process’ for a service container to run it in the TomEE instance instead of a separate JVM…WHAT? Yes, that’s another blog, for another time!
‘Use custom classpath’ points to nl-bos-custom/lib/jad_app_connector.jar or any other dependent libraries in the ext folder!
‘Image’ is not required, but you can grab a copy from the server here:
sudo find /opt -name 'configurationconnector.png'; Upload it to your project and select it. If not selected, AppWorks will use a default image.
After save, and publish, check the XMLStore: /Cordys/WCP/Application Connector/

A custom webservice
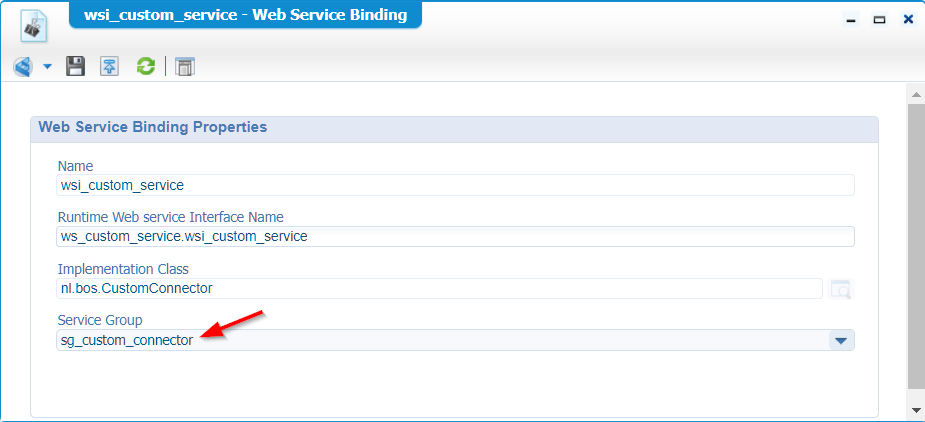
Great, now let us create/generate a new ‘Web Service’ type of document with the source ‘Custom Web Service’. Nicely saved in the webservices folder of our project with this input:
- Name:
ws_custom_service - Namespace
cs - Interface name:
wsi_custom_service - Implementation class will be our new connector
Custom App Connector - Add a service operation
sendwithout any IO schema
After finishing it, you have a service available in your project…It’s magic! 🔮
The final code-base in GitHub makes it possible to add service operations like
subscribe,publish, andunsubscribe.
The final touch for the ‘send’ operation is an implementation XML like this:
1 | <implementation xmlns:c="http://schemas.cordys.com/cws/1.0" |
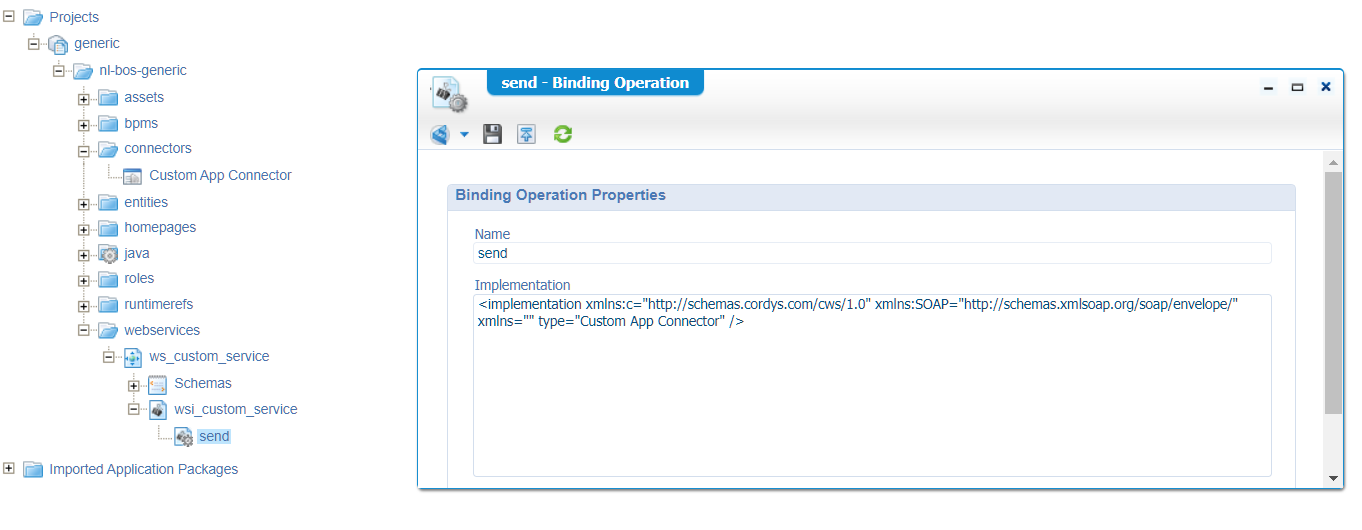
The “type” value for the implementation XML can be any value…It will be passed into our connector code for you to check its value!
Publish, but don’t evaluate it yet! We require the next step first…
The service container
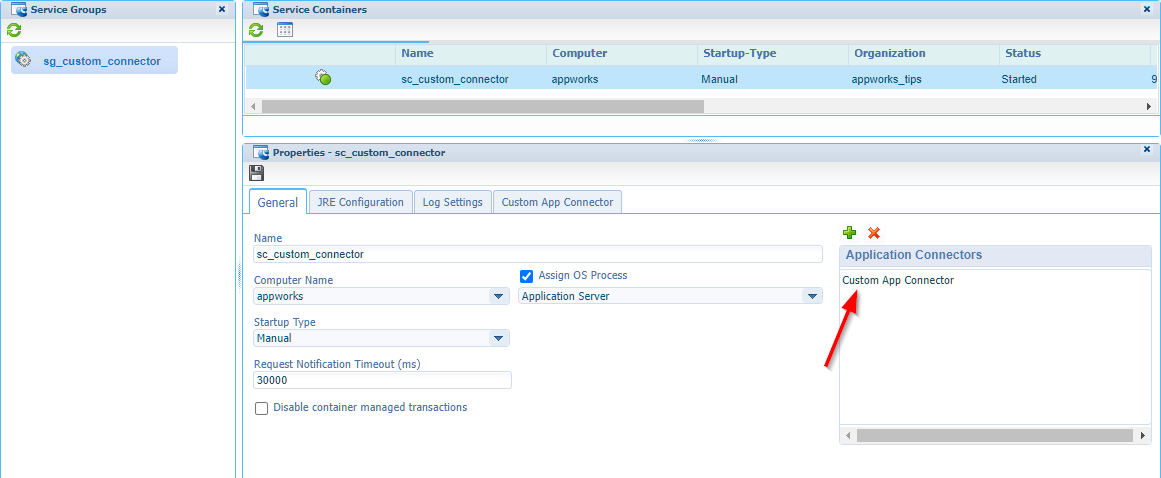
Open the ‘System Resource Manager’ and create a new service group/container with this input:
- Type: our crafted
Custom App Connector - Name group:
sg_custom_connector - Select your service interface…
wsi_custom_service - Name service:
sc_custom_connector
Do all the regular stuff (like assign to OS process, automagically start)…There is no use to add any JAR libs in the JRE configuration tab of the service container as we already defined it in the custom classpath of our application connector type of document!
The final config screen can be left empty as we won’t use it (not if you’re smart and used the ‘ftp.caf’ UI!); It’s the config screen of our runtime-reference! You can create your own blank screen as described before (xForm/HTML page).
Also check the image in the left…That’s the default you can override with your own image configuration on the ‘Application Connector’ document!
Finish it, and make sure you see a green light on the service container! ✅
At problems, you can enable the logging on the service container as well; For a view on the logfile do:
sudo tail -999f /opt/opentext/AppWorksPlatform/defaultInst/Logs/appworks_tips#sg_custom_connector#sc_custom_connector.xml
Right…almost there!
The final evaluation
Well, where are you waiting for…Have a test request on the ‘send’ webservice!
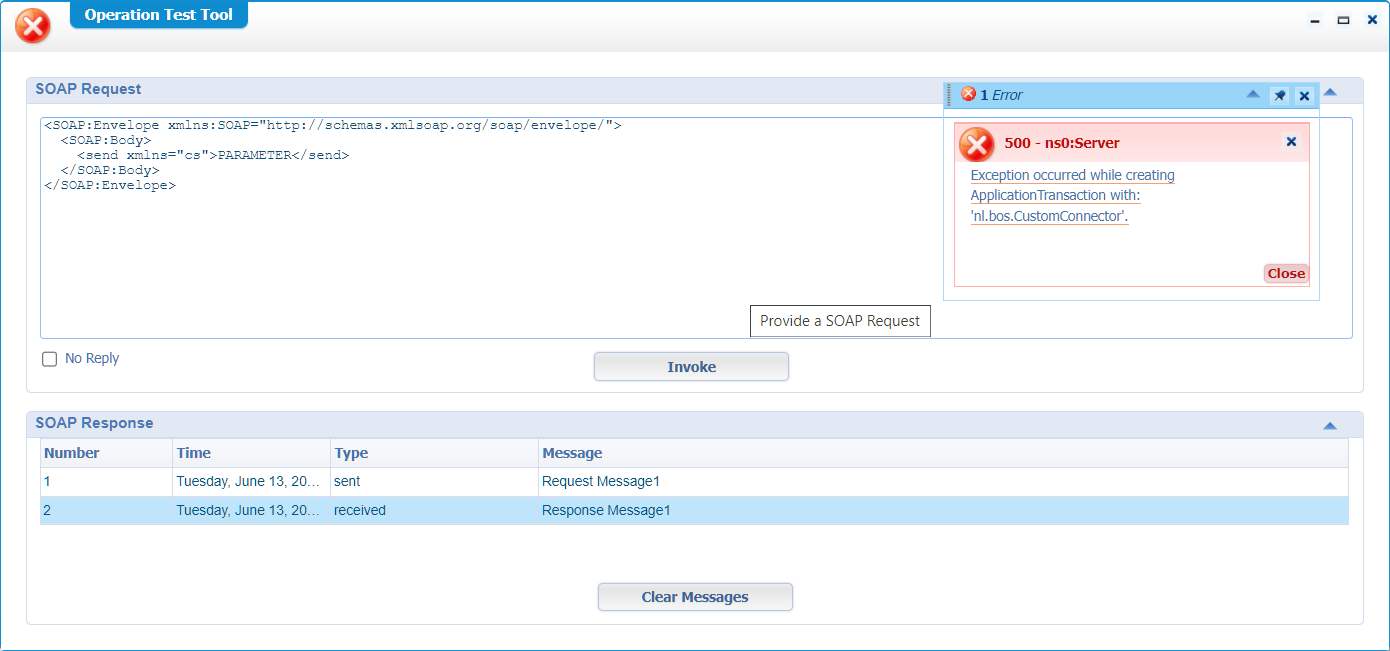
Hmmmm…That’s a failure! The good news is my code is recognized, and we need some implementation seeing the stack trace behind the error:
1 | com.eibus.localization.exception.custom.LocalizableUnsupportedOperationException: |
Now we get to a valid question on what our connector is supposed to do!? 🤔 Lucky for me, the analyst guy/gal is ill this week, so we’re free to do whatever we want! 🤠
Notes:
- It could be that the service group is not correctly “attached” to the interface; Double-click it in your project to select it.
- I also needed to add my custom connector as ‘Application Connector’ in the ‘General’ tab of the service container! Don’t shoot the messenger why this was not done during the initial creation of the container!?
Before we break our head on any implementation, I always prepare myself for the next step…You eventually need it!
Remote debug your code implementation
During the craftsmanship of an EIS connector, we did a similar task. So, in quick steps to continue debugging our Maven project.
Set your TomEE into debug mode. After this it will run with an extra flag:-agentlib:jdwp=transport=dt_socket,address=*:8000,server=y,suspend=n:
systemctl stop tomeeexport JPDA_ADDRESS="*:8000"sudo JPDA_ADDRESS=$JPDA_ADDRESS sh /opt/tomee/latest/bin/catalina.sh jpda run
Connect remotely from your IDE with a new run configuration (where you need to update it to your “host”!):
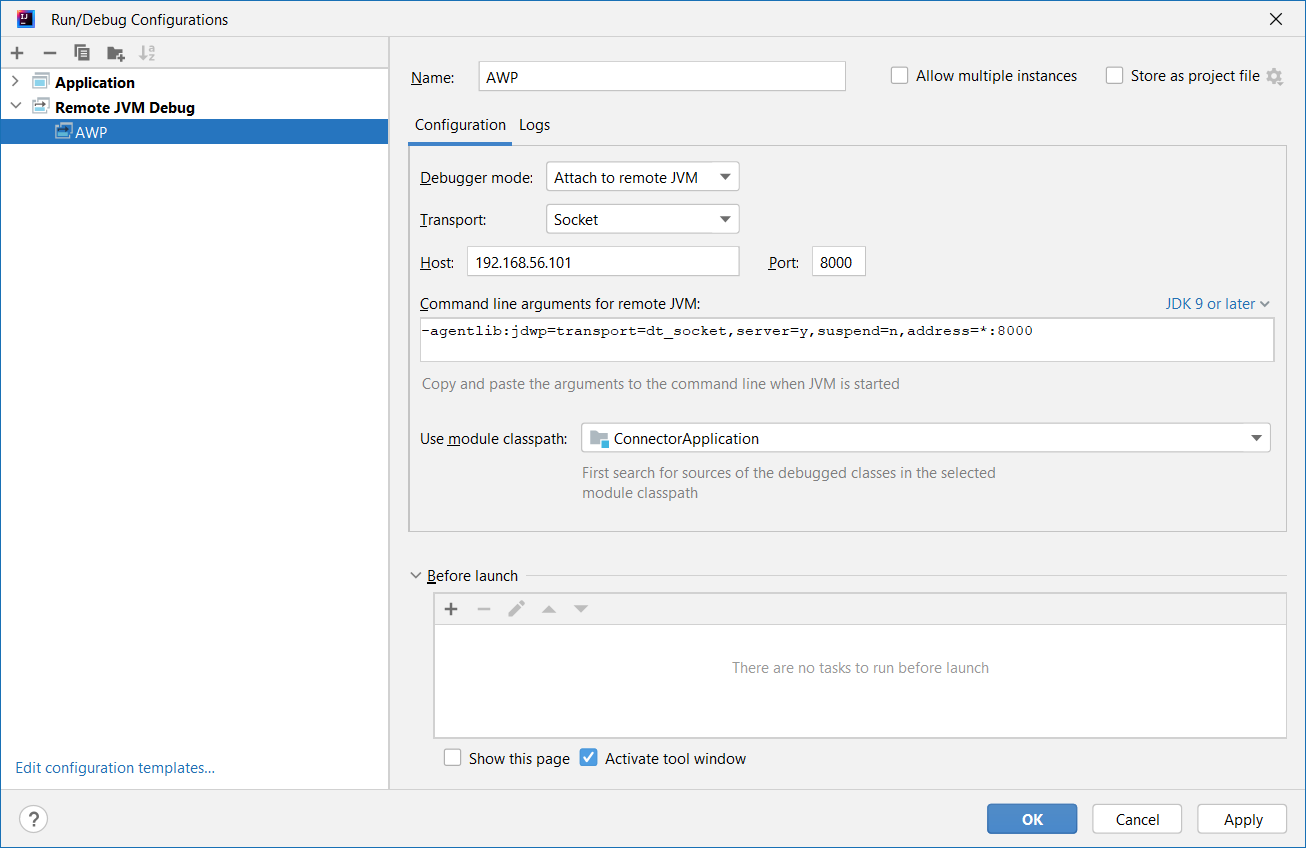
Once ready, you can start that debug flow with starting a remote debug session:
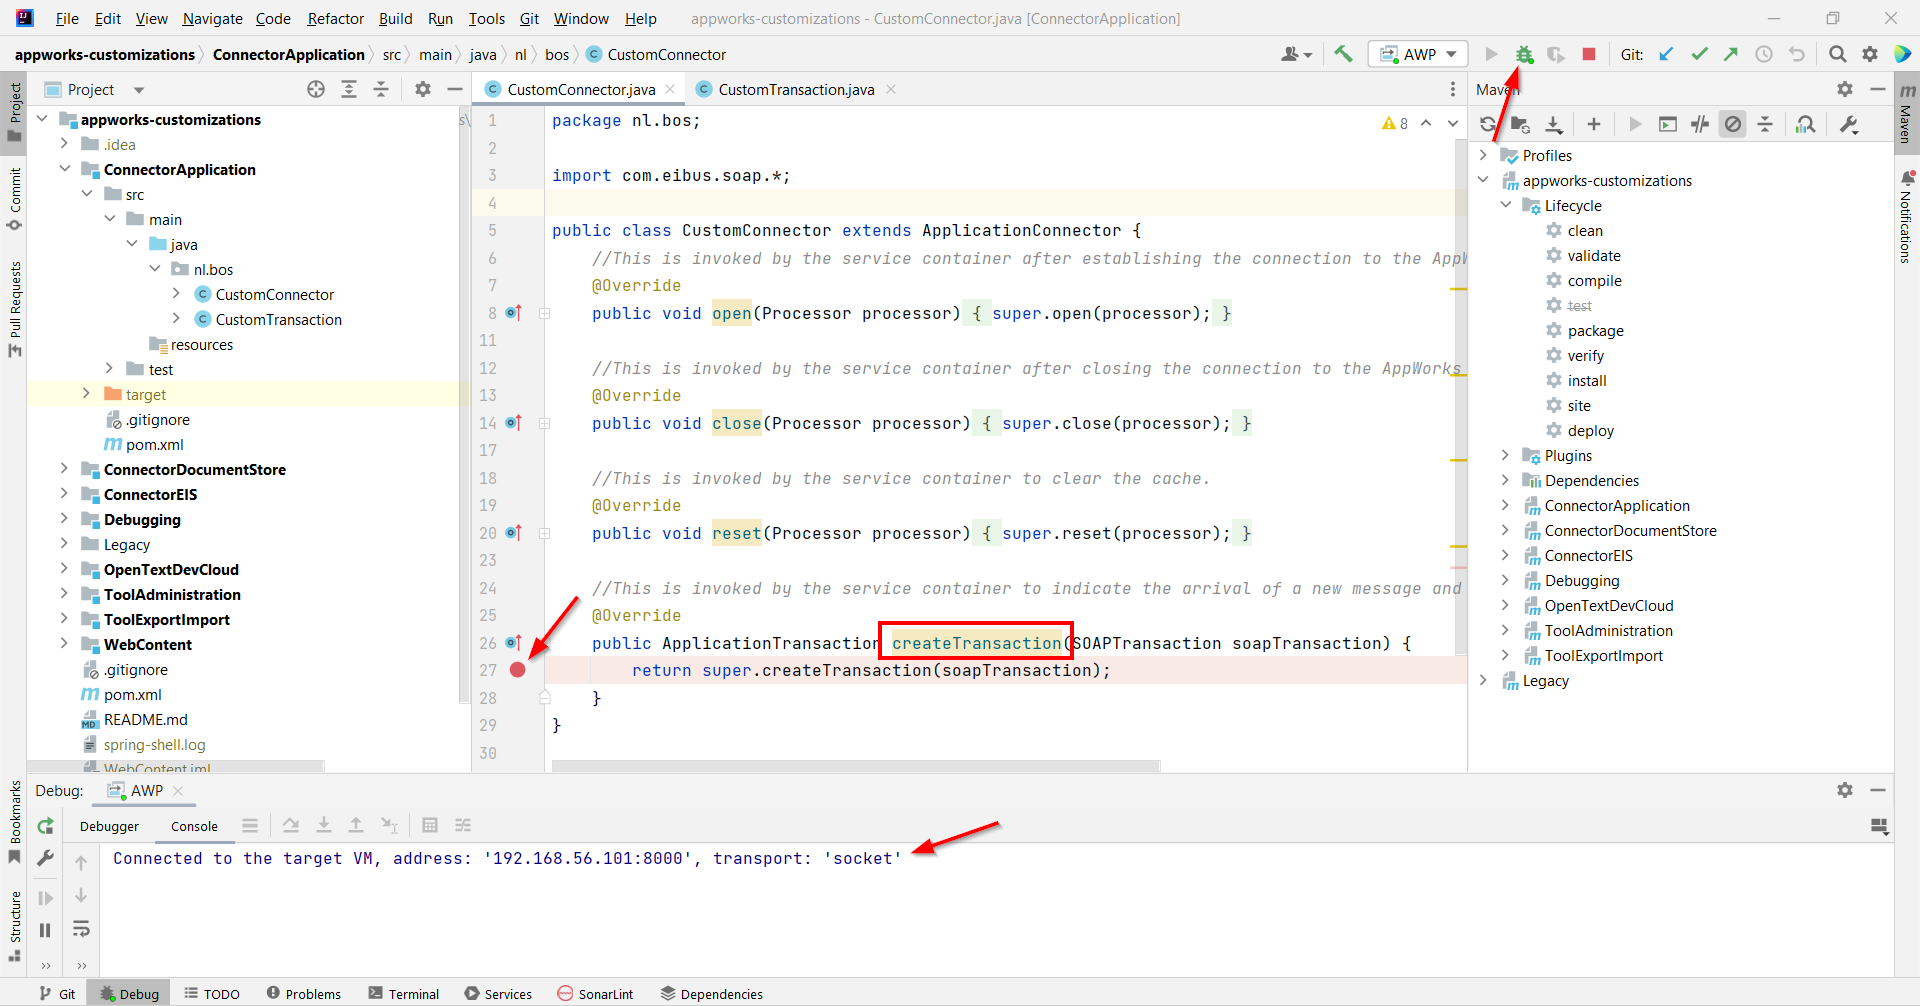
Now, assess your custom webservice operation again in AppWorks and watch the magic passing by…My first conclusion is indeed not to call the super.createTransaction(soapTransaction); method, but to produce something fancy! Something that can consume the SOAPTransaction object and sends a response back in an ApplicationTransaction object!? How? Well, I guess it’s now time to embrace the knowledge we’ve gained from the AppWorks SDK post!
After fiddling around, this is my first update to make sure the error is gone with also an empty response:
1 | public class CustomConnector extends ApplicationConnector { |
1 | public class CustomTransaction implements ApplicationTransaction { |
The rest you can find on my GitHub where I build my first connector to a fascinating public MQTT broker…Just because we can! 🤠 Let’s see if it’s done once this post is online!
UPDATE: The final code (at this moment) runs pretty well and can connect, disconnect, ping for activeness, subscribe to a topic, publish a message to that topic (with a wait for callback), and eventually unsubscribe! A great accomplishment for the hours I had!
“Better stolen well than badly conceived”; Have a look at the connectors of the platform itself (the ‘httpconnector’ was input to my creativity):
httpconnector.jar-com.opentext.applicationconnector.httpconnector.HttpConnectordocumentstore.jar-com.cordys.documentstore.applicationconnector.DocumentStoreConnectoremailconn.jar-com.eibus.applicationconnector.email.MailConnectorldapconn.jar-com.eibus.applicationconnector.ldap.LDAPServiceOpen these JAR files with JD-GUI…You don’t have it from me! 🤐
Before I forget…Once you update your code in your IDE, upload a new version to your project (with override option), publish the JAD document again, and restart TomEE (in debug mode if applicable!). You can also bypass this with a Maven build and deploy the JAR directly on the server, but that’s out of scope for this post.
YES…Nailed it with a 🏆 “DONE”! A relief as well as it took already too much of my valuable time. The small hints (I got from OpenText Professional Services…You know who you are!), just brought that ball over the top of the hill which can benefit you all on your own implementation for a new type of connector! Please, provide a comment on your valuable connector experiences and share what interesting connector is on your list. I have a peaceful weekend this time with sweat dreams on my accomplishment for this post…Cheers 🍻
Don’t forget to subscribe to get updates on the activities happening on this site. Have you noticed the quiz where you find out if you are also “The AppWorks guy”?


