
Hi there AppWorks fans,
Welcome to a new installment of AppWorks tips.
We learned something in the field again…It’s all about external service authentication, and how we suppose to call such external service from our AppWorks platform. We all know the platform is build based on SOAP services as well as ReST services. For this particular example we dive into an external SOAP service which is available somewhere in our own intranet. It’s an authenticated service based on “basic access” within the HTTP request. This post will cover the build of such a service (not really AppWorks, but this way you have a clear view on how it all sticks together). We dive into the valuable tool SoapUI to make the service call, and finally we show you how to call the endpoint from our all beloved AppWorks platform.
So, bring your sodas, beers, or whatever you drink and have a dive together into a most interesting service journey…
Let’s get right into it…
This post will have three sections delivered to you:
- IntelliJ with Spring boot; A worldwide IDE to develop applications in (my case) the Java language. We will dive into the creation of a Spring boot application and extract services from a WSDL (also called contract-first development!).
- SOAP UI for our endpoint testing; Also a worldwide tool to play with SOAP services (as well as ReST services). We only use a small part of the tool, but I already mentioned the tool in other posts as highly valuable tool to collaborate with the AppWorks platform services!
- AppWorks with the external service config; Finally, we also make our “basic authenticated” external service available within the platform for further consumption.
Let’s have a start…
…Are you ready?
…Are you excited?
…O-boy-O-boy!
…This will be great again! 😍
IntelliJ with Spring boot
Download IntelliJ here. For this post, you should be fine with the ‘Community’ edition of the software package. Before I forget it! We dive into Java-code, so make sure you have Java installed…duh! I run Java 11.0.8 for this post.
So, when you have IntelliJ up and running, our next step is to go to start.spring.io. If you want to start with Spring, this is your main website to start with it. My input looks like this:
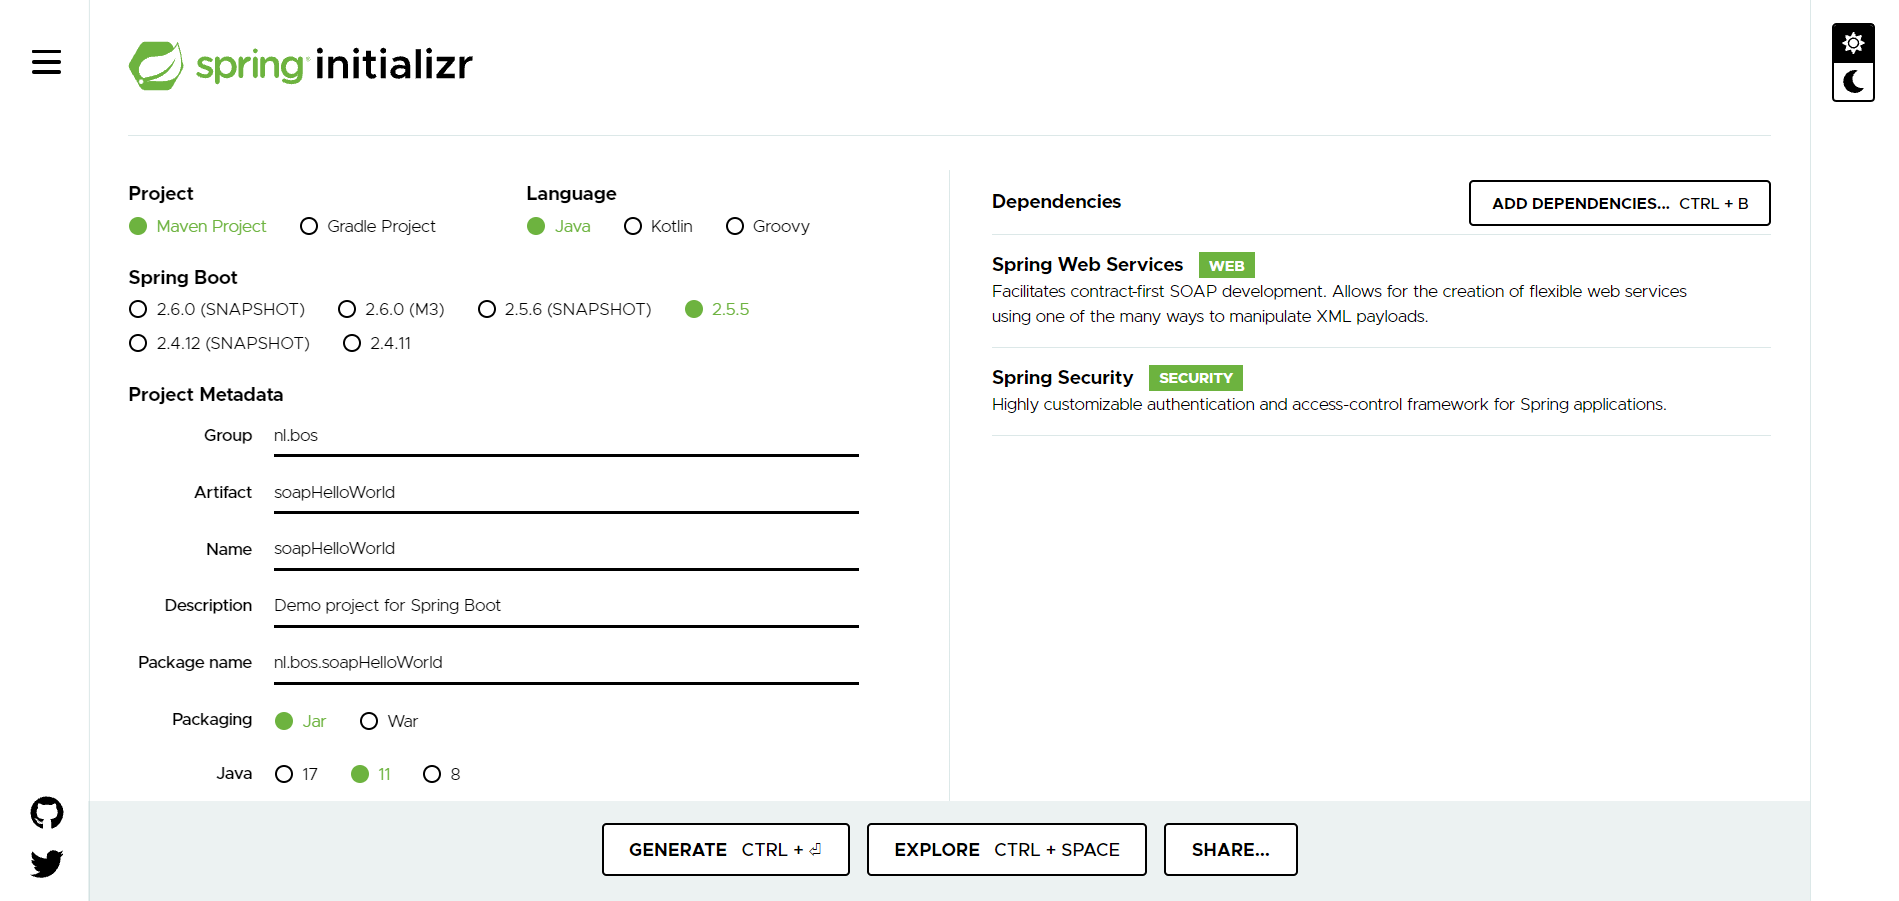
Not to forget!…This project will be a Maven type of project which manages all the dependencies for us. Make sure you have this also available on your local development machine.
When done, we can hit that ‘Generate’ button. It downloads a ZIP file which we need to extract; Once extracted, you can open the file pom.xml in IntelliJ. You should see something like this where we can hit the ‘run’ button, see a startup of the Spring boot application, and listening on host “localhost” with port “8080”:

Well, where are we waiting for…Open that browser: http://localhost:8080/
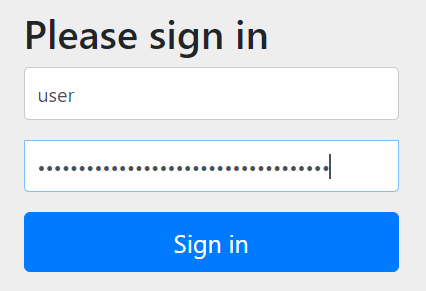
The default credentials are ‘user’; grab the password from the console of the previous screenshot! We can sign in, but nothing happens!? Of-course not! as we didn’t code anything (yet!). The only thing we have now is a “Spring boot” application with a default “Spring security” configuration. Our next step is to add endpoints of (in our case) type SOAP and manipulate the security a bit. This way it falls smoothly into our own requirement (simply basic authentication without that HTML form!).
Spring is also great in building ReST endpoints, but that’s not the goal for our post!
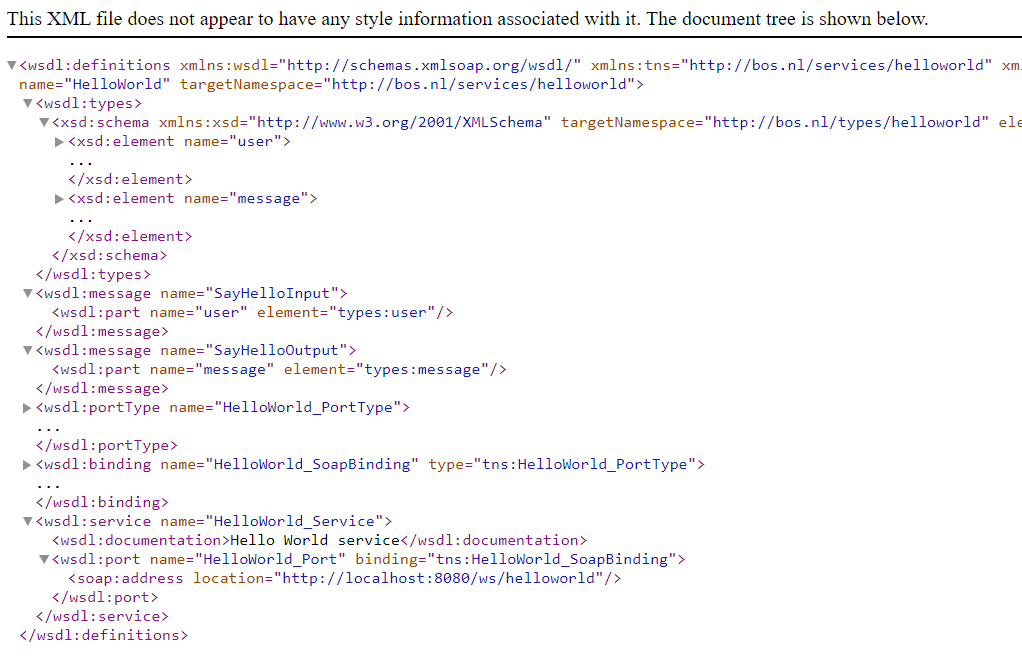
So, now what? We’ll use a contract-first approach which means we first start with a ……
YES…My friends…A “contract” which can be of type XSD, or type WSDL. For our demo we use a WSDL like this one which we will save under the ‘resources’ folder of the project in a nicely named subfolder wsdl.
The next step is to ‘generate’ Java code out of the WSDL file…Yes, it’s magic, but before we can do this we need to add an extra plugin into our Maven pom.xml file. The plugin looks like this (where you need to point to the correct schema directory of the just created WSDL):
1 | <build> |
Now, we can open a terminal (which is available from IntelliJ; otherwise just open a command prompt/PowerShell). Make sure to be in the root directory of the project (where we find our pom.xml), and give this Maven command: mvn generate-sources
Wait for a couple of seconds and find yourself the generated classes in the ‘target’ folder of the project: /target/generated-sources/xjc
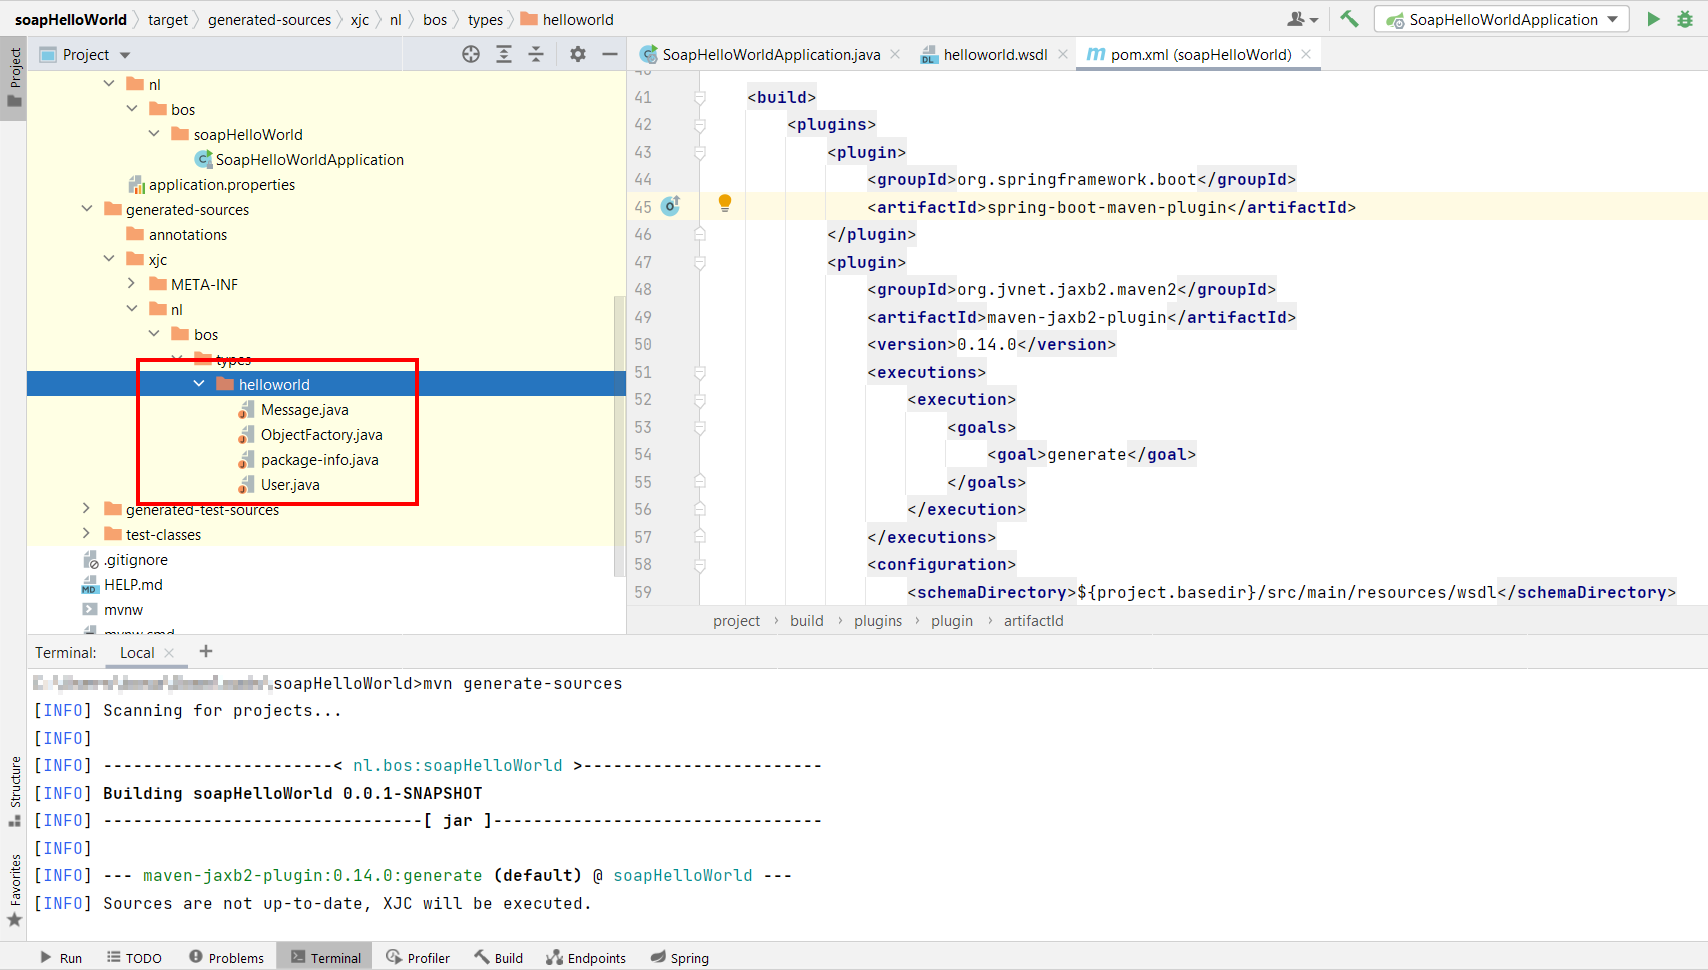
You can have a look into them, but I just leave them as is.
Service “provider” implementation
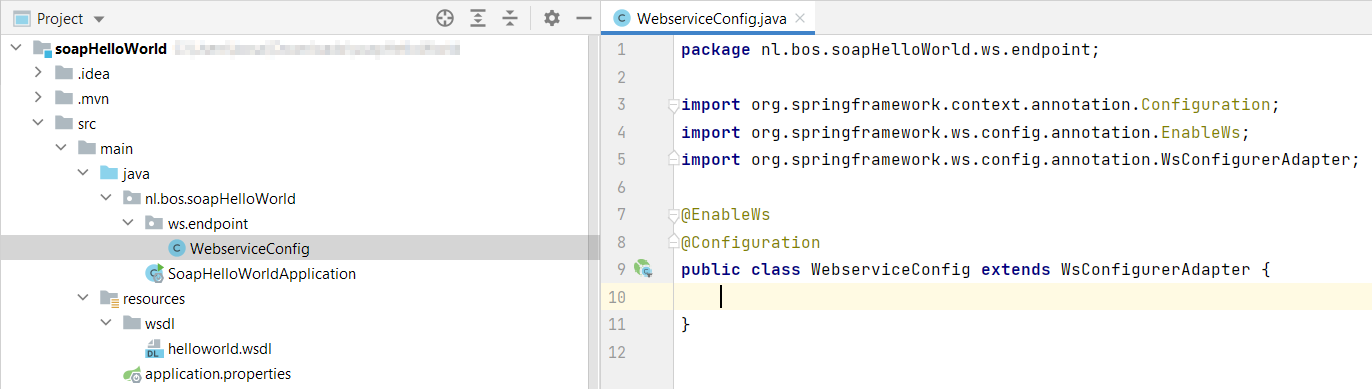
Time to create our first Webservice configuration class WebserviceConfig in the package nl.bos.soapHelloWorld.ws.endpoint which extends the Spring class WsConfigurerAdapter. Add annotations like @EnableWs, and @Configuration, and our class is born:
Time for the @Bean implementation in this same class:
1 |
|
This class is now responsible for matching incoming XML messages on the defined URI.
Our next class is an @Endpoint annotated class called HelloWorldEndpoint.
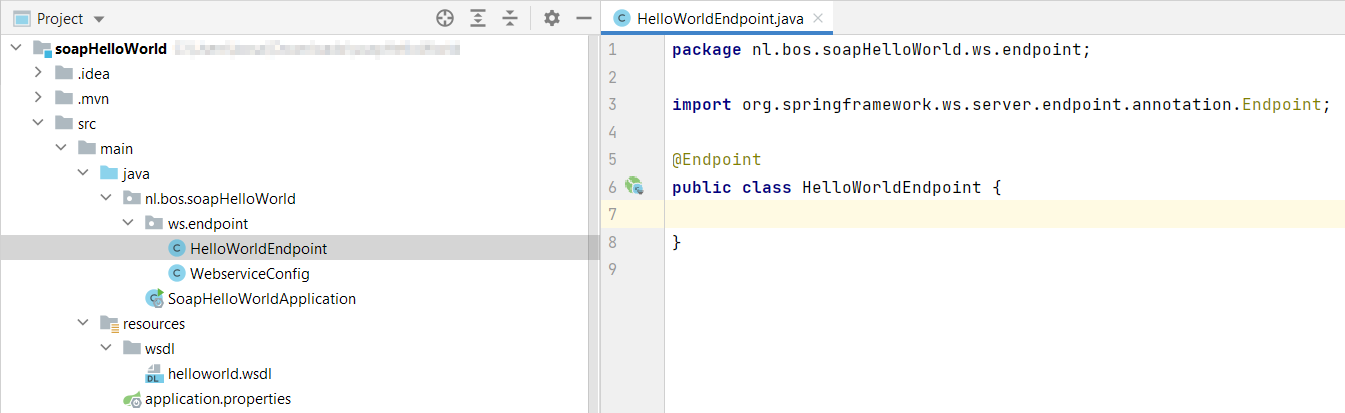
The content looks like this:
1 | private static final Logger LOGGER = LoggerFactory.getLogger(HelloWorldEndpoint.class); |
If the ‘User’, ‘Message’, and ‘ObjectFactory’ object in the package
nl.bos.types.helloworldare not available, you might need to re-open the project. This will reload the generated sources and will pick it up again.
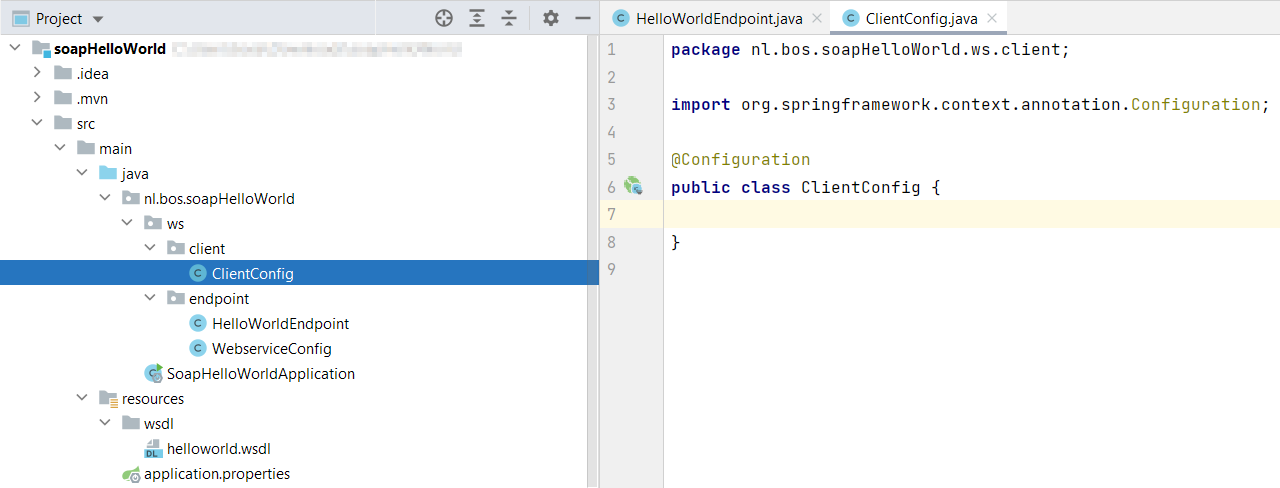
Service “consumer” implementation
Our next class is a ClientConfig class with annotation @Configuration:
This will be our @Bean implementation:
1 |
|
Finally, we wire it all together in a @Component annotated class with the name HelloWorldClient :
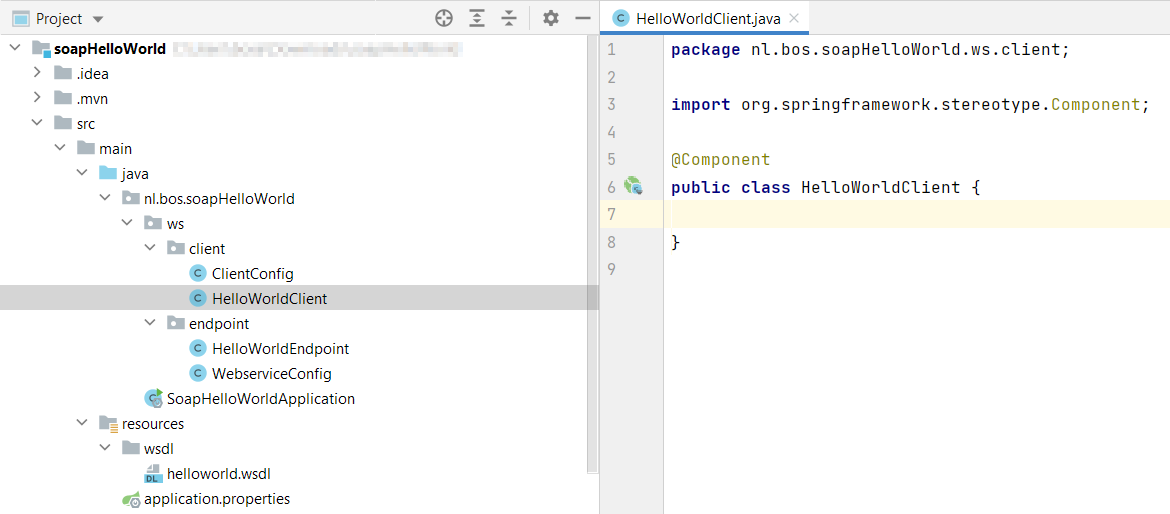
With this content as implementation:
1 | private static final Logger LOGGER = LoggerFactory.getLogger(HelloWorldClient.class); |
Implementation is ready…
Start the application again, and see if this URL is available now: http://localhost:8080/ws/helloworld.wsdl
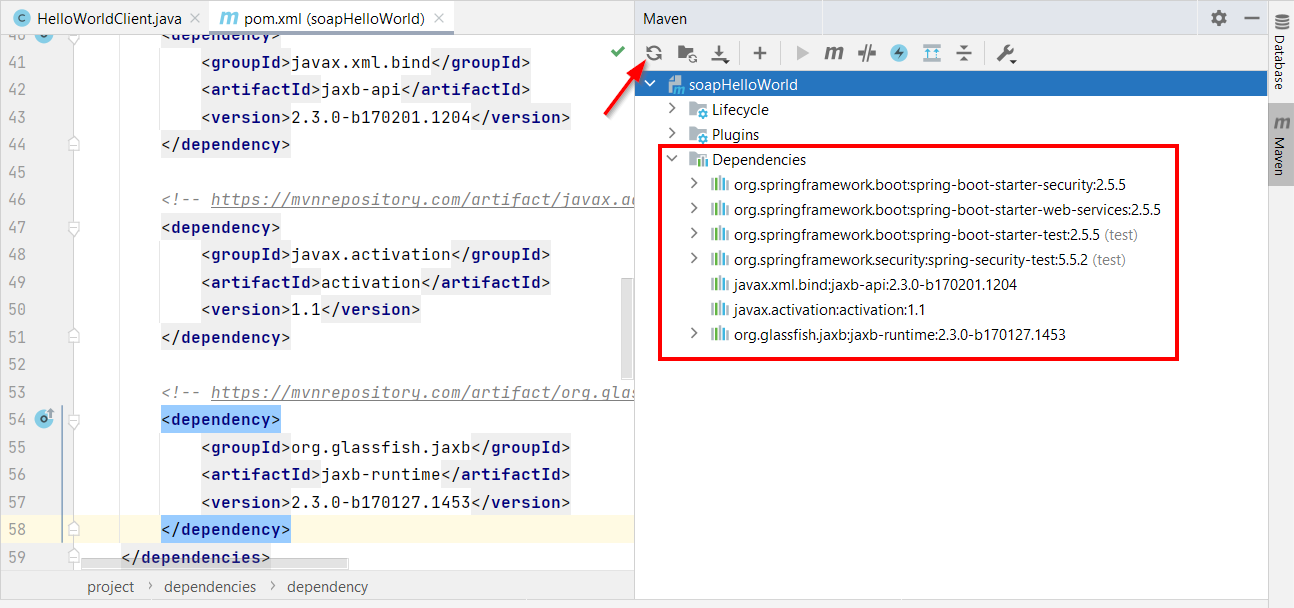
If it doesn’t start because of missing dependencies and ClassNotFoundException’s, you need these in your
pom.xml(within the ‘dependencies’ element)
2
3
4
5
6
7
8
9
10
11
12
13
14
15
16
17
18
19
20
<dependency>
<groupId>javax.xml.bind</groupId>
<artifactId>jaxb-api</artifactId>
<version>2.3.0-b170201.1204</version>
</dependency>
<!-- https://mvnrepository.com/artifact/javax.activation/activation -->
<dependency>
<groupId>javax.activation</groupId>
<artifactId>activation</artifactId>
<version>1.1</version>
</dependency>
<!-- https://mvnrepository.com/artifact/org.glassfish.jaxb/jaxb-runtime -->
<dependency>
<groupId>org.glassfish.jaxb</groupId>
<artifactId>jaxb-runtime</artifactId>
<version>2.3.0-b170127.1453</version>
</dependency>After these updates, you also need to update the Maven dependencies for you project:
Try again on the URL…Eventually, you will also get that nice shining green light as WSDL response (after you’ve passed the default security layer of Spring boot!):
“Basic Authentication” for Spring boot
We already saw something around Spring security with the default login page. We’ll get rid of this login page as we want to play with real ‘Basic authentication’ at HTTP level without any default forms.
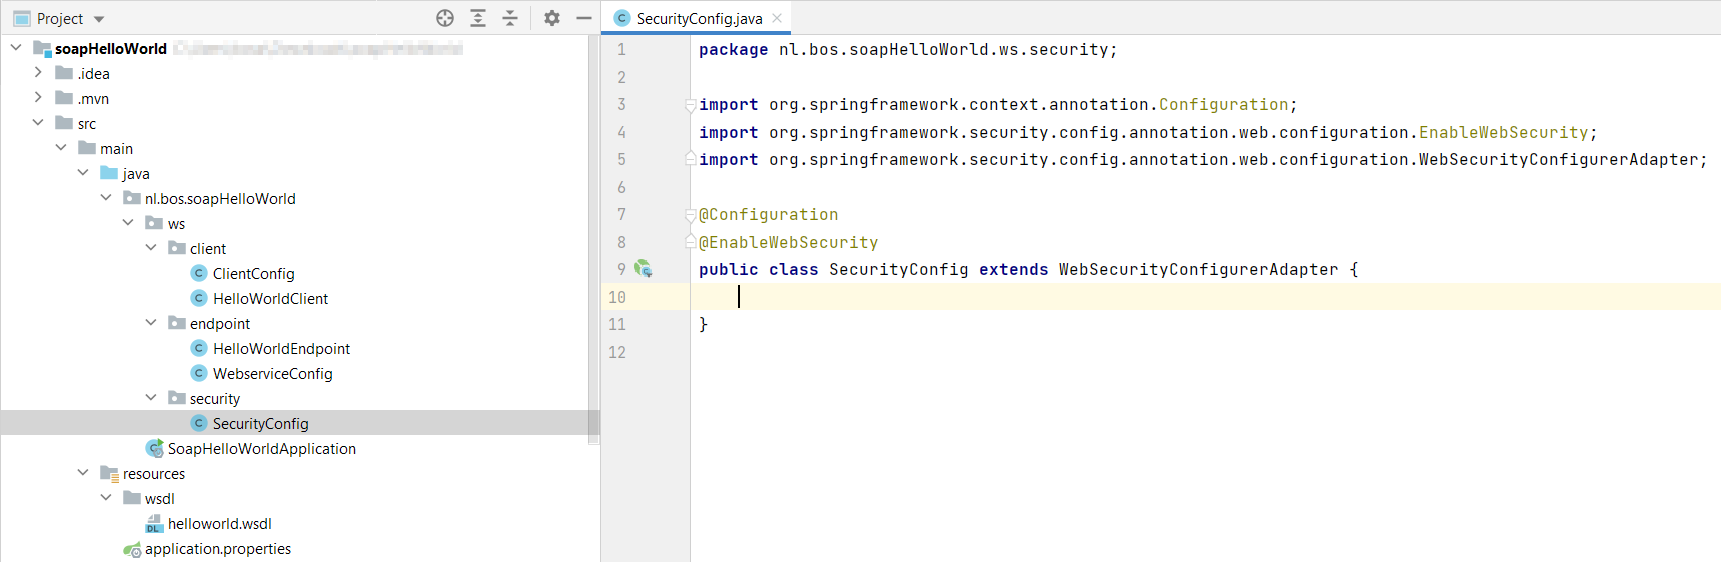
For this we create a new class with name SecurityConfig in the package nl.bos.soapHelloWorld.ws.security which we annotate with @Configuration and @EnableWebSecurity. We also make an extension based on WebSecurityConfigurerAdapter
This will be the implementation of the new security configuration class:
1 |
|
After a restart of the Sprint boot application, we won’t see the generated password anymore in the console! Great!…How about our URL? Well, a basic authentication popup replaces the login form. After this we see the WSDL again:

Credentials:
- Username: user
- Password: password
Nice…Our plan comes alive, and we have a basic authenticated SOAP service available locally on our laptop. Time to consume it…First from SOAP UI, and after this from the AppWorks platform perspective!
Before I forget…Download my project here. For this post I just run the service from my IntelliJ, but the power of Spring is to build a JAR with Maven mvn clean package. After this command, we can now run it outside the IDE; standalone with this command: java -jar C:\Temp\soapHelloWorld\target\soapHelloWorld-0.0.1-SNAPSHOT.jar
My resources for this first section:
- https://codenotfound.com/spring-ws-example.html
- https://stackoverflow.com/questions/52056421/basic-authentication-doesnt-work-for-soap-web-service-with-active-directory-lda
- https://stackoverflow.com/questions/33654516/using-http-basic-authentication-with-spring-webservices
- https://stackoverflow.com/questions/49654143/spring-security-5-there-is-no-passwordencoder-mapped-for-the-id-null
- https://www.baeldung.com/spring-security-basic-authentication
SOAP UI for our endpoint testing
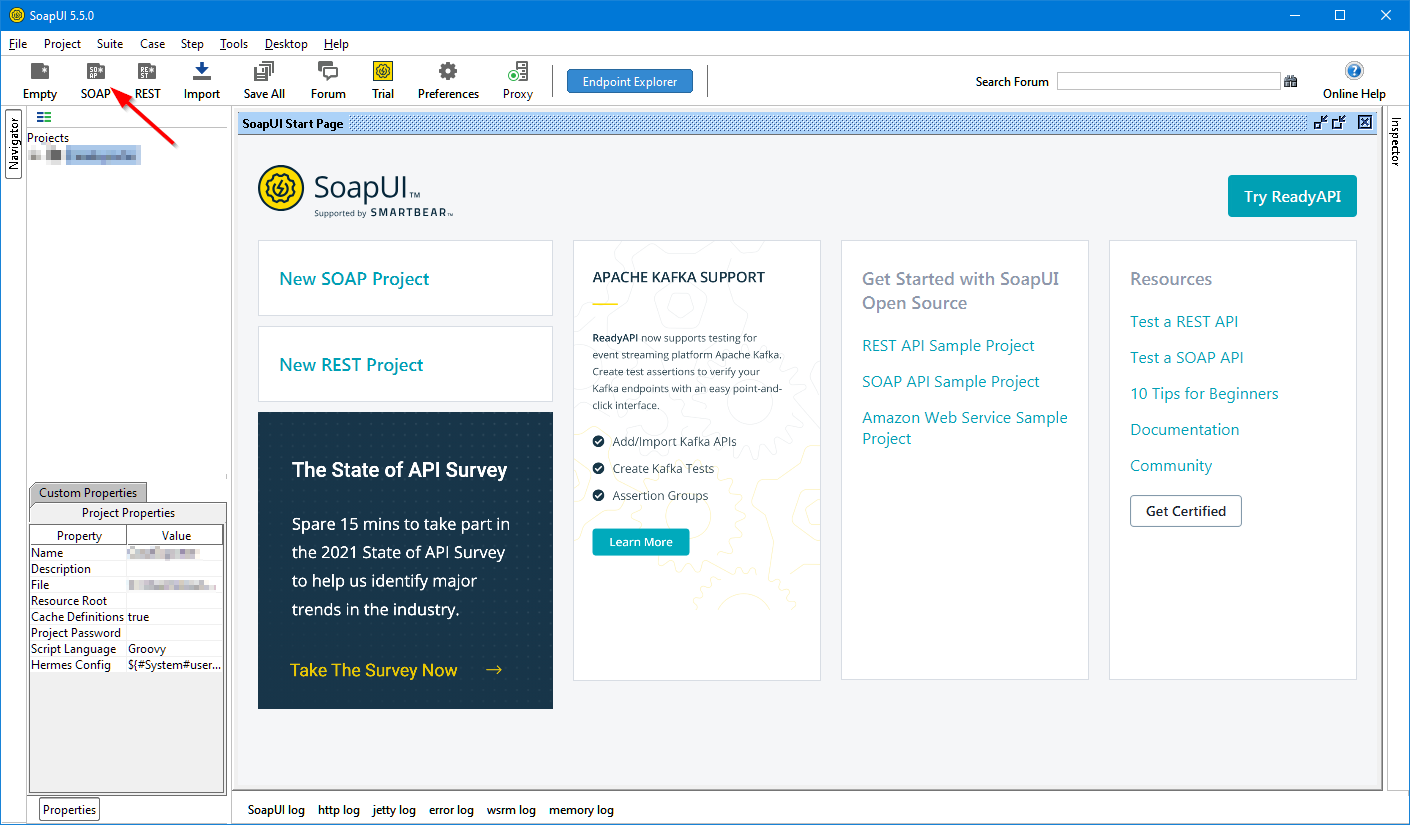
Time to consume our webservice from within the tool SoapUI. I use the open-source version (I currently run version 5.5.0) of the product. After a local installation, and a startup of the tool, we get a screen like this where we can create a new SOAP project:
We see a new modal popup where we fill in this information:
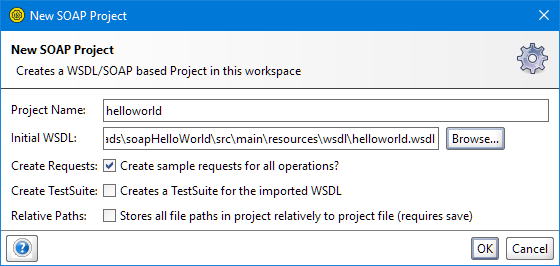
You see me pointing to the local WSDL file in the project itself. The exposed http://localhost:8080/ws/helloworld.wsdl is behind basic authentication and this wizard can’t manage it for some reason!?, or I’m not aware of the correct feature…Let me know!. Hit the ‘OK’ button and watch the magic happening. Eventually you should be able to make a call like this:
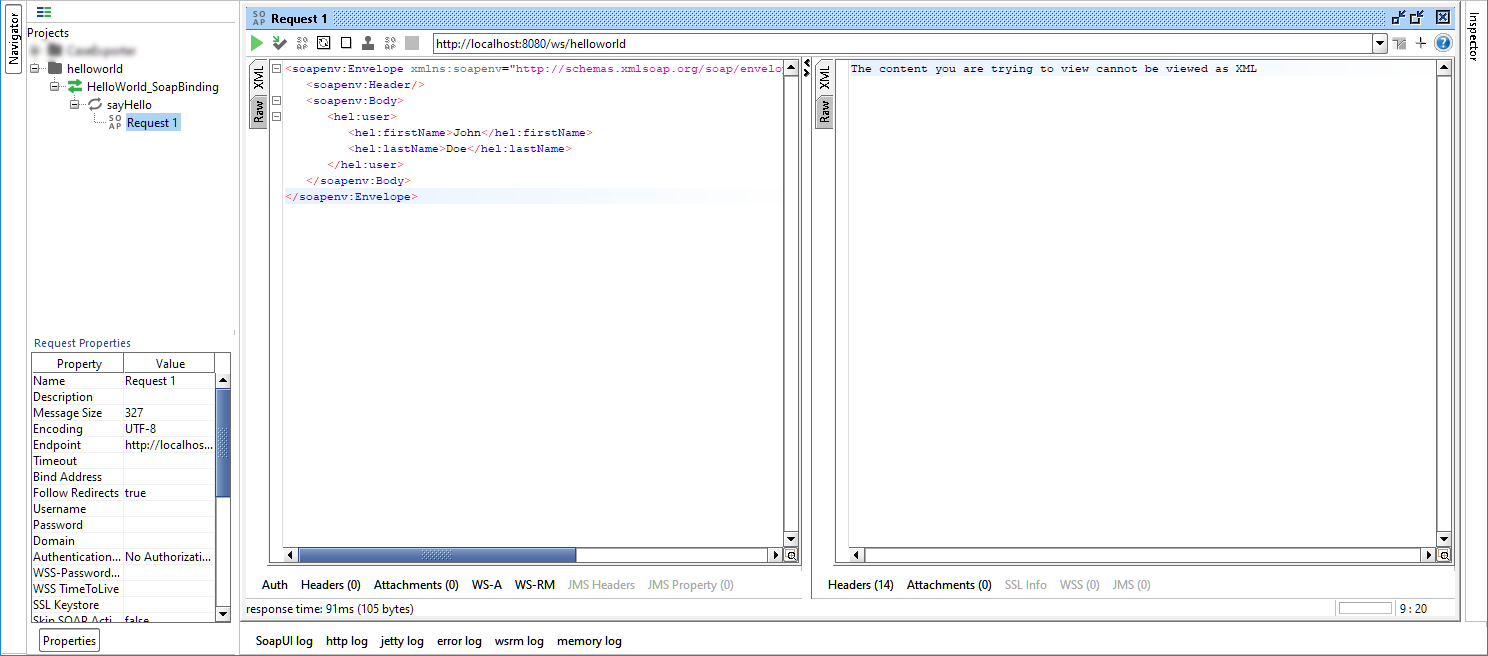
You see it fails, and this has to do with the basic authentication! So, let’s add the authorization to the call, and do a retry:
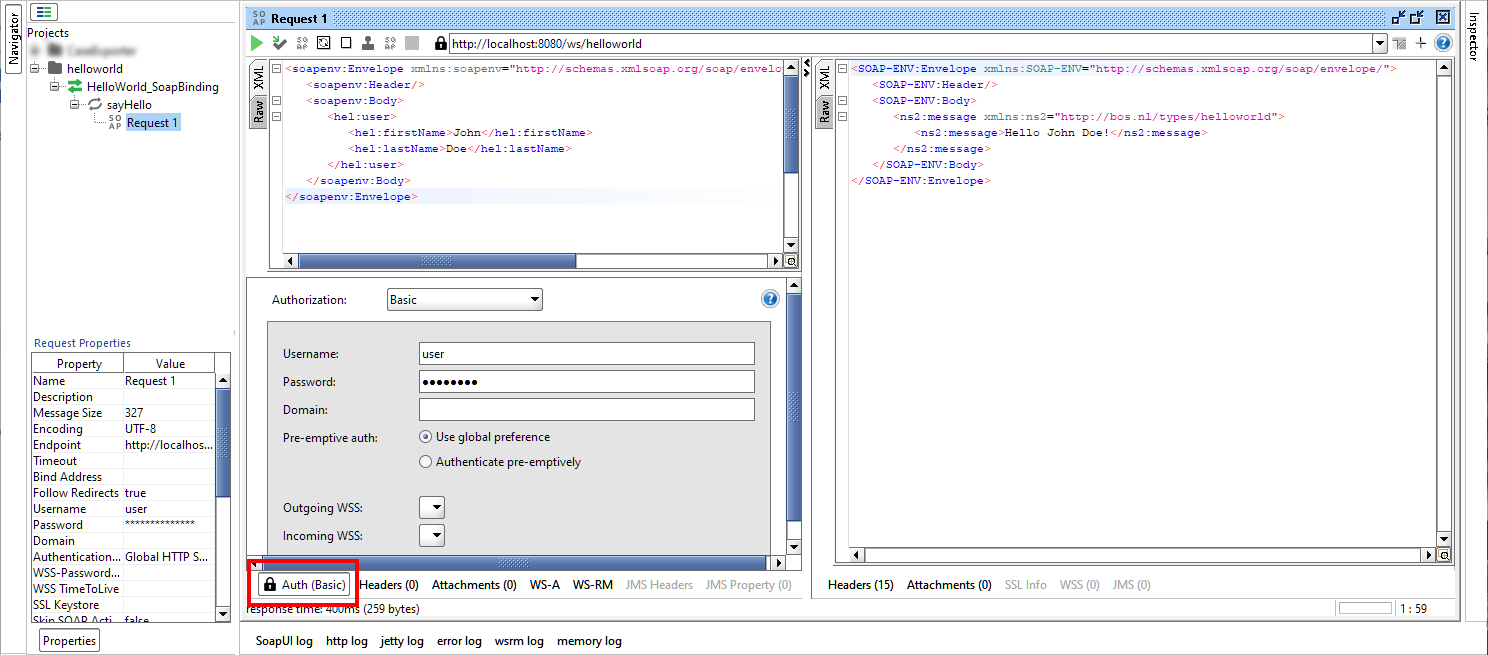
Great…I’m always happy with a green flag! ✅
Next…
AppWorks with the external services config
Time for our beloved platform and have a call from that perspective. So, spin it all up; open your favorite project (with a developer rolled account…In my case ‘awdev’).
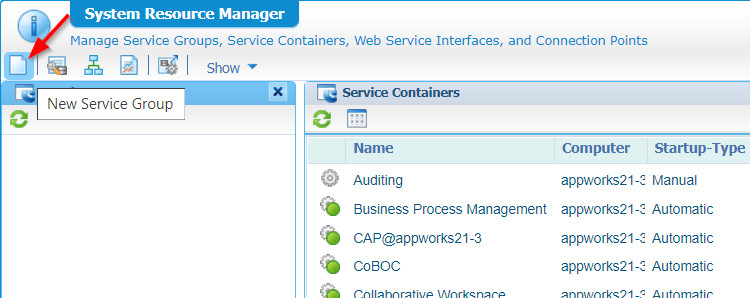
When we talk about calling external SOAP services, we also talk about the UDDI service container in your organization which manages the SOAP requests. For this we first open the ‘System Resource Manager’ where we create a new service group:
Just follow wizard with these input bullets:
- Connector type:
UDDI Service - Service group:
- Name:
uddi_service_group - Selected web service interfaces:
Method Set UDDI
- Name:
- Service container:
- Name:
uddi_service_container - Startup:
automatically - Assign OS Process:
Application Server(is default and recommended!)
- Name:
- Don’t do anything with the ‘Use HTTP Proxy’ setting (there is an authentication setting here, but it is something else!)
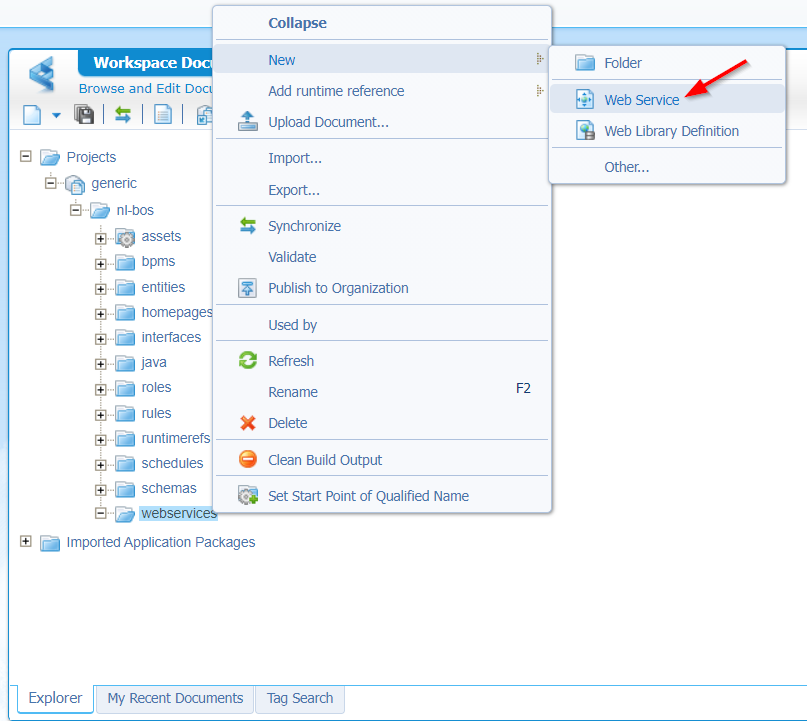
Once the service container is up and running, our next step is the creation of a new webservice (based on our WSDL URL). I have this screen in front of me where we start with a new webservice creation on the crafted ‘services’ folder.
We see a wizard starting up, and fill in the first screen like this:
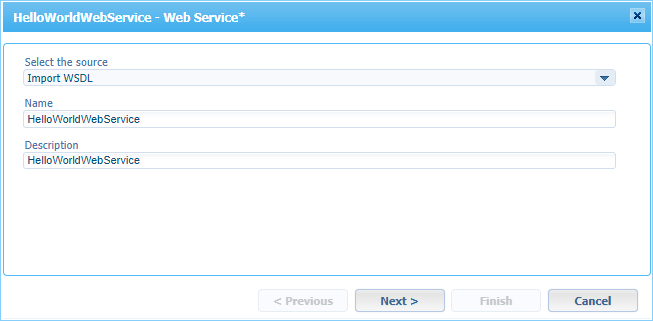
Hit the ‘Next >’ button to continue.
Now the tricky part as this time we need to ‘read’ from a WSDL URL. We have something available at http://localhost:8080/ws/helloworld.wsdl, but we cannot reach this URL directly from the AppWorks VM! We need to make sure to use local IP address of my local machine (which should be reachable from the AppWorks platform VM). This will be the URL (in my case): http://192.168.56.1:8080/ws/helloworld.wsdl. You see we already have the possibility to add authentication to this call (what we couldn’t directly do within SoapUI). The screen looks like this (after I clicked the ‘Show Services’ button):
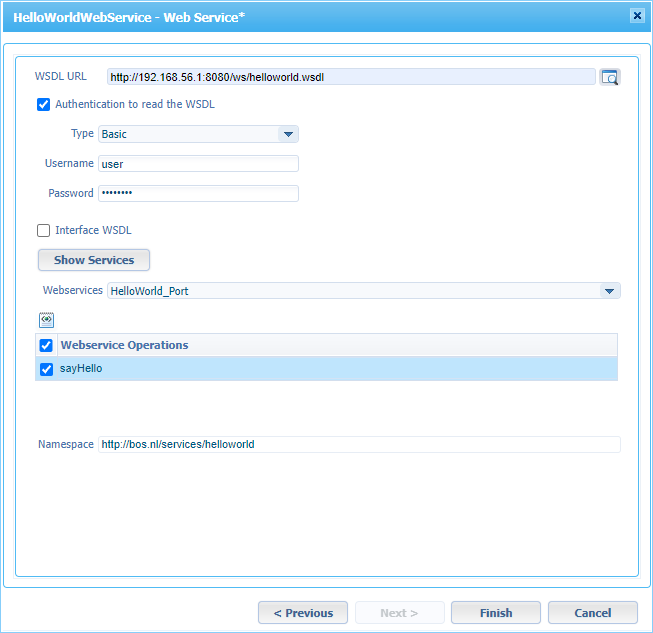
Hit the ‘Finish’ like a bro, and see our external service generated in our project…How nice!

Have yourself a publication of the new generated service, but before we can evaluate it! Yes…You know what to do…right? Add the service interface to the service container which needs to manage the request. Do you mean the UDDI service container? Ohw mama…for sure!! 😎 (you figure that one out for yourself)
Time for a first test from the context menu of the ‘sayHello’ operation…
Hmmm…That’s an error (404): [Server returned the following error: 404 null..](javascript:void(0))
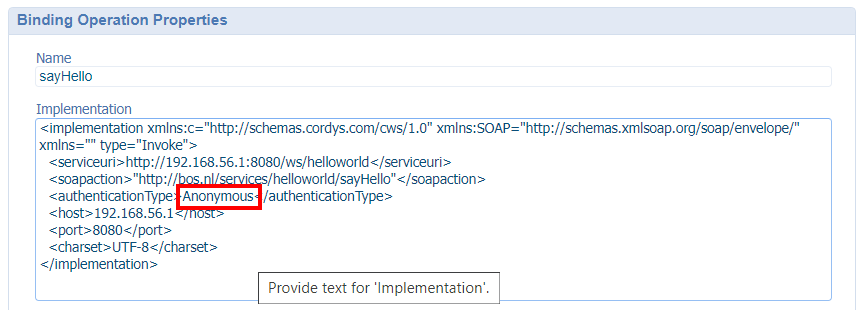
So, it doesn’t even find my service! Let’s have a look at the implementation XML for the sayHello operation (just with a double click!). I guess it’s time to update the serviceurl to something like this: <serviceuri>http://192.168.56.1:8080/ws/helloworld</serviceuri> where we replaced the ‘localhost’ part!
Publish, and try again…
Hmmm…the 404 is gone, but the result is empty!? Would it have to do with our authentication as we didn’t configure anything for the real call? During a recheck on the implementation XML, we clearly see an ‘Anonymous’ authentication type!? Didn’t we set this already for the service generation!? Correct, but that was authentication for only reading the WSDL file, and not the request for consumption! Remember that SoapUI call?
So, we need to do something on authentication level for this service. For this we go to a new artifact with the name ‘External Services Configuration’ where we can select our webservice interface from the dropdown:
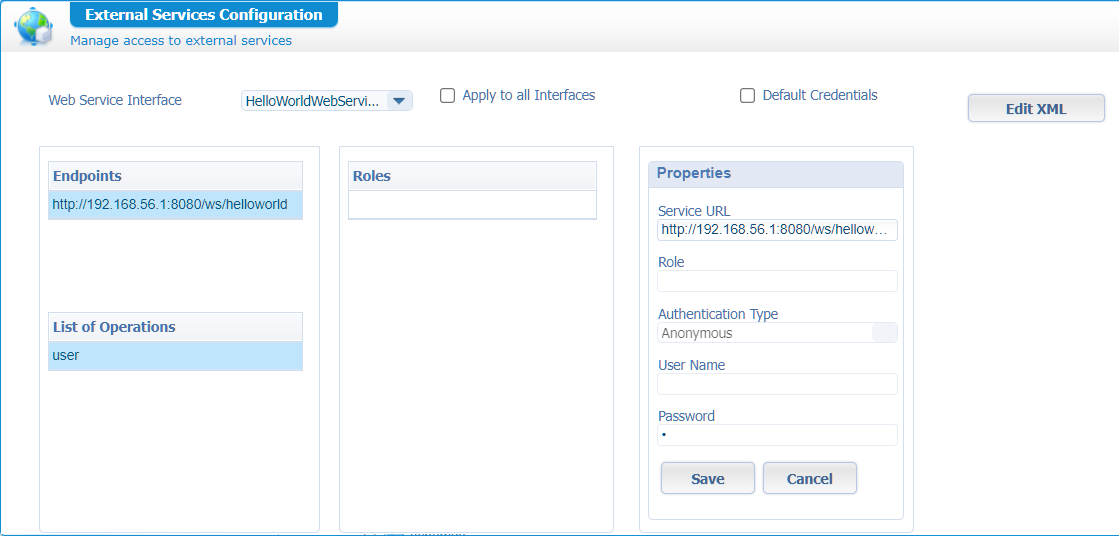
Now what? The authentication type isn’t updatable as we don’t have any role applied!? So, it looks like we first need to add a role into our solution! Let’s also apply that role to the runtime security of the webservice and let’s also assign our ‘awdev’ account to it…
First the runtime security of the webservice:
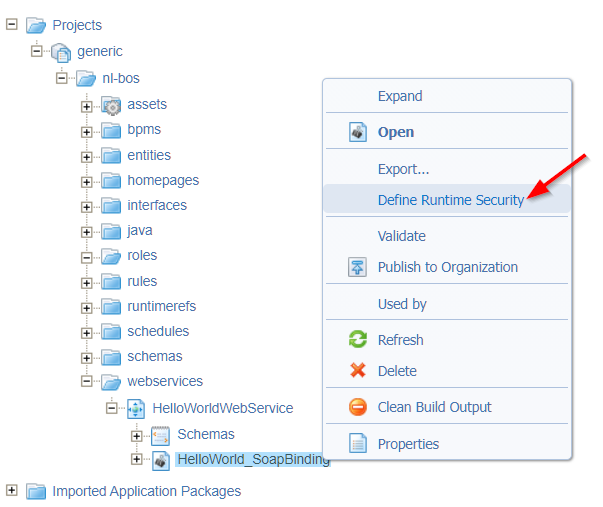
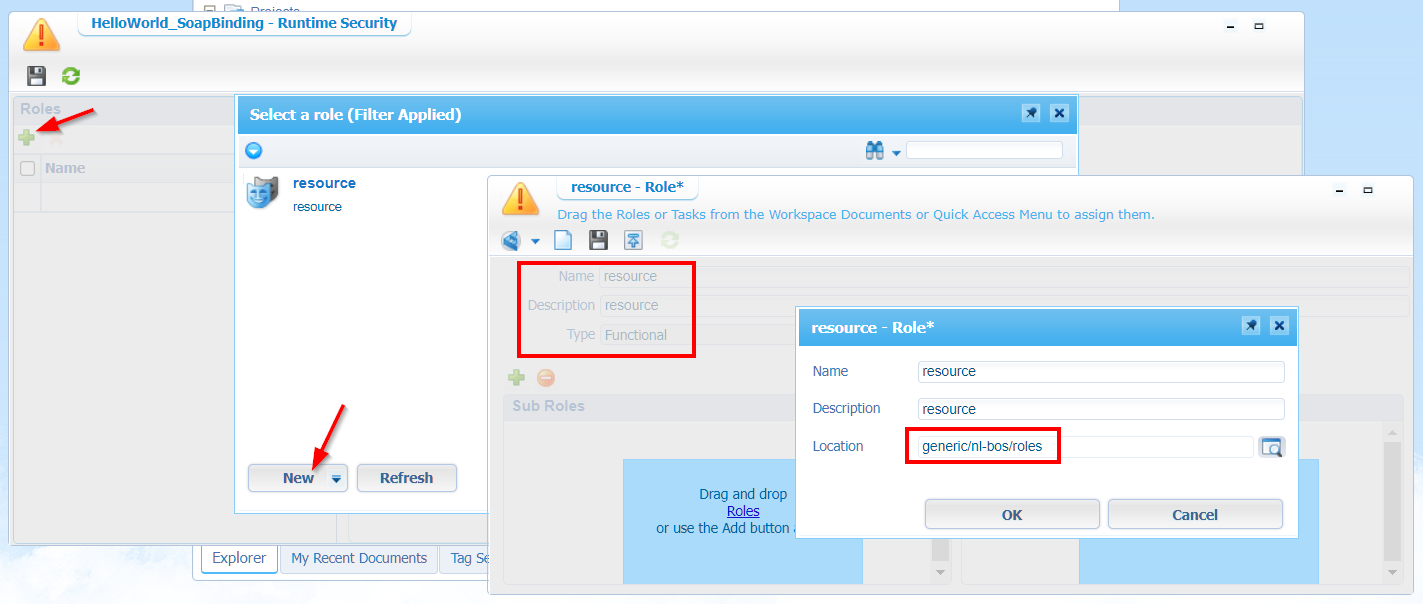
Add a new “functional” role with name ‘resource’ and save it in the ‘roles’ folder of the project:
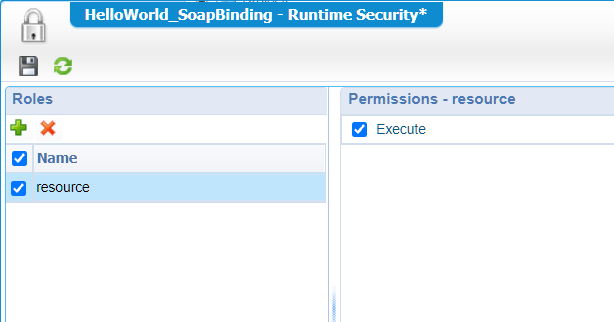
After creation of the role (and published!), we can mark the permission ‘Execute’ for the webservice runtime security:
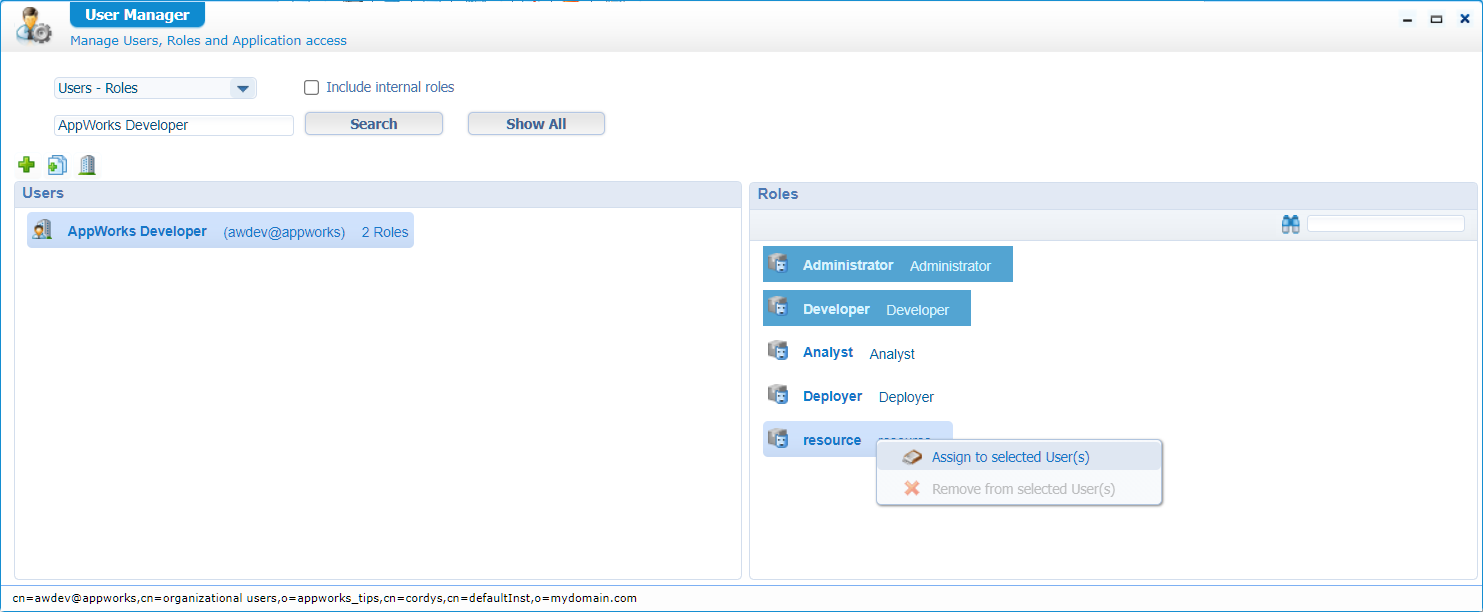
Let’s publish the webservice again and jump to the artifact ‘User Manager’ where we applied our ‘awdev’ account to the new ‘resource’ role.
Back to the ‘External Services Configuration’ where we can now update the authentication type…nice!
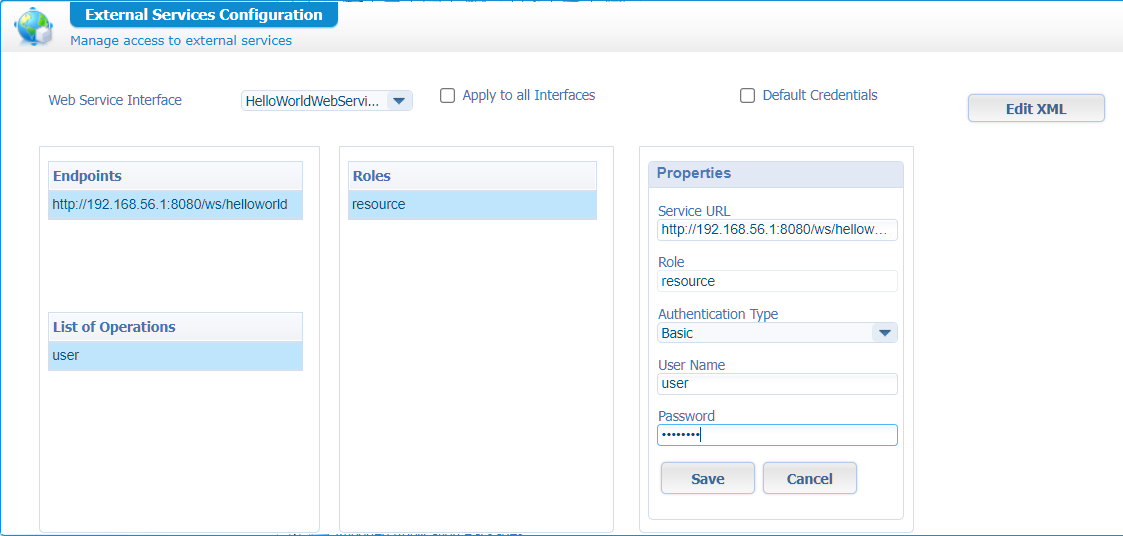
Save it, and have also a look at the XML behind the ‘Edit XML’ button:
1 | <accessconfigurations xmlns="" applyToAllMethodSets="false"> |
Time for a retest, with this time a valid response…YEAH…That’s the good stuff…Give yourself a knuckle-bump!! 👊

As a final double-check I was curious if the implementation XML (on double-click on the ‘sayHello’ service) updates in the authenticationType element, but it’s still filled up with the value ‘Anonymous’. Could it be the default which overrules the ‘External Services Configuration’!? Who cares…YOLO!…It works…#DontFixItIfItAintBroke! 😁
Also this post (about an “UDDI Interceptor”) might be interesting for you to read as it relates to this post.
Yes, my friends, a well-earned “DONE” this time. We learned much more about creating our own SOAP service with Spring boot and how to consume it from SoapUI as well from our all beloved AppWorks platform. Have a great service week-end, and I see you in the next post with another great topic about an always interesting AppWorks Tips! Cheers…
Don’t forget to subscribe to get updates on the activities happening on this site. Have you noticed the quiz where you find out if you are also “The AppWorks guy”?
