
Hi there AppWorks fans,
Welcome to a new installment of AppWorks tips.
This post will dive into a feature request I see always passing by in every project! That is? Well, a layout where our end-user can view the metadata of the selected entity…and!…Show the uploaded content next to the metadata (side-by-side!). To make it a bit more interesting we make sure it’s also possible to trigger a modal popup with the same type of view. Where does this feature come from? Well, really easy! In the time, when everything was done on good old paper, we managed to digitalize these papers into a digital document. This digital version of the paper is uploaded into systems like our AppWorks platform together with the extracted metadata! To make sure everything went fine we create some double-check option into the system where we can view the metadata together with the content…Et voilà…There you have it! With this feature we can also make it possible to enter missing data into the metadata form. This last feature is called metadata indexing, so the documents can be found back much easier and faster. Enough of the chit-chat and feature explaining…Let’s craft…and…
Let’s get right into it…
Spin up your machine and enter the ‘Walhalla’ of the AppWorks platform design-time where we log in with our always trustworthy ‘awdev’ account! Isn’t that a nice sentence to start the post with!? 😜
We jump right into our project with a start entity called ‘todo’ that has all the main elements generated…have look on the table with that screenshot:
| Label | Name | Type |
|---|---|---|
| Name | todo_name | Text |
| Description | todo_description | Long text |
| Status | todo_status | Enumerated integer |
| Due date | todo_due_date | Date |
| Category | todo_category | Enumerated text |
These are the “extra’s” I did to make it all a bit nicer:
Set the ‘Display name’ and ‘Name’ on the entity properties to: Todo
Add a business ID on the Identity BB: todo_{10}
Changed the ‘Label’ of the DefaultList to: Todo Items
Add some values to the ‘todo_category’ property: High, Medium (default), Low
- With some nice icons from FamFamFam.com
The same for ‘todo_status’: New[1] (default), In process[2], Done[3]
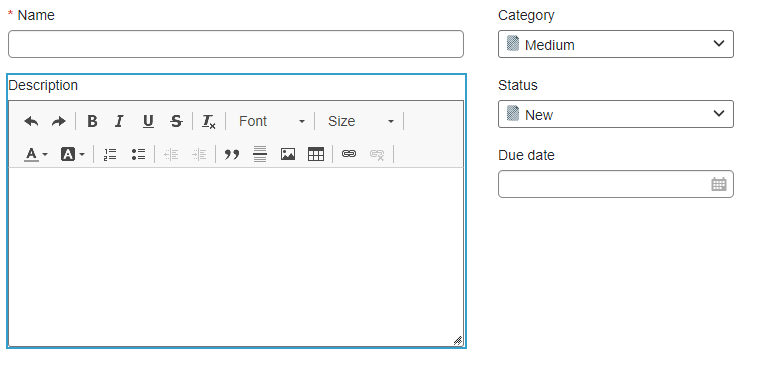
An update on the ‘Create’ form like this:
![layout_002]()
Add the ‘Title’ BB with a property specification:
item.Properties.todo_category + "_" + item.Properties.todo_nameAdd the ‘File’ BB
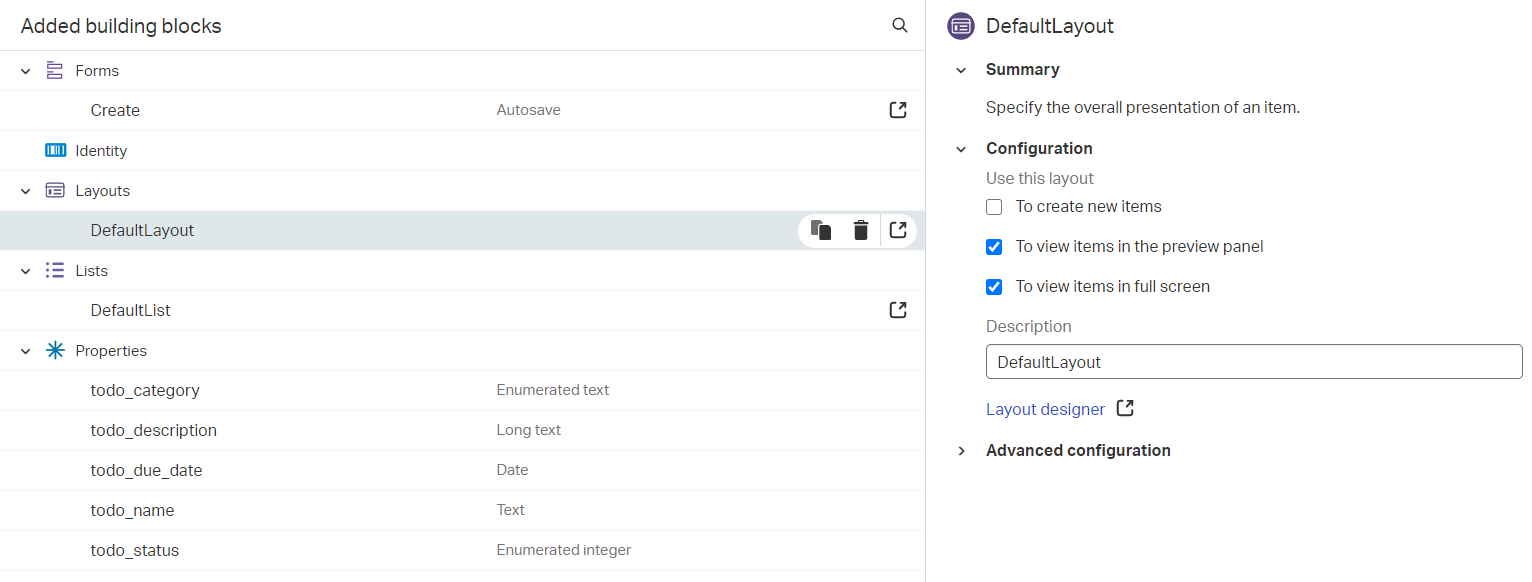
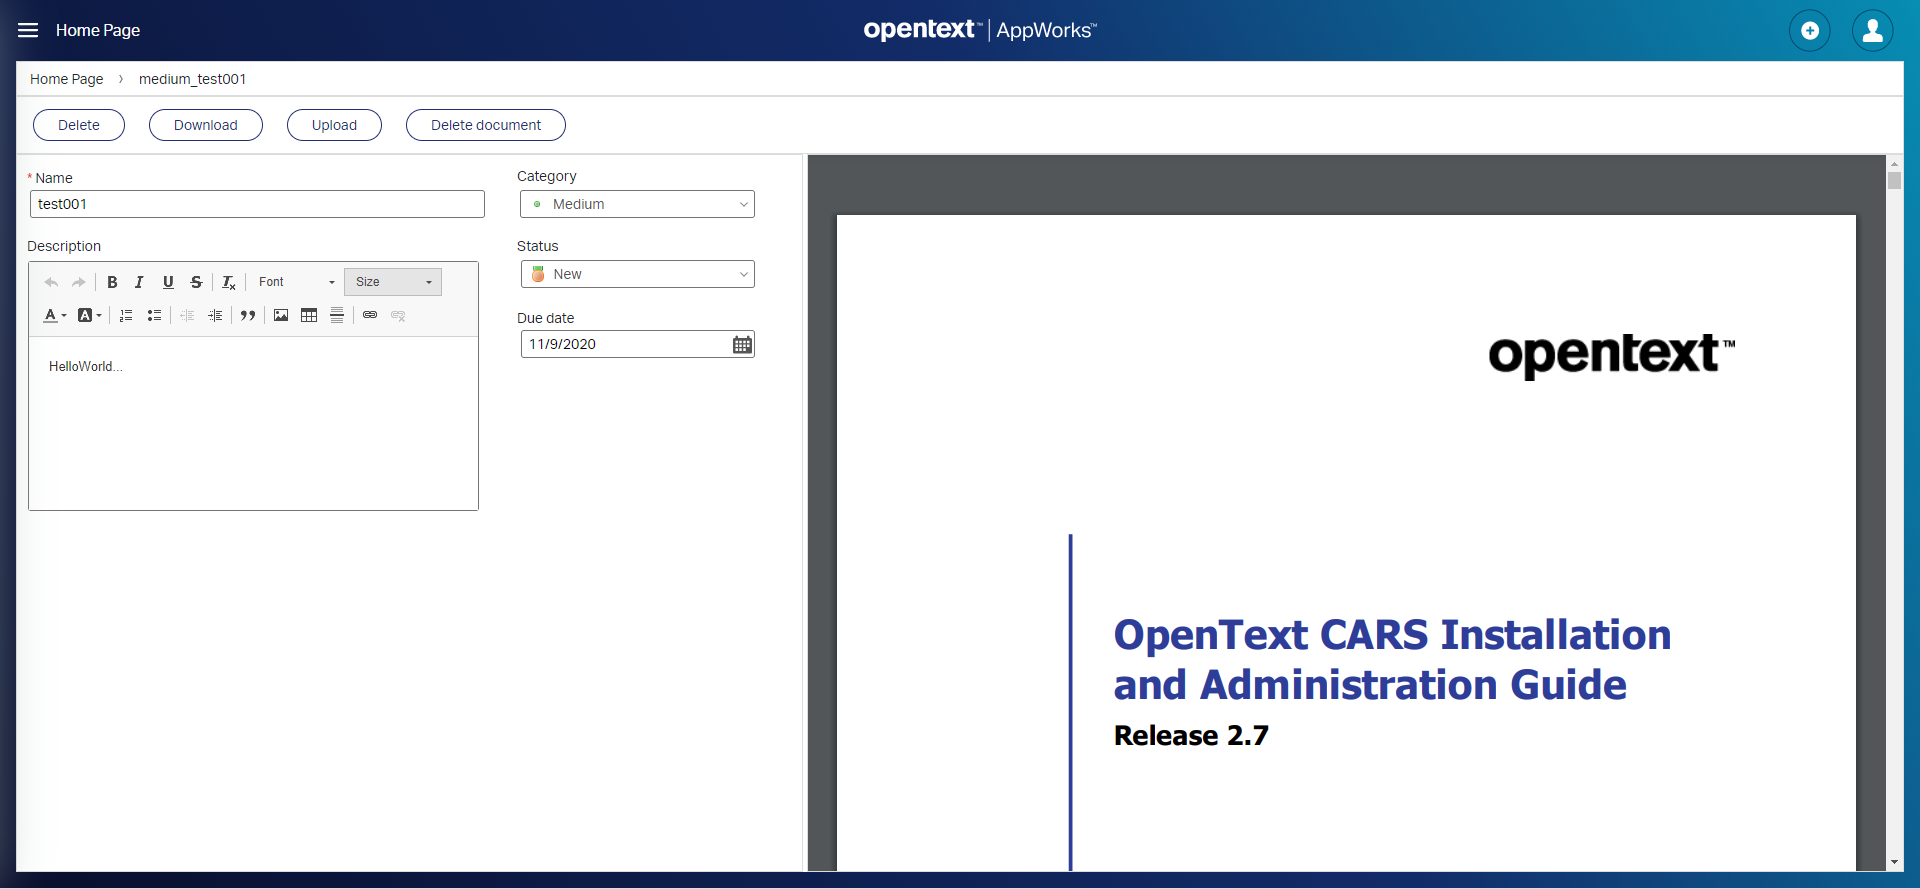
Update the ‘DefaultLayout’ with a preview panel
![layout_003]()
Add an event rule BB:
- Name: onEventInitSetDueDate
- Event: An item is initialized
- Action: Set property ‘todo_due_date’ =
today + 1 end of months + 2 mondays- That will be today + 1 month and 2 days later (just for a complex example)!
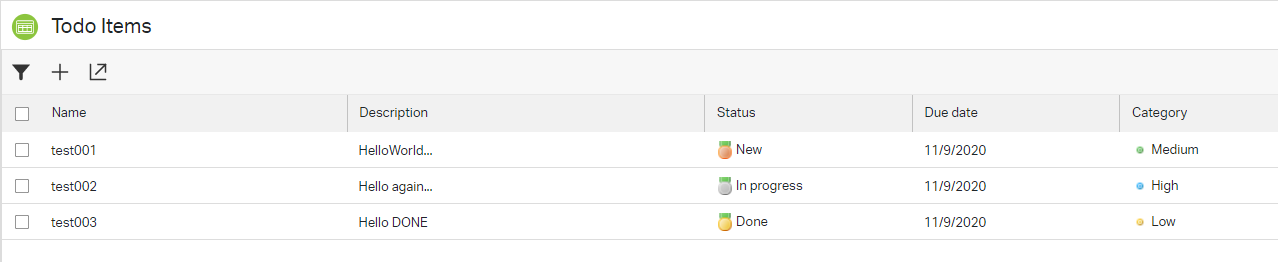
Update the ‘DefaultList’ BB with a nicer presentation where the ‘Status’ and ‘Category’ show those nice icons!
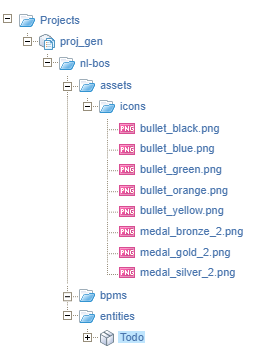
A fix for your icons if they are not visible in runtime (I had that same problem!). My project looks like this with those icons uploaded into the folder:
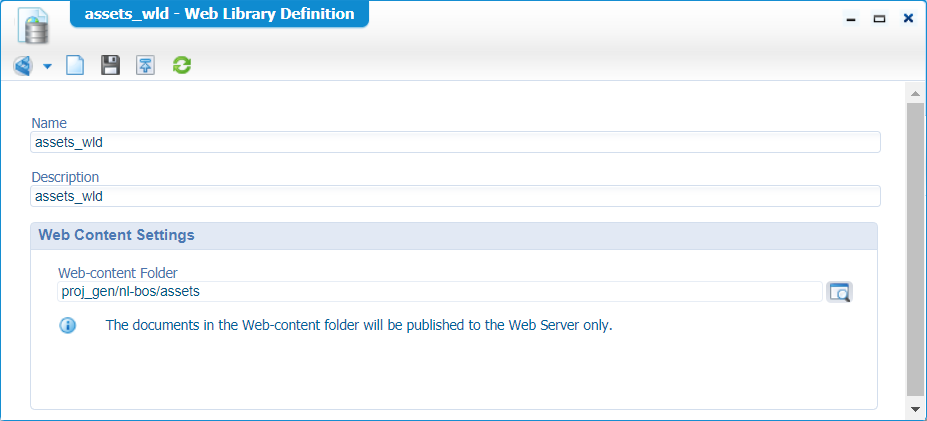
After publishing I can’t find them back on the server!? That’s because of a missing document called ‘Web Library Definition’. I created it in the ‘nl-bos’ folder like this:
After publishing, I see the icons in this folder:
/opt/opentext/AppWorksPlatform/defaultInst/webroot/organization/appworks_tips/nl-bos/assets/icons/bullet_green.pngWhich matches exactly what I see in the developer console of Chrome: http://192.168.56.107:8080/home/appworks_tips/nl-bos/assets/icons/bullet_green.png
Looks like that’s it for the first publish and test in runtime…
How nice…for a first start and creating a new instance of the ‘Todo’ entity:

…and the list view:
With an open item after and some uploaded document:
Next…
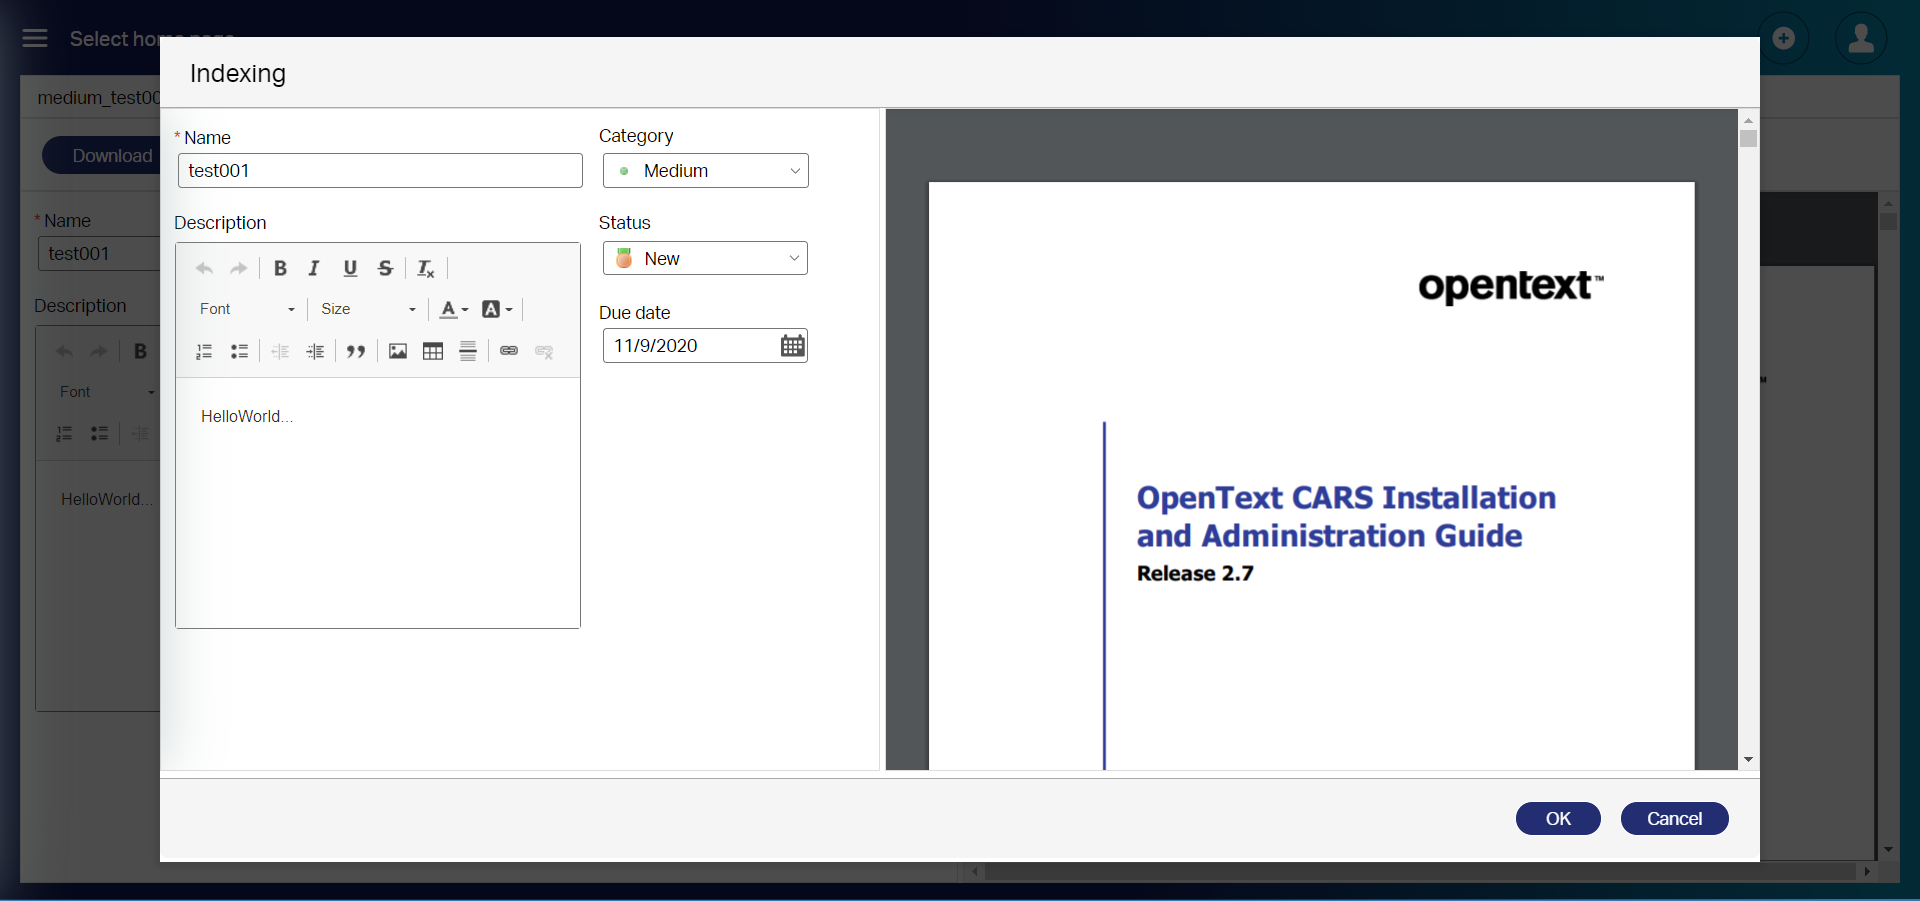
The creation of that modal “indexing” popup
The first question you might have is ‘why?’ as the current layout is already sufficient to index and double-check the metadata based on the content, and I indeed agree…But…some bullets to convince you otherwise:
- This screen might be filled up with other related panels that show more information concerning the entity.
- You bring the focus purely on indexing of the entity
- The technical capabilities of the platform as it will demo some nice, advanced features
Let’s continue the grind…
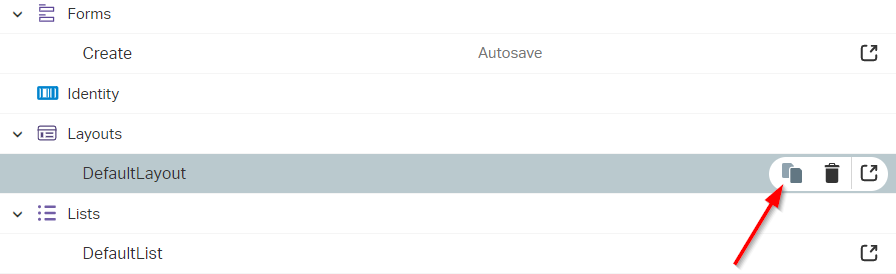
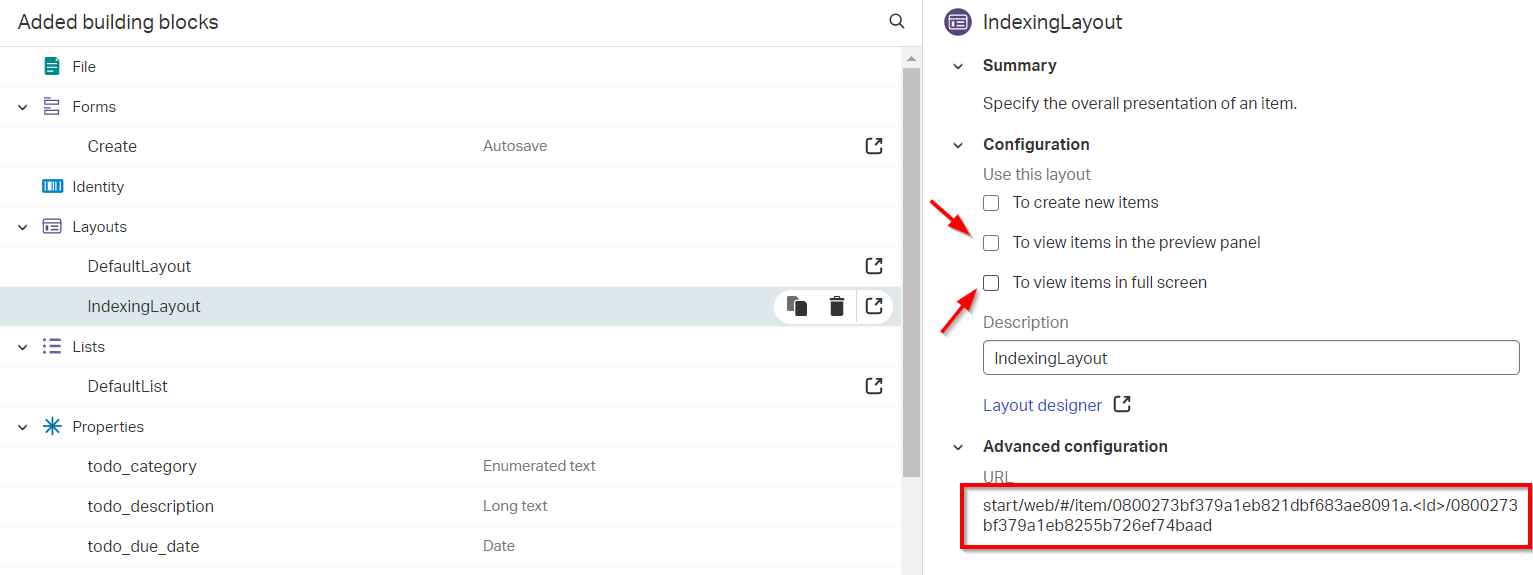
Copy the current ‘DefaultLayout’ of the ‘todo’ entity and name it ‘IndexingLayout’
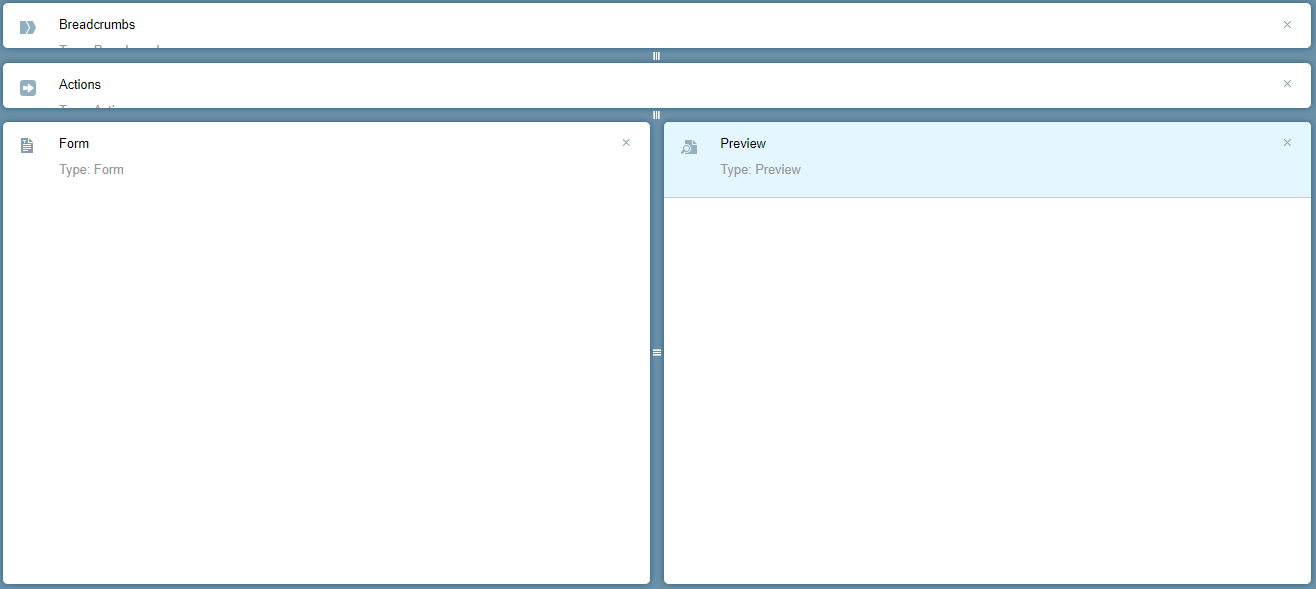
Edit that new layout and just make sure you end up with 2 panels. Left the ‘Create form’ and on the right side that ‘Preview panel’ (You probably only need to remove the ‘Breadcrumbs’ and ‘Actions’ panels!)
Make sure to remove those 2 marks and copy that URL in the advanced configuration section.
Next step is to introduce a new rule BB on the ‘todo’ entity. This must be a rule of type ‘Action’ with a name like ‘onActionIndexing’
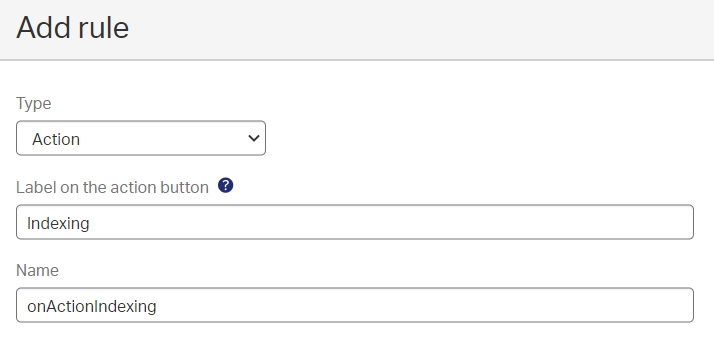
That rule can be configured like this:
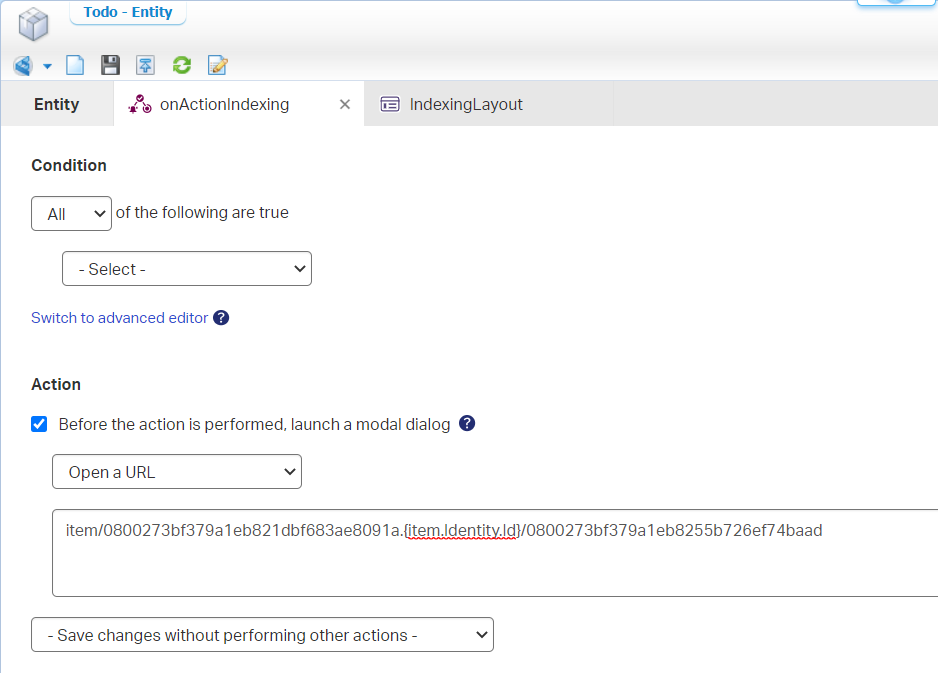
- A condition is not required as (in our case) we might always trigger the action
- The action is opening a modal popup with a URL…Yes!…The URL you’ve just copied with some smart modification
item/0800273bf379a1eb821dbf683ae8091a.{item.Identity.Id}/0800273bf379a1eb8255b726ef74baad
- And we ‘Save changes without performing other actions’
Do a publication and see what changes in runtime!
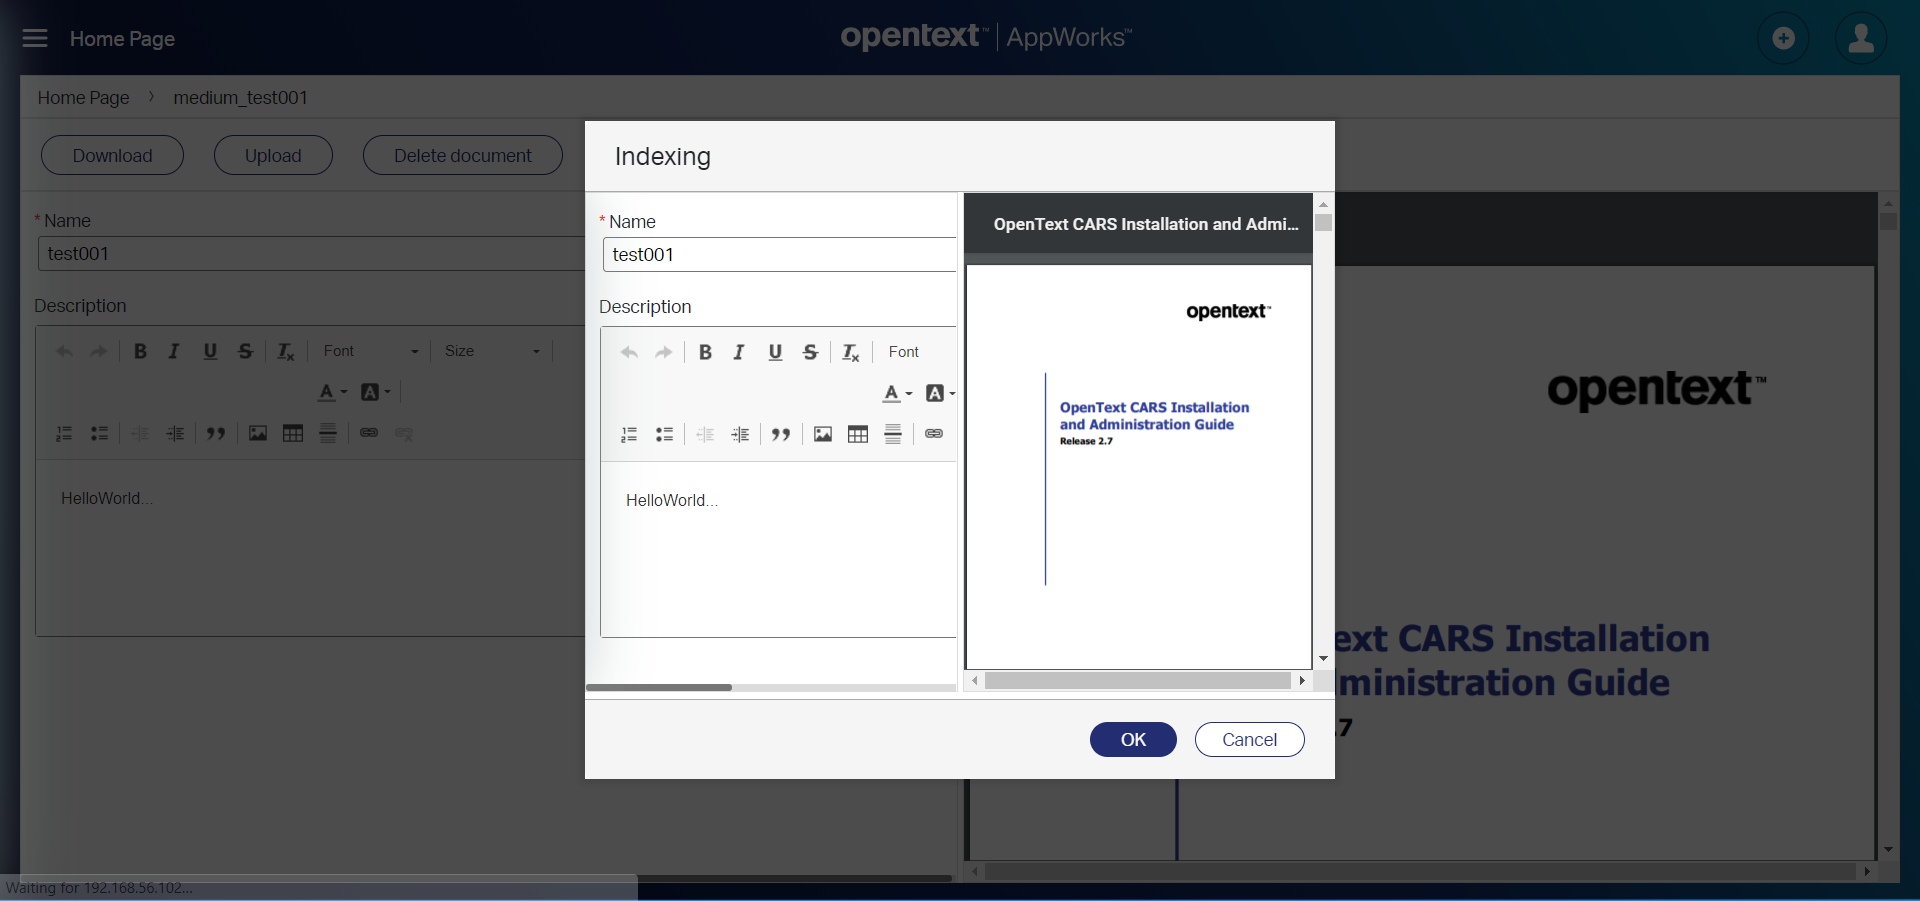
Trust me…That ‘Indexing’ button is behind that modal popup in the action bar!
How nice!…Only a little small in width, but let’s fix that with a little CSS!
The CSS trick
Add a new document (I just save it in ‘nl-bos’ folder) to your project of type ‘Theme’

After save, we go to the ‘Advanced’ tab where we see some ‘Less’ styling code!
Less is just a pre-compiler for CSS that makes reusability possible with variables.
Go to the end of that code part and add these lines of CSS (After that last end bracket of the ‘body’ tag)
1 | ai-dialog { |
Publish it all and see the result happing in runtime…Nice stuff! 😍
Things to know:
Yes…I manipulated that ‘Create’ form, so it fits a bit better in the modal popup, but that’s our task as consultant!
That publish of the theme results in a ‘custom.css’ on the server in this location:
/opt/opentext/AppWorksPlatform/defaultInst/webroot/organization/appworks_tips/themes/custom.css- With a resolvable URL like this: http://192.168.56.107:8080/home/appworks_tips/themes/custom.css
- Why do you need to know?…Well, when %$#^%$# hits the fan it’s good to know where stuff is updated in the end.
Clean your browser cache or use an incognito tab for these types of updates
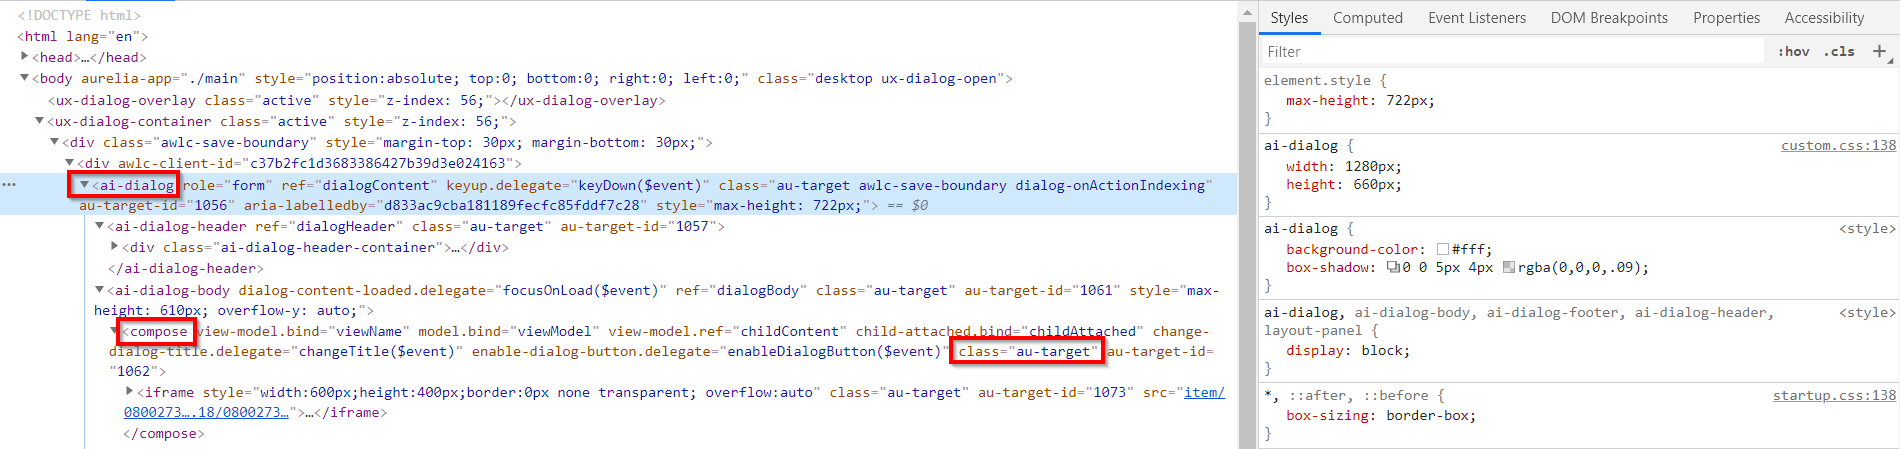
How did I get that that small CSS part?
That’s the power of the developer console in Chrome with
<F12>
You also see in the screenshot that our copied (and manipulated) URL is placed into an iframe with inline CSS. This is a bit hard to overrule from an external custom.css and that’s the reason we needed to use those ‘!important’ statements.
Who is your daddy?…Nailed it!…”DONE”…It gives a nice feeling when crafted features fall directly into place and this is exactly one of them. We created something nice here with a modal popup, so our end-users can focus on the ‘indexing’ part of the work they need to do. We learned about custom action button that can trigger any URL within the platform with passing in nice parameters. We even saw some small CSS theming in action where a small change can have a big impact, but now you know how it’s done…Have the best of all week-end, and I see you (as always) in another post with a new AppWorks Tips installment…Yeah! 👊
Don’t forget to subscribe to get updates on the activities happening on this site. Have you noticed the quiz where you find out if you are also “The AppWorks guy”?
