Hi there AppWorks fans,
Welcome to a new installment of AppWorks tips.
This time we take a small step in generating a webservice from some custom Java code that makes the generation of a random integer available in the solution. And as we all know: Making things random is great for demo purposes as we don’t need to fill-in the information ourselves. “Automation”…That’s what makes the world makes a better place…right? 😜
Let’s get right into it…
First we need to define the several steps that are required to meet this requirement.
- We need an entity with an ‘Integer’ typed property
- We need to expose the ‘Update’ service operation for that entity
- We need this downloadable jar file and make it available for the WS-AppServer
- We need to generate a custom webservice from the downloaded file
- We need to create a BPM that calls the custom webservice and updates the entity with the retrieved value
- We need a Rule that starts the BPM
- We need to validate, publish and test it all
Now it’s time to spin up the machine and login to the ‘AppWorks Explorer’ with the ‘awdev’ user.
And then dive into step 1 ‘entity with an ‘Integer’ typed property’
For our example we use the ‘Member’ entity where we crafted already a nice ‘Integer’ property with the name ‘mem_age’…perfect!
Next step (2)…‘Expose the Update webservice operation for that entity’
Open the ‘Member’ entity and get to the most valuable, but smallest building block. You can find it as last item on the list:
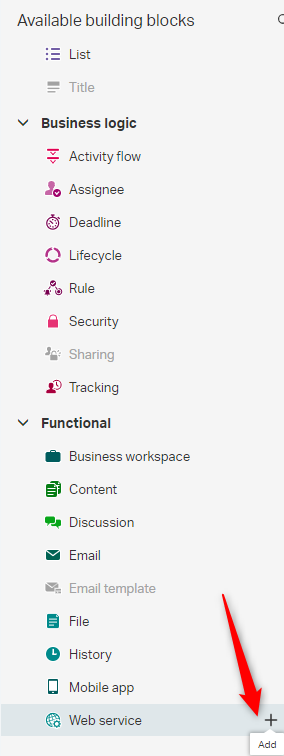
After adding it to the entity you get a new feature panel for the web service configuration. Make sure you mark the ‘Read’ and ‘Update’ operations. This makes soap-services available from where we can read/update data on the instanced entity. These service blocks can also be reused in a BPM…And that is what makes it even more valuable.
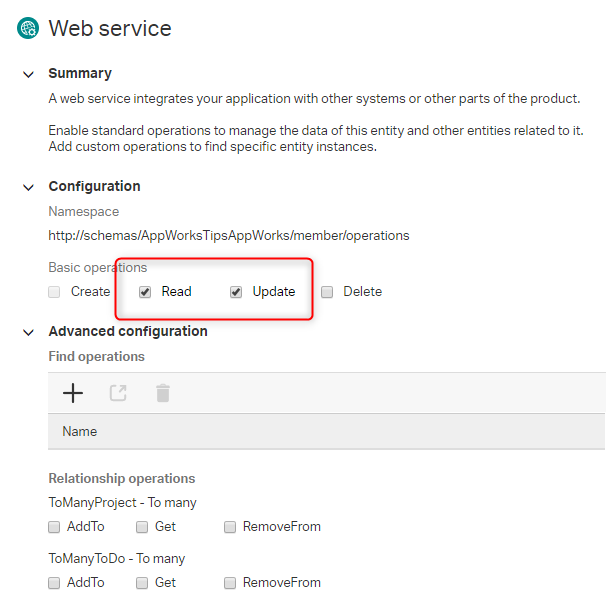
Save and publish the entity now.
Next…
3. Make the downloaded jar file available for the WS-AppServer service container.
If you don’t have the WS-AppServer service container up and running you should search the site as we explained this feature already in a previous post.
Open a terminal session with MobaXTerm to the VM and upload the downloaded JAR file to the ‘otadmin’ home folder.
You should also have available a ‘custom’ folder in this location on the VM, but otherwise you need to create it sudo mkdir /opt/opentext/AppWorksPlatform/defaultInst/custom
And let the ‘tomcat’ user own this folder (if not already!?) sudo chown tomcat:tomcat /opt/opentext/AppWorksPlatform/defaultInst/custom/
Copy the uploaded JAR file to this ‘custom’ folder sudo cp ~/AppWorksServices-1.0-SNAPSHOT.jar /opt/opentext/AppWorksPlatform/defaultInst/custom/
Now we need to tell the WS-AppServer to search for this JAR file from its classpath…Does it ring a bell?
Correct!…The ‘System Resource Manager’ artifact in AppWorks where we get the properties on the ‘WS-AppServer’ service container.
Maybe a bit small, but this is the string to pass in (If other jar files are already there, you can separate them with a ‘:’): /opt/opentext/AppWorksPlatform/defaultInst/custom/AppWorksServices-1.0-SNAPSHOT.jar
Restart the TomEE instance with systemctl restart tomee
And monitor when it’s back in the air (‘Server startup in X ms’): sudo tail -f /opt/tomee/latest/logs/catalina.out
Also check if the ‘WS-AppServer’ server container is still green!

Then…next step…
Generate a custom webservice from the downloaded file. Step 4!
Go back to you project workspace and go to the ‘custom’ folder (or create one if not yet available).
Right-click the ‘custom’ folder again and this time we create a new -> other… document of type ‘Java Class Metadata’
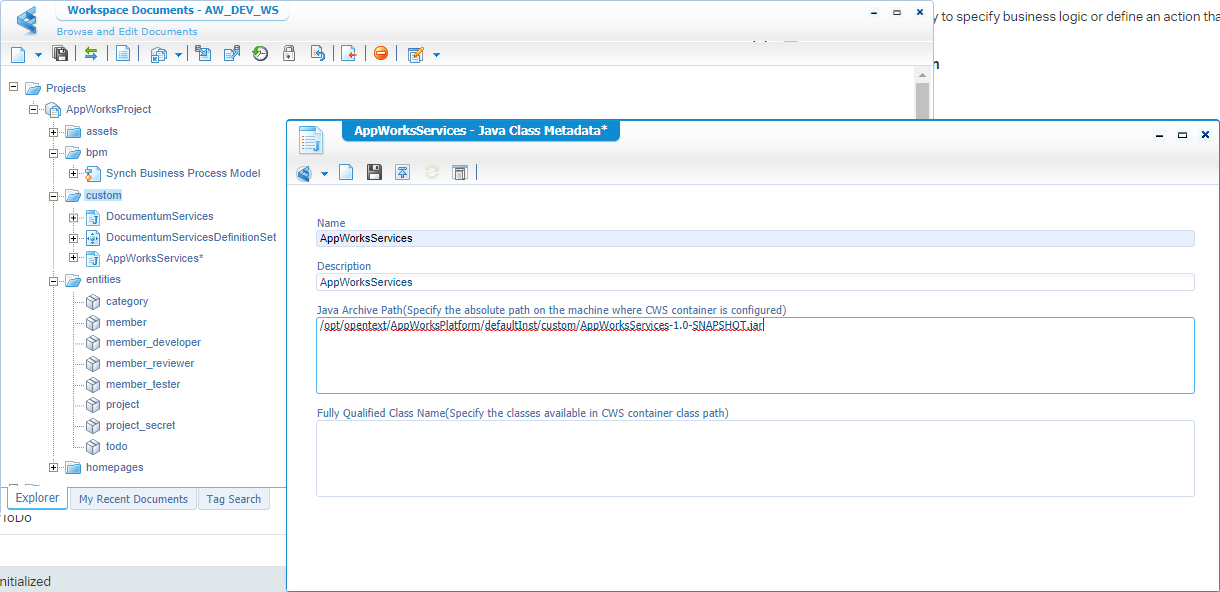
After saving you see the next result in the project folder
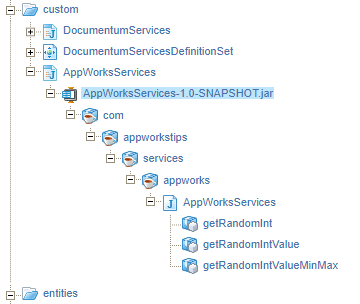
Now open the ‘AppWorksServices’ class (the one just above the ‘getRandomInt’ method).
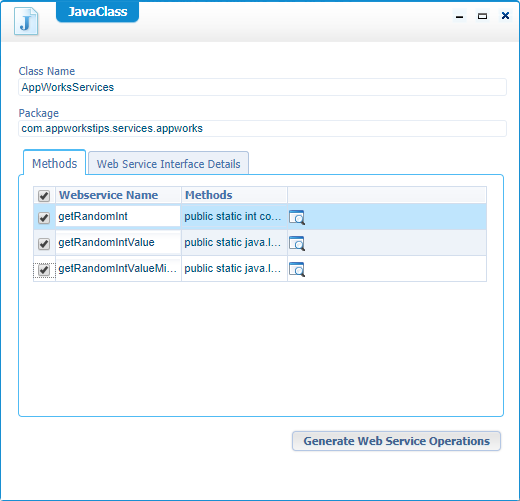
Select all methods and hit that button to execute the ‘Generate Web service Operations’ action!
To see what happened now you need to close the JavaClass screen and get back to het project structure where you can find the generated webservices.
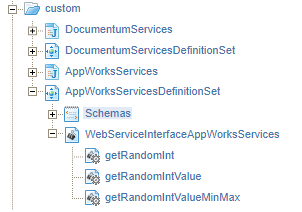
Double-click on the ‘WebServiceInterfaceAppWorksServices’
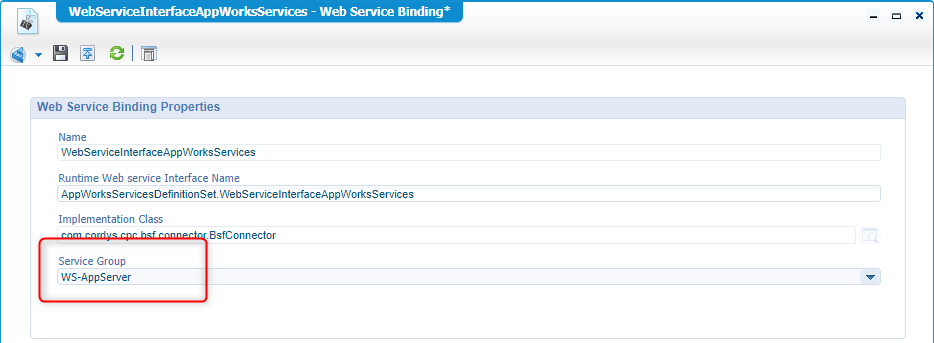
Select the correct ‘Service Group’. Now the generated service knows where to execute.
Save it and also ‘publish’ it to the organization.
Now, right-click the ‘getRandomIntValueMinMax’ and select the ‘Test Web Services Operation’. You get a screen where you need to ‘Invoke’ this SOAP-request.
1 | <SOAP:Envelope xmlns:SOAP="http://schemas.xmlsoap.org/soap/envelope/"> |
The result will be a random value between 0 and 100 (in this case!)
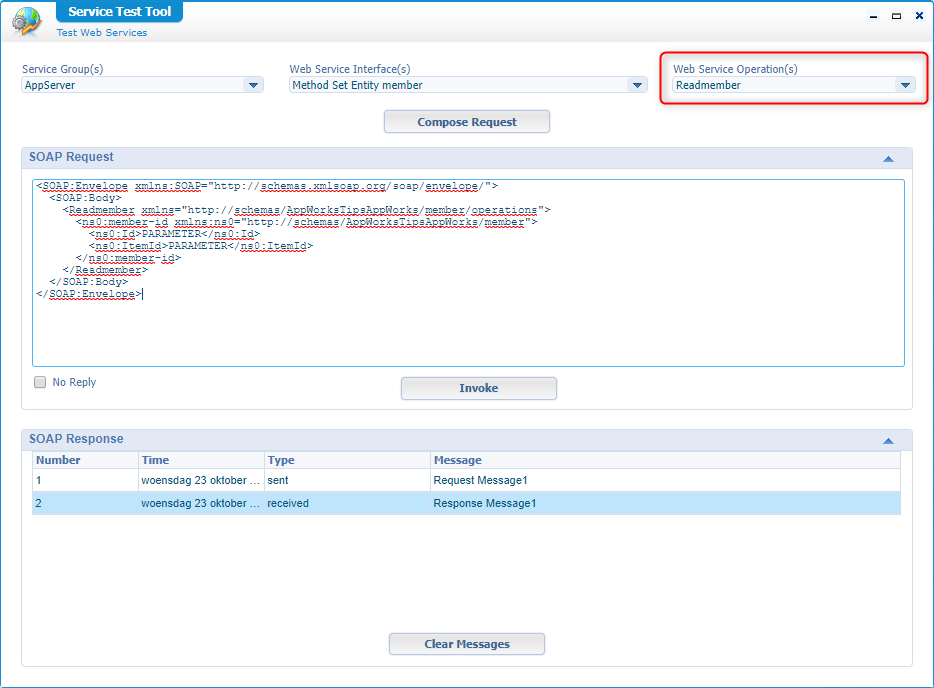
Ok…But what about testing the already exposed ‘Read’ and ‘Update’ service on the ‘Member’ entity!?
Good question and the answer is the ‘Service Test Tool’ artifact. Try this one…But make sure to put a valid ‘ItemID’ for an already instanced ‘Member’ entity (or create a new one!)
Next step…
Create a BPM that calls the custom webservices (step 5)…This is where the fun starts! 😜
Get back to your project folder structure and go to the ‘bpm’ folder (or create 1 if it’s not yet available!)
Right click it and create a new document of type ‘Business Process Model’
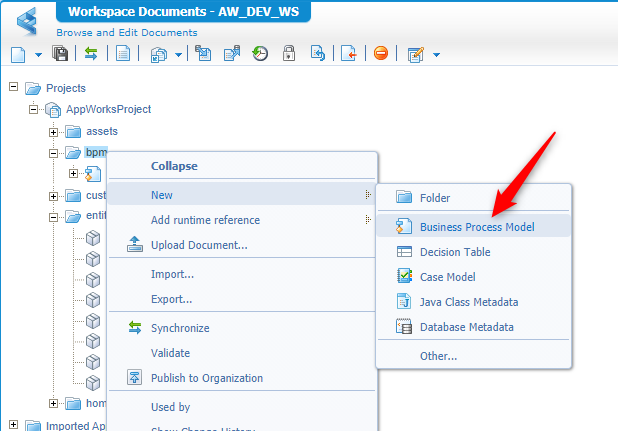
A new panel opens for creating a new BPM and start with dragging in a new green ‘Start’ item.
Next is adding 2 webservices (The ‘getRandomIntValueMinMax’ and ‘Updatemember’). What about the ‘Readmember’?…We don’t need it for now as we get the ‘current’ entity itemID (required to do the update) from a ‘special’ property in the BPM!
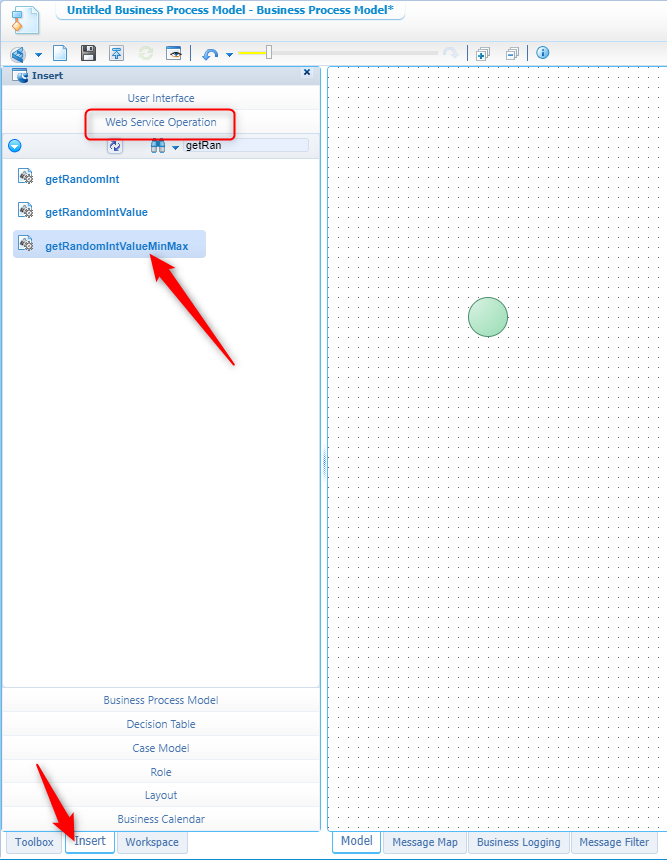
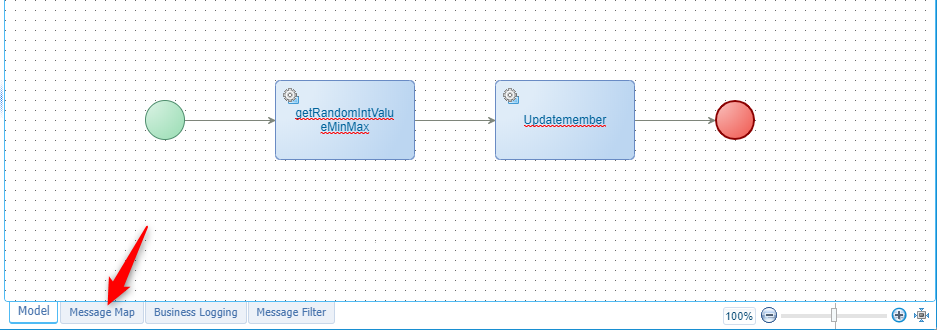
Continue building the BPM like this:

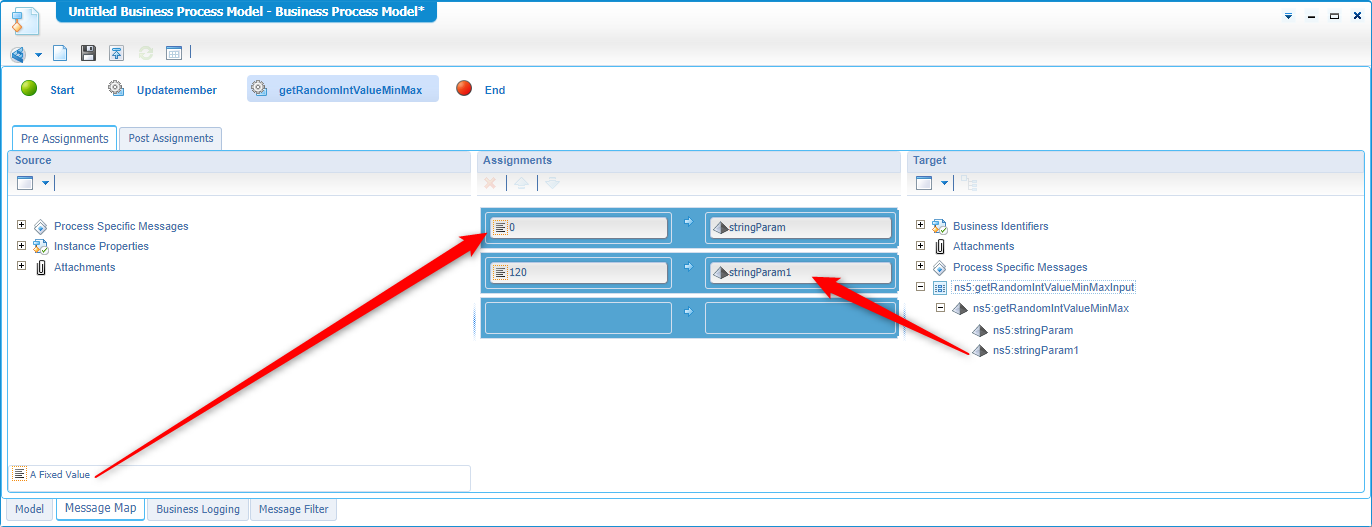
Next we’ll do some ‘Message mapping’ so the correct data is flowing into the correct server.
First we configure the ‘getRandomIntValueMinMax’ like this with some dragging & dropping and setting the 2 fixed values (Remember…We update the age of a member so keep in range with the minimal/maximum values for this property…The zero in the screenshot is updated to an 18 on my environment!).
In this same step we ‘could’ also save the result from the service. This can be done in the ‘Post Assignment’ tab where we ‘could’ create a new ‘Process Specific Message’ and save to output…but…The output can also be used directly on a second activity…That is the power of the Enterprise Service Bus!
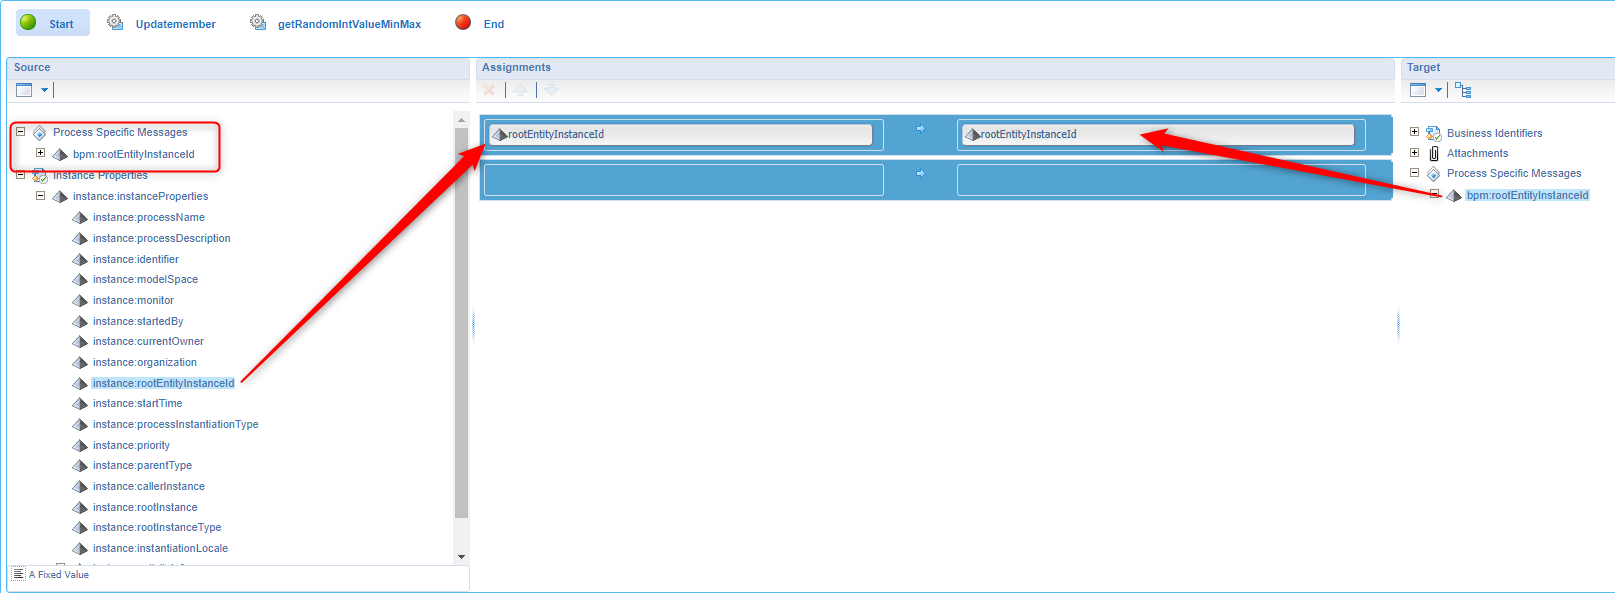
For ‘debug’ purposes later it’s a good practice to save the ‘special’ BPM property to a separate element in the ‘Start’ of the BPM…You’ll see this later. That top-right element is created by me.
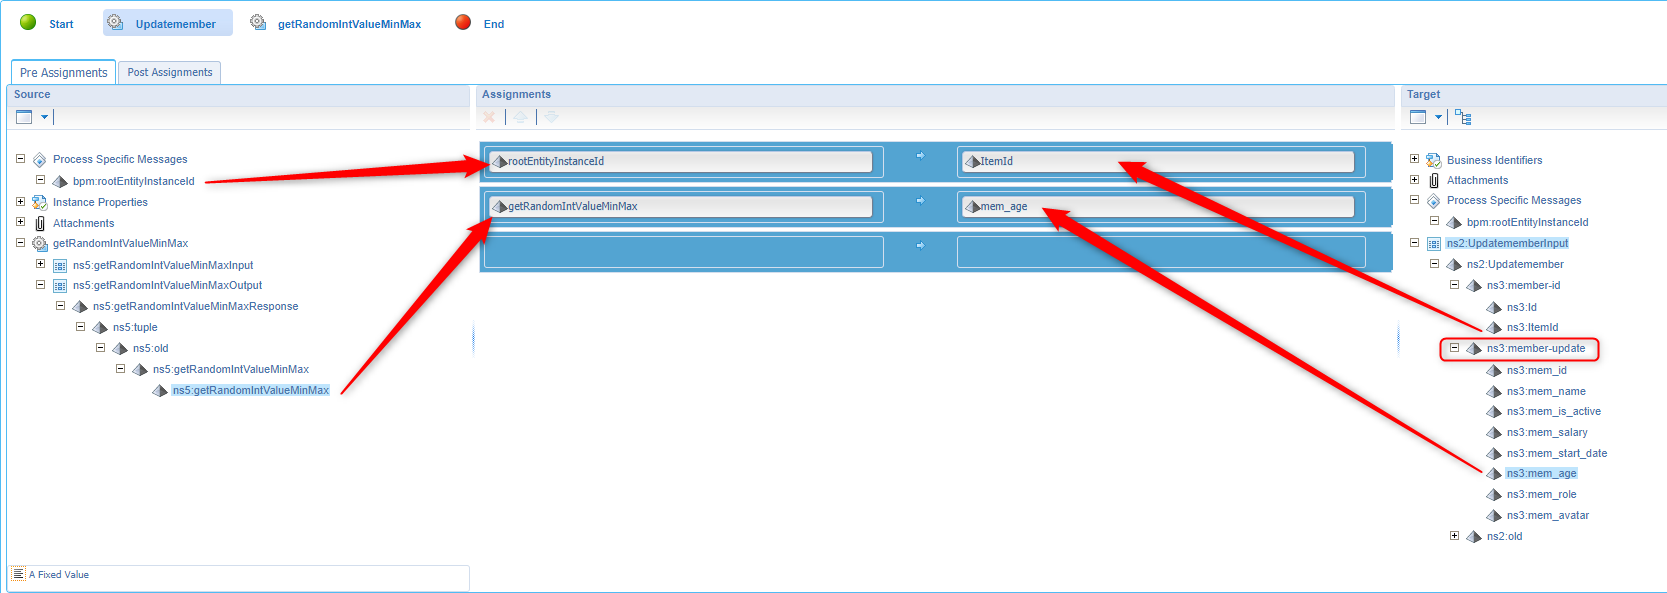
Let’s go to the other service and configure it like this (in the ‘Pre-Assignment’ tab!). Make that you select the correct nodes for the member-update part (and not like me where I used the ns2:old part…This is where the old/original entity data is saved!). The screenshot points to the correct elements.
Now save the process with name ‘getRandomInt’.
Then right click on the model (on a white space) and validate the flow and build it (or hit <F9>)…and then!…Make sure you publish it (otherwise the debugger will not start…learned something here!)
We could leave it for now and go to the next step, but let’s do some debugging on the BPM (with <Ctrl> + <F12>)!
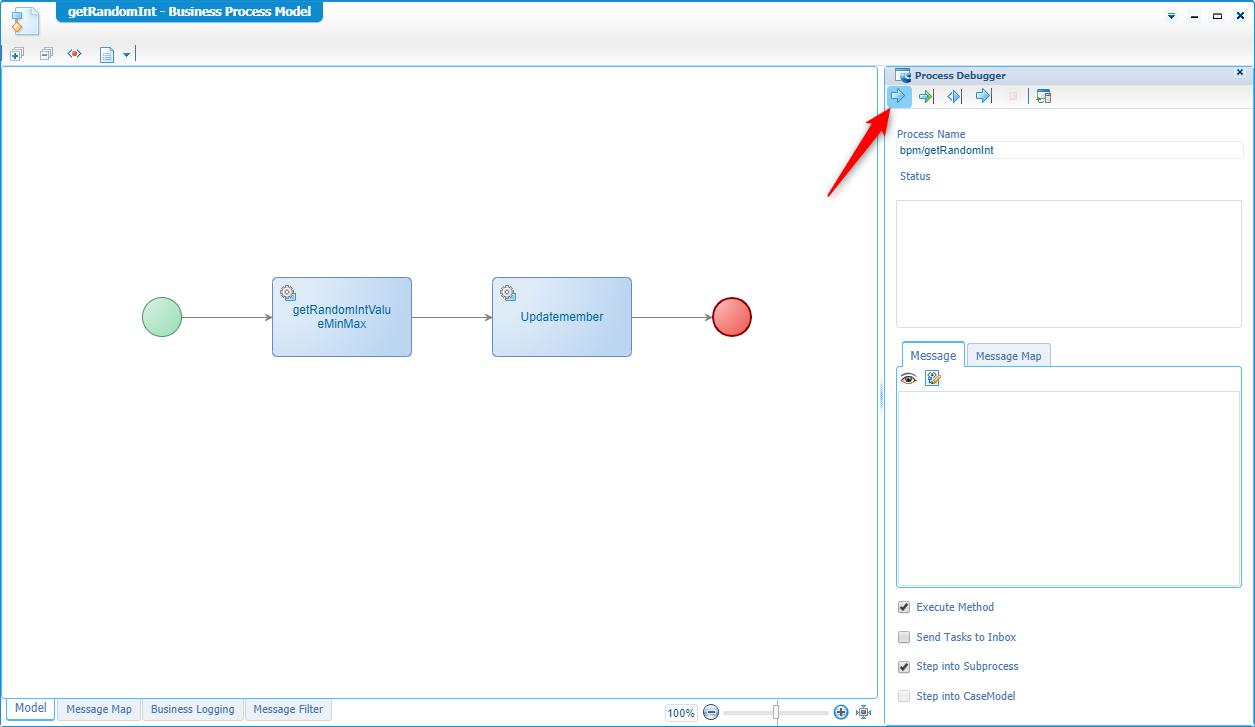
Click the ‘Step by Step’ button to debug through the BPM.
Our first stop is the value for the ‘rootEntityInstanceId’. You see it’s an empty value now, but the message can be updated like this (with off course a valid Item ID that you created upfront!):
<rootEntityInstanceId xmlns="http://schemas.cordys.com/default">0800270ce1bea1e9b54de6ede7ba1172.655367</rootEntityInstanceId>

Here you see why we save that ‘rootEntityInstanceId’ as separate element. In debug mode we can update the value per steps…I thought it was also possible to update it somewhere in the ‘Start’ message but was not able to produce the outcome as expected.
Continue the debug process will you get back a random integer value from the first service.
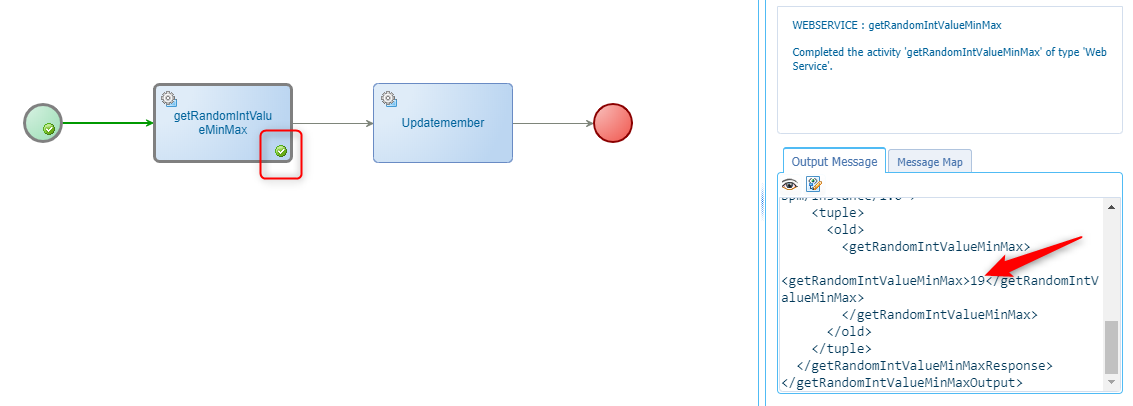
Now continue till the end…It should not fail and in the ‘Updatemember’ step you should see nicely the ItemId filled in as expected

Have also the logging open on the VM
sudo tail -f /opt/tomee/latest/logs/catalina.outwhere You see these messages passing bygetRandomIntValueMinMax Random int: 66
Create a Rule that starts the BPM in this step 6
Open the ‘Member’ entity and add a new ‘Rule’ building block…You should know by now what is expected…right?
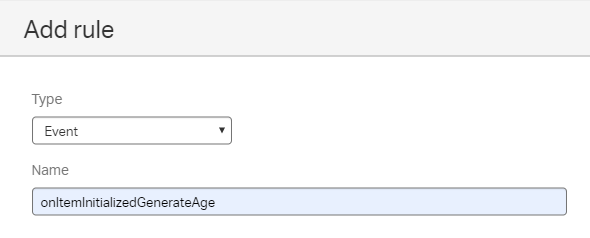
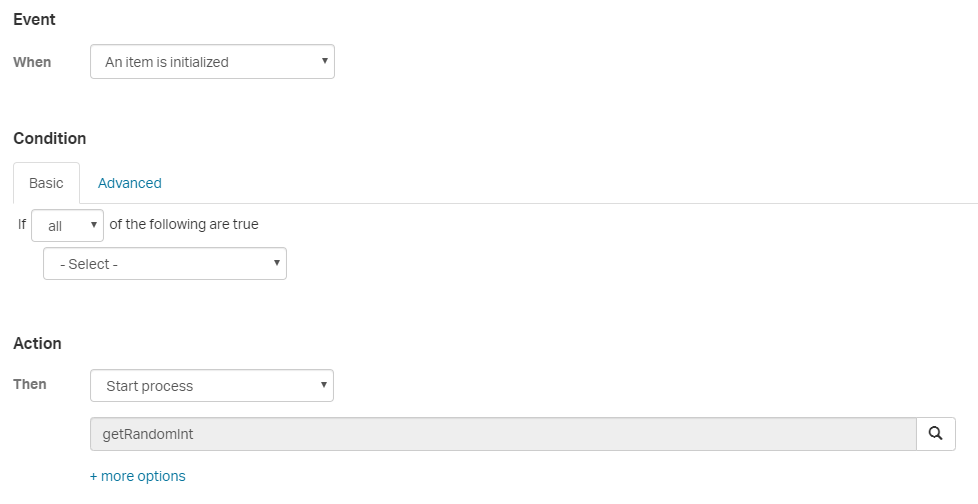
Configure the rule like this so it starts our flow when the item is initialized. And now see that our BPM flow could better have a name like ‘setRandomIntForMemberAge’…For you to change! 😎
Don’t forget…save the entity and publish it!
Step 7 is validation, publishing and testing…
Now it’s time for our end-result…
I made a small change also on the ‘Member’ entity ‘Create’ form as the ‘mem_age’ was required from some last post, but as it’s filled in automatically we can remove it from the ‘Create’ form and only make it read-only on the ‘Default’ form.
After the validation and publishing, the test is pretty simple.
Create a new ‘Member’ entity instance. In our case a ‘Reviewer’ as the ‘Member’ entity itself is abstract and the ‘Reviewer’ entity was the subtype! You see the ‘Age’ is empty on the screen but gets updated in the back-end (you can check the log on that)!
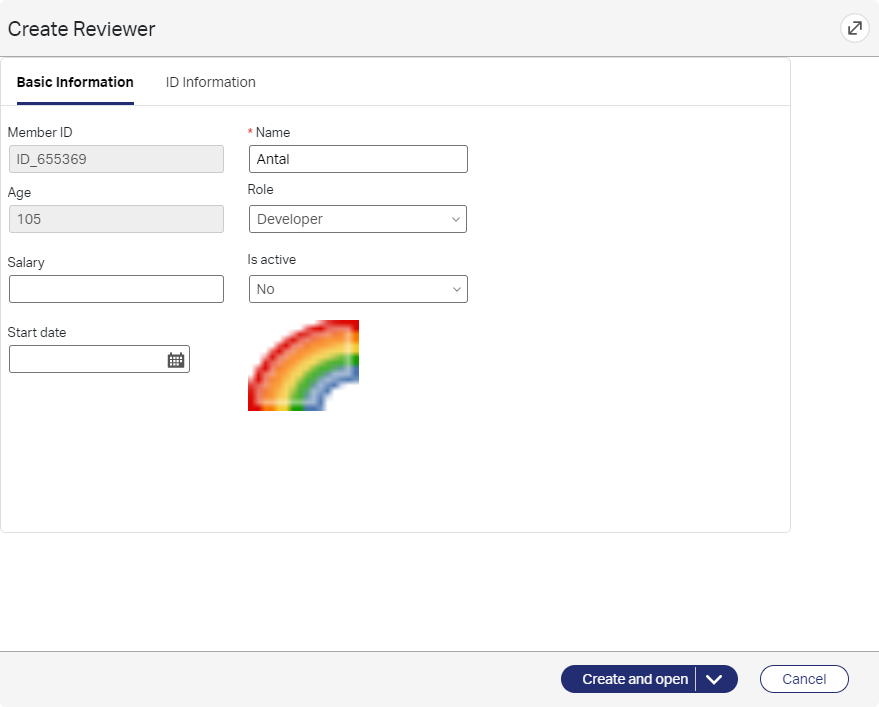
Now hit that ‘Create and open’ to see the final result!
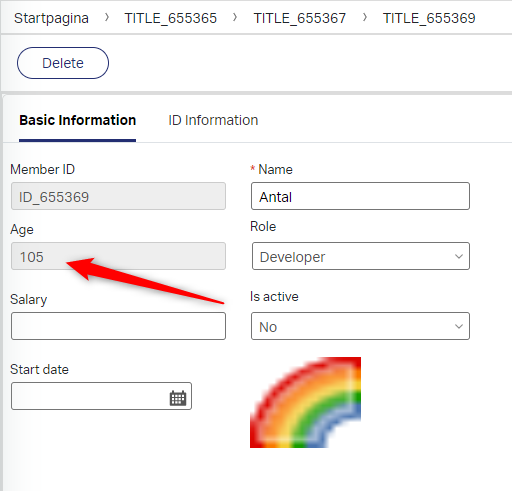
And this makes it a ‘DONE’ for the post. Again, a lot to learn from where we already saw more information then we intent for this post. Exposing webservices is something we’ll cover also in another post, but it’s always good to see how easy and valuable this building block is. Also, the debugging of a BPM is valuable knowledge that is usable in every solution. Have a good one for today and I see you in the next post.
Don’t forget to subscribe to get updates on the activities happening on this site.


