
Hi there AppWorks fans,
Welcome to a new installment of AppWorks tips.
In this post we’ll have a look on a new type of document called ‘Schedule’. You create this document like you also create a new document of type ‘Entity’ or type ‘Business Process Model’. Why do we want to know this information at this moment in time? Well, really simple! It just past my AppWorks journey that a follow on my current project. This document pro-tip came from an old hand in the business (you know who you are!), and we’ll dive into it with this post…For sure! it will help you match your schedule requirements on your own project.
Let’s get right into it…
Spin up the VM, and we just start off in our familiar workspace with our own project and our own workspace. In my case, the ‘appworks_tips’ organization with a ‘aw_dev_ws’ workspace, and a ‘generic’ project in it. The account I use is the ‘Developer’ rolled ‘awdev’ I always use for my posts.
Well, let’s start with a new folder to keep the structure…We call it ‘schedules’

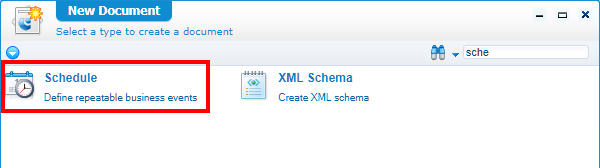
Create a new document in this folder of type ‘Schedule’.
See this document also as a ‘Schedule model’ as instances will be created from it for execution!
After creation a new panel pops up…

Some extra explanations on this document…
Target Document Type will have 3 choices.
- Start a BPM which we can monitor in the PIM
- A webservice execution which we can monitor in the corresponding service container, or we can check the system which is involved (like the creation of a certain entity…We can check our own runtime for that one!)
- Run a custom XML
Count is the number of times the schedule will be triggered.
- -1 means infinity
- 0 is not very useful
- 1 or higher will run it that many times
Auto Deploy marked ‘true’ will make sure an instance is directly created on package deployment in an organization (non-shared!) which will start in ‘Active’ state to execute your scheduled action. The documentation mentioned the shared space where it will always be deployed in ‘Inactive’ state as multiple organization are involved!
Schedule Type will have 2 basic choices
- Run once where we can run it now or after a specific duration
- Run recurring will repeatedly (hourly, daily, etc.) call the action. Interesting is the ‘Fortnightly’ as I was not familiar with the word, but it means once every 2 weeks (every 15th day)
- Keep in mind:
- Hour/minute is in 24H format. 11:15 PM will be 23 Hours and 15 minutes.
- The specified time is based on the time on the AppWorks server
So far the basic explanation…Time for some examples
Run a recurring BPM
For this we first create a new ‘Business Process Model’ document with name ‘bpm_test’ nicely saved in our ‘bpms’ folder of the project.
Keep it simple like this one:

You see we add a trigger type ‘Message’, so we are able to pass some input data with our BPM. This is not required, but I’m just curious on the outcome. The ‘bpm:note’ is based on this XML:
1 |
|
The message document can be created from the ‘Message Map’ tab where you can paste “XML as Message”:

Once done we can save the BPM and make sure to publish it also…
Next…Back to our schedule!
Select the just created BPM and update the ‘Request XML’:
1 | <note xmlns="http://schemas.cordys.com/default"> |
We make it run 3 times every hour at minute 35.

Why picking that specific 35 minute?…Well, have a date command on your AppWorks VM (CentOS). My server time is 10.31 AM
So, 35 will happen in 4 minutes!!….So, no time to wait….quickly publish the schedule!!!

Hmmmm….to bad! Our ‘Scheduling’ service container is not up and running….
Time to have a look in the ‘system’ organization with our ‘sysadmin’ account.
It’s indeed not running…
Let’s make it start automatically and spin up the service container…
Now, back to our schedule document…I will update those minutes from 35 to 50 (as I had a toilet-break!) and after publication I get all the green flags as feedback…Alright…Wait till the server reached 10.50!
…
Well, I’m passed it…Let’s check the PIM
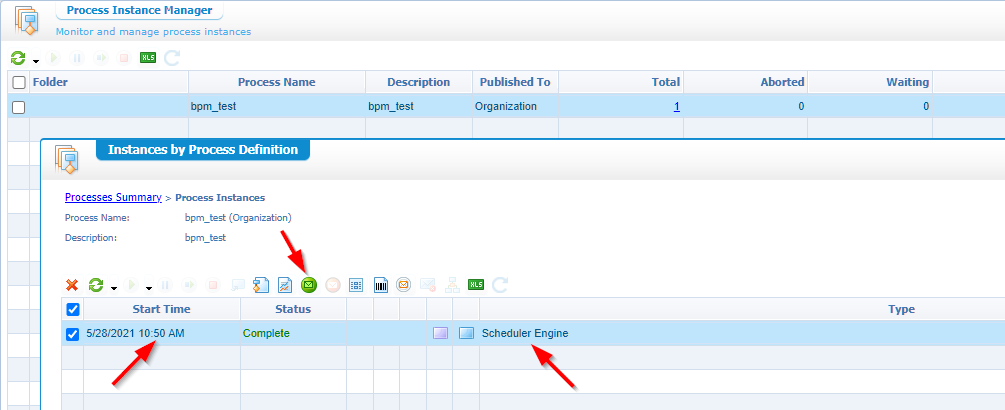
There it is…Exactly on time…triggered by the ‘Scheduler Engine’. When you mark the BPM instance you can also check the input message with the correct value as expected…NICE!
Time for a long brake…For 1 hour I would say…I see you at 11:50
…

Time for the next one…
Run a webservice after duration
Create a new schedule document with input like this (named ‘start_duration_service’):

We will call an internal service delivered with the ‘Identity’ package of the platform called ‘CreateTitle’. The request will be generated, and you only need to provide a value for the ‘Name’ element. We unmark the ‘Auto Deploy’, so we have something to play along with when we package the project and deploy it to an organization!
Save and publish….Wait for 2 minutes and check the runtime!
…
Hmmm…nothing!?
Ok…Time to check the ‘Schedule Manager’ artifact for (in)active schedules:

Hmmm…Looks like it’s inactive! We should have known this because we unchecked the ‘Auto deploy’ option…So, this also behaves the same in development time! I don’t disagree…I was just wondering and figuring out things specially for you (and for myself)! 😅
Right-click it and deploy to the active state…Wait again for those 2 minutes or hit the ‘Execute Now’ button in the ‘Active Schedules’ tab, but what fun would that be!?
…
There it is…(Trust me…I didn’t hit that execute button and also not the create option in runtime!)

Webservices!!….The possibilities are endless!
GREAT…Next one…
But wait!….What do I see in runtime after 10 minutes!
Hmmm…Looks like that -1 value in the ‘Count’ field does exactly what it supposed to do! So, it looks like the ‘Duration’ type is not just a one-timer call like the documentation is telling me. On the other hand, we now know how to trigger something every configured time-frame since deployment!

I made the ‘start_duration_service’ schedule inactive from the ‘Schedule Manager’ by hitting the ‘Undeploy’ action…#UseYourSystemWisely! From this action I also see the time (12:50 AM)…Yes, our third run of the ‘start_hourly_bpm’ schedule! It’s indeed triggered from the PIM perspective and with that I see it’s also moved to the ‘Inactive’ tab of the ‘Schedule Manager’…It’s magic people!!
Next…
Run a custom XML now
This is an interesting one as what kind of XML can we fill in?? I don’t have a clue so just let us just paste the XML of the ‘CreateTitle’ request and see what will happen?
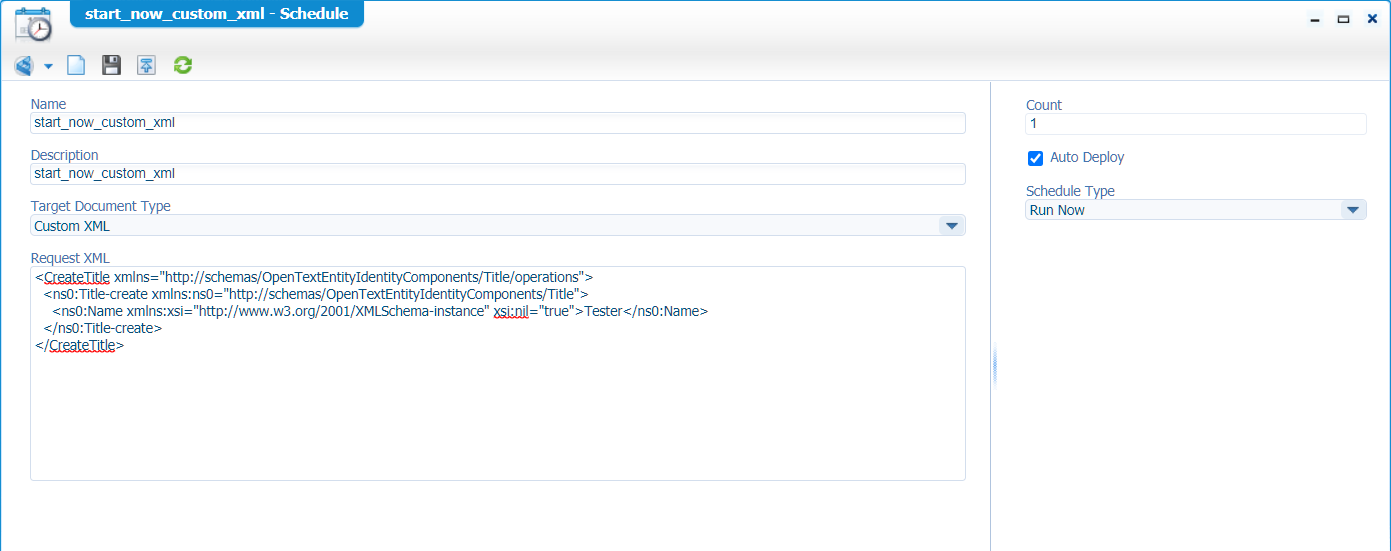
Save it with name ‘start_now_custom_xml’ in our ‘schedules’ folder in the project and do a publication. What about the ‘Auto Deploy’ mark? Well, when marked it should directly start this one-time schedule after publication. When unmarked it will be available (after publication) in the ‘Unactive’ tab of the ‘Schedule Manager’ and when it’s deployed from there it will just run once on that moment.
Interesting thought! as this one-time schedule is pretty useful also when you have some global or environment specific to update during package deployment (‘Auto Deploy’ marked) on your new organization.
A refresh in runtime for the ‘Title’ entity in the ‘Identity package’ tells me the ‘Tester’ value is created after that first deployment…nice! In the ‘Schedule Manger’ it is set back to the inactive tab, and a second deployment will trigger it again just once and moves it back to inactive! As expected, but nice to see that theoretical thoughts come together in practice!
Do a package deployment
Now that a have a small mix of schedules it’s time to package things and see what will happen in a brand-new created organization called ‘appworks_tips_deploy’…Have a search on this website as organization creation is already explained.
For the package part we can right-click our project and select ‘Packaging’ > ‘Package properties’ where we make sure the deployment space is set to only ‘Organization’

After this setting, we can right-click the project again and select ‘Packaging’ > ‘Create package’…Wait a for all the green marks and in the end we can download our package.
Now, let’s switch to our ‘system’ organization with the ‘sysadmin’ account as package deployment always happens from this space (I also forget this principle every time!). Here we open the ‘Application Deployer’ artifact where we can select our ‘deploy’ organization and do an upload & deploy of our created package:

Just follow the deployment steps…you can’t do anything wrong if you just read the screens and understand what you’re doing.
What could happen if it’s your first deployment are the package signing struggles. By default, the platform would like to install a ‘signed’ package, but this can be overruled by the ‘Security Administration’ artifact…Have a look here:

OK, deployment ready, let’s switch to our brand-new deployment organization (I also connected my regular ‘awdev’ account with ‘Administration’ role) where we should be able to open the ‘Schedule Manager’ artifact, but what would we expect to see here? Well, 3 things:
- An active ‘start_hourly_bpm’ which will be triggered at minute 50 of the hour (server-time)
- An inactive ‘start_duration_service’ because of the unmarked ‘Auto Deploy’ option!
- An inactive ‘start_now_custom_xml’ because it was active, but after the first run it became inactive, but we should have a ‘Title’ instance in runtime for this new organization!…After double-checking, it gives me a green light!
Great…We learn as we go…Next step!
The ‘DeleteScheduleTemplate’ webservice
Ok, now we know how to deploy schedules and how they are triggered. We learned about ‘active’ and about ‘inactive’ schedules, but what about deleting a schedule?
hmmm…There is no option for deletion on a schedule in the ‘Schedule Manager’ artifact?

No worries…This is where the ‘Services’ of the platform will be your best friend. Open up the ‘Web Service Interface Explorer’ artifact and have a search for ‘DeleteSchedule’. You will retrieve 4 operations where we only need the 2 of the ‘Scheduling’ service group. The difference:
- ‘DeleteSchedule’ will delete an ‘active’ schedule as this is just a running ‘copy’ of the template
- ‘DeleteScheduleTemplate’ will delete and ‘inactive’ schedule which is our ‘template’ to run from!
Right-click the ‘DeleteScheduleTemplate’ and run it with the test tool. The request will look like this:
1 | <SOAP:Envelope xmlns:SOAP="http://schemas.xmlsoap.org/soap/envelope/"> |
The ‘deleteinstance’ set to TRUE will also delete the active schedule of this template.
With a response like this:
1 | Copy to Clipboard |
What I also tried was this (but don’t do this at home!):
- Copy the template ID (from the inactive tab)
- Did a deployment (to the active tab)
- Removed the template ID (with the service call)
- Did an undeploy (from the inactive tab)
The outcome?…A “lost in space” schedule as it wasn’t found anywhere in both tabs!
This is a sample request for the deletion of an ‘active’ schedule:
2
3
4
5
6
7
8
9
10
11
12
13
<SOAP:Body>
<DeleteSchedule xmlns="http://schemas.cordys.com/scheduler/1.0">
<tuple>
<old>
<schedule count="" templateid="" templateOrganization="">
<scheduleid>0800273e-9411-a1eb-b0b5-78211d8e865e</scheduleid>
</schedule>
</old>
</tuple>
</DeleteSchedule>
</SOAP:Body>
</SOAP:Envelope>
The circle is closed…I give it a “DONE” on the schedule topic in this post. We learned about the ‘Schedule’ type of document with the several types of actions to execute (like the start of a BPM, or the execution of a service). The second thing is about the deployment of these schedule documents and how often they are triggered. Great information which we can for sure use in the futures we hear passing by in our projects. Have a nice week-end, and I CU in the next post…next week!
Don’t forget to subscribe to get updates on the activities happening on this site. Have you noticed the quiz where you find out if you are also “The AppWorks guy”?
