
Hi there AppWorks fans,
Welcome to a new installment of AppWorks tips.
When I have a discussion/explanation about lifecycles with people I always get that same great question! How do I use intermediate tasks in the platform and how do they work in runtime? Well, it’s not all that complex, but if you don’t know where to search for it might be a hard thing to understand. This post will bring the clarification to that one question with a simple to understand example to play along with! And because we have also other types of ‘Activity connectors’ available on that same lifecycle we’ll do a dive on those too…The top of the cake will be decorated with a ‘special’ activity that is floating around in the ‘state’…You’ll see…
Let’s get right into it…
Start your VM and open your project with a developer rolled user account. In my case ‘awdev’.
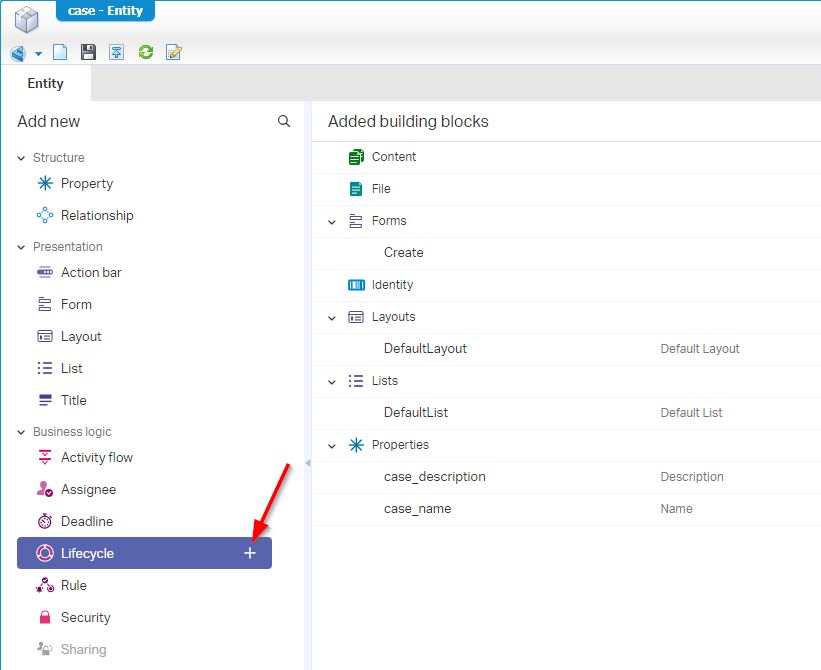
We want to dive into the lifecycle activities so make sure you have some entity available that can be instantiated in runtime by the end-users…Why? Because by now we all know that a lifecycle trigger happens on new entity instance creation!
I just pick the entity from last post…The ‘case’ entity where all the basic crafted building blocks are in place, so we can test it in runtime. Have a look in the previous post for some screenshots for a start situation.
The next thing for this entity that we need to add is a new lifecycle building block:
You get a new panel where you are able to create a new lifecycle. You can give your own input, but this is a screenshot how my first implementation looks like:

You see every state will trigger a new activity based on that ‘State entry’ construct and that will automatically happen when entering the state. You can see this because the selected ‘A’ icon for the flow. For a ‘State entry’ construct this is also the only option.
After deployment, you are able to create a new ‘case’ entity in runtime you will start to see an ‘Activity1’ task in the inbox of the current user. Also, this is default behavior on lifecycle activities if you didn’t configure it otherwise.

You see I have some other tasks also in the inbox that look the same, but that is off-course because I played along before starting this post!
You can just finish the task to get the second activity and end the lifecycle till you’ve reached the end. You might also see the tasks are empty when you open them but that is because we didn’t apply any task form to them. That is also not needed for our post, but if you like…Be my guest to add it. We did it also on other posts.
Next…
Adding the ‘A’, ‘M’ and ‘I’ tasks
Back to design-time where we open the lifecycle again, so we can make an update in the first state which looks like this:
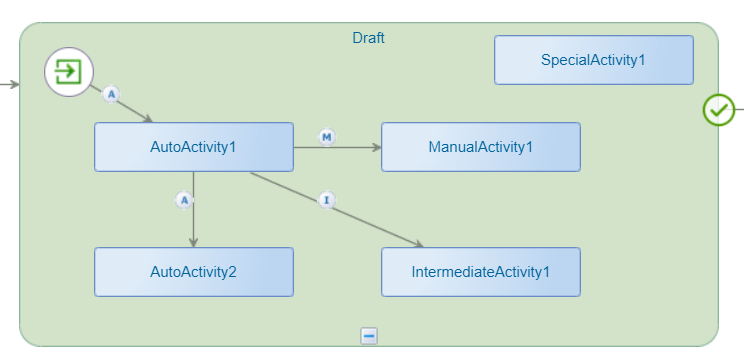
You see we added some more flavor to the state with these activities:
- AutoActivity1: Will start on entering the state (we already saw that one!)
- AutoActivity2: Will start automatically when ‘AutoActivity1’ is completed
- ManualActivity1: Can “optionally” be started by hand when ‘AutoActivity1’ is completed. You’ll get a modal popup for that in runtime!
- IntermediateActivity1: Can “optionally” be started by hand with a button when you have opened ‘AutoActivity1’. So, there is no need to complete ‘AutoActivity1’!
- SpecialActivity1: Can “optionally” be started by hand with a button. That button is not on any task, but it’s available on the action bar within the entity instance…And only when the entity is in that particular state!
Let’s publish the entity again with this updated lifecycle and figure out where our activities can be started…
Before you see some results you need to create a new instance of the ‘case’ entity as the previous created entity will follow the ‘old’ lifecycle!
So we’ll start with the ‘AutoActivity1’ that we can open from our ‘All tasks’ inbox. When you take a look in the action bar for this task you will see a button row of task related actions:

First for our ‘IntermediateActivity1’…For this one we have the action called ‘Add related task’. When you click on it you see this modal popup:
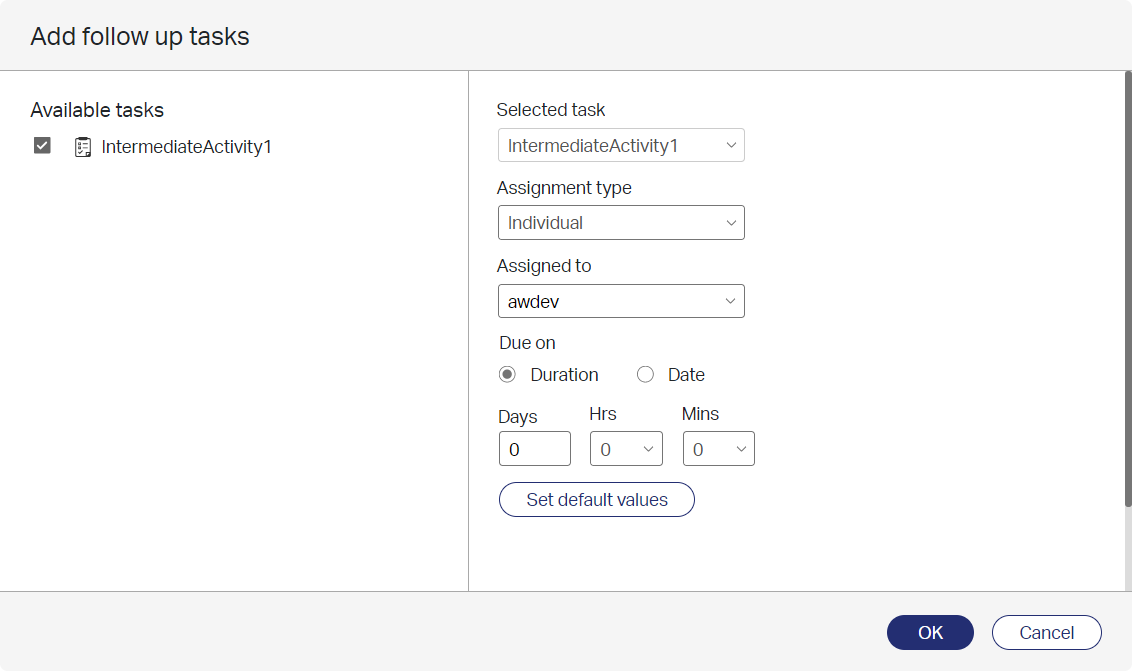
Make your settings (or leave the defaults) and send out this task by clicking OK. Back in the ‘All tasks’ inbox you see some changes. We get that ‘Intermediate’ task, but you also see a ‘Hold/Pause’ on the ‘original’ task!
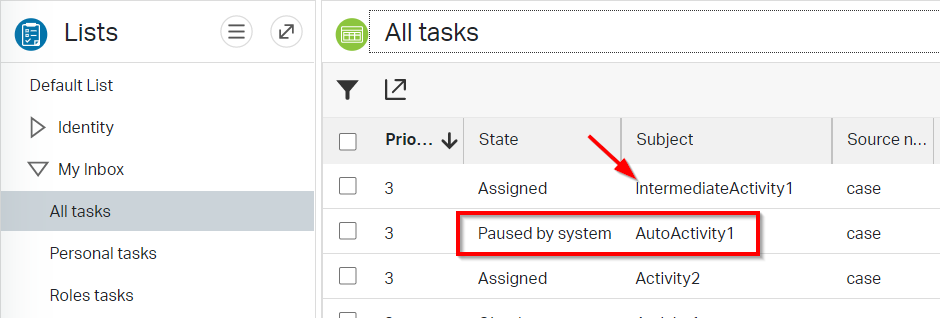
So, the conclusion is that this intermediate task is really something that needs to be handled ‘in between’ of its parent task. Why else call it ‘intermediate’!? 😜 See it as a step-out of the ‘normal’ activity flow, so you can contact someone else when there is a need to wait for a response.
When you finish the ‘intermediate’ activity you’ll see that the ‘original’ AutoActivity1 is ready for processing again!
Open it and this time we hit the ‘Complete’ action button…So you get a modal popup like this:
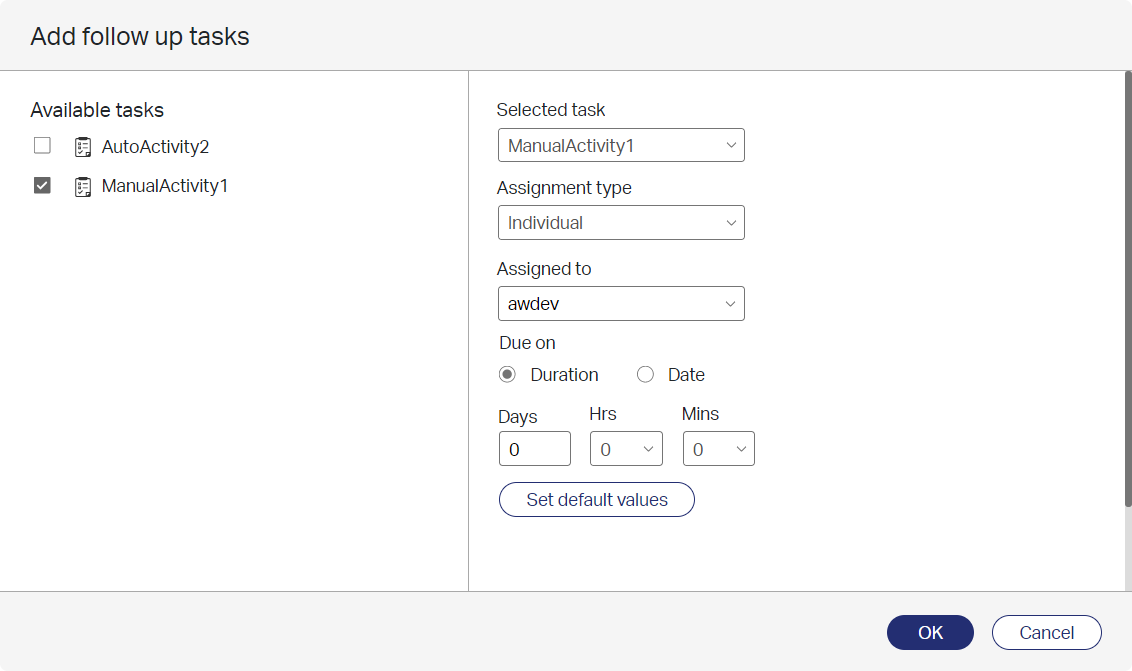
Note that you will only get this popup when manual tasks are available as a next activity! You will also see the default selected auto activity!
Deselect the ‘AutoActivity2’ and select the ‘Manual’ task before you hit OK to continue…
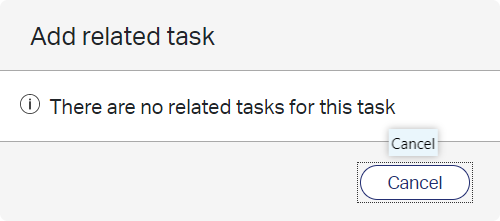
We get the ‘ManualActivity1’ in our inbox that we can complete. You might have noticed that this task has the same button action bar with also the ‘Add related task’, but when you click it you’ll get a notification like this (as expected):
After completion of this task you will see that we go to the next stage in our lifecycle, and you also see that the ‘AutoActivity2’ is skipped because we removed the selection as next activity in completion of the ‘AutoActivity1’ task!
Well, looks like almost all the ‘Activity connectors’ are discussed now…We only miss that ‘Special’ task!
Where would it be?
Well…Let’s create a new ‘case’ entity and make sure you are in the ‘Draft’ state as we are by default when lifecycle initialization happened. So, don’t complete any tasks and just open the ‘case’ entity, so you will see something like this (It’s the default ‘view’ layout of our entity):
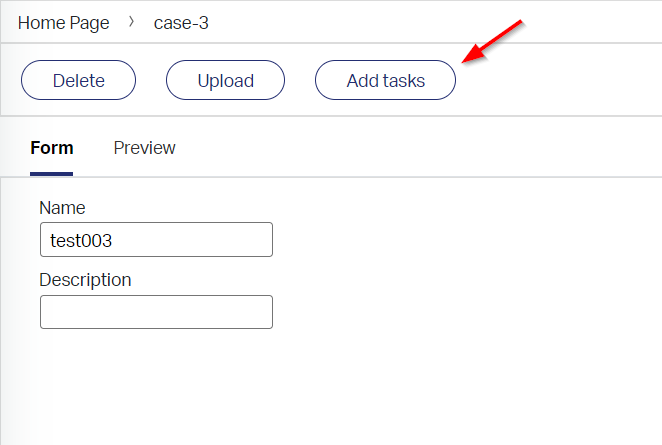
Hit that ‘Add tasks’ button…
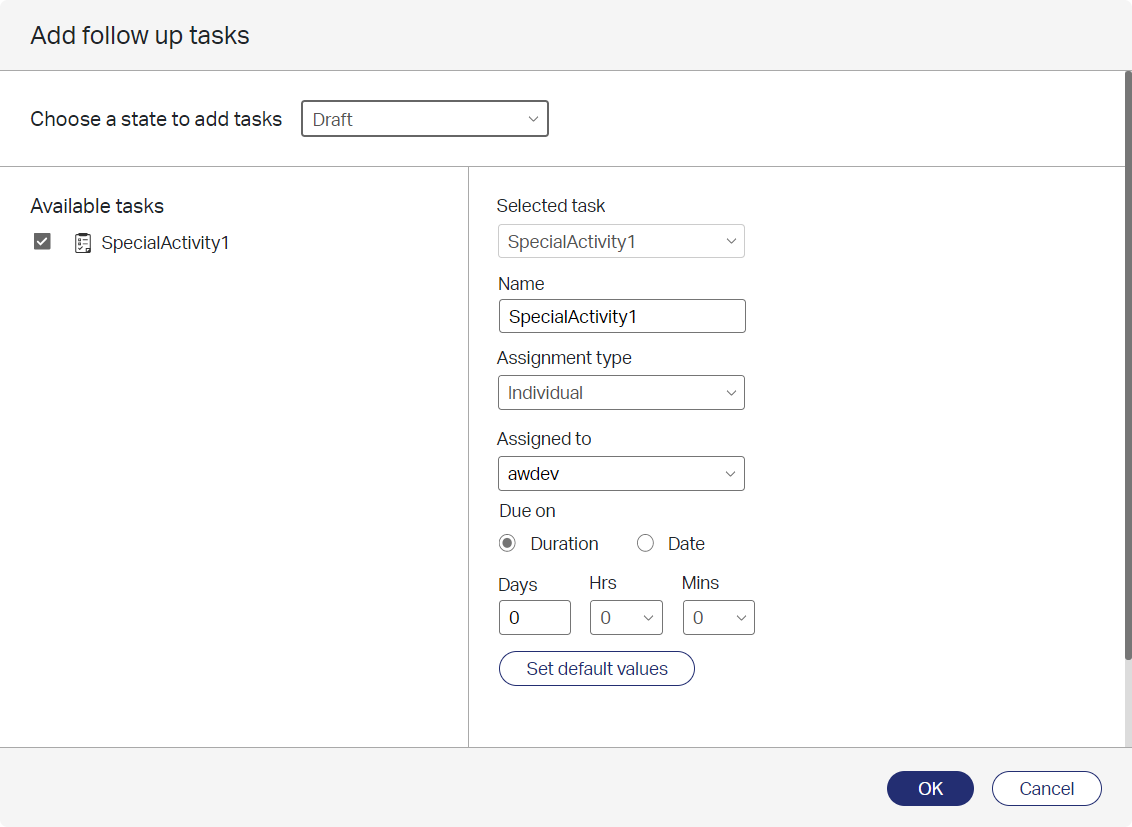
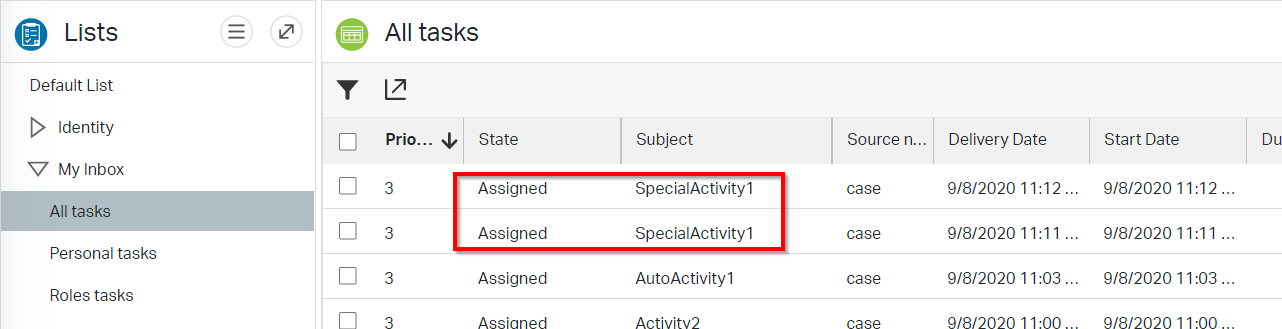
There you have it…It’s not on a task, but a button on the action bar of the entity itself. Mark it and hit that OK. And do that action again, so you have two ‘SpecialActivity1’ tasks in your inbox to handle:
Also, for this ‘Add tasks’ button applies to the same principle: When there is no available activity to select you will be notified with a modal popup: ‘No follow-up tasks are available to add to this task. Check back later.’
That looks like a pretty clarified ‘DONE’ to me with a nicely crafted example where we learned more about the several ‘Activity connectors’ that are available for you to use in a solution. We’ll never forget that ‘Intermediate’ task that places a ‘Hold’ on the parent task, so the end-user can handle the ‘In between’ activity. Also, the ‘special-floating-in-the-lifecycle-state’ activity was worth trying out and now you also know how it all works in runtime for our beloved end-users…Yes…The end-users!…That’s why we craft all those nice solutions!? 💪
Let me know in the comments if you think any additional information is missing. I will see you in the next post! Have a great week-end…
Don’t forget to subscribe to get updates on the activities happening on this site. Have you noticed the quiz where you find out if you are also “The AppWorks guy”?
