
Hi there AppWorks fans,
Welcome to a new installment of AppWorks tips.
One of the questions I often get is how to move to a next lifecycle state based on conditions. Let’s say we have some states on a ‘todo’ entity like this:
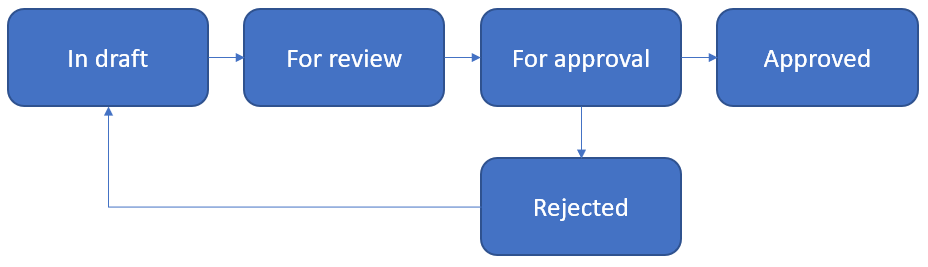
You see the case already here where we want to decide whether we want to ‘approve’ or ‘reject’ a new ‘todo’ instance, but how do we low-code this?
Let’s get right into it…
First we need an entity ‘todo’ with some properties you can define on your own and we have 1 Boolean property called ‘todo_is_approved’ that we will use for the proper routing in our lifecycle.
Create the 2 forms for entity creation/viewing and make an ‘AllToDoItems’ list. Whatever you put in these building blocks doesn’t matter as it is just for our convenience to be able to test later.
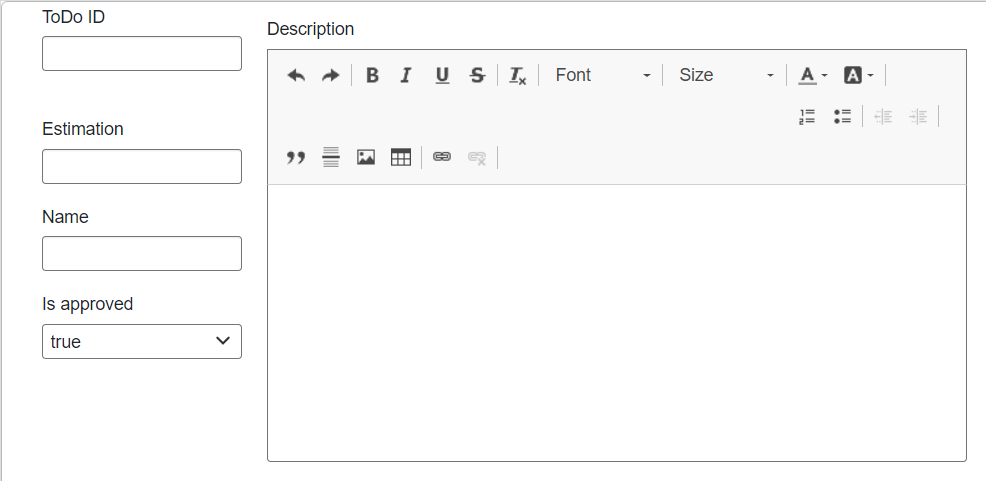
This is my starting point that I’m able to test with for now (after validation and publication):

With this as a creation form:
Let’s now jump into the lifecycle of this entity by adding a new one!
After the lifecycle building block is added you start with a clean lifecycle panel where you can start crafting something like this (incl. those labels)…Not hard to do I would say…right?
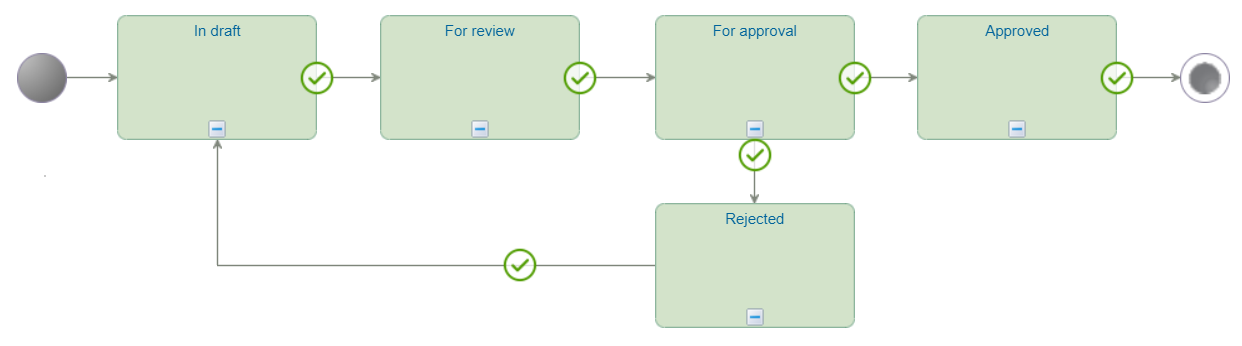
Looks almost the same as the example in the intro only more in the AppWorks style! 😜
Next step is to add some tasks where applied and in our case it would be sufficient to add a task in the ‘For approval’ state!

For the other 2 previous steps we updated the transition properties to a ‘Conditional Event’ with the simple but efficient condition true==true

This makes sure these 2 states are passed through so we end up in our ‘For approval’ state when the lifecycle starts running after creation of a new instance of the entity in runtime!
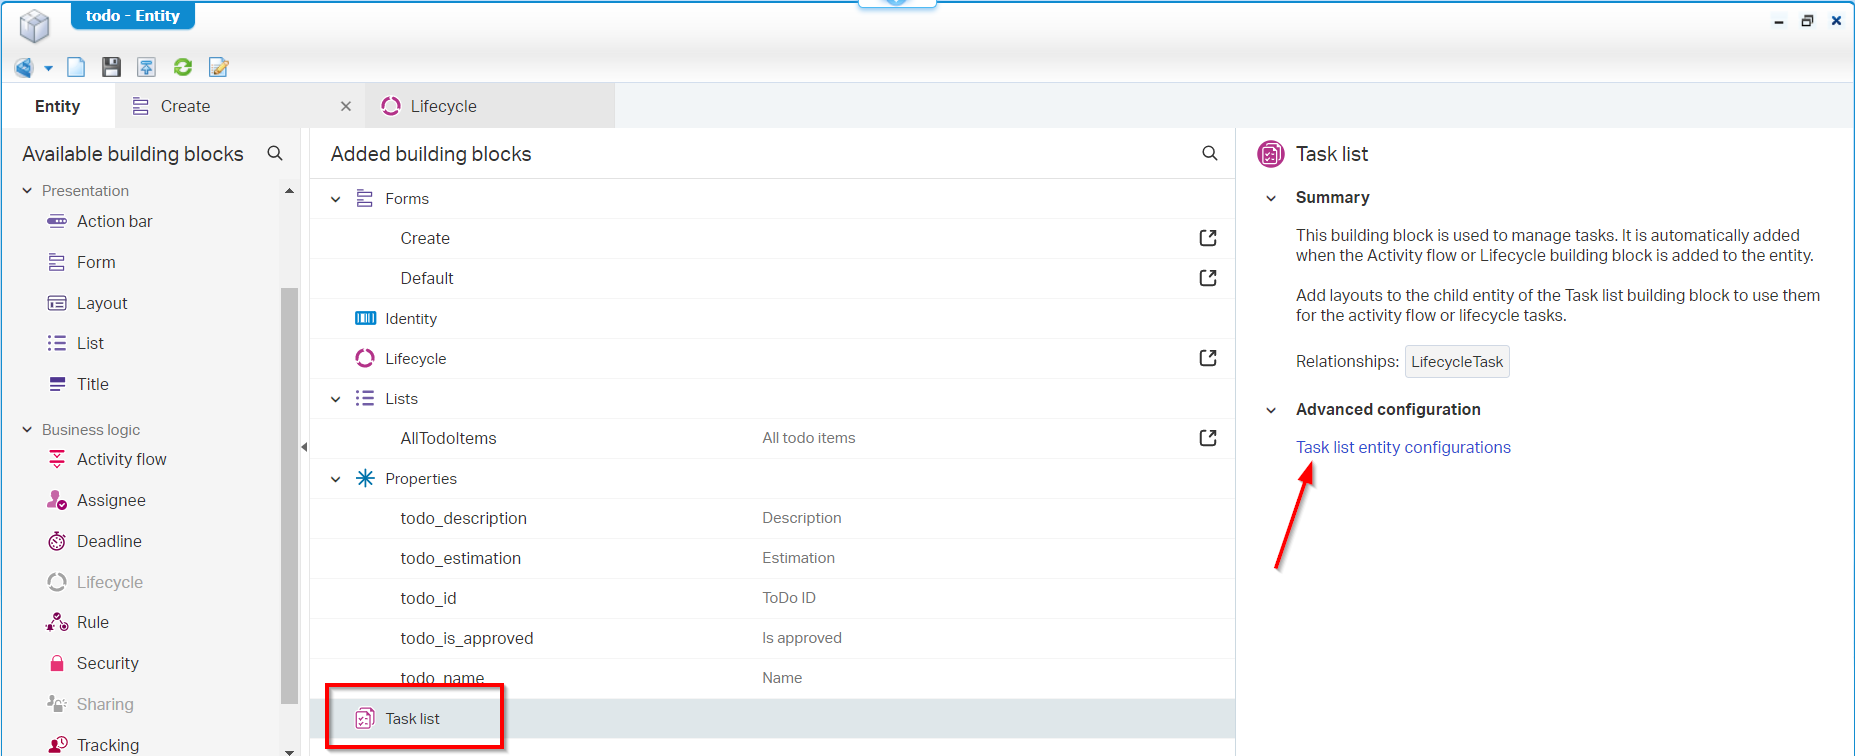
Now, jump back to the entity building block overview and open the (automatically added) ‘Task list’ building block.
In this new ‘related’ ‘LifecycleTask’ entity we first create a ‘Default’ form with some basic task related information and after this we’ll use that form in a new ‘Layout’. And what we already learned is that this new layout can then be connected to the task in the lifecycle!
This is my task form with some basic fields (also some task related fields):

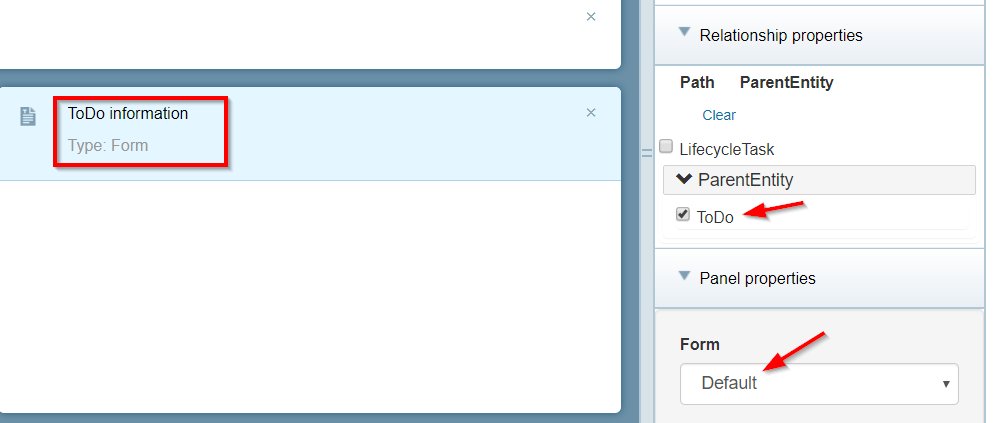
And this is the ‘ApprovalTask’ layout I crafted:

- The ‘Breadcrumbs’ is a default panel
- The ‘Lifecycle Progress’ is a default panel
- The ‘Task Information’ is a panel that shows the ‘Default’ form of the ‘LifecycleTask’ entity
- The ‘Actions’ is a panel that shows the default task actions
- The ‘ToDo Information’ is a panel that shows the ‘Default’ form of the ‘ToDo’ entity (is the ‘ParentEntity’ of the ‘LifecycleTask’…make sure you have selected it in the panel properties!)
Heading back to the lifecycle of the ‘ToDo’ entity where we update our ‘Approve’ task with our just crafted layout…Take a note of the icon in the ‘Approve’ activity!

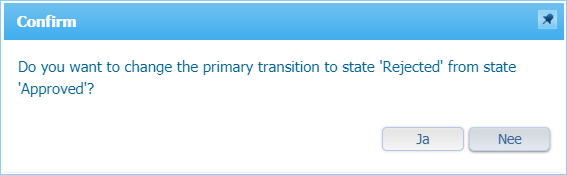
To make it all nice looking we need to update the ‘primary transition’ options for the flows between the status of the lifecycle. This makes sure that the ‘Lifecycle Progress’ panel in the task layout can ‘grab’ the correct information to show a nice progress overview for this instance! You need to make this setting on each flow for the ‘Happy’ path of your lifecycle.

Only one of the 2 output flow can be a ‘primary transition’. If you update for example the flow to the ‘Rejected’ state you get a message if you want to make this flow your primary transaction. But that is not your ‘Happy’ flow, so that’s a ‘NO’ for us!
Let’s save it all, validate and publish it all and see if we get some nice stuff in the runtime for our beloved end users…
The creation of a new ‘ToDo’ entity!

After this creation, go to your tasks in the main screen and see that a task is there for you to open!

And there you have it…our end screen where we can handle are ‘Approve’ activity!
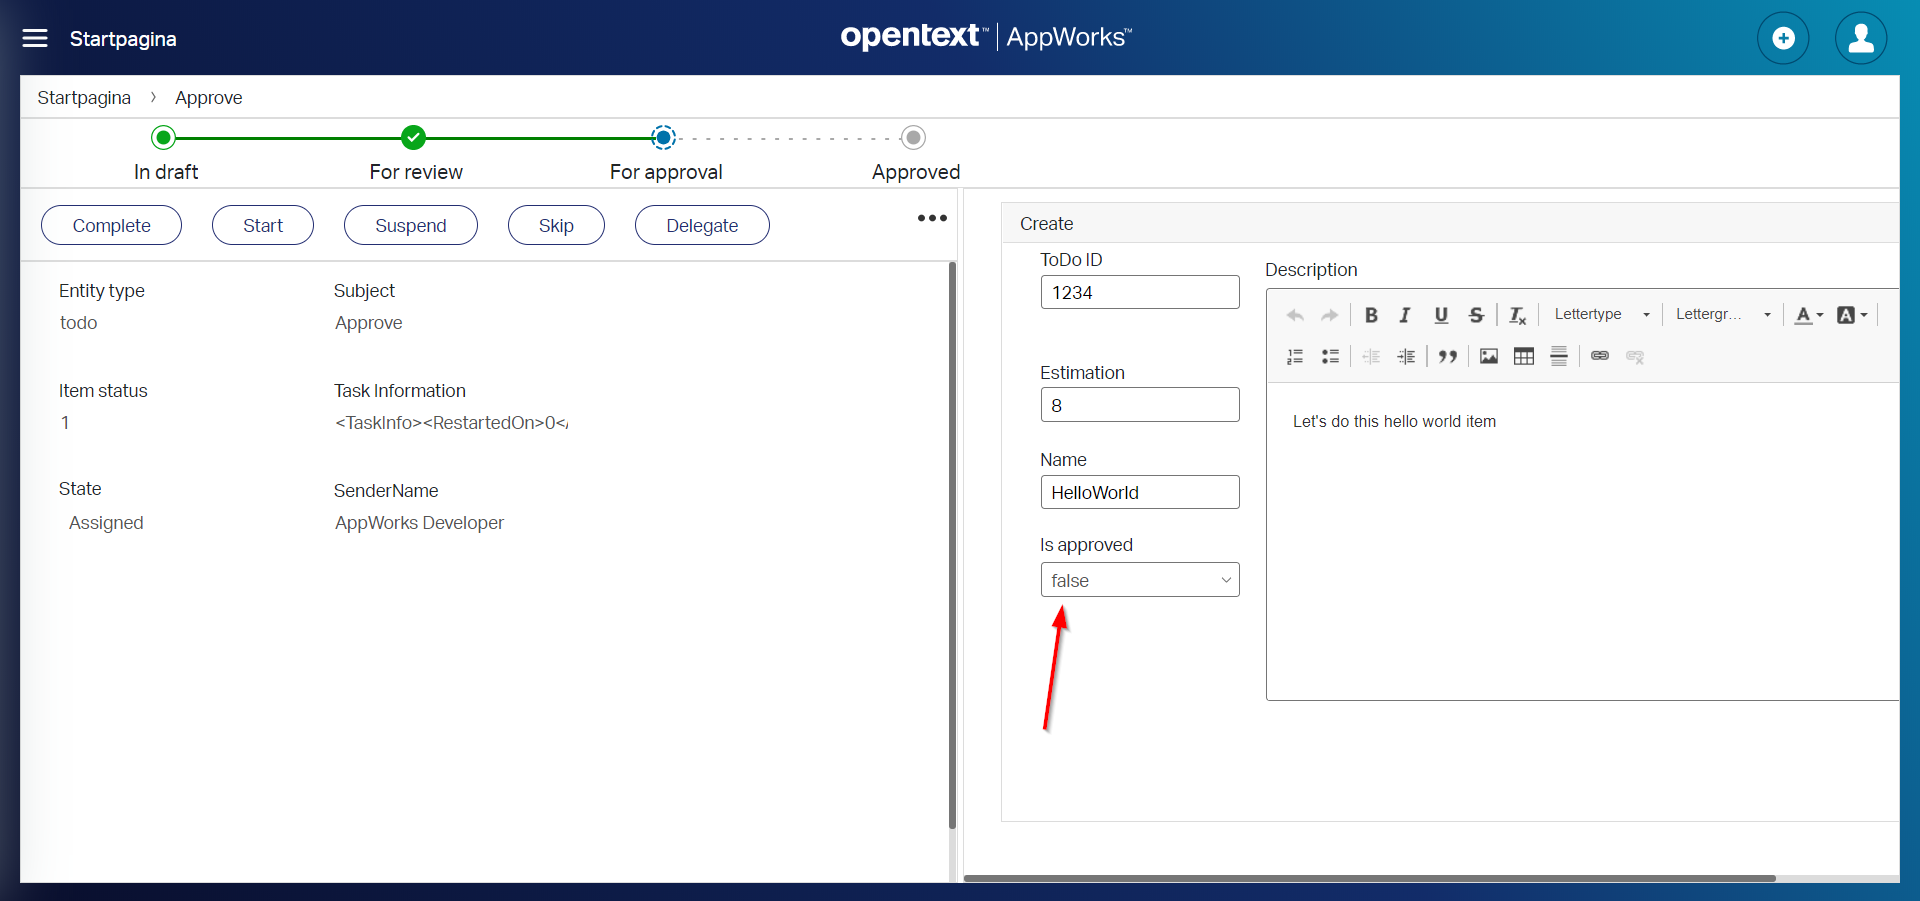
But there is no logic behind this approval….right?….See the next step!
Back to our lifecycle to low-code that logic!
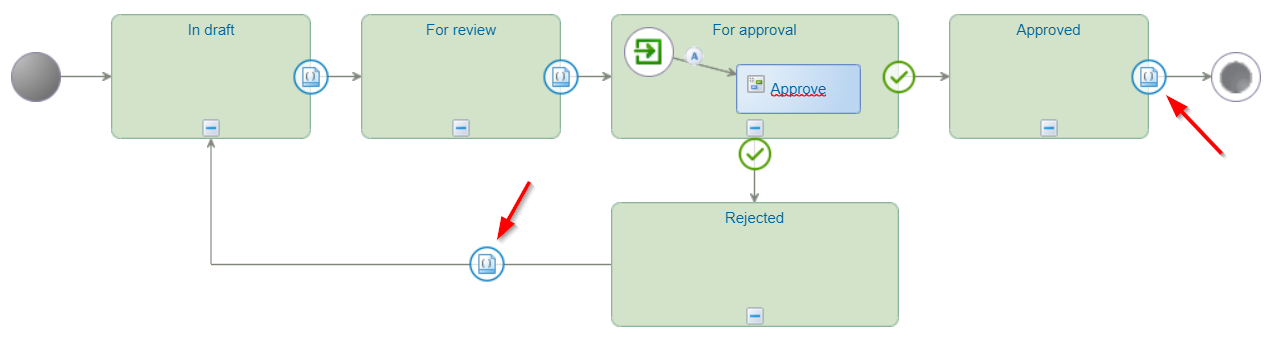
Get the ‘Transition Properties’ of the 2 outgoing flows of the ‘For approval’ state. And check out the fancy settings we can do there:

- Make sure it’s still an ‘Activity Completion Event’ as the user still needs to complete a task of the ‘Approve’ activity in this state!
- For the ‘Approval’ step we apply this condition:
item.Properties.todo_is_approved==true - For ‘Rejection’ we apply this one (duh?):
item.Properties.todo_is_approved==false
And for the result we also applied the true==true conditional events on the ‘Approved’ step and the ‘Rejected’ step with this screen as an end-result.
Let’s save, validate, deploy, and test that again!
When the ‘Is approved’ is set to ‘FALSE’ it will result in a new task in your inbox. Once you completed the current task…The task screen will look the same only the task buttons will be gone once the task is completed.
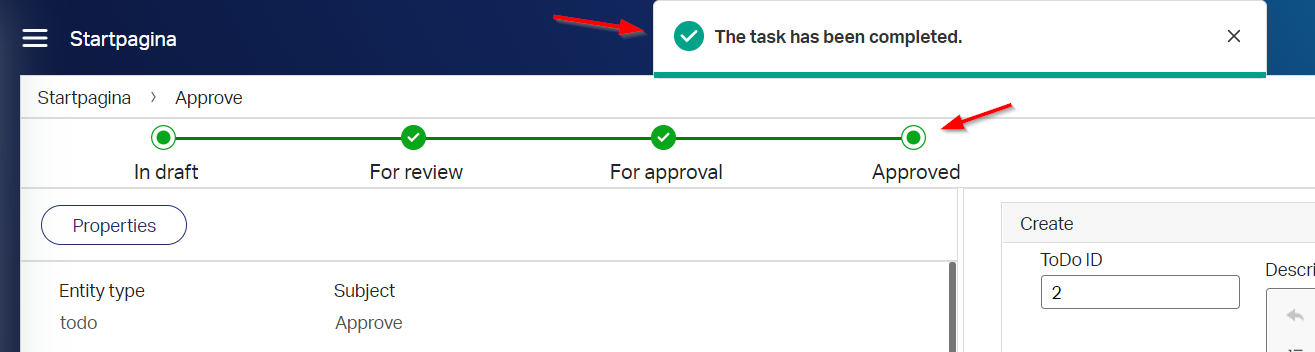
And when ‘Is approved’ is set to ‘TRUE’ you will see the lifecycle being updated to the last state.
And there you have it…Our earned “DONE” for today. Great stuff about conditional routing through your lifecycle and where we also see the difference between manual events and automatic events. Now you might raise the question: “Can we make an endless loop if you also update the output to the ‘Rejected’ with a conditional event true == true“? and the answer is YES you can (I tried!), but for the performance of your VM it’s not recommended and you will (after timeout and the continuous loading screen) end up with an error during your entity creation!

And that’s it…Have a great day and I see you in the next one!
Don’t forget to subscribe to get updates on the activities happening on this site. Have you noticed the quiz where you find out if you are also “The AppWorks guy”?
