
Hi there AppWorks fans,
Welcome to a new installment of AppWorks tips.
This time we’ll see and try-out something interesting. In these days it’s common to work with ReST endpoints that implement features in a ‘loosely’ coupled way and deployed as a separate service somewhere in a (maybe Docker?) container. Most of the time we also see that this ReST API is responding back with some data in JSON format…Only, our AppWorks platform is not running on ReST with JSON data, but it’s running on SOAP with XML data. The principles are the same, but the implementation technique is different. Converting from one to another can be hard, but not with this post!
Let’s get ready on consuming some ReST API with a JSON response on our AppWorks platform…Hell Yeah!!??
Let’s get right into it…
Some steps need to be followed, but don’t worry as ‘The AppWorks guy’ explains! Take the quiz where you can also find out if you are one!?…Step 1.
Create a ReST endpoint that sends back JSON
For these steps we can do several approaches. You can follow this short guide where you learn to create a ReST endpoint with the Spring framework.
Or download this one and run with java -jar .\demo-0.0.1-SNAPSHOT.jar. I run it with java version "10.0.1" 2018-04-17 and after start-up I have this JSON response when I go to URL http://localhost:8080/hello with JSON: {"id":1,"name":"Earth"}
Even better is this URL http://192.168.56.1:8080/hello (as it must be reachable from our AppWorks platform!)
You can also use an open API like:
https://jsonplaceholder.typicode.com/ with a sample call like: https://jsonplaceholder.typicode.com/posts
https://opendata.education/api where you can do a call like: https://api.opendata.education/rest/sif/requests/SchoolInfos.json
A note on this API as it exposes JSON in OData format which uses ‘@’ and ‘#’ in the JSON response which is not correctly interpreted with the ReST handler we use in this post! A nice note on this topic can be found here
Or if you already have something running in your network that results in same kind of construction it’s also fine.
Add a run-time reference of type ‘Application Connector’
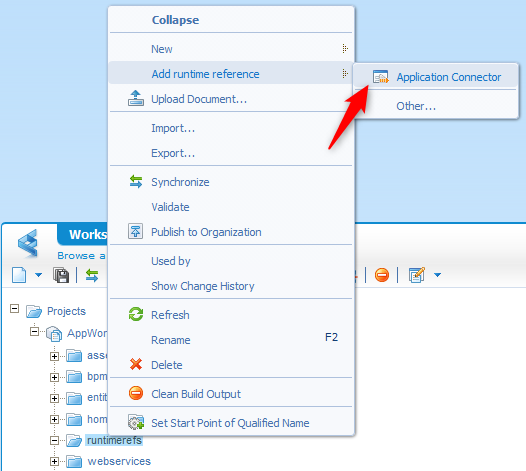
Create a new folder in the project with name ‘runtimerefs’. Just to keep the project structured. Right click the folder and add a new ‘runtime reference’ of type ‘Application Connector’
Select the ‘OpenText HTTP Connector’
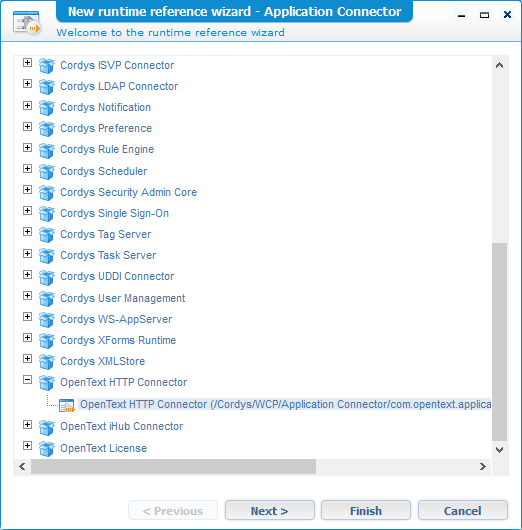
And click ‘Finish’
Later we’ll use this reference during the creation of a new webservice!
Create a new HTTP service connector
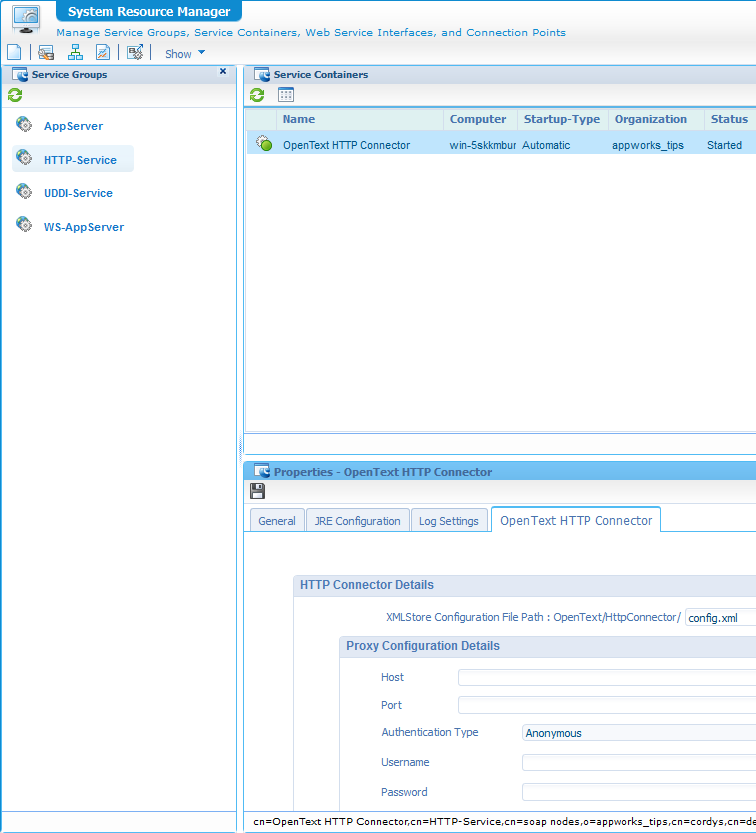
Open the ‘System Resource Management’ artifact and create a new ‘Service Group’ from the ‘OpenText HTTP Connector’
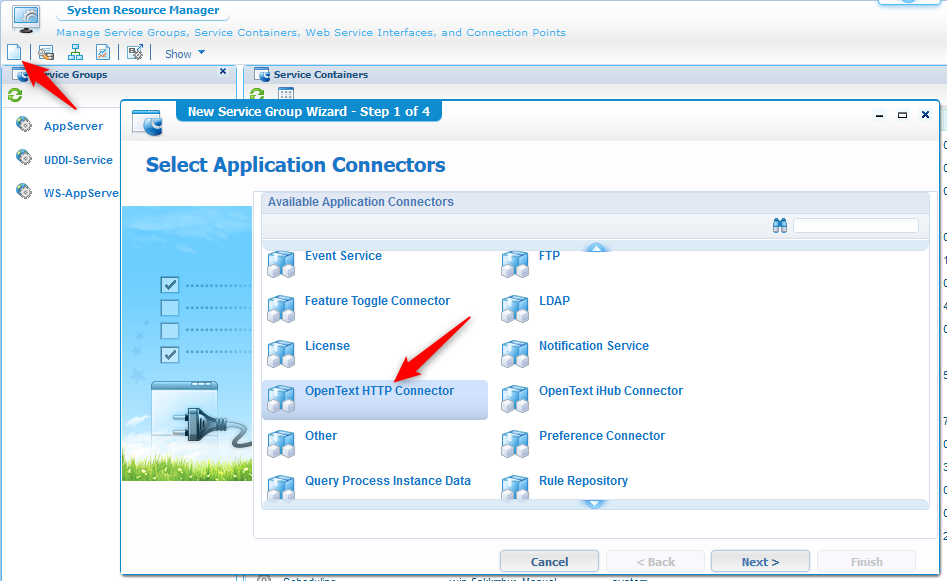
And click ‘Next >’

Give it a name of ‘HTTP-Service’. Make sure those 2 interfaces are available and select 1 before you click ‘Next >’

Let it start ‘Automatically’ and click ‘Next >’
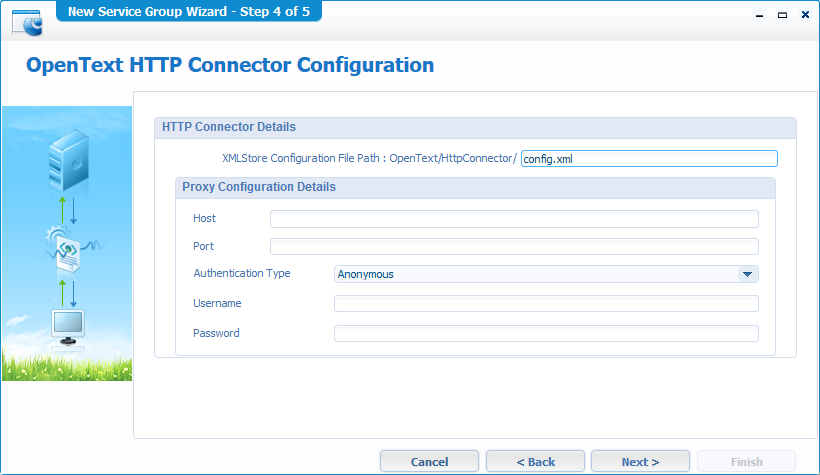
Fill-in the ‘config.xml’ configuration file and click ‘Next >’ again
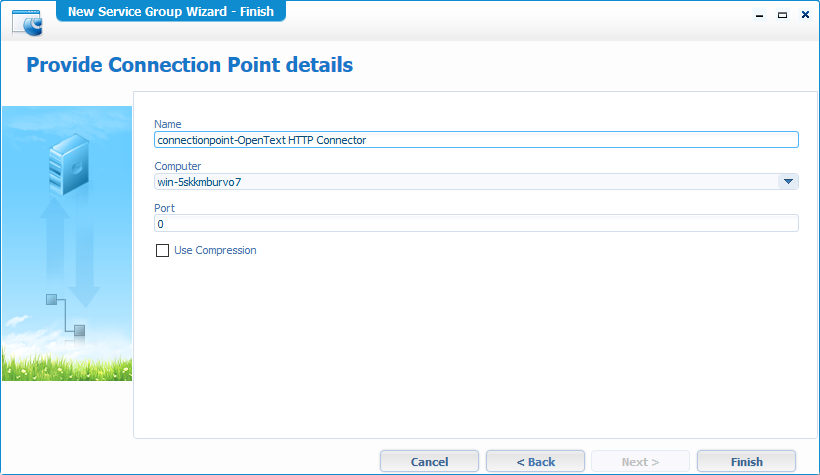
Now it’s time to hit that ‘Finish’ button.
Hooray for this end-result…soda-time! 🥤
Create an XML Store with ‘XML Store Definition’
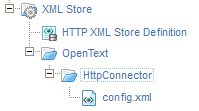
What we now want to do is making that config.xml available in our XML store on the location we just configured /OpenText/HttpConnector/config.xml…correct?
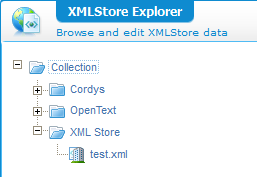
How can we check this? Well, open the ‘XMLStore Explorer’ artifact and view the folder structure!
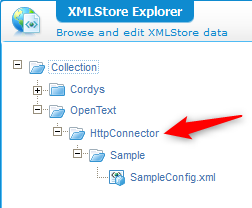
Our file should land in the red-arrowed folder!
How can we accomplish this?
First create a new folder in the project with the name ‘XML Store’ and add a new document of type ‘XML Store Definition’ with the fancy name ‘HTTP XML Store Definition’
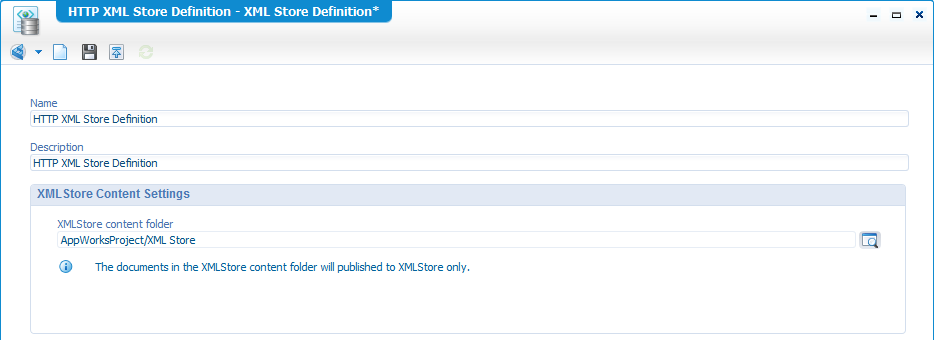
Now set the folder as ‘Set Start Point of Qualified Name’!
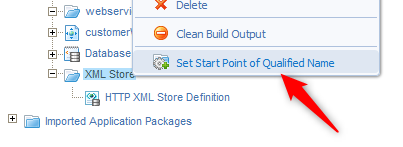
What does this option do?
Well, it makes the published content of the application unique in runtime…Yes, read that again (it’s from the manual)! So, this is good for application names that have the same name. When those are installed in the same environment it would get a conflict in naming…right?. This option helps you avoiding the conflict in naming.
Let’s try this out with a small test…Shall we!?
First without the QN option!
Create a small ‘test.xml’ and publish it (must be valid xml tag as the ‘XML Store Definition’ checks it!)
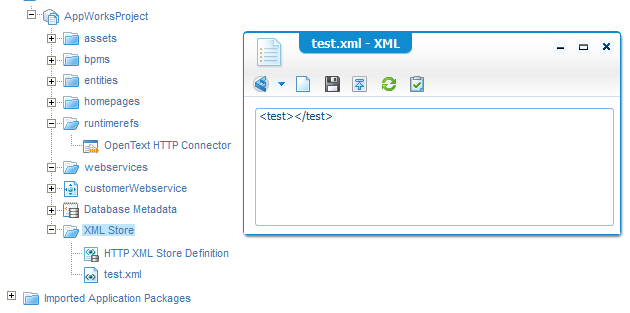
Where is it saved in the XML store?
Now a publish with the QN option enabled and publish the ‘test.xml’ again…

It’s in the root…So, the ‘XML Store’ folder is removed from the path.
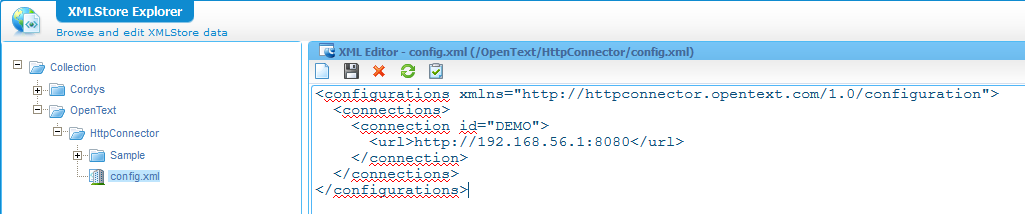
And what did we want to accomplish?…Well, this path /OpenText/HttpConnector/config.xml available in our xml store and for the XML content we use this data:
1 | <configurations xmlns="http://httpconnector.opentext.com/1.0/configuration"> |
Remember the connection ID!!
Create the file like this and save it in the correct path (you probably need to create those 2 subfolders first!)
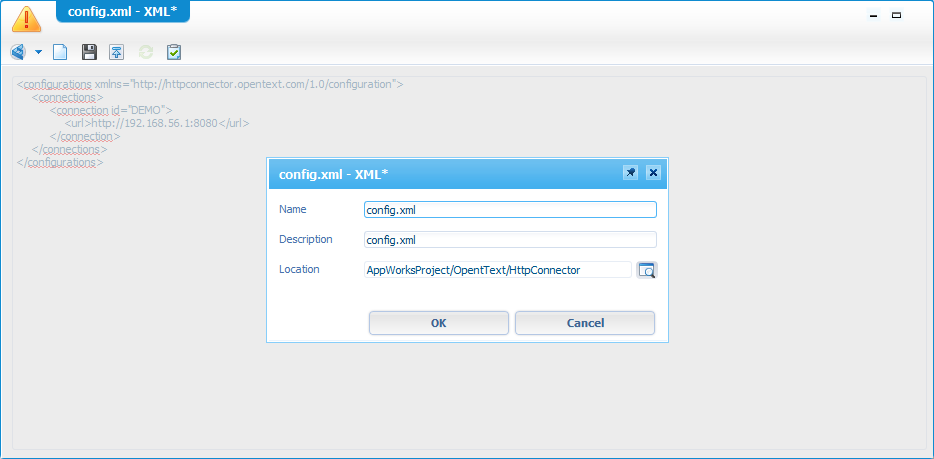
Make sure it looks like this
And after a publish you see the magic happening of our low-coded configuration
The ‘test.xml’ files are removed by hand for a nice screenshot 😜
Check out the ‘HTTP Connection Manager’ artifact
It’s optional, but nice to know!
There is an artifact available called ‘HTTP Connection Manager’ where you can update the connection configuration too!

You might need to restart the HTTP Service container (where you pointed to the config.xml). Depends on the order of creation.
Create a new custom webservice
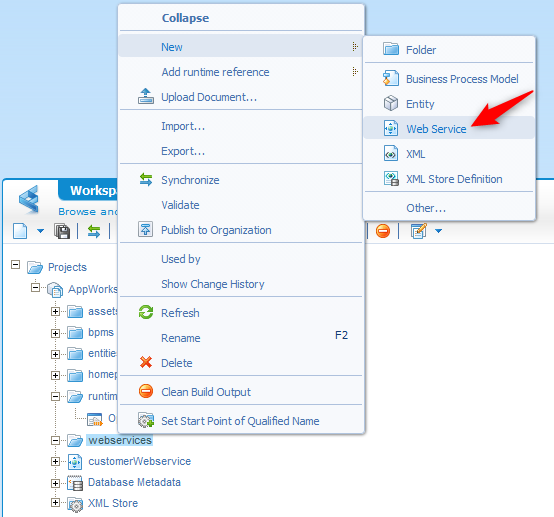
Again, first create a nice ‘webservices’ folder for project structure.
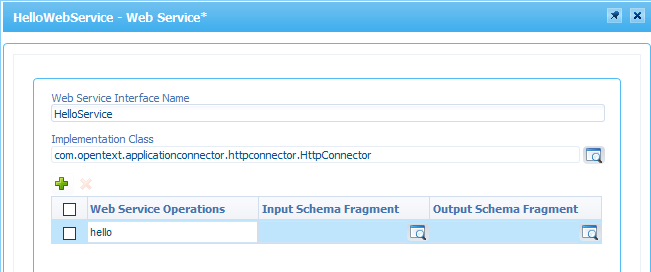
And then create a new document of type ‘Web Service’
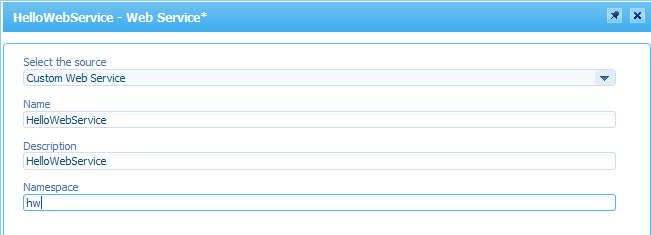
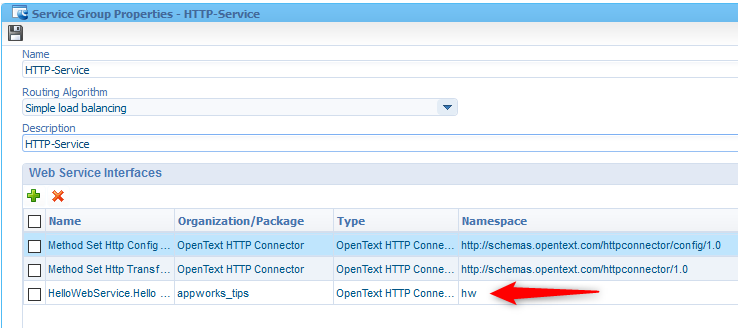
Fill-in the screen like this (and don’t forget that namespace!)
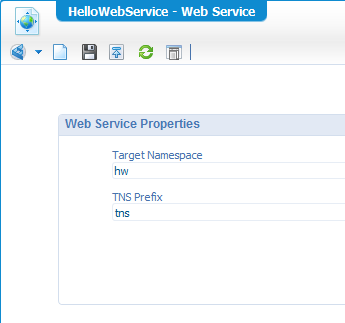
Click ‘Next >’
Fill-in like above and ‘Finish’ to get the next screen
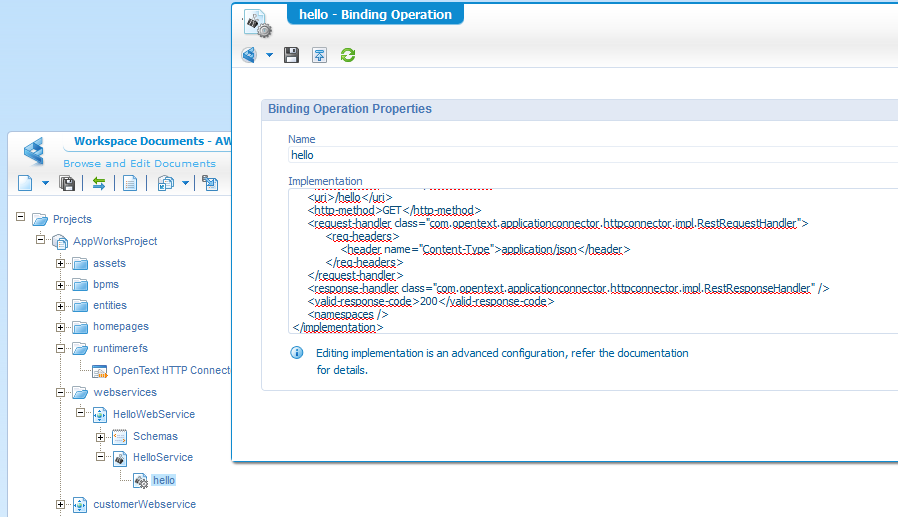
Close it to get back to the project view where you can open the ‘Hello’ operation on our crafted ‘HelloService’. Place this content into the ‘Implementation’ part
1 | <implementation xmlns:c="http://schemas.cordys.com/cws/1.0" xmlns="http://httpconnector.opentext.com/1.0/implementation" xmlns:SOAP="http://schemas.xmlsoap.org/soap/envelope/" type="HTTP"> |
Now open the ‘HelloService’ itself and select the ‘HTTP-service’ from the service group dropdown. Now the service “knows” what connector to use!
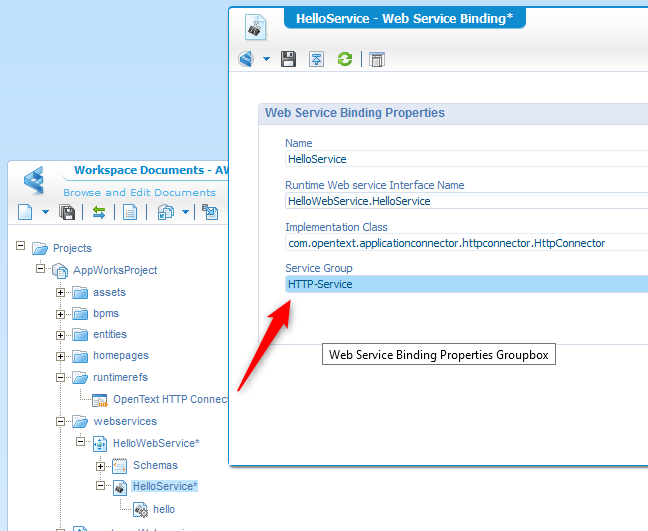
And after a save and publish of this last service you should also see this interface available in the ‘HTTP-Service’ service group in the ‘System Resource Manager’!
If you are curious and want to see more code you need to look in this location of the platform installation
/opt/opentext/AppWorksPlatform/defaultInst/components/httpconnector/httpconnector.jarI just used a Java decompile site to make the java class files readable. (but you don’t have it from me!)
Also, nice to see that there is a second request handler available next to the already used handler in this post!
- This post uses:
com.opentext.applicationconnector.httpconnector.impl.RestRequestHandler- But the second one is
com.opentext.applicationconnector.httpconnector.rest.html.RestHTMLRequestHandler
Test the webservice
Ready for the big moment of truth?
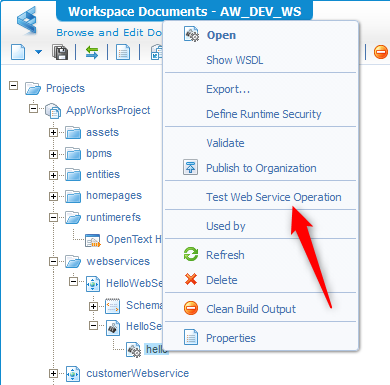
Right click the operation and hit it like a pro!
The request XML (remove the PARAMETER part)
1 | <SOAP:Envelope xmlns:SOAP="http://schemas.xmlsoap.org/soap/envelope/"> |
Hit the ‘Invoke’ button and see the response!
The response XML
1 | <data> |
And now you see something great as our JSON response from http://192.168.56.1:8080/hello is converted into XML…it’s magic! (∩`-´)⊃━☆゚.*・。゚
Other thoughts and tips
Now that we have XML back we can also use it in a BPM like we saw in the previous posts…Great stuff…Again!
Also, get into the Advanced Development Guide where you find a section about “Developing Web services using the HTTP connector”. And you learn also about these topics
- Passing parameters in the request
- Adding authentication
- HTTPS calls
- HTTP headers
- Get data from XPath in the request
And this, my AppWorks friends, brings me the “DONE” where we’ve been waiting for. Really good stuff this time where we learned about consuming a JSON responded ReST endpoint in our SOAP service with XML data related AppWorks platform. I thought it was not possible, but here you have it…Your final destination!
Have a good day and see you in the next one…
Don’t forget to subscribe to get updates on the activities happening on this site. Have you noticed the quiz where you find out if you are also “The AppWorks guy”?
