
Hi there AppWorks fans,
Welcome to a new installment of AppWorks tips.
All kudos for this post go to the company iXenso! They showed an interesting demo during an “OpenText partner challenge” within the AppWorks community of OpenText. It was a challenge where partners got the possibility to build an implementation based on the latest JS API. The most interesting thing I saw during the demo was the implementation of a drag & drop functionality between two custom created panels. It’s time to show you how to build drag & drop functionality yourself.
AppWorks Community? YES, my friends…Only if you’re a partner of OpenText! Ask your sales representative at OpenText for a valuable participation invite.
Let’s get right into it…
So, where to start? Well let’s first find out about 2 concepts:
- What do we mean by two custom “panels” in AppWorks terms?
- How does drag & drop in HTML work in the first place?
When we have an answer to both questions, we can combine that knowledge into our AppWorks solution. Add a little flavor in the form of the “new JavaScript API” and dig gold for your end-users!
First things first…
Two custom panels in AppWorks
From my own experience there are two best ways to implement a custom panel (in an entity layout):
The first one is (in my opinion) a bit cumbersome, but valid to use for a custom panel. The advantage is that you are closer to the ‘result list’ logic, but your code is also closer integrated to the platform. The second one provides full flexibility, but you need to write more boilerplate code. This post uses the HTML5 SDK way because this makes it also easy to build a POC outside AppWorks and import it later on…Continue reading, and you’ll see!
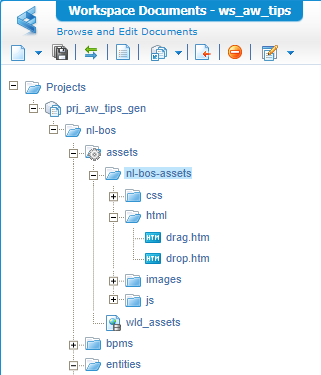
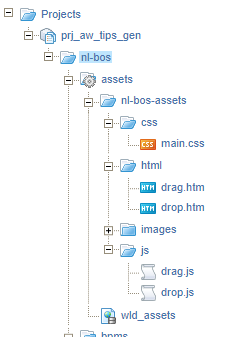
Start your VM and open your favorite workspace with the developer roles account. We first make sure we have 2 HTML files in place drag.htm and drop.htm. The project will look like this:
Notes:
- We set the
assetsfolder as ‘Start Point of Qualified Name’. This makes sure our paths start with in our case/nl-bos-assets- The
wld_assetsdocument is a ‘Web Library Definition’ type of document pointer to web-content folderprj_aw_tips_gen/nl-bos/assets. This makes sure our content lands on the correct ‘webroot’ server location! In my case/opt/opentext/AppWorksPlatform/defaultInst/webroot/organization/appworks_tips/nl-bos-assets/html
Published both files and make sure they are accessible from runtime with these URLs:
http://192.168.56.107:8080/home/appworks_tips/nl-bos-assets/html/drag.htmhttp://192.168.56.107:8080/home/appworks_tips/nl-bos-assets/html/drop.htm
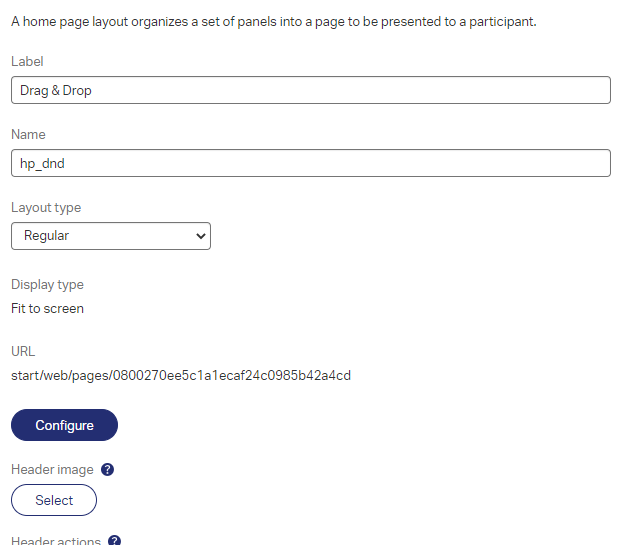
Next step is to create a new ‘Home Page’ type of document (nicely saved into the layouts folder of our project). The label of this new homepage will be Drag & Drop; the name will be hp_dnd.
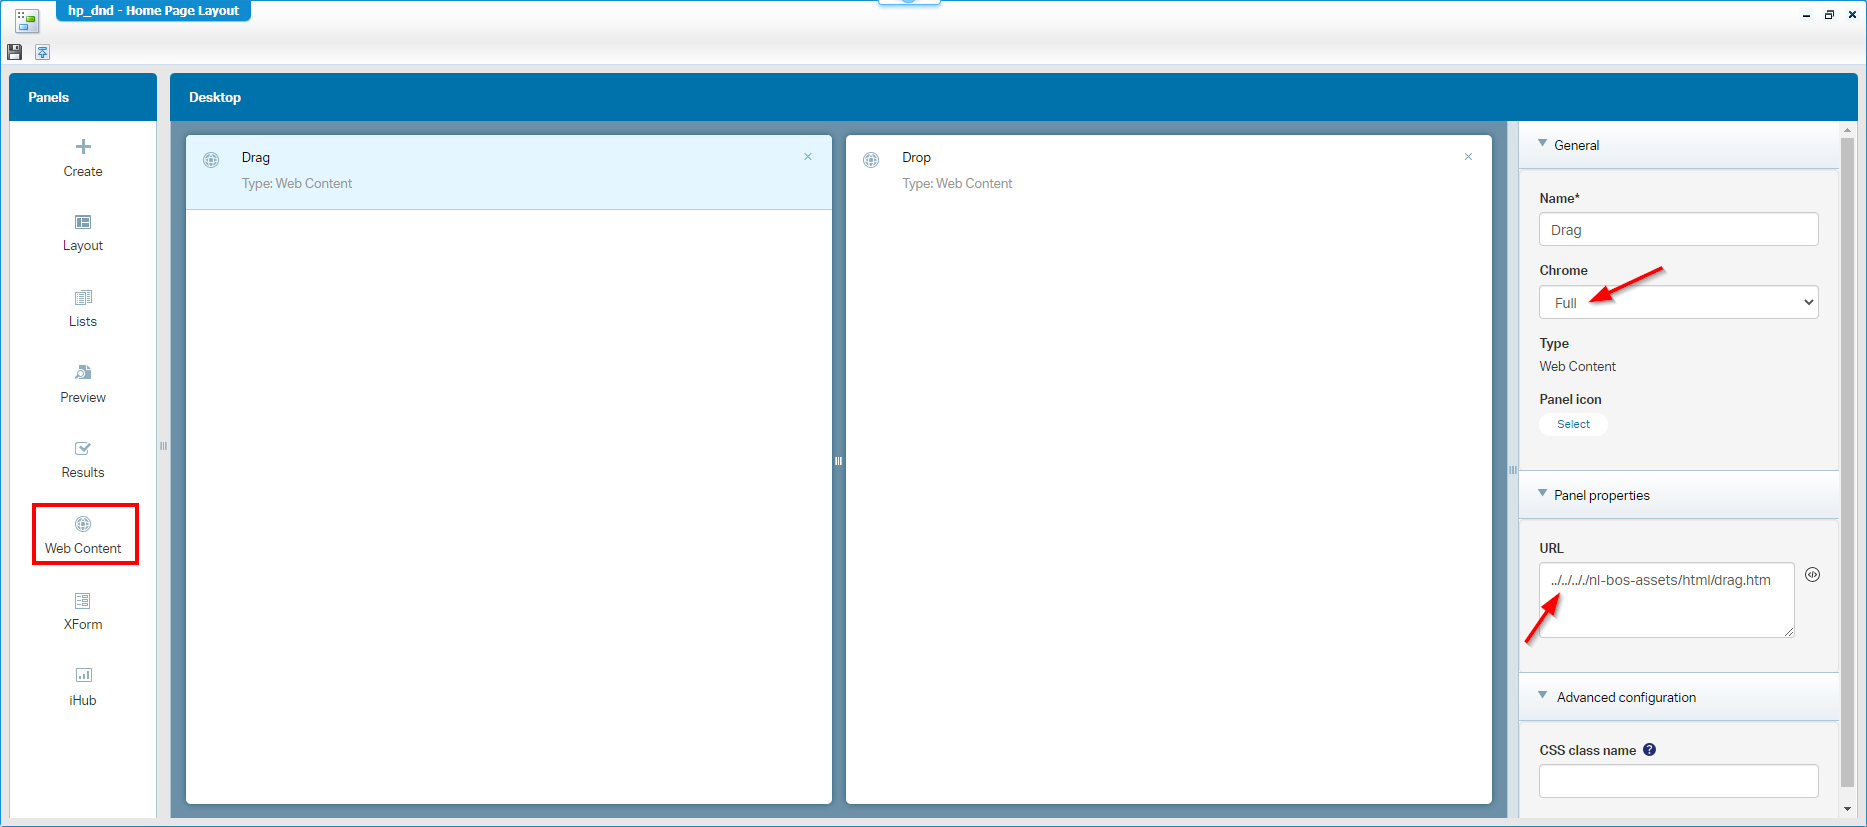
Make sure to ‘configure’ the homepage with two panels of type ‘Web Content’…like this:
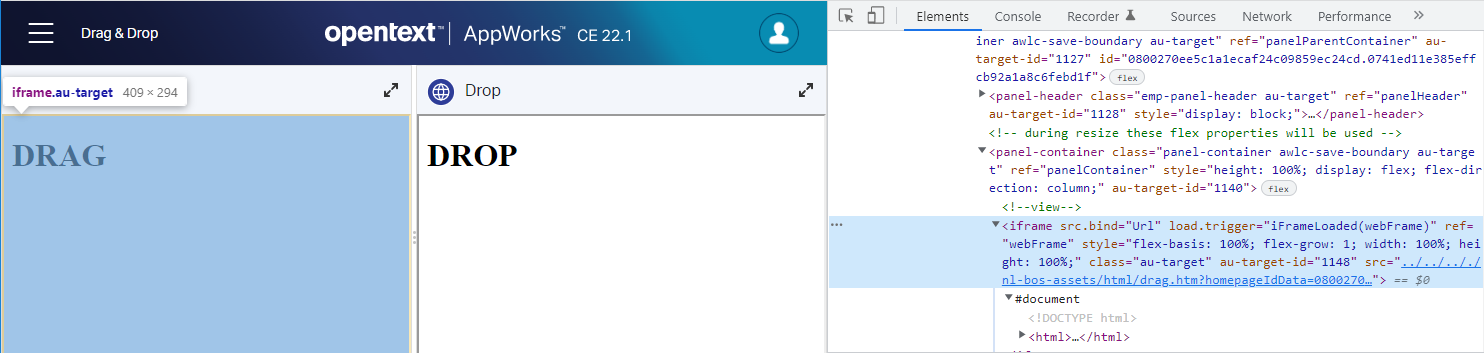
After publication into runtime, you should have something to explore. With the <F12> developer tools in place, you also conclude we require a drag & drop between <iframe> elements!
Next…
Drag & drop in HTML
Time for a small proof of concept (outside the AppWorks platform!). Make a folder DnD in your local machine and create this set of documents in the given folders:
main.htmcss\main.csshtml\drag.htmhtml\drop.htmjs\drag.jsjs\drop.js
Get your favorite editor/IDE (I use IntelliJ), open the folder, and start with a first and easy implementation on the main.htm like this:
1 | <html lang="en"> |
This will be the content for the other two .htm files:
1 | <html lang="en"> |
1 | <html lang="en"> |
Notes on those 2 files with small nuances in drag vs. drop:
- The main.css doesn’t contain any content (yet!)
- Also, those two JavaScript files don’t contain any content (yet!)
- We use jQuery for easy HTML element access. Continue your grind…
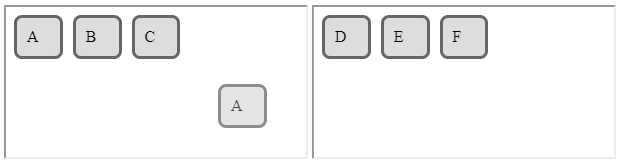
- The
draggableattribute makes sure to make the ‘div’ element draggable with your mouse…See screenshot!

====
!!IMPORTANT!!: Don’t open the main.htm file directly in your browser via file://! For the above demo it works fine for now, but once we continue development you require to access the main.htm file via a webserver. IntelliJ uses a built-in localhost webserver on port 63342 to serve my files.
====
A quick CSS update in main.css, makes it all much nicer:
1 | .container { |
The
.box.overwill be set in the JavaScript later!
…
Time for some business logic in the JS scripting part. First for the “dragging” part:
1 | $(document).ready(function () { |
Notes:
$(document).ready(function () {...}is plain jQuery to wait till the page is ready loading; This is the short notation:$(function() {...}- The ‘for-each-loop’ loops over the selected box-elements and sets the events to “listen” for (this is also my first experience…I never used it but works greatly!)
- We introduce 2 functions to manage the
dragstartevent, and thedragendevent- In those functions we just open our logging-eyes and play with the transparency of the dragged element
Second implementation for the “dropping” part:
1 | $(document).ready(function(){ |
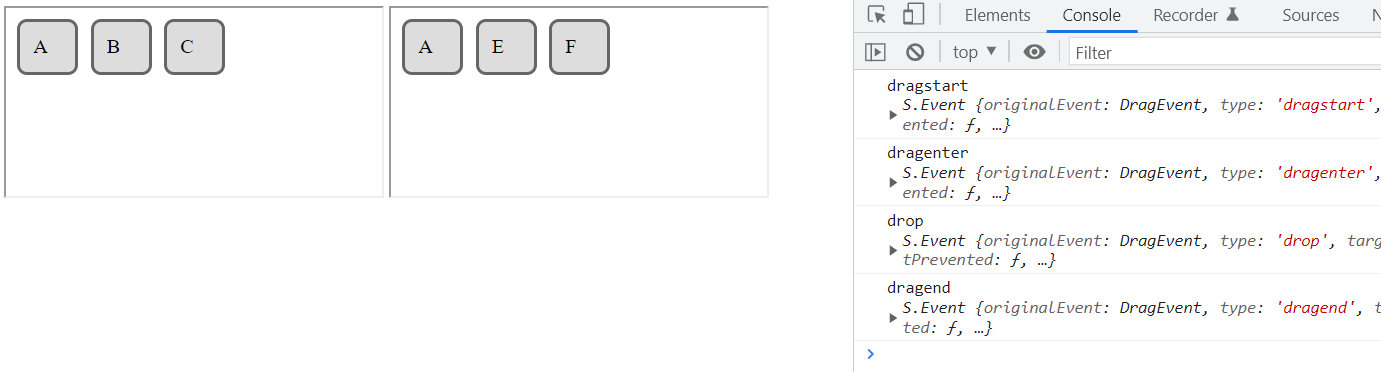
This is the same code; only other events, and we set/remove the
overproperty to “see” some visual effect!
At this moment you should see all events passing by from the development console, except for one! That’s the ‘drop’. Fix this with a small update:
1 | function handleDragOver(e) { |
To solidify the ‘drop’ action, we also update our related function:
1 | function handlehandleDrop(e) { |
We’re getting close…Now we only require to pass some HTML content to the other side. So, in our ‘dragstart’ event it’s time to add one extra line to set the data. In the ‘drop’ event we’ll pick it up and set the content from the retrieved data:
1 | //in drag.js |
Niceeee!…This is my piece of art from which to extend your knowledge!
Combine both to earn the “golden medal”
Now, it’s time to upload our sources into our beloved AppWorks platform to see if this is still working as developed!? Just like this:
After a publication to runtime, we have a nice green flag! 💚 ✅
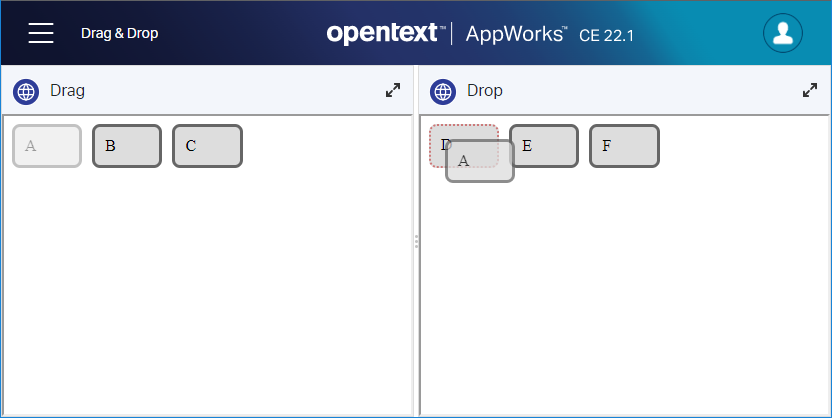
How nice is this!? What power did we expose here!? Well, how about the combination with the power of the new JS API? Ohw mama!…do we see possibilities and opportunities here! 😎
We made it!…The path is now open for your own explorations on the greatest implementation for drag & drop functionality on the platform! “DONE”. We learned about a valuable customization for our end-users who love to drag & drop things around in their runtime. Have a great weekend, and I see you in the next one…Cheers! 🍺
This is my list of resources for this post:
- web.dev
- Drag between two iframes
- Local coder
- StackOverflow
- W3Schools - Drag and Drop API
- W3Schools - JS reference
Don’t forget to subscribe to get updates on the activities happening on this site. Have you noticed the quiz where you find out if you are also “The AppWorks guy”?
