Hi there AppWorks fans,
Welcome to a new installment of AppWorks tips.
If you ever saw the nice OpenText demos of AppWorks (and also other OT products), I’m always amazed how nice they glue it all together with interesting landing pages. More specific a landing page like this one:

The screenshot of this landing-page is found with the ‘AppWorks Case Accelerator’ solution build by OpenText. You’ll find it here; I don’t dive into the accelerator itself…It’s on my backlog!
For the curious people: extract all the data of the accelerator download (incl. extraction of thecws.zip) and find your way to\CaseAccelerator_22.2\cws\SourceCode\Case Management\Web\landingpage!
This post unravels the secrets on creating a nice tiled landing page for your end-users. We don’t copy any code from the solution, but this post shows what is behind such a page. Spoiler alert! It’s not part of any low-code principles, but just good old HTML programming with the latest techniques; Watch and learn…
Let get right into it…
First things first…Start your VM, login to your platform and make sure you have a basic HTML page available from an assets folder point of view. Have a look at this post to have a head start on a structure like this:
nl-bos-generic(folder)assets(folder; Make sure to set the ‘Start Point of Qualified Name’)css(folder)html(folder)landingpage.htm(‘HyperText Markup Language’ document)
icons(folder)images(folder)js(folder)wld_assets(‘Web Library Definition’ document)
This is the initial content for the landing-page HTML file:
1 |
|
You already see this content relates to CSS and JS for a nice Bootstrap implementation! I was just curious what is changed since I graduated from school; long, long time ago!
Second spoiler: We’ll use the ‘Card’ component for our responsive implementation.
After publication of the wld_assets document, you can access the HTML file from a URL like this: http://192.168.56.107:8080/home/appworks_tips/html/landingpage.htm
You will just see a gray background with ‘Hello world!’ in the top…Nothing fancy (yet!)…Great, next step!
Replace default homepage with our landing-page
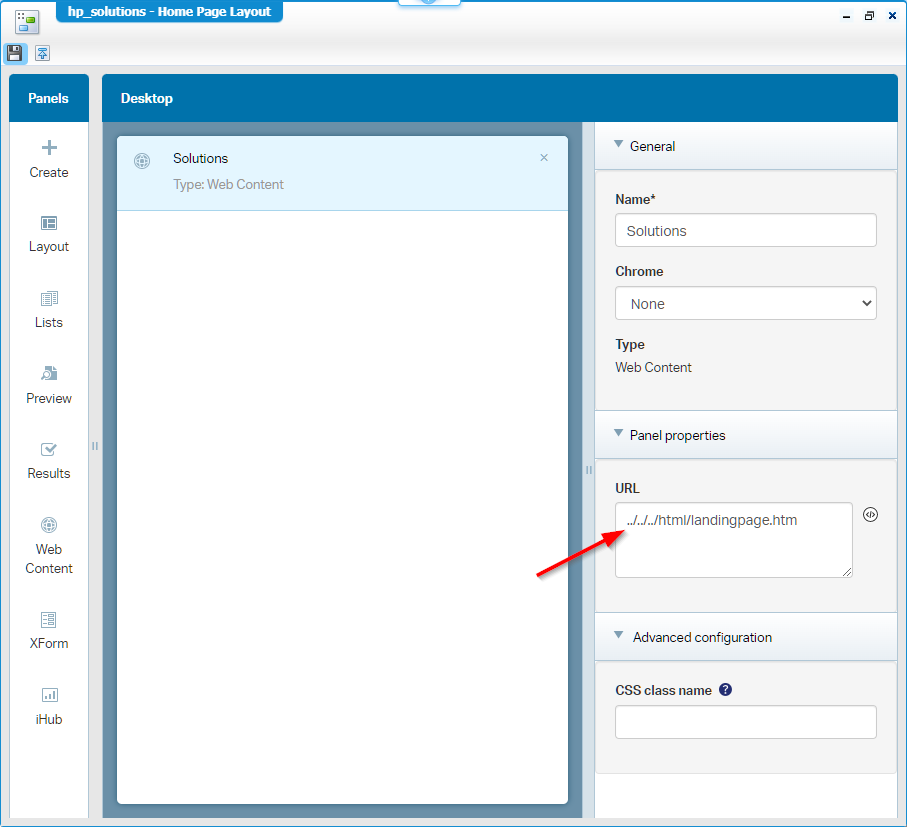
Create a new regular ‘Home Page Layout’ type of document. Give it the label Solutions and name it hp_solutions. Save it in the homepages folder of our project and hit that blue ‘Configure’ button to only add a panel of type ‘Web Content’. The configuration will look like this:

For you to copy that relative path:
../../../html/landingpage.htm
You can already evaluate the homepage from a development perspective in runtime:

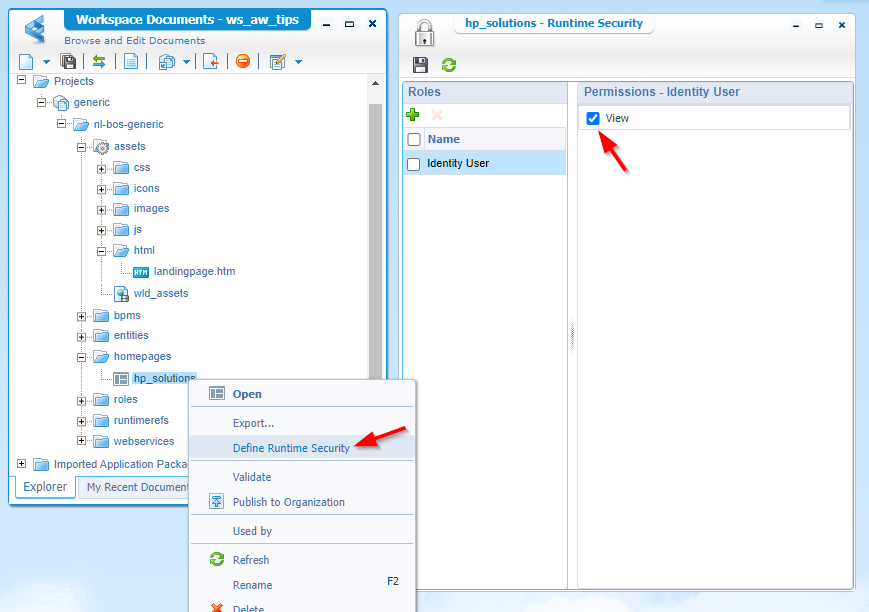
Only, I always recommend to assess with a regular user account. In my case that’s the awtest account with only the internal role ‘Entity Runtime User’ applied (not needed in our case, but just a good habit to do)! After logging in with this account (from an incognito Chrome tab), you’ll conclude this account does not “see” our homepage. Let’s fix this with a new runtime security on the crafted homepage:

I use the ‘Identity User’ role as each user is by default applied to it! We could also create our own role and use it for the implementation, but that’s not the target for this post!
After republication of the homepage, our test account has valid access. The only thing this account also “sees” is the default start-page/homepage of the platform. We can remove it in the ‘app/admin’ section of the solution with our developer account:

There is no need to search for a ‘save’ button…It just magically updates! 😲 Refresh the incognito tab for the test account, and you’ll find out only the ‘Solutions’ home is available and opens by default now!
Now what to do? Well, how about the implementation of the responsive ‘Card’ layout!?
Card layout implementation
After reading the Bootstrap ‘Card’ component documentation and playing around from my side, the first card looks like this DIV-structure (see also the comment in the previous HTML sample!):
1 | <div class="" style="margin: 1rem;"> |
Yes, please remove the
<h1>Hello world!</h1>part!
When you look closely, you also notice this DIV structure uses a ‘Font Awesome’ class fa-solid fa-bolt. To make it work you need 2 extra libraries (like the Bootstrap libraries); A CSS and a JS file:
1 | <!--This part in the top of the page--> |
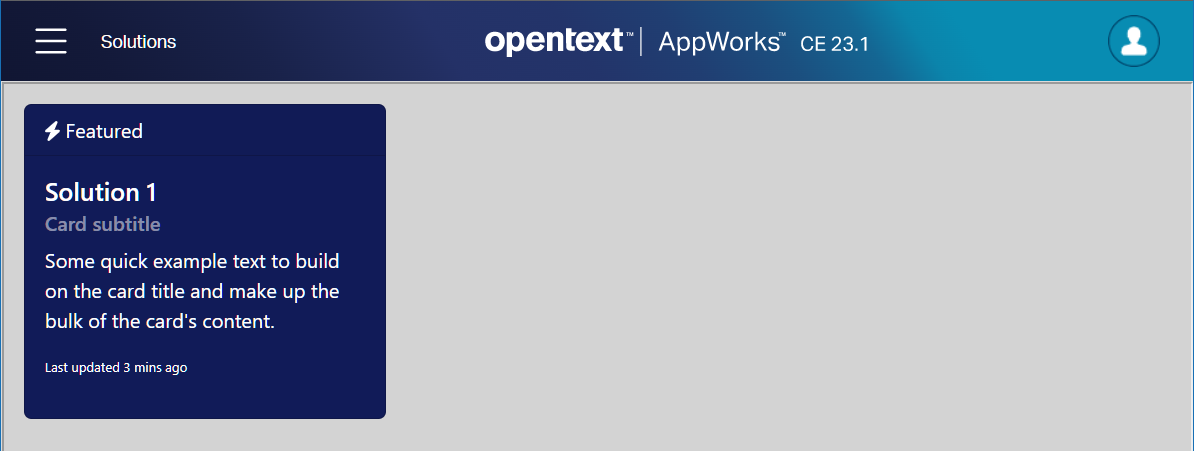
After publication, the first card is a fact in runtime for your test user:

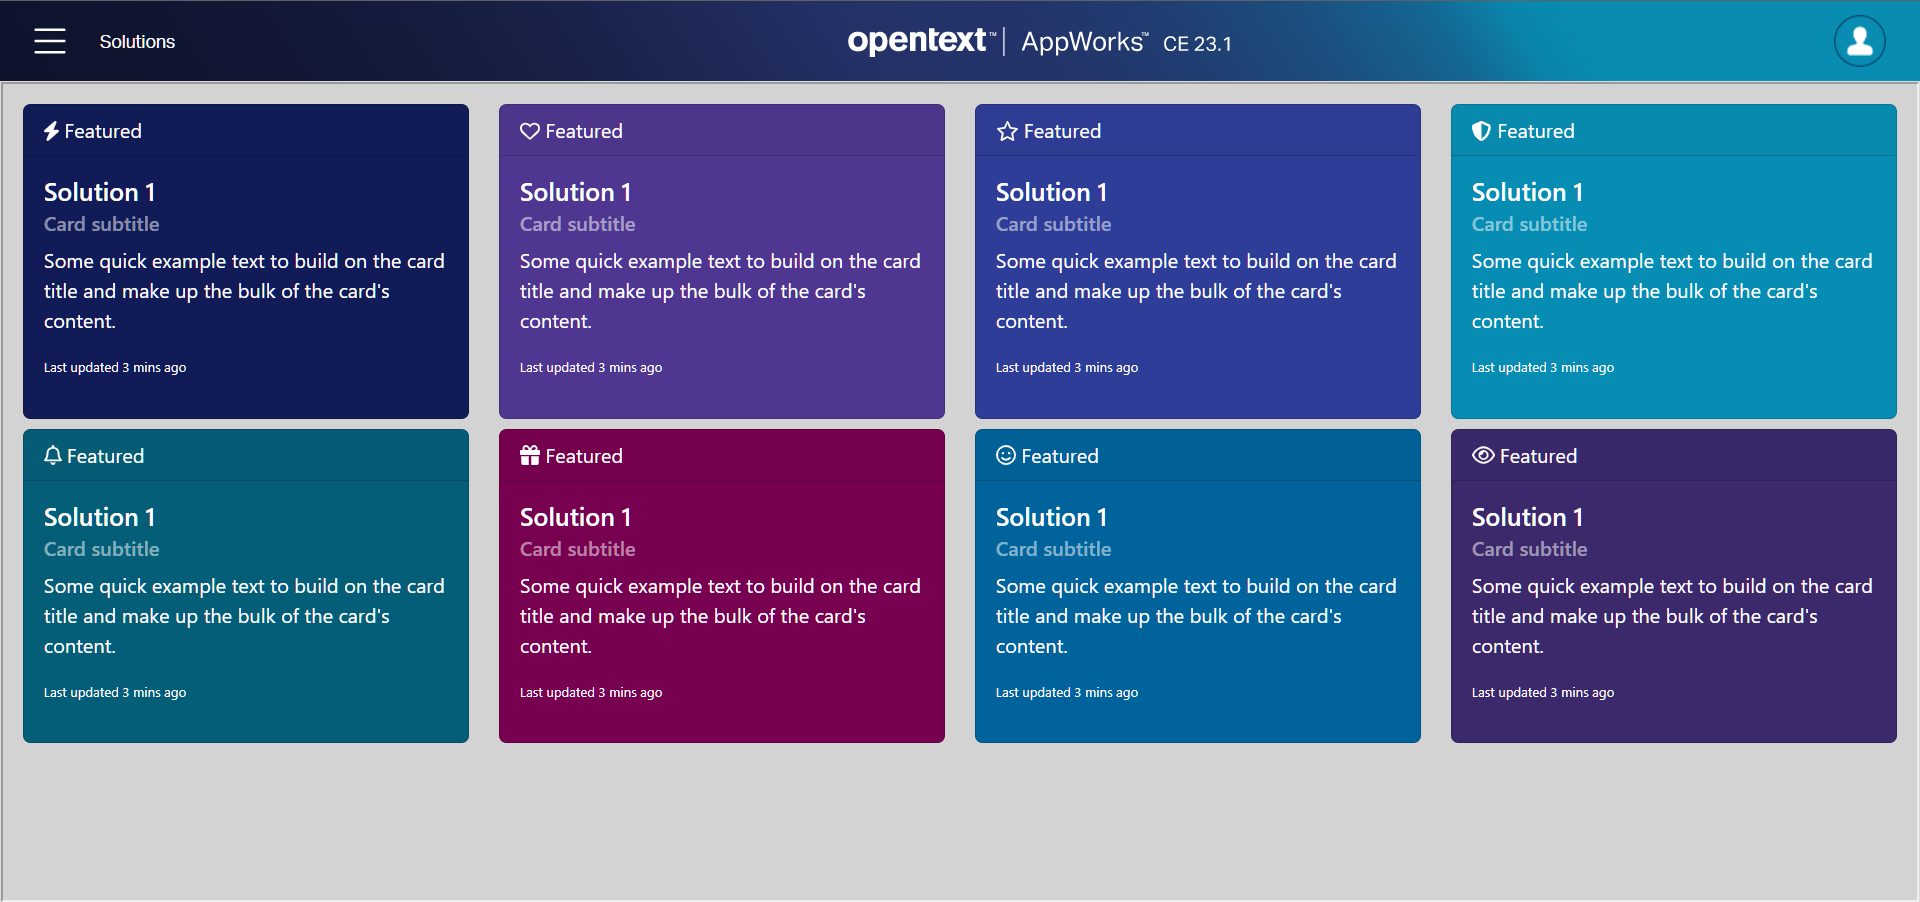
NICEEEE…Let’s add the others as well!

You can download my end-result HTML here
Have you also checked the responsiveness of this nicely crafted page? That’s the power of the Bootstrap ‘Grid system’
What else to implement?
Let’s see what creativity we have in mind after that first implementation on the HTML landing page!?
Those tiles are clickable, but currently link to
#(which is nothing for now!). When you create an ‘Application Configuration’ entity (right-click your project), you can add a ‘toMany’ relation to a new ‘Solution’ entity which has a URL property pointing to the homepage document (which is just a relative URL) of that specific solution! Use the HTML5SDK to read this configuration (after enabling the ‘Web Service’ BB on it) and off you go after a little JavaScript magic! 😁 WAIT…STOP! Such relation is NOT possible on that config entity from what I see (in AWP21.4!); The workaround could be a ‘Long Text’ property defining that same logic in JSON format and read it with your fancy JS skills.Make the background of the tiles gradient like this header of the runtime UI! A Google request got me to this valuable site.
It’s possible showing user specific information on a special “Welcome” tile like you saw in the introduction screenshot. Sounds hard to do, but after this update you can grab the user details from the web content iFrame URL (via JavaScript)…See this example on that similar trick! Watch this update on extending the ‘Web Content’ panel relative URL to something like this:
1 | ../../../html/landingpage.htm?userId={User.Properties.UserId}&userDisplayName={User.Properties.IdentityDisplayName}&userName={User.Properties.Name}&userPicture={User.toPerson.Properties.Picture} |
It’s even possible (with JS again!) to get the current date/time on the “Welcome” tile:
let date = new Date().toLocaleString();With some more creativity it’s even possible to show notifications or built a notification bell on that same “Welcome” tile. See again this post!
…
The possibilities are endless; It’s up to you to make it happen after approval and bringing it up into your Agile Scrum Sprint! 😉
Other highly interested resources during this implementation
For FREE icons, see here; For more FREE icons, see here.
…
I also did a quick dive into the term ‘Content Delivery Network’; You see ‘CDN’ in my URL examples for the external libraries, but what is it? Well, it’s just a trusted online central location to safely reference your external libraries (like CSS and JavaScript files). Like the libraries for font-awesome. Why must it be a save heaven? That’s because your website depends on it!
I give the post a “DONE” where we learned valuable lessons on building a custom landing page for our multi project solution. Most stuff I learned a long time ago, but you see it’s still valid for a current day implementation. Happy coding on this new insight and let me know in the comments (with nice screenshots) what landing-page you’ve created for you end-users. It can inspire others to build greatness for our beloved end-users. Have a great weekend and till next week…cheers! 🍺
Don’t forget to subscribe to get updates on the activities happening on this site. Have you noticed the quiz where you find out if you are also “The AppWorks guy”?

